American Thanksgiving is coming up and there’s nothing more thanksgiving-y than butternut squash – creamy, dreamy and delicious. So thank you southern neighbours for allowing me to celebrate the harvest again with this Dairy-Free Butternut Squash and Pear Soup. I love you.

So, here’s a true story -once upon a time, I was looking through my fridge and there was some left over pumpkin, a pear that was nearing the end of it’s life and a perfect little squash. Therefore, I naturally decided to make soup. The end.
I know, I know – sounds weird, but trust me, they willingly found each other and are now happily married and ready to spend their lives together as one happy triad. Some things are just meant to be.
WHAT IS DAIRY-FREE BUTTERNUT SQUASH AND PEAR SOUP?
This soup is ALL the creamy and NONE of the dairy. It has everything that a great soup has – aromatics, body and flavour…it is the real deal.

The reason why I love this recipe so much is because everything is roasted beforehand and roasting means caramelization and caramelization means flavour! So cube up that squash, toss it in some EVOO and some spices, pop that bad boy in the oven and let it do it’s magic.
INGREDIENTS FOR DAIRY-FREE BUTTERNUT SQUASH AND PEAR SOUP
I love using simple and healthy ingredients for the majority of my recipes and this soup is no exception. Moreover, ingredients can easily be swapped or subbed for those of your choice, or what is in your fridge. For example, you might choose to use sweet potatoes instead of squash, cream instead of coconut milk or different herbs you have to use up – cooking is flexible!
ROASTING THE INGREDIENTS
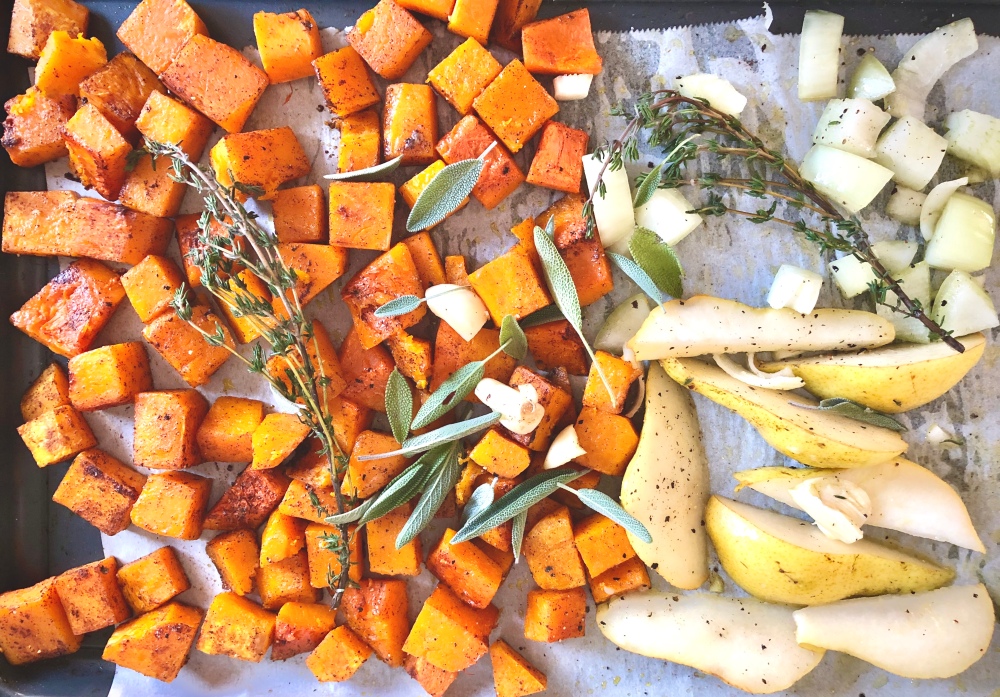
Firstly, we are going to cook the vegetables. Since the squash takes longer to cook through, give it about 20-25 minutes to roast up, pull it out and add the rest of the ingredients to the sheet pan, toss with a bit more oil and roast for another 20 until everything is fork-tender. Browned edges are accepted and encouraged.

MAKING THE SOUP
Now it’s time to soupify! Remove the thyme sprigs and dump everything else into a blender with the pumpkin and broth. Add more broth if you prefer a thinner soup.
Blend ‘er until smooth.

While the soup is blending, place a large pot over medium-high heat with some olive oil. When the oil is hot, add a bunch of sage leaves and a sprinkle of sea salt and let crisp up for 1-2 minutes. Remove from pot and place on a paper towel to absorb some of the oil.
Turn the heat to medium-low, transfer the soup to the pot and add the coconut milk. Let simmer until the milk is fully incorporated and warmed through.

GARNISHING DAIRY-FREE BUTTERNUT SQUASH AND PEAR SOUP
Transfer to your favourite bowl and garnish with the crispy sage, flaky sea salt and a few grinds of pepper. I mean…Come on!
OTHER DAIRY-FREE SOUP RECIPES
Easy Creamy Cauliflower Soup (quick and easy)
Roasted Carrot Soup with Ginger (my absolute favourite)
Crockpot Ginger and Turmeric Immune Boosting Soup (come home to a comforting meal)
TOOLS NEEDED FOR THIS RECIPE
Click below to check out what I use to make this Dairy-Free Butternut Squash and Pear Soup!
This post contains affiliate links and I may earn a small commission when purchases are made after clicking the links, at no cost to you. Thank you!
Dairy-Free Butternut Squash and Pear Soup
Servings: 4
Prep time: 10 minutes
Cook time: 55 minutes
Ingredients
- 1 medium-sized butternut squash, cut into one-inch cubes
- Olive oil
- 1/2 tsp cinnamon
- 1/4 tsp nutmeg
- salt
- pepper
- 1 pear (I used Bartlett), sliced
- 1 small yellow onion, diced
- 3 cloves garlic, smashed
- 3-4 sprigs thyme
- 20 fresh sage leaves, separated
- 1/2 cup pure pumpkin (optional)
- 1 1/2 cups vegetable broth
- 3/4 cup canned coconut milk
- 1/4 cup roasted hazelnuts (optional)*
- A dollop of dairy-free coconut yogurt (optional)
Instructions
- Preheat oven to 375 degrees.
- Place squash on a sheet pan and drizzle with one tablespoon of olive oil. Sprinkle over the cinnamon, nutmeg, 1/2 teaspoon of salt, a few grinds of fresh black pepper and toss together with your hands until evenly coated and then roast in oven for 25 minutes.
- Remove the sheet pan from the oven and add pear, onion, garlic, thyme sprigs and ten sage leaves. Drizzle with a little more olive oil, salt and pepper and toss again. Create a “bed” for the garlic cloves by placing them on top of some of the other vegetables, so they do not burn from the direct heat of the pan. Roast for another 20 minutes, or until everything is fork-tender.
- Remove from oven and discard thyme sprigs. Add everything to a blender with the pumpkin and broth and blend until smooth. Add in a bit more broth if you like a thinner soup.
- While the soup is blending, place a large pot over medium-high heat and add one tablespoon of olive oil. When the oil is hot, add the remaining ten sage leaves and a pinch of sea salt. They should begin sizzling immediately. Let them fry for about a minute or so, until nice and crispy. Remove and place on a paper towel to absorb some of the excess oil.
- Lower the burner to medium-low heat and add the blended soup into the same pot that was used to crisp the sage. Add the coconut milk and simmer for about 5 minutes.
- Ladle into bowls and garnish with roasted hazelnuts, yogurt and crispy sage!
NOTES
*To roast hazelnuts, place them on a sheet pan and into a 350 degree oven for 8-10 minutes. Once browned lightly, remove and let cool. Rub them between your fingers to remove the skins.


