The post Tropical Nice Cream appeared first on Never. Not. Eating..
]]>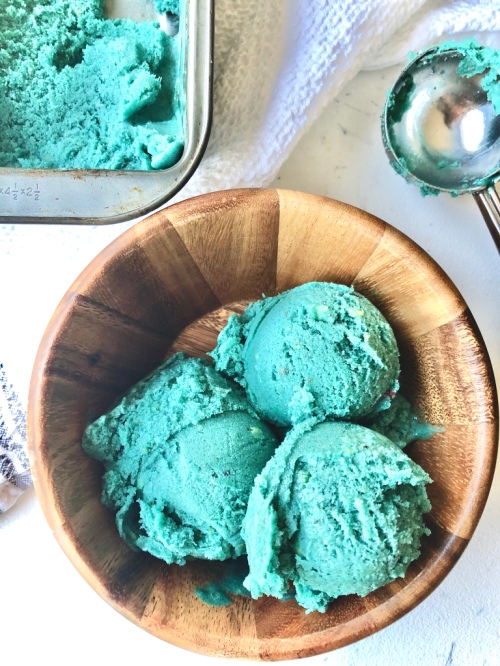
My dad is a HUGE ice cream fanatic and I have definitely inherited the same taste buds from him. Any kind, anywhere – we’re game. Thus, the inspiration for this recipe…because y’all know I can’t be eating real ice cream every day. This Tropical Nice Cream is SO easy and SO tasty you may never go back to the real stuff again.
Grab your bananas. Let’s do this.
This is a one-ingredient recipe. I can’t believe it, either. You are going to need:
- Frozen fruit
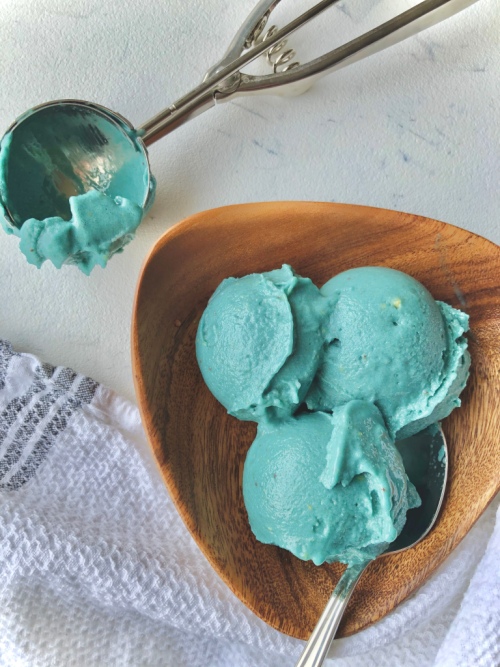
Yup. That’s it! Okay, fine…if you want your ice cream to be the pretty blue that you see in the photos, then just add some spirulina powder and that’s that. But the base of this “ice cream” can be achieved by just using frozen fruit. You are so welcome.

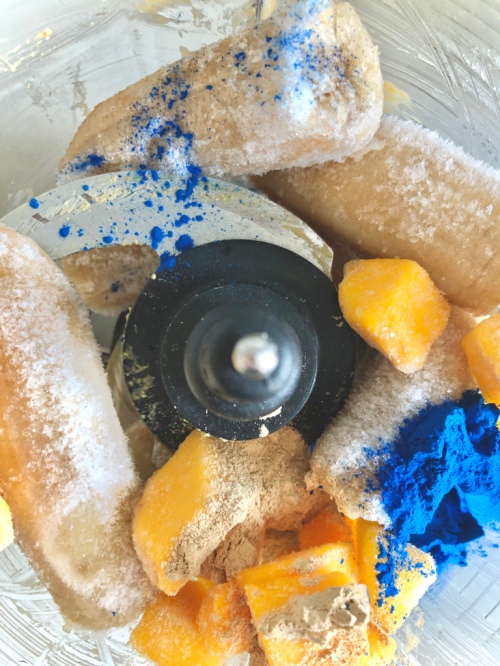
Okay, make sure you have a whole five minutes. Grab your food processor. Load it up with some frozen bananas, mangoes, pineapples and spirulina (if using). Blend. Eat. Feel amazing. Make some more.
But actually…it’s that easy! Happy New Year to us.
Tropical Nice Cream
Servings: 4
Prep time: 1 minute
Cook time: 3-5 minutes
Ingredients:
- 4 frozen bananas (quarter or half them before freezing)
- 1/2 cup frozen pineapple
- 1/2 cup frozen mango
- 1 tsp blue spirulina (optional)
Instructions:
- Add all ingredients to a food processor (or blender). Pulse a few times until fruit is broken up and spirulina is incorporated. Blend on low until smooth. You will need to scrape down the bowl a number of times throughout.
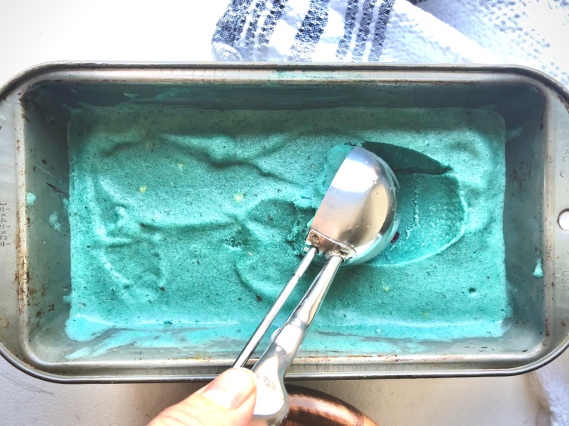
- Transfer to an air-tight container and place in the freezer. Remove from freezer a few minutes prior to eating and serve using an ice cream scoop (or large metal spoon) that has been dipped in warm water.
The post Tropical Nice Cream appeared first on Never. Not. Eating..
]]>The post Easy Butternut Squash Fettuccine “Alfredo” with Whipped Ricotta appeared first on Never. Not. Eating..
]]>- Smooth and rich like an alfredo but without the dairy and calorie count
- Vegetable bonus blended right into the sauce
- A lot less fat content than regular alfredo
- Cloud-like whipped ricotta (okay, it’s dairy, but some things are just worth it)
That is all. Hopefully you are convinced.

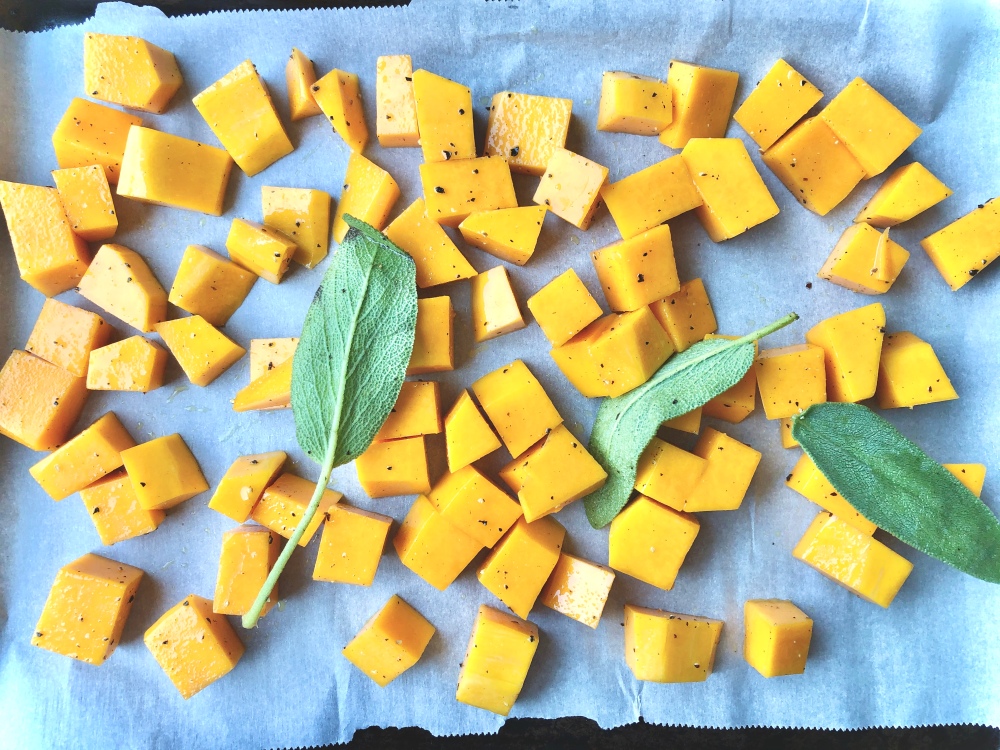
This recipe starts like any good vegetarian recipe – with a few cups of roasted vegetables. So sharpen your knife and start cubin’ up that butternut squash, add a few sage leaves, do the drizzy with some EVOO and season with S & P! Pop it in the oven and forget about it (well, for 20 minutes, until you have to give ’em a toss)!
In the meantime, throw some fettuccine into a pot of heavily salted boiling water and cook until al dente.
When the squash is slightly caramelized and tender, remove from oven and let’s start the transformation from solid –> liquid(ish). Grab your blender – I use my Ninja for everything…it is A.M.A.Z.I.N.G. – transfer the squash and some veggie stock and blend until smooth.
On the same sheet tray that you had the squash on, add two tablespoons of breadcrumbs and a quarter cup of chopped walnuts and put back into the oven to toast up. This only takes a few minutes, so watch carefully! When browned, remove from oven and toss in a few finely chopped sage leaves and some melted butter and set aside…YUM.
Let’s continue shall we…I’m drooling. Okay – grab a pan, heat some olive oil and saute some diced shallots until transparent. Add in a few cloves of minced garlic and it’s ready for the sauce. Pour in the butternut squash puree and add some more stock to the pan, cooking and stirring until smooth and combined.
Next, add half of a cup of canned coconut milk and simmer for a few minutes until sauce has thickened.
While the sauce is finishing, grab your ricotta from the fridge and beat with a hand mixer with 1 tablespoon of freshly squeezed lemon juice, a pinch of salt and a few grinds of pepper. Whip until it is smooth and creamy and spreadable and marvelous.

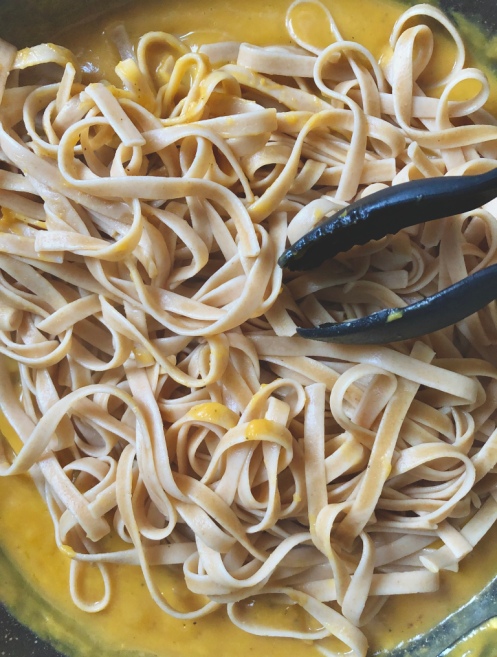
The Grand Finale: When the sauce coats the back of a spoon, it’s ready for it’s best friend – pasta – to join it in the pan. Toss the pasta around with a pair of tongs and be sure to coat every last strand with that velvety sauce. Turn the heat off and add a squeeze of lemon juice to bring it altogether.
Plating: Start with the whipped ricotta. Maybe even be fancy and make a little “swoop” on your plate!

Next, add the fettuccine, and then top with the bread crumb/walnut mixture. And now it’s time to manger, manger (that’s French, mmmm kay?!)!

One question – Are you a “use a spoon to assist in the delicate twirling of the noodles around your fork” kind of person, or a “shove noodles in mouth as quickly as possible, I’m not worried about whether they are hanging from my mouth” kind of person? Because I’m definitely number two.

^ A twirling attempt…strictly for pictures.
Easy Butternut Squash Fettuccine “Alfredo” with Whipped Ricotta
Servings: 4
Prep time: 15 minutes
Cook time: 40 minutes
Ingredients:
- Olive oil
- 3 cups of butternut squash, cubed
- 6-8 sage leaves, separated
- 325 g fettuccine (or 4 serving sizes)
- 1/2 cup ricotta cheese
- 1.5 tablespoons fresh lemon juice, separated
- 2 tbsp bread crumbs
- 1/4 cup walnuts, finely chopped
- 1 tbsp butter, melted
- 1 cup vegetable stock, separated
- 1 shallot, finely diced
- 2 cloves garlic, minced
- 1/2 cup canned coconut milk
- salt and pepper to taste
Instructions:
- Preheat oven to 375 degrees F.
- Line a baking sheet with parchment paper and add squash, 1 tbsp olive oil, 3-4 sage leaves, a few pinches of salt and some fresh black pepper and toss to coat. Place in the oven and roast for 30-40 minutes or until you see slightly caramelized edges and squash is fork-tender.
- Meanwhile, bring a pot of heavily salted water to a boil and add fettuccine. Cook until the pasta is al dente (according to package directions…or taste one)! Reserve one quarter cup of the pasta water and then drain the fettuccine and set aside.
- For the whipped ricotta: Add ricotta, 1 tablespoon of lemon juice and a pinch of salt and pepper to a medium bowl. Use a hand mixer and whip on medium speed until ricotta is smooth and fluffy – about 3-4 minutes. Place in fridge to keep cool.
- For the crumb topping: On a baking sheet lined with parchment paper, toast the bread crumbs and walnuts in the oven for about 5-8 minutes, or until golden brown. Watch carefully so they don’t burn. Remove from oven and add 3-4 finely chopped sage leaves and the melted butter. Toss and set aside.
- When the squash is done cooking transfer to a blender (don’t discard the sage leaves, transfer to blender as well) and add 1/2 cup of vegetable stock. Blend until smooth.
- Heat a tablespoon of olive oil in a large pan over medium-low heat. Add the shallot and saute for a few minutes until it starts to turn translucent. Add the garlic and cook for 30 seconds, or until fragrant. Pour the blended squash into the pan and add the quarter cup of pasta water and the other 1/2 cup of stock, stirring for a few minutes until smooth. Add the coconut milk and simmer until it thickens and coats the back of a metal spoon. Squeeze a bit of lemon juice overtop of the sauce and then add the pasta. Turn the heat off and toss the pasta around until coated with the sauce.
- To plate, spread some whipped ricotta on the bottom of your plate. Add the pasta on top and then sprinkle with the bread crumb/walnut crumble. Bravo!
The post Easy Butternut Squash Fettuccine “Alfredo” with Whipped Ricotta appeared first on Never. Not. Eating..
]]>The post Shakshuka appeared first on Never. Not. Eating..
]]>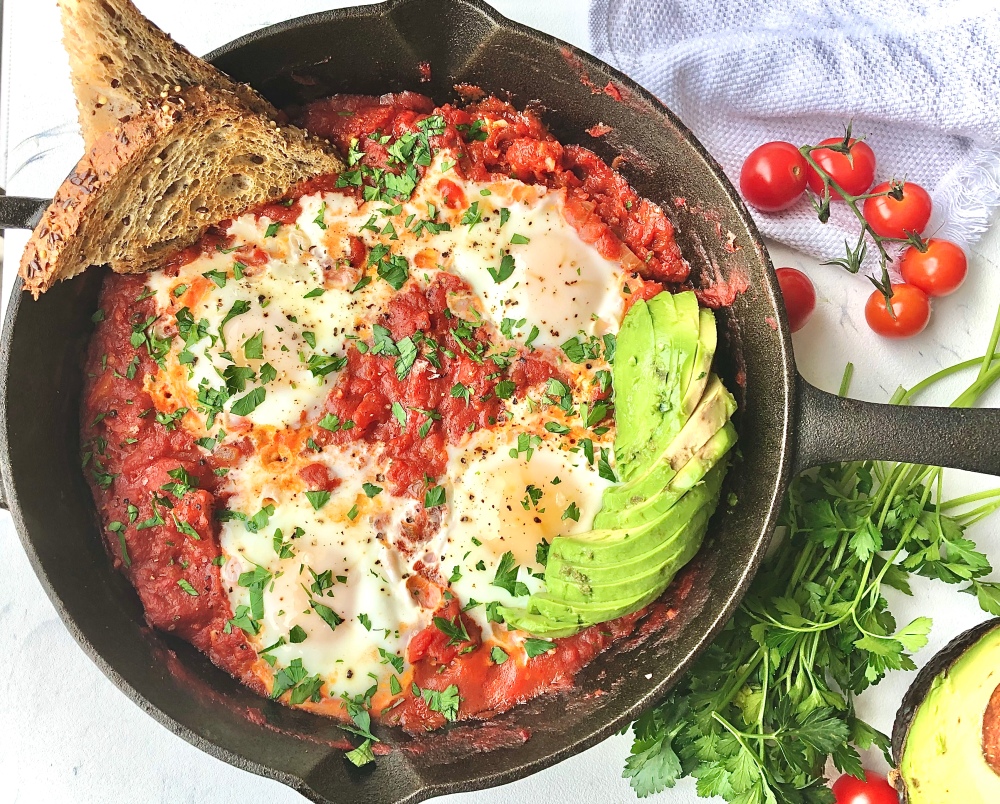
I’ve been really diggin’ Middle Eastern cuisine lately, and shakshuka is something that has been on rotation in my kitchen for a while now. It is basically eggs poached in a spicy tomato sauce served with crusty bread for dipping. And I’m not mad about anything that I can dip into.
There are many places where shakshuka can be found on every corner, and one that has been inspiring me lately is Israel. Does anyone want to go with me?? I’m patiently waiting for the school year to be over so I can hop on a plane and land in Tel Aviv where I will devour all of the deliciousness that derives from this up and coming city.
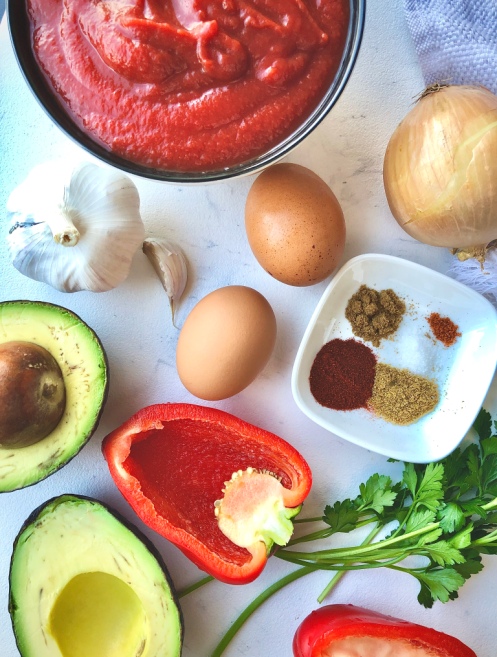
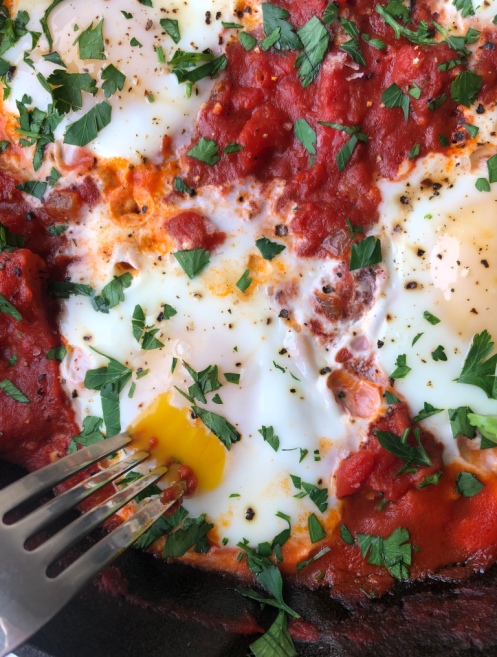
Shakshuka is so simple and easy. It’s onions and bell pepper, sauteed with garlic and traditional middle-eastern spices, like cumin, coriander, paprika and cayenne, and simmered in a tomato sauce. Make a few wells in the sauce, crack a few eggs, let them cook to your liking and you have breakfast. Or brunch. Or lunch or dinner. Good for a friendly gathering, too. You can’t limit shakshuka…Don’t even try.
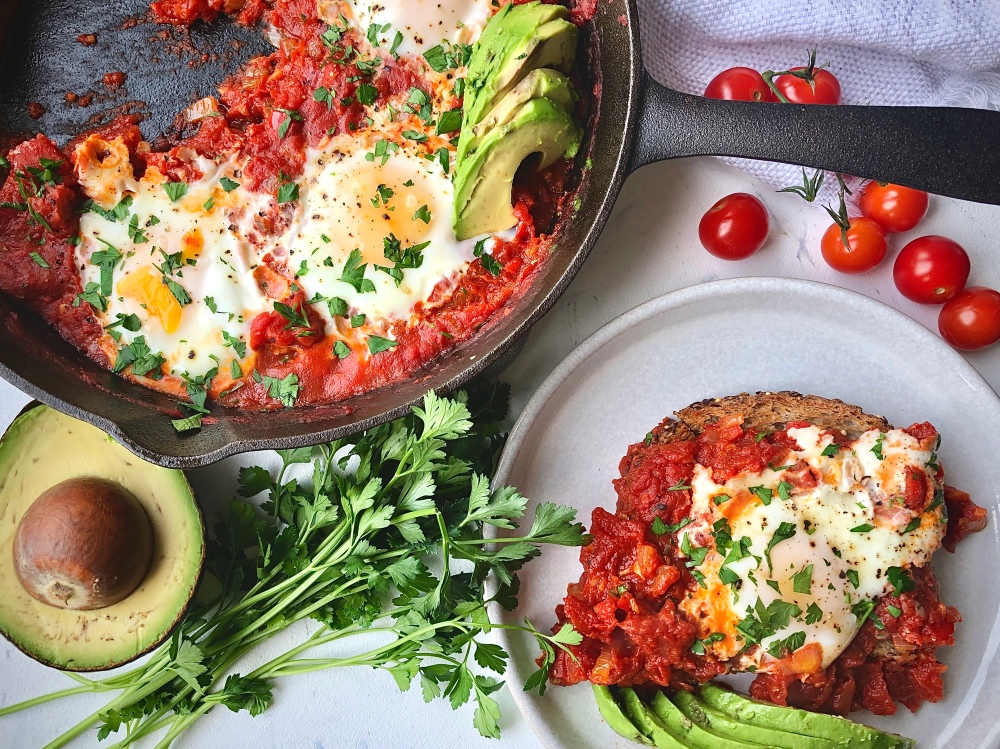
Did I mention that all of this delightfulness is made in ONE cast iron pan. Yup. I love an easy clean.
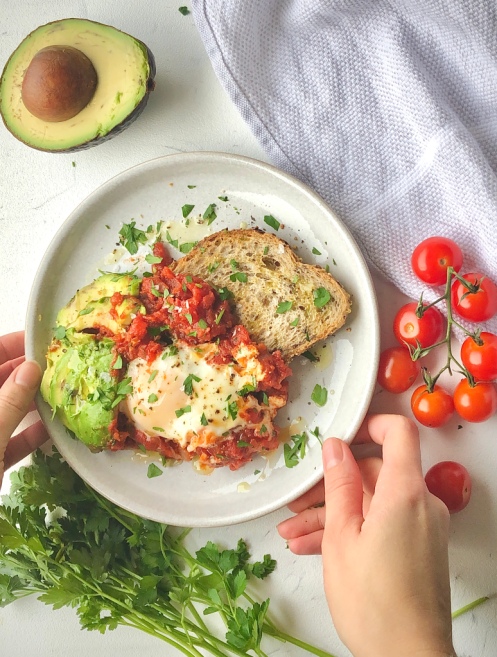
Toppings: You know I’m the topping queen. If I can find more food to put onto a dish full of food than I’m a happy girl. I like to add creamy avocado slices, a crusty sourdough bread for dipping, fresh parsley and flaky sea salt on top of my shak. Feta is also a badass addition.
Shakshuka
Servings: 3-4
Prep time: 5 minutes
Cook time: 30 minutes
Ingredients:
- 2 tbsp olive oil, plus more for drizzling
- 1/2 of an onion, diced
- 1/2 of a red bell pepper, seeded and finely diced
- 2 cloves of garlic, finely chopped
- 1/2 tsp cumin
- 1/2 tsp paprika
- 1/4 tsp coriander
- pinch of cayenne (optional)
- 1 cup crushed tomatoes
- 1 cup canned diced tomatoes (with their liquid)
- 4 large eggs
- salt
- fresh black pepper
- parsley
- avocado (optional)
- toasted, crusty bread (I prefer sourdough), for dipping
Instructions:
- Heat olive oil over medium heat in a cast iron skillet. Add the onion and saute for a minute. Add the bell pepper and continue to cook for about 10 minutes, or until onion starts becoming translucent and just slightly browned around the edges.
- Add the garlic, cumin, paprika, coriander and cayenne. Toast until fragrant, about one minute.
- Pour in the crushed and diced tomatoes, a pinch of salt and a few grinds of fresh black pepper. Let simmer for 15-20 minutes. The sauce will lose a lot of its water content and it will thicken up.
- Make 4 wells in the sauce and crack an egg into each one. Turn the burner down to medium-low, cover the skillet and cook for 3-5 minutes, or until eggs are cooked to your liking.
- Turn heat off and sprinkle with fresh parsley, a few more grinds of pepper and flaky sea salt. Add avocado slices and eat with your favourite crusty bread.
The post Shakshuka appeared first on Never. Not. Eating..
]]>The post Maple Chai Hasselback Pears with Candied Pecans and Coconut Whip Cream appeared first on Never. Not. Eating..
]]>This is a dessert that you can feel good about. It is paleo, vegan and gluten-free and therefore could just be replaced for tonight’s dinner and you are winning.
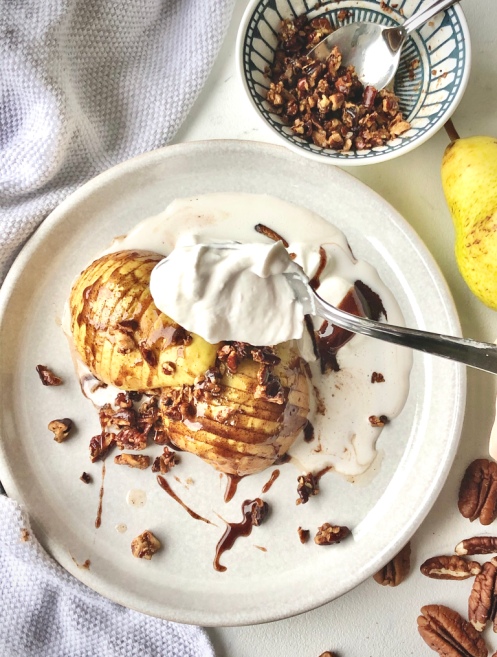
To hasselback something means to make a number of thinly-spaced slices which take on the job of sucking up all of the delicious sauces that will be poured on top, and in this case, it’s an aromatic maple syrup and chai spice hybrid. Holy Hannah.
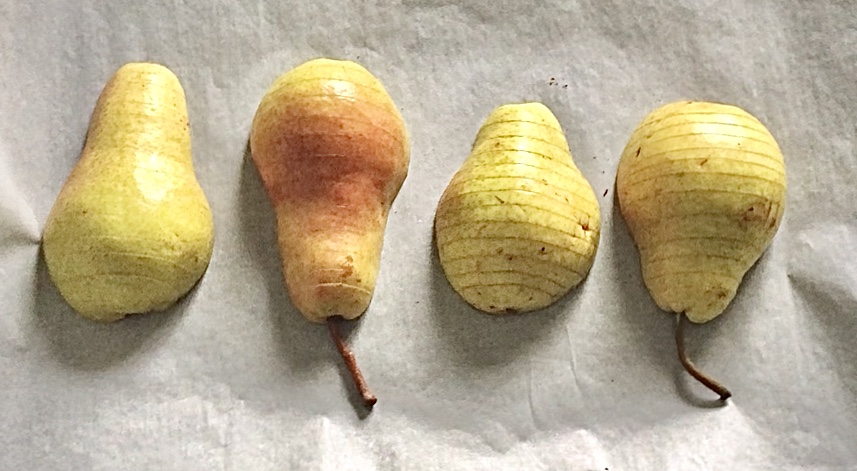
To successfully hasselback your pears for this recipe, cut them in half and remove the core with your knife. Starting with one half at a time, place slice-side down between two chopsticks (or butter knives if you don’t have them) and use a sharp knife to cut slices all the way across the length of the pear. The chopsticks act as a stopper so that your slices don’t go all the way through the fruit.
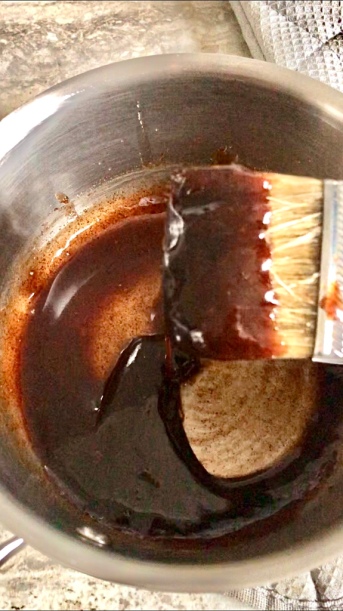
The maple chai glaze starts with maple syrup and coconut oil in a small saucepan, whisked together with cinnamon, cardamom, ground ginger, allspice, cloves, nutmeg and some black pepper. Simmer for just a few minutes. You will see it thicken slightly. Turn off heat and finish off with some vanilla and flaky sea salt and then it’s ready for drizzling.
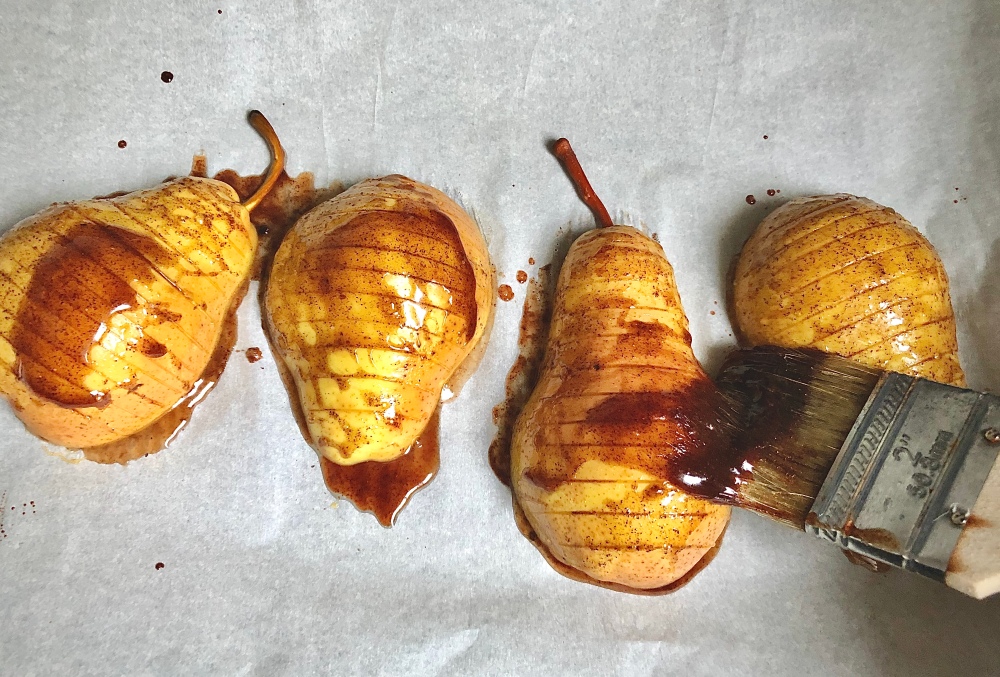
Brush some of the glaze on the pears and pop ’em in the oven to start tenderizing, about 15 minutes. Remove from oven and carefully (they are hot!) use your fingers to separate some of the slices so that you can brush even more glaze onto and into the pears. Bake for another 10-15 minutes until the pears are fork-tender.
Grab some pecans and give them a fine chop. Place them on a baking sheet lined with parchment and pop them in the oven to toast up real quick. Keep watch – you don’t want them to burn! After about 6-7 minutes, pull them out and toss them with a bit of brown sugar and either coconut oil (if you are vegan or paleo), or butter.
To prep for the whip cream, place a metal mixing bowl into the freezer with your wire beaters for at least 15 minutes before making this recipe. Place a can of coconut milk in the fridge overnight or a few days for best results. This allows the full fat “cream” layer to separate from the more transparent “water” layer. We will only be using the cream for this recipe, but don’t throw away that precious coconut water that you find at the bottom of the can! You can blend it into smoothies or use it instead of almond milk in my Power Boosting Smoothie Bowl recipe!

Carefully scoop the cream into the bowl that was in the freezer. With your hand mixer, beat the cream for a minute. You should see it start to thicken. Add your vanilla and maple syrup (or honey) and beat for two more minutes until it resembles regular whip cream. Chill until ready to use.
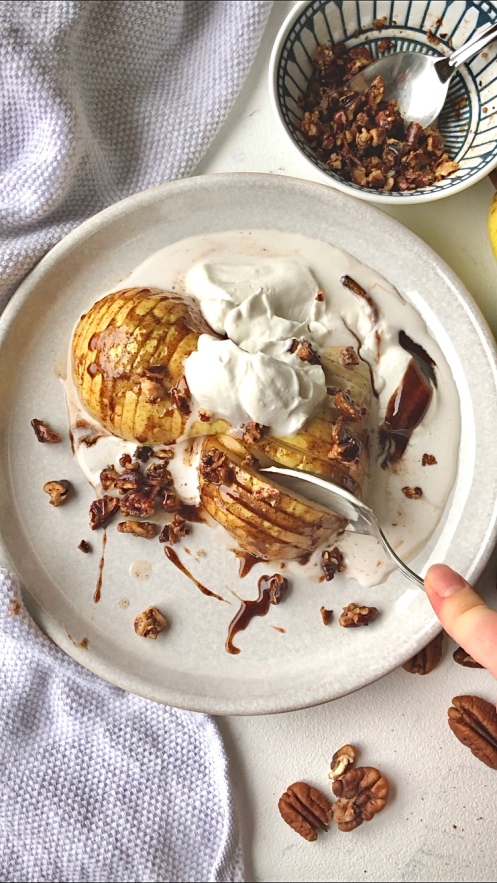
Assembly time – Place your pear halves on a plate and top with pecans and whip cream. Drizzle with the extra maple chai glaze and thank me later.
Maple Chai Hasselback Pears with Candied Pecans and Coconut Whip Cream
Servings: 2
Prep time: 10 minutes
Cook time: 25 minutes
Ingredients:
- 2 ripe pears (Bosc or Bartlett), halved and cores removed
For the maple chai glaze:
- 1/4 cup pure maple syrup
- 1 tbsp coconut oil
- 1 tsp cinnamon
- 1/2 tsp ground cardamom
- 1/4 tsp ground ginger
- pinch of cloves
- pinch of allspice
- pinch of nutmeg
- fresh black pepper
- 1/2 tsp vanilla
- pinch of flaky sea salt
For the candied pecans:
- 1/3 cup finely chopped pecans
- 1 tsp brown sugar
- 1 tbsp coconut oil, melted (or butter, if not vegan)
For the whip cream:
- one can of full fat coconut milk (I find the brand Aroy-d works well), chilled at least overnight
- one tsp pure vanilla extract
- one tbsp pure maple syrup (or honey, if not vegan)
Instructions:
- Preheat oven to 375 degrees F. Place a metal bowl and wire beaters into the freezer.
- Prepare the pears by placing one half at a time, slice-side down, between two chopsticks (or butter knives). Use a sharp knife to cut slices all the way across the length of the pear. The chopsticks act as a stopper so that your slices don’t go all the way through the fruit. Set aside while you prepare the glaze.
For the maple chai glaze:
- Add maple syrup, coconut oil, cinnamon, cardamom, ginger, cloves, allspice, nutmeg and a few grinds of black pepper to a small saucepan and bring to a simmer over medium heat. Simmer for 4 minutes. It will thicken slightly. Remove from heat.
- Brush the glaze over the hasselback pears and place pears into the oven to bake for 15 minutes.
- Remove from oven and use your fingers to separate the slices a little more (careful, it will be hot). Brush over more of the glaze, making sure it seeps into the grooves that you helped separate, and return to oven for another 10-15 minutes, or until fork tender. Remove and let cool for a few minutes.
For the candied pecans:
- Place the pecans on a small baking sheet lined with parchment paper. Toast in the oven alongside the pears for about 6 minutes or until fragrant. Watch carefully to avoid burning.
- Remove from oven and add brown sugar and coconut oil (or butter) to the nuts, tossing together. Set aside.
For the coconut whip cream:
- While the pears are baking, make your whip cream. Remove the can of coconut milk from the fridge. Open carefully and scoop out the solidified cream, placing into the metal bowl that was chilling in the freezer earlier. Do not add the water at the bottom of the can.
- Beat on medium speed for 1-2 minutes, until it has began to noticeably thicken up.
- Add vanilla and maple syrup and beat for another 2 minutes on high, until it resembles regular whip cream. Place back in the fridge to stay cold.
Assemble:
Place the baked pears onto a plate. Add candied pecans and coconut whip cream. Drizzle over the remaining maple chai glaze. Dig in!
The post Maple Chai Hasselback Pears with Candied Pecans and Coconut Whip Cream appeared first on Never. Not. Eating..
]]>The post Rainbow Buddha Bowl with Garlic Tahini Dressing appeared first on Never. Not. Eating..
]]>Sorry…got weird for a second there…but listen, here is a bowl full of pure healing. A range of super-tasty-yet-so-good-for-you vegetables paired with nutty brown rice and a garlicky-lemon tahini sauce to slather at your own will. Lunchtime game-changer.

A lot of my recipes are inspired by different places that I have visited and the foods and ingredients that I have discovered there. This dish is the opposite. I’ve been dying to get to Israel to try out what I hear to be the most amazing cuisine. A trip that most definitely will be taken in the near future, but for now, I’m going off what I know so far with this simple tahini dressing.

If you don’t know, tahini is the peanut butter of sesame seeds. It has a bitter, nutty kind of taste that pairs very well with lemon and garlic – hence this sauce. Just whisk with some cold water until you reach a drizzlable consistency and slather, slather, slather.
The foundation of this bowl is brown rice, but you can really use any grain you like. We ARE already packing this bowl full of vegetables, so we may as well continue down the path to health and choose the far superior rice. Ahem, brown rice. Cook the rice according to package directions (brown rice takes a long time, so plan ahead)!

Tip: When your rice is done cooking and it is time to remove from the heat and “let stand for five minutes,” open the lid, toss in a handful of golden raisins and quickly close the lid again. They give this dish a sweet, juicy “pop!” Trust me. I do this every time I make rice. The little golden jewels plump up by absorbing the steam that is trapped inside of the pot and there is nothing wrong with that.
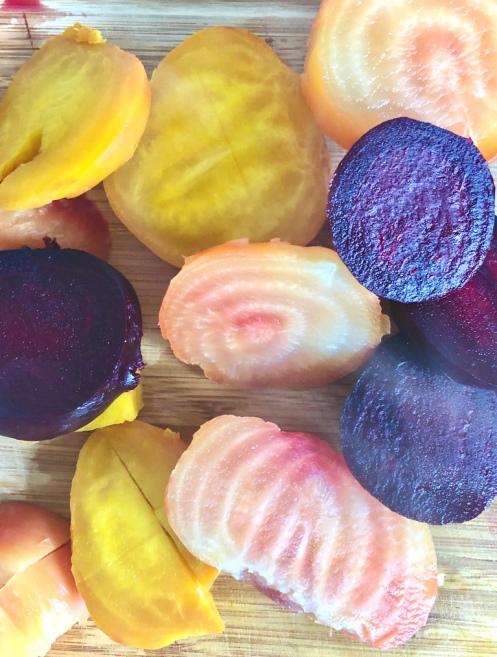
Veggies – Start with your beets, as they take the longest. I like to use a mix of red, candy striped and golden beets for that “rainbow” effect. Wash the outside of them and place them on a large piece of aluminum foil. Wrap the foil up like a present, making sure that there are no openings for the steam to escape. Place on a baking sheet, throw them in the oven and forget about them for an hour or so.

Chop up your butternut squash, your brussel sprouts and your kale and drizzle with olive oil, salt and pepper. The squash goes in first – 15 minutes. Pull out and add the sprouts. 15 minutes. Pull out and add the kale. Another 10 minutes. Done.

Other rainbow prep – Other than the roasted veg, I also like to prepare the following to add: avocado, olives, green onions, pomegranate seeds and hemp hearts. Muy rainbow-esque!
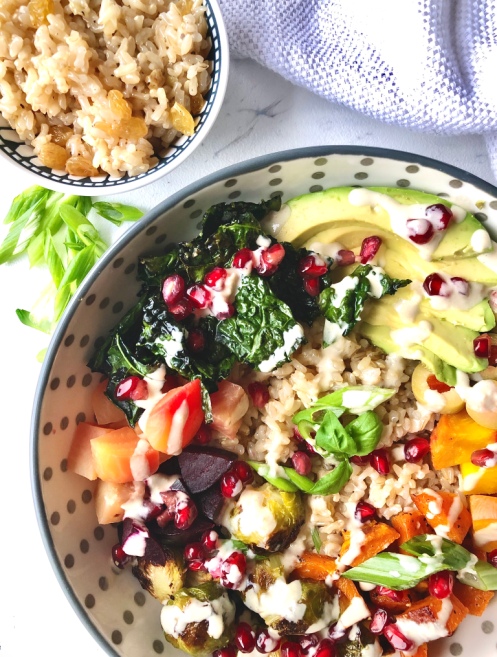
Assembly – It’s BUDDHA BOWL TIME! Scoop the rice into the bottom of your bowl. Around the outside, spoon in all of the different vegetables and toppings. Drizzle with tahini sauce and take pictures to remember this ceremonious day.
Rainbow Buddha Bowl with Garlic Tahini Dressing
Serving Size: 4
Prep time: 20 minutes
Cook time: 1 hour 15 minutes
Ingredients:
- 4-5 raw beets (I like to use a mix of red, candy stripe and golden), washed
- 1 cup dry brown rice
- one-quarter cup of golden raisins (optional)
- 2 cups butternut squash, cut into half-inch cubes
- 2 cups brussel sprouts, cored and halved (about 20 sprouts)
- 6 leaves of tuscan (black) kale, thick stem removed, roughly chopped
- 6-7 olives, sliced
- 2 scallions, sliced
- olive oil
- salt
- pepper
- 1 avocado, sliced (optional)
- half cup pomegranate seeds (optional)
- 4 tablespoons hemp hearts (optional)
For the tahini sauce:
- one-quarter cup of tahini
- 2 tbsp freshly squeezed lemon juice
- 1 clove of garlic, grated
- salt
- 3-4 tbsp ice cold water
Instructions:
- Preheat oven to 400 degrees F. Place beets in the middle of a large piece of aluminum foil and wrap up like a present so that there are no open areas where the steam could escape. Place the foil package on a baking sheet and bake for 1 hour and 10 minutes, or until a fork inserts easily.
- Rinse the rice under cold water until water runs clear. Meanwhile, add one tablespoon of olive oil to a medium-sized saucepan over medium heat. Add the rice and toast for a minute in the oil. Add a pinch of salt and two cups of water. Bring to a boil on high heat. Once boiling, cover and turn the heat to low and simmer for 45 minutes. Do NOT open the lid!
- While the rice is cooking and the beets are roasting, chop up your vegetables. Drizzle the squash, brussel sprouts and chopped kale (each in their own separate bowl) with olive oil and sprinkle with a pinch of salt and a few grinds of black pepper.
- When the beets have been roasting for about half an hour, pull the baking sheet out of the oven and add the squash, continuing to roast for 15 minutes. Pull the baking sheet out again, add brussel sprouts and quickly return to oven to roast for another 15 minutes. Remove sheet tray one more time, toss the veggies around and add the kale, roasting for 8-10 more minutes or until kale is crisp and vegetables are cooked through. Remove from oven.
- For the sauce, start by putting 2-3 ice cubes in a bowl and fill the bowl with cold water. Set aside. In a small bowl, whisk together the tahini, garlic, lemon juice and a pinch of salt until combined. Add the cold water, one tablespoon at a time, whisking until fully incorporated. It usually takes me between 3-4 tablespoons to get the consistency that I like. Set aside.
- When the rice is finished cooking, turn the burner off, lift the lid of the pot, throw in the golden raisins and quickly place the lid back on top. Remove the rice from the hot burner and let stand with lid on for 5 minutes. Fluff with a fork before assembling the bowl.
- Carefully open the foil package with the beets inside (the steam will escape and it is hot)! Use two paper towels to peel the skins off of the beets. Rinse peeled beets under cold water to remove any excess skin and diced ’em up!
- Assemble the bowl by scooping the rice and raisins into the bottom and surrounding it with the beets, squash, brussel sprouts, crispy kale, avocado, scallions, olives and pomegranate seeds. Drizzle with the tahini sauce and sprinkle on some hemp hearts for an extra protein punch.
The post Rainbow Buddha Bowl with Garlic Tahini Dressing appeared first on Never. Not. Eating..
]]>The post The Best Chocolate Chunk Banana Bread appeared first on Never. Not. Eating..
]]>
I’ve only ever made one banana bread recipe, and it’s this one. It is my absolute favourite…moist, fluffy and delicious. I’ve played around with the recipe a little bit over the years – making it dairy-free, egg-free and including less sugar – and it always works out pretty well, regardless of the change. In the recipe below, you will see the original recipe as well as some healthier adaptations, if you so wish. Your choice.

The dry: You are going to need flour (All Purpose, but sometimes I do half AP and half whole wheat), baking soda, baking powder and salt. Mix, mix, mix.

The wet: Beat one cup of sugar (less if you want) with two eggs (or use “flax eggs” – mix two tablespoons of ground flax with five tablespoons of water and let sit for ten minutes in the fridge to thicken), vanilla and vegetable oil until combined.

In three additions, add the dry mixture alternatively with half a cup of buttermilk (for non-dairy, mix together half a tablespoon of white vinegar with half cup of almond milk and let sit for five minutes before adding to the wet ingredients), mixing just to combine. Do not over mix!

Now comes the part that makes this bread drool-worthy. Toss in a bunch of dark chocolate chunks – the more, the merrier. Mash up those bananas with a fork and dump them right in, too! NOTE: Your bananas should have a brown peel. They are so much sweeter when they are at this stage and perfect for banana bread. I promise.

Oh Em Gee. Look at that yumminess… Talk about goals.
Carefully fold in the bananas and chocolate chunks and then pour into a greased loaf pan.

Toss a couple more chocolate chunks on top to make it look pretty…and for more chocolate chunks on top. Duh.
Now it’s time for the oven. Waiting is the worst part, but it is so worth it in the end. Bake for 45-55 minutes or until a toothpick inserted into the middle comes out clean.

Cool on a wire rack and just try not to eat it. Or eat it…we’re working on our winter bodies…right?!

The Best Chocolate Chunk Banana Bread
Prep time: 10 minutes
Cook time: 50 minutes
Ingredients:
- 2 cups all-purpose flour*
- 3/4 teaspoon baking soda
- 1/2 teaspoon baking powder
- 3/4 teaspoon salt
- 1 cup sugar
- 1/2 cup canola oil
- 2 large eggs
- 1 teaspoon pure vanilla
- 1/2 cup buttermilk**
- 3 overripe bananas, mashed
- 1 cup dark chocolate chunks
Instructions:
- Preheat the oven to 350 degrees and grease a loaf pan.
- In a medium-sized bowl, whisk together the flour, baking soda, baking powder and salt. Set aside.
- In a separate, larger bowl, beat the sugar, oil, eggs and vanilla together until smooth and combined.
- Add the dry ingredients and buttermilk alternately in three additions, being careful not to over mix the batter.
- Add the mashed bananas and chocolate chunks and carefully fold with a spatula until incorporated into the mixture.
- Pour into prepared pan and bake for 45-55 minutes, or until a toothpick inserted in the middle comes out clean.
- Run a butterknife along the edges of the loaf to loosen and turn out onto a wire rack to cool completely.
NOTES:
*You can also use whole wheat flour or half AP and half whole wheat.
**If you are dairy-free, substitute the buttermilk for almond milk mixed with 1/2 tablespoon of white vinegar (let sit for about 5 minutes)
The post The Best Chocolate Chunk Banana Bread appeared first on Never. Not. Eating..
]]>The post Dairy-Free Butternut Squash and Pear Soup appeared first on Never. Not. Eating..
]]>
So, here’s a true story -once upon a time, I was looking through my fridge and there was some left over pumpkin, a pear that was nearing the end of it’s life and a perfect little squash. Therefore, I naturally decided to make soup. The end.
I know, I know – sounds weird, but trust me, they willingly found each other and are now happily married and ready to spend their lives together as one happy triad. Some things are just meant to be.
WHAT IS DAIRY-FREE BUTTERNUT SQUASH AND PEAR SOUP?
This soup is ALL the creamy and NONE of the dairy. It has everything that a great soup has – aromatics, body and flavour…it is the real deal.

The reason why I love this recipe so much is because everything is roasted beforehand and roasting means caramelization and caramelization means flavour! So cube up that squash, toss it in some EVOO and some spices, pop that bad boy in the oven and let it do it’s magic.
INGREDIENTS FOR DAIRY-FREE BUTTERNUT SQUASH AND PEAR SOUP
I love using simple and healthy ingredients for the majority of my recipes and this soup is no exception. Moreover, ingredients can easily be swapped or subbed for those of your choice, or what is in your fridge. For example, you might choose to use sweet potatoes instead of squash, cream instead of coconut milk or different herbs you have to use up – cooking is flexible!
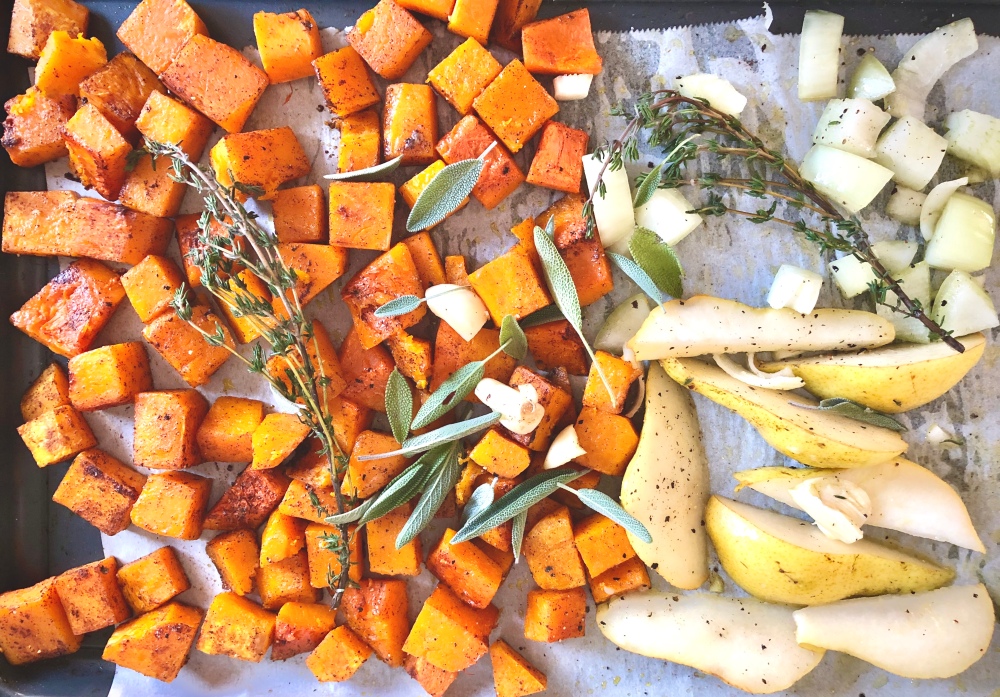
ROASTING THE INGREDIENTS
Firstly, we are going to cook the vegetables. Since the squash takes longer to cook through, give it about 20-25 minutes to roast up, pull it out and add the rest of the ingredients to the sheet pan, toss with a bit more oil and roast for another 20 until everything is fork-tender. Browned edges are accepted and encouraged.
MAKING THE SOUP
Now it’s time to soupify! Remove the thyme sprigs and dump everything else into a blender with the pumpkin and broth. Add more broth if you prefer a thinner soup.
Blend ‘er until smooth.

While the soup is blending, place a large pot over medium-high heat with some olive oil. When the oil is hot, add a bunch of sage leaves and a sprinkle of sea salt and let crisp up for 1-2 minutes. Remove from pot and place on a paper towel to absorb some of the oil.
Turn the heat to medium-low, transfer the soup to the pot and add the coconut milk. Let simmer until the milk is fully incorporated and warmed through.

GARNISHING DAIRY-FREE BUTTERNUT SQUASH AND PEAR SOUP
Transfer to your favourite bowl and garnish with the crispy sage, flaky sea salt and a few grinds of pepper. I mean…Come on!
OTHER DAIRY-FREE SOUP RECIPES
Easy Creamy Cauliflower Soup (quick and easy)
Roasted Carrot Soup with Ginger (my absolute favourite)
Crockpot Ginger and Turmeric Immune Boosting Soup (come home to a comforting meal)
TOOLS NEEDED FOR THIS RECIPE
Click below to check out what I use to make this Dairy-Free Butternut Squash and Pear Soup!


This post contains affiliate links and I may earn a small commission when purchases are made after clicking the links, at no cost to you. Thank you!
Dairy-Free Butternut Squash and Pear Soup
Servings: 4
Prep time: 10 minutes
Cook time: 55 minutes
Ingredients
- 1 medium-sized butternut squash, cut into one-inch cubes
- Olive oil
- 1/2 tsp cinnamon
- 1/4 tsp nutmeg
- salt
- pepper
- 1 pear (I used Bartlett), sliced
- 1 small yellow onion, diced
- 3 cloves garlic, smashed
- 3-4 sprigs thyme
- 20 fresh sage leaves, separated
- 1/2 cup pure pumpkin (optional)
- 1 1/2 cups vegetable broth
- 3/4 cup canned coconut milk
- 1/4 cup roasted hazelnuts (optional)*
- A dollop of dairy-free coconut yogurt (optional)
Instructions
- Preheat oven to 375 degrees.
- Place squash on a sheet pan and drizzle with one tablespoon of olive oil. Sprinkle over the cinnamon, nutmeg, 1/2 teaspoon of salt, a few grinds of fresh black pepper and toss together with your hands until evenly coated and then roast in oven for 25 minutes.
- Remove the sheet pan from the oven and add pear, onion, garlic, thyme sprigs and ten sage leaves. Drizzle with a little more olive oil, salt and pepper and toss again. Create a “bed” for the garlic cloves by placing them on top of some of the other vegetables, so they do not burn from the direct heat of the pan. Roast for another 20 minutes, or until everything is fork-tender.
- Remove from oven and discard thyme sprigs. Add everything to a blender with the pumpkin and broth and blend until smooth. Add in a bit more broth if you like a thinner soup.
- While the soup is blending, place a large pot over medium-high heat and add one tablespoon of olive oil. When the oil is hot, add the remaining ten sage leaves and a pinch of sea salt. They should begin sizzling immediately. Let them fry for about a minute or so, until nice and crispy. Remove and place on a paper towel to absorb some of the excess oil.
- Lower the burner to medium-low heat and add the blended soup into the same pot that was used to crisp the sage. Add the coconut milk and simmer for about 5 minutes.
- Ladle into bowls and garnish with roasted hazelnuts, yogurt and crispy sage!
NOTES
*To roast hazelnuts, place them on a sheet pan and into a 350 degree oven for 8-10 minutes. Once browned lightly, remove and let cool. Rub them between your fingers to remove the skins.
The post Dairy-Free Butternut Squash and Pear Soup appeared first on Never. Not. Eating..
]]>