The post Vegan Pumpkin Coconut Cake appeared first on Never. Not. Eating..
]]>
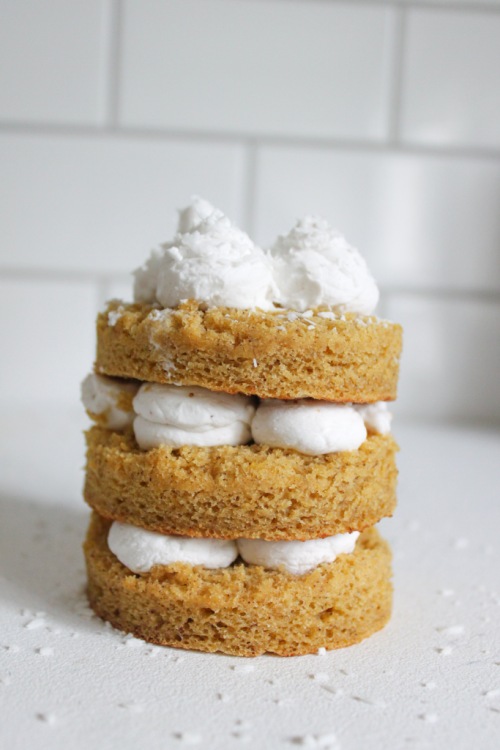
That’s right…Eggless, milkless, and as a bonus – glutenless! No bad foods allowed. A perfect Thanksgiving dessert for the upcoming long weekend!
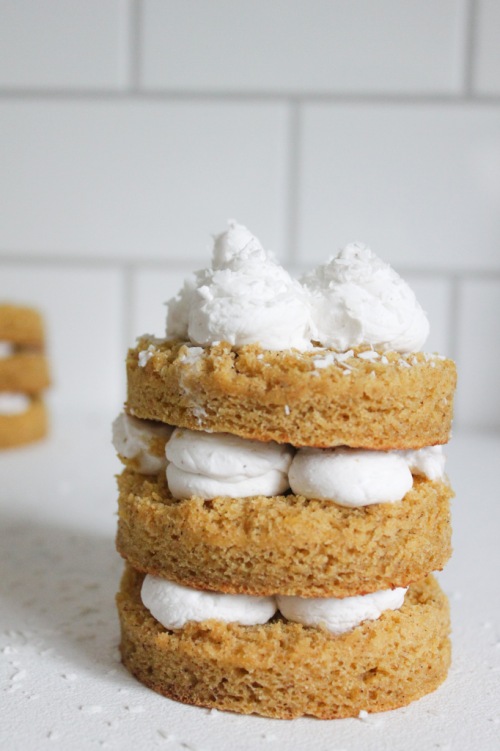
This cake takes minutes to put together, minutes to bake, and seconds to eat. It is moist and fluffy and perfect. You can make individually stacked cakes (as seen in the photos), or you can make one, two-layered cake.
Here is what you will need for the cake:
- My homemade pumpkin puree (or store bought, but it’s just not as fresh)
- Gluten-free flour
- Apple cider vinegar
- Oat milk
- Pumpkin pie spice
- Salt
- Banana
- Brown sugar
- Vanilla
- Baking soda
- Baking powder
For the whipped coconut cream:
- Canned coconut milk
- Vanilla
- Cinnamon
- Salt
- Powdered sugar
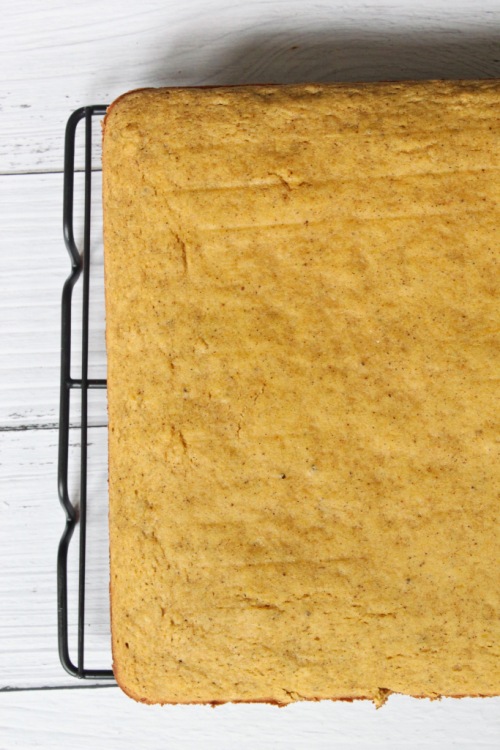
To make the cake, prepare a baking pan by greasing it, lining the bottom with parchment paper and then sprinkling with flour. Combine the apple cider vinegar and oat milk and let sit for 5 minutes. This is a buttermilk substitute, which helps makes the cake fluffy and gives it a bit of a tang. Next, blend all of the ‘wet’ ingredients together – the pumpkin, banana, vanilla and brown sugar. In a separate bowl, sift together the flour, baking soda, baking powder, salt and pumpkin pie spice. Add the dry ingredients and milk mixture to the wet ingredients in four additions, starting with the flour. Pour into prepared baking pan. This will bake for around 12-15 minutes.
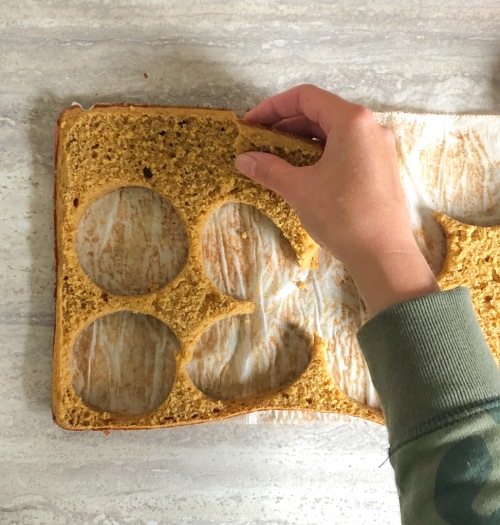
Once cooled, you can assemble you mini cakes (or one large cake) by using a round cookie cutter and cutting out circles to stack on top of one another. Alternatively, you can slice the cake down the middle and create a two-layered cake. This is a good option if you want to feed a larger party.
Baking this cake fills your house with all the smells of Fall and that, my friends, is never a bad thing! Happy baking!
Vegan Pumpkin Coconut Cake
Serving size: Makes three individual cakes or one, two-layer cake
Prep time: 10 minutes
Cook time: 12 minutes
Ingredients:
- 1/2 tbsp apple cider vinegar
- 1/2 cup oat milk (or any plant-based milk)
- 1 cup pure pumpkin (not pumpkin pie filling)
- 1 banana, mashed
- 1/2 cup brown sugar, tightly packed
- 1 tsp pure vanilla extract, separated
- 1.5 cups gluten-free flour
- 1 tsp baking soda
- 1 tsp baking powder
- 1 tsp pumpkin pie spice
- 1/2 tsp salt
- 1 14 oz can full-fat coconut milk (placed in the fridge for at least 24 hours)
- 2 tbsp powdered sugar
- 1/4 tsp cinnamon
- 2 tbsp dried coconut flakes, for topping (optional)
Instructions:
- Preheat the oven to 350 degrees Fahrenheit. Grease a 13 x 9 inch rectangular pan, line with parchment paper and dust with flour. Place a mixing bowl and electric mixer attachment into the freezer (to prepare for the whipped cream).
- Combine apple cider vinegar and oat milk together in a small bowl. Set aside.
- Beat pumpkin, banana, brown sugar and 1/2 tsp vanilla together in a large bowl until smooth.
- In a separate bowl, sift the flour, baking soda, baking powder, pumpkin pie spice and salt together.
- In four additions, add the flour mixture and oat milk to the wet ingredients, starting with the flour, and beating until combined.
- Pour batter into prepared pan and bang the pan on the counter a few times to release any air bubbles. Bake for 12-15 minutes, or until an inserted toothpick comes out clean. Remove from oven and let cool in the pan for five minutes before flipping onto a wire rack to finish cooling completely.
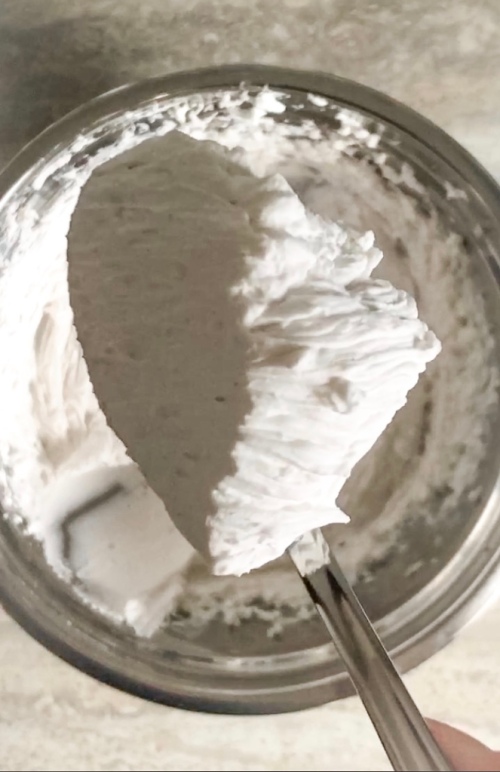
- While the cake cools, make the whipped cream. Remove the bowl and mixers from the freezer and carefully open the can of coconut milk from the fridge. Scoop the solid white part at the top of the can into a bowl (refrigerate the water at the bottom of the can and save for smoothies). Beat the coconut solids on medium speed for 30 seconds. Add the powdered sugar, the cinnamon, the rest of the vanilla and a pinch of salt. Beat for another minute until it is thick and creamy.
- When the cake is cool, use a round cookie cutter to cut out nine circles (or cut the cake in half to make two layers). Spread some of the whipped cream onto the first cut out circle. Top with the second and repeat. Add some whipped cream on top of the third circle and sprinkle with some of the dried coconut, if desired. Alternatively, if making one large cake, spread some of the whipped cream on the first layer of cake, top with the second layer and then dollop the rest of the whipped cream on top. Sprinkle with coconut flakes.
- Serve immediately or store in the fridge for up to 48 hours.
The post Vegan Pumpkin Coconut Cake appeared first on Never. Not. Eating..
]]>The post Homemade Pumpkin Puree appeared first on Never. Not. Eating..
]]>
WHAT’S THE DIFFERENCE?
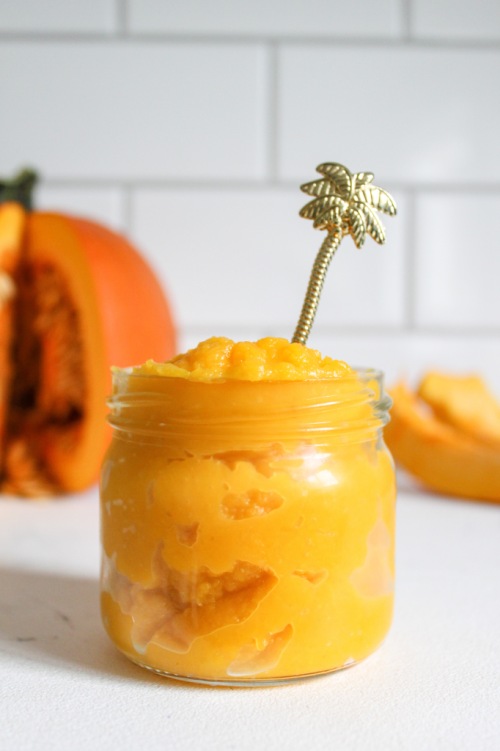
The puree from the store often includes preservatives, such as sugar and salt, so I prefer to avoid those additives by making my own. It’s the easiest thing to do, so if you were just thinking “Way too much work,” you’re wrong. Try it!
CHOOSING THE PROPER PUMPKIN
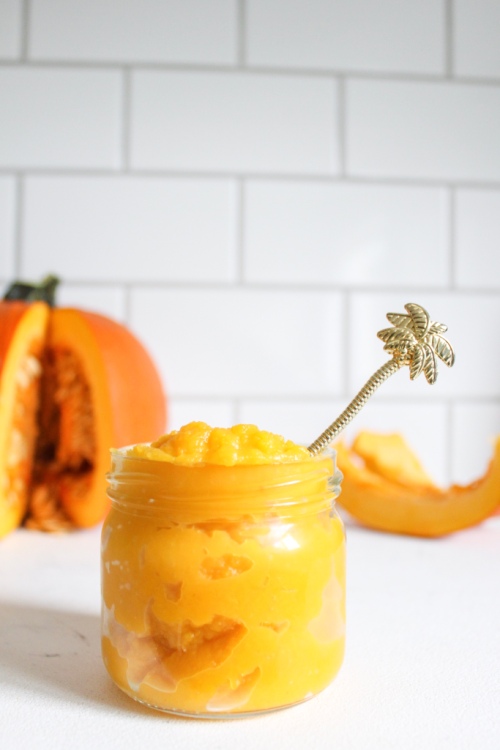
The most important part of this recipe is selecting the appropriate pumpkin variety. Those really big ones that you carve into on Halloween….No bueno. They are really bland in taste, and such a hassle to cut up due to their size. You CAN eat them, but they are not a good choice for pies or any other baked goods that include pumpkin. Your best bet is to find a Pie Pumpkin. They are sweeter and more flavourful and can be used in both sweet and savoury recipes.
I typically hold off on seasoning the pumpkin too much as one pumpkin usually makes a large enough batch to use in both savoury and sweet recipes, and each type of recipe would be seasoned differently. If you are making the puree solely for pie, pancakes, pumpkin spiced lattes, or anything on the sweeter end, you can definitely add some cinnamon and nutmeg to this recipe to jazz it up! On the contrary, you can grind some pepper and add some dried thyme or sage if you plan to use the puree in more savoury-type dishes, like soups or casseroles.
Like I said, pumpkin puree is really easy to make. The most challenging part is just getting your pumpkin cut up! So, grab yourself some sharp knives, and let’s roll!
Homemade Pumpkin Puree
Yield: About 3 cups (depending on the size of your pumpkin)
Prep time: 10 minutes
Cook time: 30 minutes
Ingredients:
- 1 pie pumpkin
- 1 tbsp olive oil
- 1/2 tsp salt
Instructions:
- Preheat oven to 375 degrees Fahrenheit.
- Using a sharp knife, cut your pumpkin into 1-inch wedges and remove the seeds. Lay the wedges flat, on a parchment-lined baking sheet. Drizzle them with the olive oil and sprinkle with salt. Use your hands to coat all of the wedges and then bake in the oven for 30-40 minutes, flipping once halfway through. When you can easily pierce a fork through the pumpkin, they are done.
- Let the wedges cool completely on the baking sheet and then remove the skin and discard. Place pumpkin into a food processor and blend until smooth. Transfer to an airtight container and store in the fridge for up to three days. You can also freeze the puree if you wish to use it later.
The post Homemade Pumpkin Puree appeared first on Never. Not. Eating..
]]>The post Homemade Pumpkin Spice Latte appeared first on Never. Not. Eating..
]]>
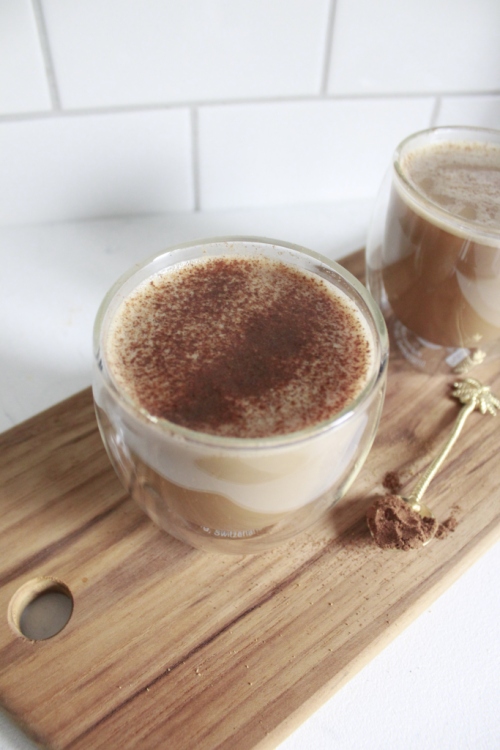
So, why would anyone pay $6.00 for a beverage from Starbucks when you can make it for way cheaper at home? You also know everything going into it when you make it yourself, and I’ll tell you what isn’t going into it – four pumps of pure sugar.

Here is what you will need to make this bevvy yourself:
- Espresso or strong coffee
- Plant-based milk (I love cashew milk)
- Pure pumpkin puree (homemade or canned)
- Maple syrup (optional)
- Pure vanilla extract
- Pumpkin pie spice (homemade or store-bought)
To make your drink more latte-ish, frothing the milk is essential. One of my favourite kitchen tools is this handheld milk frother that I purchased from amazon. It is super cheap and works so, so well. I use it every day. I highly recommend investing in a frother if you are looking to save money by creating your own coffee-based beverages.
Pumpkin pie spice can be found for purchase at most grocery stores, or online here. You can also make it yourself by combining cinnamon, ginger, cloves, nutmeg and some cardamom. If you don’t often use many of these spices, I would recommend just buying it as you will have an abundance of leftovers that will just be taking up room in your pantry.

To put this yummy drink together, you first want to get your coffee ready. Brew 1-2 shots of espresso, depending on preference, in your espresso maker. Alternatively, you can use regular coffee instead. Next, combine your milk with all of the other ingredients, steam and then froth it up. Pour over espresso and top with an extra sprinkling of pumpkin pie spice and you got yourself a PSL.
Homemade Pumpkin Spice Latte
Servings: 1
Prep time: 5 minutes
Cook time: 5 minutes
Ingredients:
- 1 cup plant-based milk (I use cashew milk)
- 1 tbsp pumpkin puree
- 1/2 tbsp maple syrup (optional)
- 1/2 tsp pure vanilla extract
- 1/4 tsp pumpkin pie spice
- 1-2 shots of espresso (or 1/3 cup strong coffee)
Instructions:
- Add the milk, pumpkin, maple syrup, vanilla and spice to a small pot over medium heat and whisk. When the milk begins to steam, use a milk frother for 20 seconds or until foamy.
- While the milk is steaming, brew the espresso or coffee.
- Pour the espresso into a tall mug and top with the frothed milk. Add a sprinkling of pumpkin pie spice on top, if that’s your jam.
The post Homemade Pumpkin Spice Latte appeared first on Never. Not. Eating..
]]>The post The Fluffiest Gluten-Free Pumpkin Pancakes appeared first on Never. Not. Eating..
]]>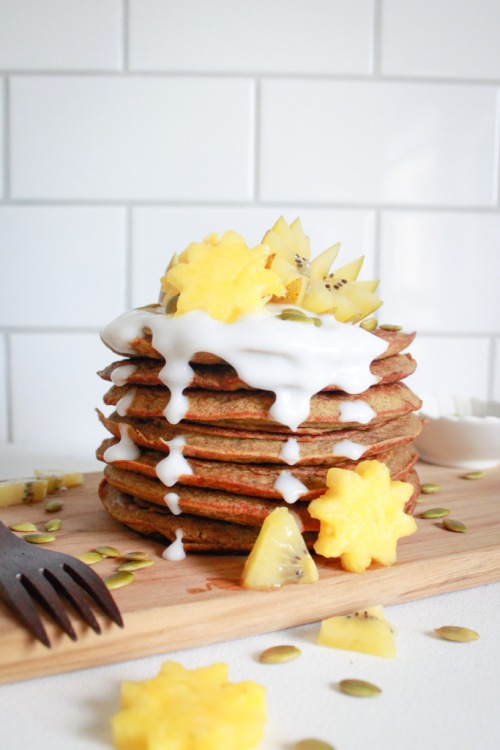
Not only are these pancakes gluten-free, they are also dairy-free and refined sugar-free. You. Are. Welcome.
This recipe was inspired by the extra pumpkin puree that I had after making my favourite pumpkin pasta dish. I hate waste and when I was thinking about what I could use the leftovers for, my brain immediately went to pancakes. Usually when I try recipes for pancakes that are gluten-, dairy- and refined sugar-free, they often turn out flat. It was my goal to create healthy pancakes that taste and look like normal pancakes. I think these are it. And, by “think” I mean “know.” I just didn’t want to sound cocky.

Because these pancakes are refined sugar-free, they are on the less-sweet side. They include the natural sweetness from a banana, but feel free to add some brown or white sugar to the wet ingredients. I, personally like to aggressively drizzle them with maple syrup after they are made and ready-to-eat, and this covers the necessary sweetness!

To start, whisk up all of your dry ingredients. Buckwheat flour, baking powder, baking soda, cinnamon, nutmeg and salt. The use of buckwheat is what makes these pancakes gluten-free. Buckwheat is actually a seed, not a wheat, as the name suggests. The seeds are ground up into a flour. It is my preferred ingredient for pancakes as I have found it to have a similar outcome as regular wheat flour, unlike other gluten-free flours, like almond and coconut.

The wet ingredients include: pumpkin (of course), canned coconut milk, a mashed banana, an egg and some vanilla. These all get whisked together. When combined, add in the dry ingredients and stir until everything has been incorporated. The batter will be thick. Set it aside to allow the ingredients to get to know one another.

When ready, add the batter to a hot pan. I find it easiest to use two spoons to help shape your pancakes the way you would like them. They only need a minute or two on each side until they are ready.

Serve with your toppings of choice. I love fresh fruit on these, cinnamon, and some yogurt. Oh, and pools of maple syrup, of course!
The Fluffiest Gluten-Free Pumpkin Pancakes
Servings: Makes 8 pancakes
Prep time: 5 minutes
Cook time: 10-15 minutes
Ingredients:
- 1 cup buckwheat flour
- 1 tsp baking powder
- 1/2 tsp baking soda
- 1/2 tsp cinnamon
- 1/4 tsp freshly grated nutmeg (or the packaged powder)
- 1/2 tsp salt
- 1/2 cup pure pumpkin puree (not pie filling)
- 1 very ripe banana, mashed
- 1 egg, beaten
- 1 cup canned coconut milk
- 1/2 tsp pure vanilla extract
- Coconut oil
Instructions:
- In a small bowl, whisk the buckwheat flour, baking powder, baking soda, cinnamon, nutmeg and salt together. Set aside.
- In a large bowl, whisk the pumpkin, banana, beaten egg, coconut milk and vanilla together until smooth. Add the dry ingredients and stir until everything has been combined. Batter will be thick. Set aside for a few minutes to allow the flavours to meld.
- Preheat a pan over medium-high heat. Add a tablespoon of coconut oil to grease the pan. Use two spoons to dollop the batter into the pan and to help spread and shape the pancakes. Cook for 1-2 minutes – you will notice the edges begin to set and bubbles begin to form on top – and flip, cooking another minute. Remove from pan and continue with the rest of the batter.
- Serve with your choice of topping – I recommend pure maple syrup, fresh fruit and dairy-free yogurt!
The post The Fluffiest Gluten-Free Pumpkin Pancakes appeared first on Never. Not. Eating..
]]>The post Dairy-Free Butternut Squash and Pear Soup appeared first on Never. Not. Eating..
]]>
So, here’s a true story -once upon a time, I was looking through my fridge and there was some left over pumpkin, a pear that was nearing the end of it’s life and a perfect little squash. Therefore, I naturally decided to make soup. The end.
I know, I know – sounds weird, but trust me, they willingly found each other and are now happily married and ready to spend their lives together as one happy triad. Some things are just meant to be.
WHAT IS DAIRY-FREE BUTTERNUT SQUASH AND PEAR SOUP?
This soup is ALL the creamy and NONE of the dairy. It has everything that a great soup has – aromatics, body and flavour…it is the real deal.

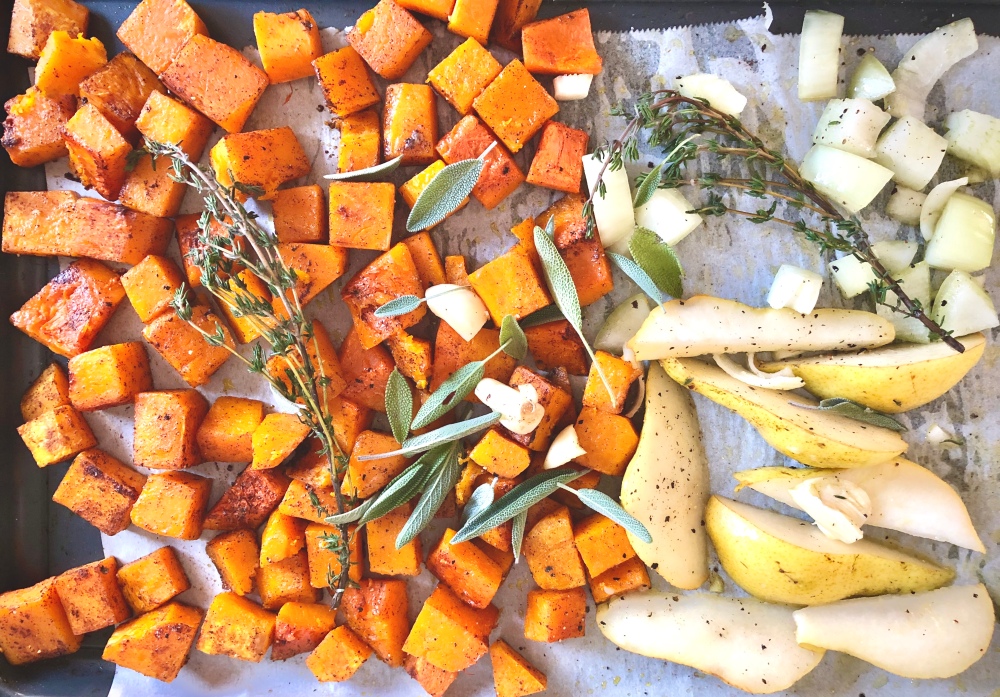
The reason why I love this recipe so much is because everything is roasted beforehand and roasting means caramelization and caramelization means flavour! So cube up that squash, toss it in some EVOO and some spices, pop that bad boy in the oven and let it do it’s magic.
INGREDIENTS FOR DAIRY-FREE BUTTERNUT SQUASH AND PEAR SOUP
I love using simple and healthy ingredients for the majority of my recipes and this soup is no exception. Moreover, ingredients can easily be swapped or subbed for those of your choice, or what is in your fridge. For example, you might choose to use sweet potatoes instead of squash, cream instead of coconut milk or different herbs you have to use up – cooking is flexible!
ROASTING THE INGREDIENTS
Firstly, we are going to cook the vegetables. Since the squash takes longer to cook through, give it about 20-25 minutes to roast up, pull it out and add the rest of the ingredients to the sheet pan, toss with a bit more oil and roast for another 20 until everything is fork-tender. Browned edges are accepted and encouraged.
MAKING THE SOUP
Now it’s time to soupify! Remove the thyme sprigs and dump everything else into a blender with the pumpkin and broth. Add more broth if you prefer a thinner soup.
Blend ‘er until smooth.

While the soup is blending, place a large pot over medium-high heat with some olive oil. When the oil is hot, add a bunch of sage leaves and a sprinkle of sea salt and let crisp up for 1-2 minutes. Remove from pot and place on a paper towel to absorb some of the oil.
Turn the heat to medium-low, transfer the soup to the pot and add the coconut milk. Let simmer until the milk is fully incorporated and warmed through.

GARNISHING DAIRY-FREE BUTTERNUT SQUASH AND PEAR SOUP
Transfer to your favourite bowl and garnish with the crispy sage, flaky sea salt and a few grinds of pepper. I mean…Come on!
OTHER DAIRY-FREE SOUP RECIPES
Easy Creamy Cauliflower Soup (quick and easy)
Roasted Carrot Soup with Ginger (my absolute favourite)
Crockpot Ginger and Turmeric Immune Boosting Soup (come home to a comforting meal)
TOOLS NEEDED FOR THIS RECIPE
Click below to check out what I use to make this Dairy-Free Butternut Squash and Pear Soup!


This post contains affiliate links and I may earn a small commission when purchases are made after clicking the links, at no cost to you. Thank you!
Dairy-Free Butternut Squash and Pear Soup
Servings: 4
Prep time: 10 minutes
Cook time: 55 minutes
Ingredients
- 1 medium-sized butternut squash, cut into one-inch cubes
- Olive oil
- 1/2 tsp cinnamon
- 1/4 tsp nutmeg
- salt
- pepper
- 1 pear (I used Bartlett), sliced
- 1 small yellow onion, diced
- 3 cloves garlic, smashed
- 3-4 sprigs thyme
- 20 fresh sage leaves, separated
- 1/2 cup pure pumpkin (optional)
- 1 1/2 cups vegetable broth
- 3/4 cup canned coconut milk
- 1/4 cup roasted hazelnuts (optional)*
- A dollop of dairy-free coconut yogurt (optional)
Instructions
- Preheat oven to 375 degrees.
- Place squash on a sheet pan and drizzle with one tablespoon of olive oil. Sprinkle over the cinnamon, nutmeg, 1/2 teaspoon of salt, a few grinds of fresh black pepper and toss together with your hands until evenly coated and then roast in oven for 25 minutes.
- Remove the sheet pan from the oven and add pear, onion, garlic, thyme sprigs and ten sage leaves. Drizzle with a little more olive oil, salt and pepper and toss again. Create a “bed” for the garlic cloves by placing them on top of some of the other vegetables, so they do not burn from the direct heat of the pan. Roast for another 20 minutes, or until everything is fork-tender.
- Remove from oven and discard thyme sprigs. Add everything to a blender with the pumpkin and broth and blend until smooth. Add in a bit more broth if you like a thinner soup.
- While the soup is blending, place a large pot over medium-high heat and add one tablespoon of olive oil. When the oil is hot, add the remaining ten sage leaves and a pinch of sea salt. They should begin sizzling immediately. Let them fry for about a minute or so, until nice and crispy. Remove and place on a paper towel to absorb some of the excess oil.
- Lower the burner to medium-low heat and add the blended soup into the same pot that was used to crisp the sage. Add the coconut milk and simmer for about 5 minutes.
- Ladle into bowls and garnish with roasted hazelnuts, yogurt and crispy sage!
NOTES
*To roast hazelnuts, place them on a sheet pan and into a 350 degree oven for 8-10 minutes. Once browned lightly, remove and let cool. Rub them between your fingers to remove the skins.
The post Dairy-Free Butternut Squash and Pear Soup appeared first on Never. Not. Eating..
]]>