The post Sweet Potato Fries appeared first on Never. Not. Eating..
]]>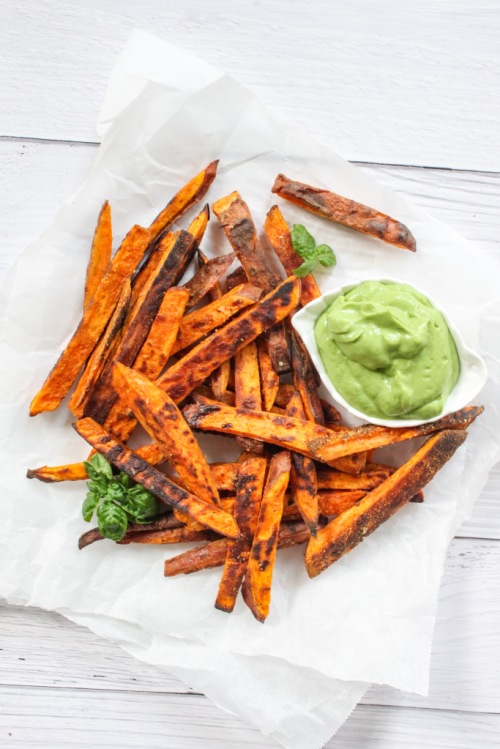
This is a simple recipe. Simple, yet impactful. It took me a while to nail sweet potato fries. They are tricky little buggers. But, I’ve learned a few tricks along this long and winding road that have helped me up my SPG (Sweet Potato Game). Let me tell you what they are:

Trick #1 – Cornstarch. Dredge these fries with it to help with the crispy-factor. I use this trick with more than just potatoes, too. I ALWAYS sprinkle my tofu with cornstarch before frying it. It’s a surefire way to get that perfect texture on the exterior, and it’s gluten-free!
Trick #2 – Place your baking sheet into a hot oven for five minutes before dumping the SPF (Sweet Potato Fries) on it. When they hit the pan, they automatically start cooking and developing that gorg brown colour. It’s kind of like preheating a pan on your stovetop!
Trick #3 – Space out your SPFs. If you load a pan with too many fries, they won’t have room to crisp up, and will steam instead. Let them socially distance. It’s for the best.
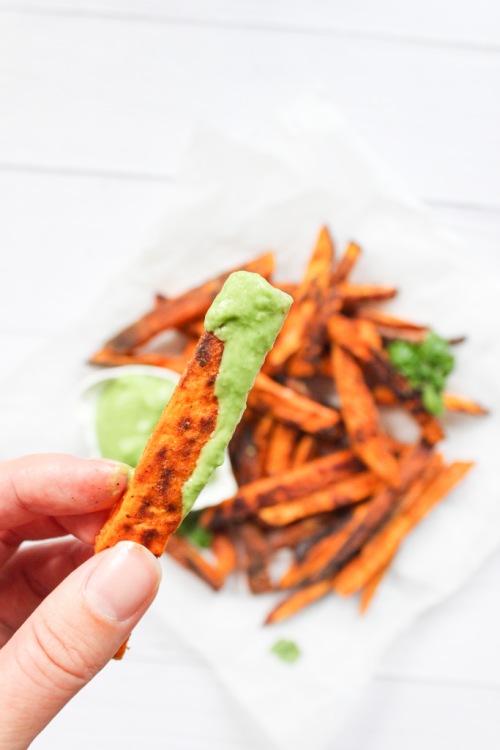
Well, now that I’ve given you all of my tricks, I only have one other thing to say – Dip these babies in my 5-Minute Good-on-Everything Green Sauce. Nothing else compares. Picture crispy sweet ‘tates dunkin’ in a pool of thick and creamy and greeny and herby and…freshy (?) sauce. And, then you eat them. Like, what?! A marriage of two extraordinary foods and memories that will last a lifetime.

If you make these SPF with my 5MGOETGS, take a pic and tag me on Instagram (@nevernoteatingca). I love seeing people make my recipes!
Also, if you understood that last paragraph, I applaud you.
Sweet Potato Fries
Serving size: 2
Prep time: 10 minutes
Cook time: 18 minutes
Ingredients:
- 1 large sweet potato, cut into long, 1/4 inch matchstick slices and patted dry
- 1 tbsp cornstarch
- 1/4 tsp paprika
- 1/4 tsp salt
- pinch of cayenne (optional)
- pinch of fresh black pepper
- olive oil
- sea salt, for topping
Instructions:
- Preheat oven to 425 degrees Fahrenheit. Place a large baking sheet into the oven while it preheats.
- In a small bowl, combine cornstarch, paprika, salt, cayenne and pepper.
- Add sweet potatoes to a large bowl and sprinkle the cornstarch mixture over them. Use your hands to toss the potatoes and dry ingredients together until coated.
- Carefully remove the baking sheet from oven and place sweet potato fries onto it. Be sure to space them out. Lightly drizzle some olive oil over the fries to help them crisp up.
- Bake for 10 minutes, flip and return to oven for another 5-8 minutes, or until browned and crispy.
- Finish with some flaky sea salt and serve with my 5-Minute Good-on-Everything Green Sauce.
The post Sweet Potato Fries appeared first on Never. Not. Eating..
]]>The post Gluten-Free Zucchini Galette appeared first on Never. Not. Eating..
]]>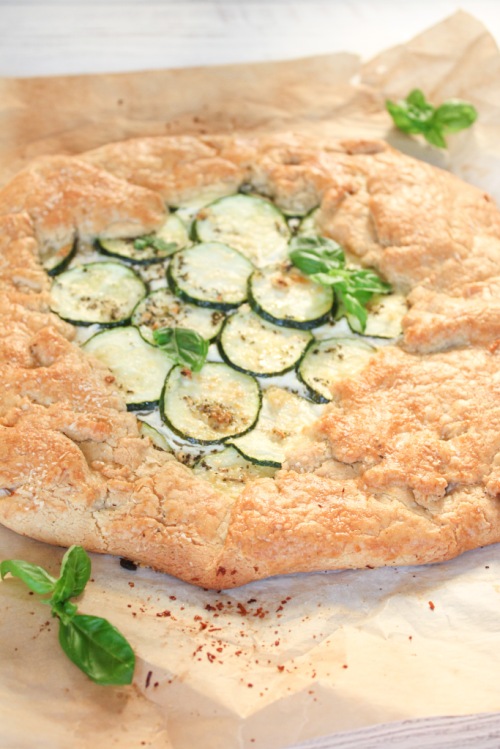
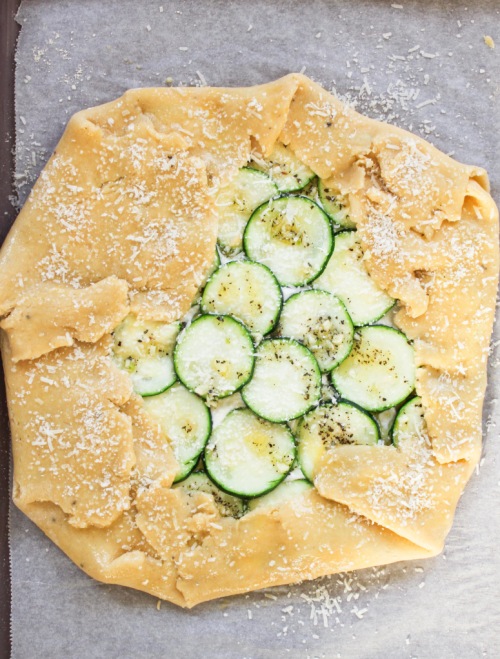
If you know me, you know I love a good galette. And I love mixing it up and creating both sweet and savoury galettes. I’ve tried everything from stone fruit to tomato to apple, and now, zucchini! You can literally wrap any produce in flaky pastry and 90% of the time it will be tasty. WORD.
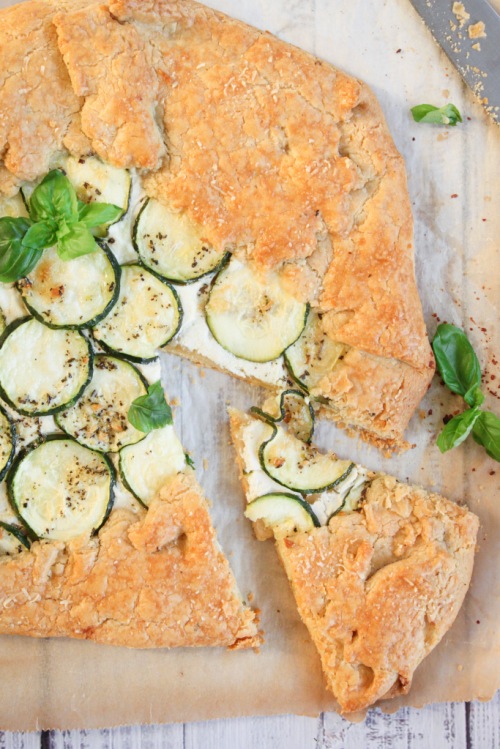
I decided to make this galette gluten-free, mostly because I avoid gluten as much as I can, but also because I just bought an All-Purpose Gluten-Free Flour by Bob’s Red Mill that I was really excited to try. Of course, anything made with gluten-free flour has a different taste than that made with regular, wheat flour, but I must say, I was impressed with how this crust held together and how flaky it was. If you eat regular wheat flour, feel free to swap in some all-purpose in it’s place!
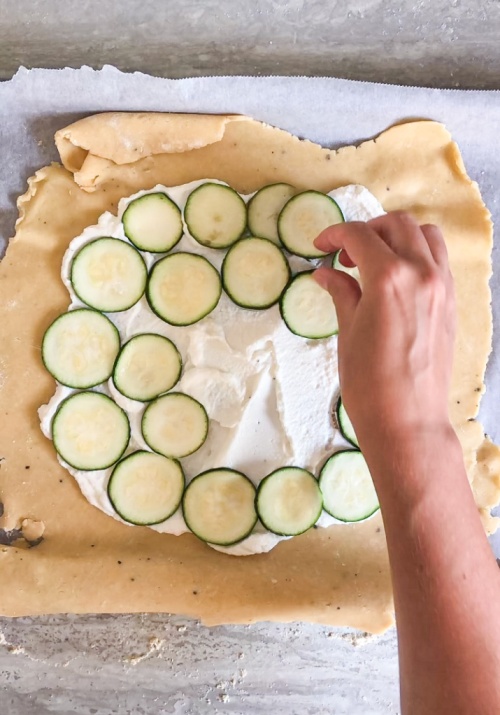
Let’s talk filling – Smooth, lemony ricotta. This is my favourite part. Extra creamy ricotta with lemon juice and zest, salt and pepper whipped together to make the dreamiest of beds for the lucky zucchini. Smear the crust with as little or as much as you want. The addition of lemon brings a brightness to the dish that makes it perfect for Spring or Summer.
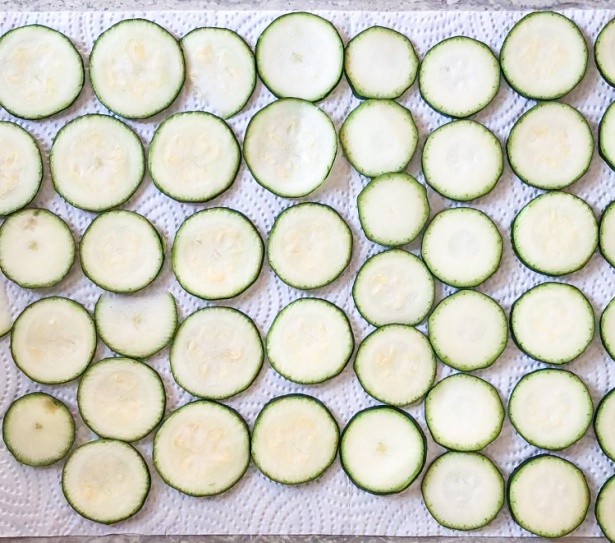
The leading actress here is the zucchini. A few important tips that will help you achieve the ideal galette would be to slice the zucchini about a quarter of an inch thick, making sure they are all the same thickness, place the slices onto paper towels for 30 minutes before assembling your tart and salt them well. This allows the (abundant) excess water to be pulled out, avoiding a soggy mess.

The dough – Finally, let’s talk about the dough. I used to be intimidated when making pastry dough, but it’s actually quite an easy skill to master. The most important part of pastry is to use very cold butter. If the butter is cold, it melts down slower into the flour and, in turn, creates air pockets, which make for flaky pastry. To ensure your butter is perfect, cut it into cubes and store it in the fridge up until you need to use it. After combining it with the flour and forming a disc shape, wrap it in plastic wrap and return it to the fridge to firm up again. After I roll out the dough and assemble the galette, I like to pop it in the fridge yet again for ten minutes. Tip: Assemble your galette, put it in the fridge and set your oven. When your oven is ready, the galette can go right from your fridge to that 400 degree heat!
That’s it…Not too complicated, right?!
Gluten-Free Zucchini Galette
Serving size: 4
Prep time: 15 minutes
Chill time: 30 minutes
Cook time: 30 minutes
Ingredients:
For the crust:
- 1 1/2 cups gluten-free flour
- 1/2 tsp salt
- 1/4 tsp black pepper
- 1/3 cup parmesan cheese, grated, plus more for topping
- 3/4 cup cold butter, cubed
- 1 tbsp white vinegar
- 3-5 tbsp ice-cold water
For the ricotta filling:
- 1 cup ricotta cheese (I use extra creamy)
- zest of one lemon
- 1 tbsp lemon juice
- a few grinds black pepper
- pinch of salt
- 1 small zucchini, sliced into 1/8-inch rounds
- 2 tbsp olive oil
- 1/2 tsp dried basil
- 1 clove garlic, minced
- 1 egg, beaten
Instructions:
For the crust:
- To a food processor, add the flour, salt and pepper and pulse a few times to combine. Add parmesan cheese and the cold butter and pulse again until dough resembles small pea shape crumbs (see photo). Add vinegar and two tablespoons of ice cold water and pulse. Continue to add water, one tablespoon at a time, until dough begins to come together. Typically, I use around four tablespoons in total. Dump the dough onto a piece of plastic wrap, form into a disc and then wrap and place in fridge to chill for 30 minutes.
- Prepare the zucchini by laying the rounds onto paper towels and sprinkling salt on the tops to draw out any excess water. Let sit for at least 30 minutes.
For the ricotta filling:
- To a small bowl, add the ricotta, zest, lemon juice, pepper and salt and mix to combine. Place in the fridge until ready to assemble.
For the rest of the galette:
- Combine olive oil, basil and garlic in a small bowl. Set aside.
- Flour your work surface and remove the dough from the fridge. Roll out into a circle about 1/4-inch thick. Carefully transfer the dough to a parchment lined baking sheet.
- Spread the ricotta mixture onto the dough, leaving a 2-inch border all the way around. Arrange the zucchini slices on top of the ricotta. Drizzle the olive oil mixture on top of the zucchini. Fold over the edges of the pastry. Preheat your oven to 400 degrees Fahrenheit and transfer the galette to the fridge for 10 minutes, or until the oven is ready. Right before placing the galette into the oven, brush the exposed pastry edges with the egg wash and sprinkle on some extra parmesan cheese, if desired. Bake for 25-30 minutes, or until galette is golden brown in colour.
The post Gluten-Free Zucchini Galette appeared first on Never. Not. Eating..
]]>The post 5-Minute Good-on-Everything Green Dressing appeared first on Never. Not. Eating..
]]>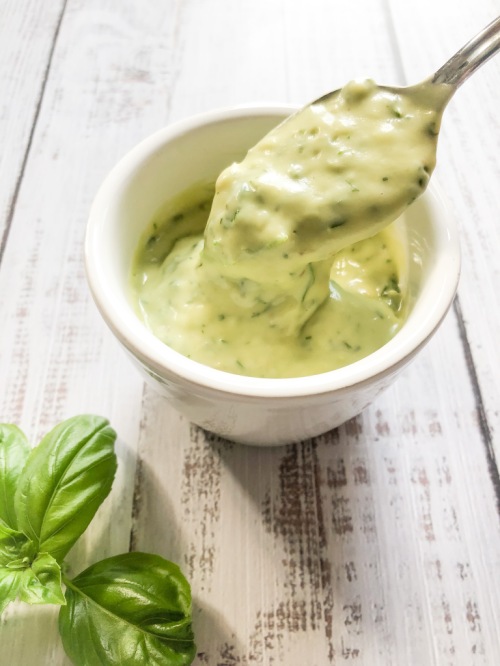
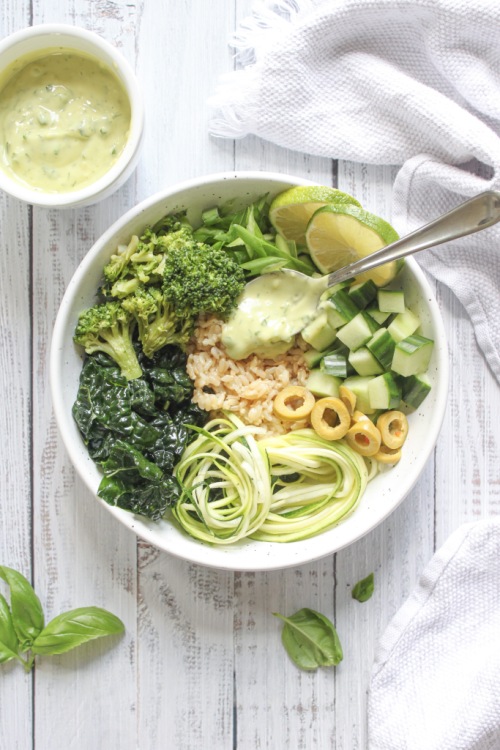
Made with an abundance of fresh herbs, avocado, garlic and yogurt, this dressing is the perfect dipper, topper and drizzler to accompany your meals. Amazing with crispy potatoes, on top of buddha bowls, as a sauce with your favourite pasta or to dip your pizza in – the possibilities are endless, my friends.
All you need are a blender and five minutes. Let’s go!
5-Minute Good-on-Everything Green Dressing
Serving size: Makes about 1/2 cup of dressing
Prep time: 5 minutes
Ingredients:
- 1/2 of an avocado
- 1/2 cup coconut yogurt (or Greek yogurt)
- 1 tbsp lime juice (about 1/2 of a lime)
- 1 clove of garlic
- 1/2 cup (tightly packed) herbs of choice (I use basil, parsley and dill)
- pinch of salt
- a few grinds of fresh black pepper
Instructions:
- Place all ingredients into a food processor and blend until smooth.
NOTES:
Drizzle over salads, pizza, pasta, crispy potatoes or on buddha bowls.
Double the recipe if serving a large crowd.
The post 5-Minute Good-on-Everything Green Dressing appeared first on Never. Not. Eating..
]]>The post Crockpot Ginger and Turmeric Immune-Boosting Soup appeared first on Never. Not. Eating..
]]>
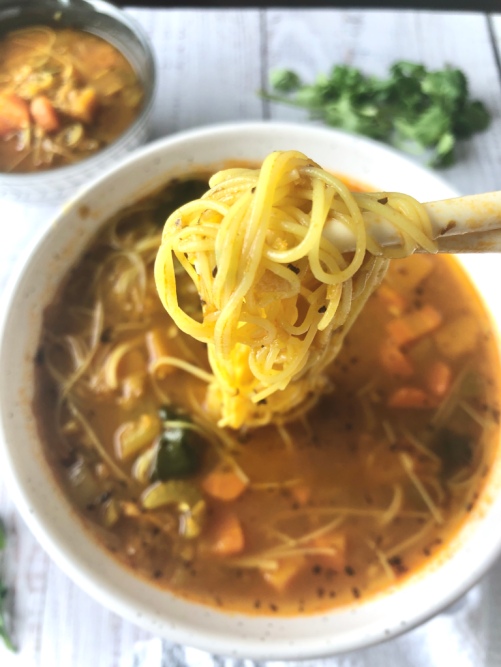
Although I love living in a country that experiences four diverse seasons, winter is always way too long. And as a teacher, it’s hard NOT to pick up a few illnesses during the winter season at school. This soup is my remedy. It has turmeric, an immune-boosting, detoxifying anti-inflammatory, and ginger, a nausea-relieving, cancer-fighting, all-round great-for-you root vegetable. Let’s fight that cold together!
The best days are the ones where you get to walk through your front door, sniff the air and remember back to this morning when you threw your dinner into the crockpot, and now it’s ready for you. Now all you have to do is take your bra off, put your sweatpants on, grab your ladle and slurp away. MMMhhhhmmmmm.
I recommend having your veggies all chopped the night before, that way you can just throw them in the crockpot when you wake up and away you go. If you are a morning person, firstly, please tell me your secret, and secondly, morning chopping is also an option. Note: This recipe may also be made on the weekend.
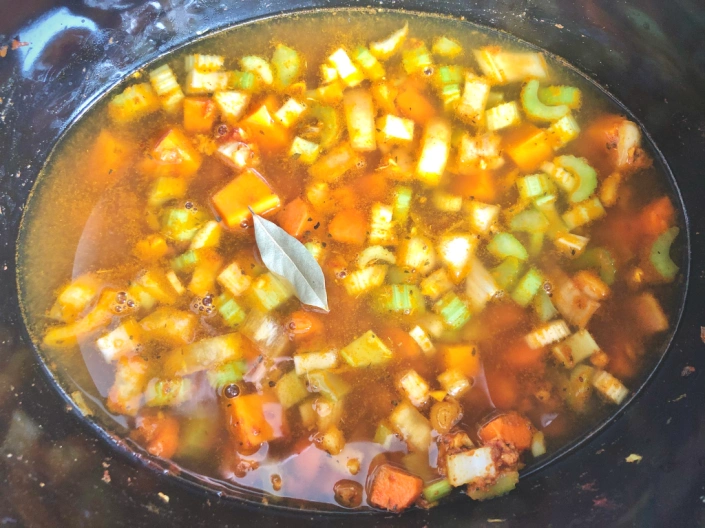
I always start this recipe by tossing my chopped onions into my crockpot with some olive oil, turning it to high heat and letting them warm up while I prep the rest of my ingredients. The heat begins to soften them before everything else enters the pot and starts to crowd them. After the onions have softened up slightly, I add in the garlic, ginger and spices and toast them up until fragrant. I then put everything else in the crockpot, put the lid on and say, “Bye, see you in a few hours. I love you. Keep warm.”
If you are still reading this:
- Thank you.
- I’m sorry.

Let’s make soup!
Crockpot Ginger and Turmeric Immune-Boosting Soup
Serving size: 6-8
Prep time: 30 minutes
Cook time: 3-4 hours
Ingredients:
- 2 tbsp olive oil
- 1 small onion, diced
- 3 cloves of garlic, minced
- 1 heaping tbsp ginger, minced
- 1 tsp dried basil
- 1/2 tsp dried oregano
- 2 tsps turmeric powder
- 1/2 tsp paprika powder
- 1 tsp salt
- 1/2 tsp pepper
- 2 tbsp tomato paste
- 1 cup carrots, diced (about 2 medium carrots)
- 1.5 cups celery, diced (about 4 stalks)
- 1 cup butternut squash, diced into 1/2 inch cubes
- 1 bay leaf
- 8 cups vegetable stock
- 1/2 cup red lentils
- 2 big handfuls baby spinach
- 100g vermicelli noodles (optional)
- Fresh cilantro or parsley for garnishing (optional)
Instructions:
- Turn your crockpot on high and add the olive oil and onion. Let this heat up while you prepare all of your other ingredients, about 10 minutes.
- Add the garlic, ginger, basil, oregano, turmeric, paprika, salt and pepper to the crock pot and stir around with a wooden spoon. Let the spices begin to toast and the garlic and ginger to become fragrant, about 4-5 minutes.
- Stir in the tomato paste until everything is coated.
- Add the carrots, celery, squash, bay leaf and stock. Put the lid on the crockpot and cook on high for 3-4 hours or on low for 5-6 hours.
- About 45 minutes before the end time, open lid and add in the lentils. Close the lid again and let cook for the remaining 45 minutes.
- When the soup is ready (vegetables are tender, lentils are cooked through), discard the bay leaf and taste, adjusting salt and pepper according to preference. Add the spinach and vermicelli noodles (if using), and put the lid on for 2 more minutes to soften.
- Ladle soup into bowls and top with freshly chopped herbs.
NOTES:
Avocado is also a great topping for this soup.
Store leftovers in an airtight container in the fridge for up to 5 days.
The post Crockpot Ginger and Turmeric Immune-Boosting Soup appeared first on Never. Not. Eating..
]]>