The post Pumpkin and Kale Pizza appeared first on Never. Not. Eating..
]]>
When an ingredient comes into season, you better believe I overdo it. Every. Single. Time. But seriously, that’s what we are supposed to do, right?! Eat local, eat seasonal. For our country, for our health.
The greatest part of this pizza is the pumpkin cream sauce. AKA the replacement tomato sauce. Garlic, thyme, homemade pumpkin puree, veggie stock, coconut milk. Simmer, simmer. Yes, please!
The crust – You can definitely buy store bought pizza dough and use that, but making your own dough is SO easy! You can find a recipe for flatbread in my blog post, found here.
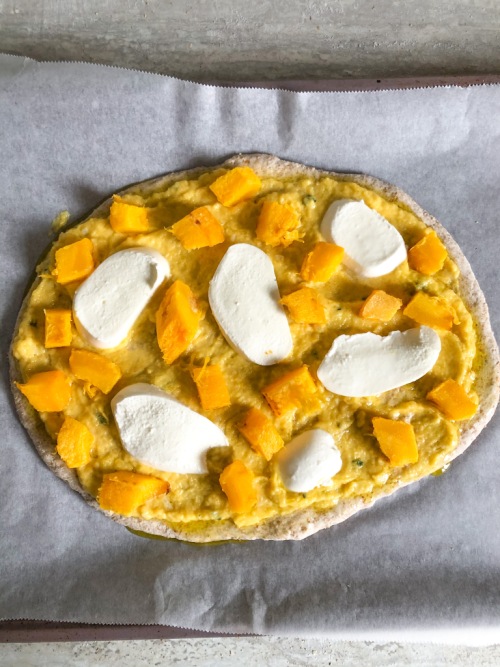
The toppings – Originally, I made this pizza vegan, and I think I preferred it to the next one I made with mozzarella. The option is yours – leave out the cheese to have a completely vegan option (as seen below)!
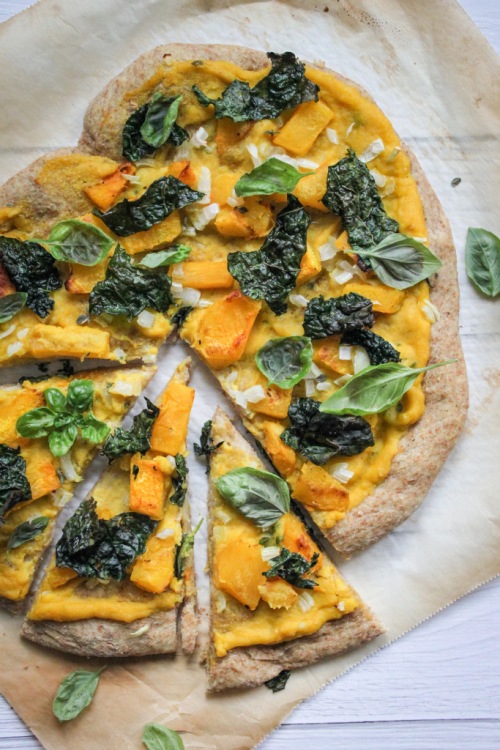
Kale is another key topping here. As I always say, it is important to massage your kale before eating, and that applies to this recipe as well. Sprinkle it with some salt, drizzle with some olive oil and get in there with your fingers! It really helps to tenderize it and make it more pleasing to the palate.
Pumpkin – Along with the pumpkin cream sauce, I have also included roasted pumpkin chunks as a topping in this recipe. They add another layer and texture that does not disappoint and help give this ‘za it’s name!

This may just be a pizza recipe that you aren’t afraid to serve the kids!
Pumpkin and Kale Pizza
Serving Size: Makes 1 large pizza
Prep time: 20 minutes
Cook time: 45 minutes
Ingredients:
- 300 g homemade or store bought pizza dough
- 1 pie pumpkin, seeds removed and sliced into 3/4-inch wedges (or 1/2 cup pumpkin puree and 3/4 cup sliced and cooked pumpkin chunks)
- 2 cloves garlic, minced
- 2 sprigs of thyme, stem removed
- 1/4 cup vegetable stock
- 1/4 cup full-fat canned coconut milk
- 2 leaves of kale, washed, dried and chopped roughly
- 125 g fresh mozzarella, sliced (optional)
- salt
- olive oil
- fresh basil for topping (optional)
Instructions:
- Preheat your oven to 400 degrees Fahrenheit.
- Place your pumpkin wedges onto a baking sheet lined with parchment paper and drizzle with one tablespoon of olive oil and a few pinches of salt. Toss to coat. Roast in the oven for 30 minutes or until fork-tender, flipping halfway. Remove from oven and let cool for a few minutes. Peel the skin off and discard. Increase the oven temperature to 450 degrees.
- Place half of your roasted pumpkin pieces into a food processor or blender and blend until smooth. Slice the other half of the wedges into 1/2 inch pieces and set aside.
- Preheat a medium-sized saucepan over medium-low heat. Add one tablespoon olive oil followed by the minced garlic and thyme. Stir and let cook until fragrant (about 30 seconds). Add in 1/2 cup of the pumpkin puree and the vegetable stock. Stir until combined and let simmer for 2 minutes. Add the coconut milk and a pinch of salt and stir to combine. Let simmer on a low heat until the cream sauce thickens and coats the back of a spoon. Remove from heat.
- Place your kale into a bowl with one teaspoon of olive oil and a pinch of salt. Use your fingers to ‘massage’ the kale for one to two minutes. This helps to tenderize it. Set aside.
- Flour your work surface and roll out your pizza dough. Spoon on the cream sauce and spread it onto the dough until fully covered, leaving a 1/2-inch border all the way around. Distribute your cooked pumpkin pieces and your mozzarella slices (if using) on top of your pizza. Bake in the oven for 5 minutes, remove and add the massaged kale, and return to the oven for another 7-10 minutes or until crust begins to brown on the edges. Remove from oven and let cool for a few minutes before slicing.
- Top with fresh basil, if desired!
The post Pumpkin and Kale Pizza appeared first on Never. Not. Eating..
]]>The post Sweet Potato Fries appeared first on Never. Not. Eating..
]]>
This is a simple recipe. Simple, yet impactful. It took me a while to nail sweet potato fries. They are tricky little buggers. But, I’ve learned a few tricks along this long and winding road that have helped me up my SPG (Sweet Potato Game). Let me tell you what they are:

Trick #1 – Cornstarch. Dredge these fries with it to help with the crispy-factor. I use this trick with more than just potatoes, too. I ALWAYS sprinkle my tofu with cornstarch before frying it. It’s a surefire way to get that perfect texture on the exterior, and it’s gluten-free!
Trick #2 – Place your baking sheet into a hot oven for five minutes before dumping the SPF (Sweet Potato Fries) on it. When they hit the pan, they automatically start cooking and developing that gorg brown colour. It’s kind of like preheating a pan on your stovetop!
Trick #3 – Space out your SPFs. If you load a pan with too many fries, they won’t have room to crisp up, and will steam instead. Let them socially distance. It’s for the best.
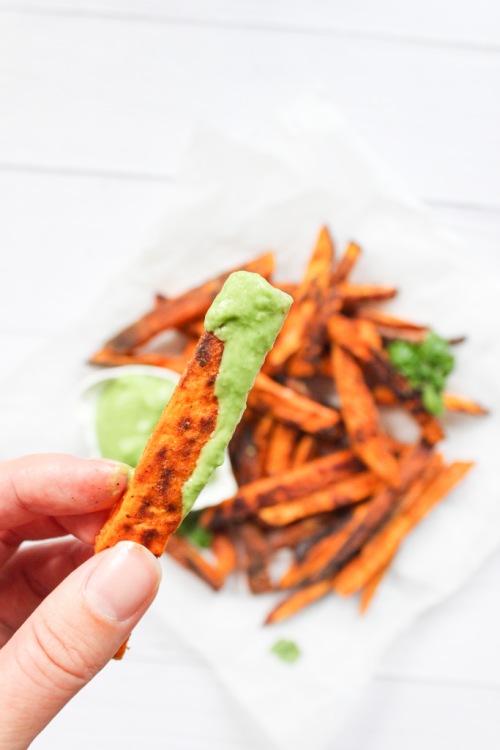
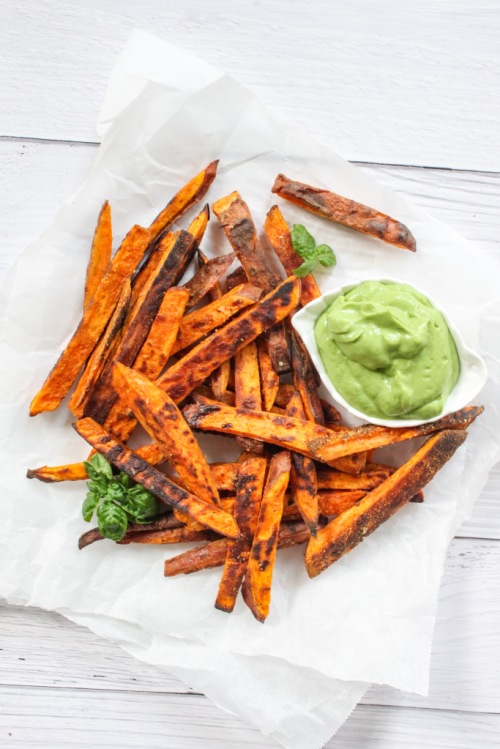
Well, now that I’ve given you all of my tricks, I only have one other thing to say – Dip these babies in my 5-Minute Good-on-Everything Green Sauce. Nothing else compares. Picture crispy sweet ‘tates dunkin’ in a pool of thick and creamy and greeny and herby and…freshy (?) sauce. And, then you eat them. Like, what?! A marriage of two extraordinary foods and memories that will last a lifetime.

If you make these SPF with my 5MGOETGS, take a pic and tag me on Instagram (@nevernoteatingca). I love seeing people make my recipes!
Also, if you understood that last paragraph, I applaud you.
Sweet Potato Fries
Serving size: 2
Prep time: 10 minutes
Cook time: 18 minutes
Ingredients:
- 1 large sweet potato, cut into long, 1/4 inch matchstick slices and patted dry
- 1 tbsp cornstarch
- 1/4 tsp paprika
- 1/4 tsp salt
- pinch of cayenne (optional)
- pinch of fresh black pepper
- olive oil
- sea salt, for topping
Instructions:
- Preheat oven to 425 degrees Fahrenheit. Place a large baking sheet into the oven while it preheats.
- In a small bowl, combine cornstarch, paprika, salt, cayenne and pepper.
- Add sweet potatoes to a large bowl and sprinkle the cornstarch mixture over them. Use your hands to toss the potatoes and dry ingredients together until coated.
- Carefully remove the baking sheet from oven and place sweet potato fries onto it. Be sure to space them out. Lightly drizzle some olive oil over the fries to help them crisp up.
- Bake for 10 minutes, flip and return to oven for another 5-8 minutes, or until browned and crispy.
- Finish with some flaky sea salt and serve with my 5-Minute Good-on-Everything Green Sauce.
The post Sweet Potato Fries appeared first on Never. Not. Eating..
]]>The post The Best Buttery Sweet Potato Medallions appeared first on Never. Not. Eating..
]]>
Butter. Thyme. Garlic. Just…wow. These potatoes are soft and tender on the inside and perfectly browned and caramelized on the outside. They would be a great crowd-pleaser for any get-together. When’s the next holiday? I need it to be tomorrow.

The process is as follows – Grab your cast iron pan. This is important to get that even heat distribution and stunning colour. Load it up with some butter and olive oil and place your salted and peppered potatoes in a single layer. Let cook until the bottoms have browned. Flip and add in a few more chunks of cold butter (it’s fine), a few sprigs of fresh thyme and a couple cloves of garlic. Pop ‘er in the oven for 10 minutes and just you wait. Perfection.

These babies will make you see potatoes in a whole new way. It will be very difficult to go back to cooking your old potato side dishes after you try these. Sorry not sorry.
The Best Buttery Sweet Potato Medallions
Serving size: 2-3 (as a side)
Prep time: 5 minutes
Cook time: 15-17 minutes
Ingredients:
- 1-2 large sweet potatoes (depending on the size of your cast iron), cut into 3/4 of an inch medallions
- Salt
- Pepper
- 4 tbsp unsalted butter, divided
- 1 tbsp olive oil
- 3 sprigs of thyme
- 2 cloves of garlic, smashed (but not chopped)
Instructions:
- Preheat your oven to 350 degrees Fahrenheit.
- Set a large cast iron pan over medium-high heat and add two tablespoons of the butter as well as the olive oil.
- Sprinkle one side of your potato medallions with salt and pepper and when the pan is hot, place the medallions -seasoned side down – into the pan. Let cook for 4-5 minutes, or until they develop a nice brown colour across their surface (try not to move them around too much during this cook time). While they are cooking, season the exposed side with more salt and pepper. Flip the potatoes and rest the garlic and remaining two tablespoons of butter (cut up into smaller chunks) on top of the potatoes. Pierce the tops of each potato with a fork, add the thyme to the pan, and then transfer to the oven and cook for 9-11 minutes, or until fork-tender. Remove from oven and serve immediately.
- For more of a garlic flavour, carefully take one of the pieces of garlic from the pan and rub it on the exterior of the potatoes.
These work so well as an accompaniment to any dish and are the perfect holiday party side!
The post The Best Buttery Sweet Potato Medallions appeared first on Never. Not. Eating..
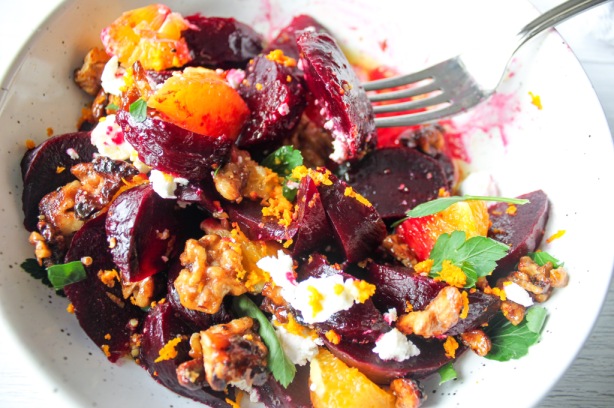
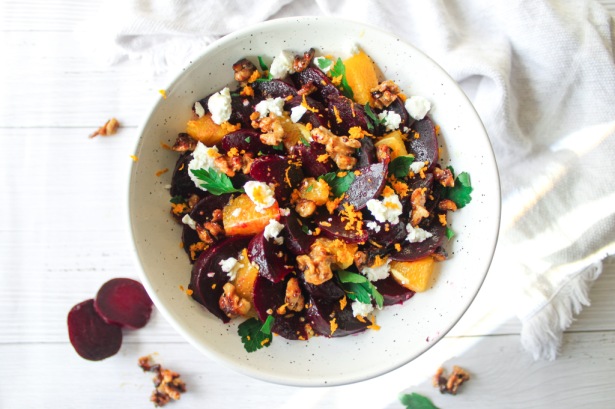
]]>The post Beet and Orange Salad with Goat Cheese appeared first on Never. Not. Eating..
]]>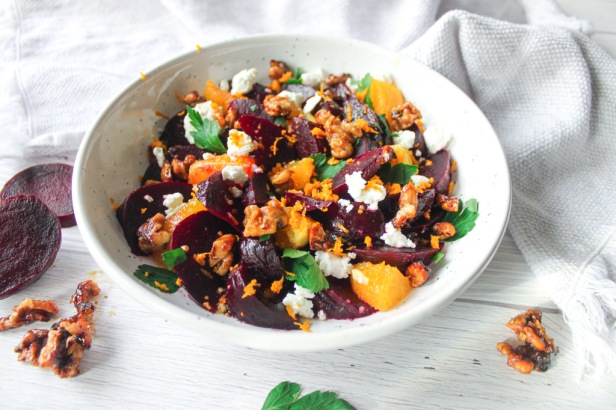
It may seem like an unorthodox pair, but I think the textures and flavours of each, balance the other out. The savoury beet, the sweet orange, the creamy goat cheese and the crunch of the toasted walnuts…money!
Beets are ridiculously good for you. They are packed with nutrients and are thought to control blood pressure, help prevent cancer and work as an anti-inflammatory. They are also so beautiful in appearance and taste, so it’s easy to use them in a number of dishes. I often use them to colour other foods, such as smoothie bowls. Bottomline – get some beets, they are pretty, healthy and yummy!
Beet and Orange Salad with Goat Cheese
Serving size: 3-4 (as a side)
Prep time: 10 minutes
Cook time: 1 hour 15 minutes
Ingredients:
For the dressing:
- 2 tbsp freshly squeezed orange juice
- zest of one orange
- 1/2 tbsp honey
- 1/2 tbsp dijon mustard
- 6 tbsp olive oil
- pinch of salt
- a few grinds of fresh black pepper
For the salad:
- 6 beets, washed
- 1 tbsp honey
- 1/4 cup walnuts, rough chop
- 1 orange, sectioned
- 1/4 cup goat cheese
- salt
- pepper
- fresh parsley for topping
Instructions:
- Preheat oven to 400 degrees Fahrenheit.
- Place beets on a large piece of tin foil and wrap into a package, making sure there are no open areas where the steam can escape. Place tin foil package on a baking sheet and then in the oven for an hour and fifteen minutes, or until a knife can easily be inserted. Remove from oven and carefully open the package. Let the beets sit for 1-2 minutes and then use two paper towels – one to hold the beet and one to rub off the skin – to peel the beets. Dice the cooked beets and place in a serving bowl. Reduce oven to 350 degrees.
- For the dressing – Add all dressing ingredients into a mason jar or container with a lid. Shake until fully combined. Set aside.
- Line your baking sheet with parchment paper. Lay your walnuts on the parchment and drizzle the honey over them. Toss to combine and spread out in a single layer. Bake in oven for 8-10 minutes, watching carefully to avoid burning. Remove from oven and let cool completely.
- Add your orange sections to the serving bowl with the beets. Drizzle with preferred amount of the dressing and toss. Taste and add another pinch of salt and pepper, if needed. Right before serving – crumble the goat cheese on top of the salad. Add the walnuts and fresh parsley. I suggest letting the salad sit in the fridge for at least an hour before serving.
The post Beet and Orange Salad with Goat Cheese appeared first on Never. Not. Eating..
]]>The post Roasted Carrot Soup with Ginger (Vegan) appeared first on Never. Not. Eating..
]]>
WHAT’S IN ROASTED CARROT SOUP
My love for ginger will be very clear when, and if, you make this soup. It is very ginger-forward, but that’s not to say that you can’t tone it down if you aren’t quite at the same level. It’s just so good that when I was testing this recipe, I kept on grating, thought it would be too much, put it in anyways and LOVED it. But seriously, if you aren’t a ginger person, don’t put as much in. But still put in a little bit, because: flavour.
Carrots – It’s almost Easter, right? We have rabbits hoppin’ around, so we have to have carrots included in the menu. It’s just logical, plus I’m pretty sure every Canadian (and American) likely has a bag of carrots in their fridge. They have probably been there for a few months, because let’s be honest, carrots never expire (who’s with me?!). Furry hairs growing out of yours? Pff…that’s what a peeler is for. Plus, what else do you use carrots for other than soup? You know how hot that liquid is? Perfect for (really) old vegetables.

Honestly though, this soup is da bomb. The key is roasting the carrots first, before soupifying it. Oh, and ginger.
THE INGREDIENTS IN ROASTED CARROT SOUP
So, you’re going to need about 4 medium sized carrots – peeled, washed and quartered (cut in half lengthwise and then halve each of those halves, widthwise). You’re going to slather those babies with some EVOO and give them a little salt and pepper rub – pop them in the sauna and let them roast for about 25 minutes or until they are browned and caramelized on the edges. Yum, yum, yum.

While the carrots are getting their spa treatment, throw some chopped onions into a pot with olive oil to cook down. Add the star of the show (ginger) and some garlic (best supporting actor), alongside some vibrant turmeric, freshly ground nutmeg (or the packaged stuff) and some salt and pepper. Stir, stir, stir.
Small dice a half of a sweeter type of apple – Granny Smith or Honeycrisp – and add it to the pot. When the carrots are done, add those in with some veggie broth and bring it up to a boil, then reduce and simmer for at least 15 minutes. The longer you simmer, the more flavourful!
At this point you can either whip out the ‘ol immersion blender, or throw it all (carefully) into your more modern blender, blend it up and pour back into the pot. I refuse to learn from experience (mainly because I prefer less dishes), so I always take the longer route and use my immersion blender. Hey, it works the pipes, okay?!

THE ENDING
Now is the sweetest, most beautiful ending. Pour in three-quarters of a cup of canned coconut milk and watch the colour turn from an ugly, rusted mustard (picture it) to a beautiful, pale-orange colour. Very cantaloupe-esque, if you will.
Anyway…this is the perfect Easter starter. Whether you are celebrating this year or not, I highly recommend you try this soup. After all, summer is coming and you know what that means – souportunities are coming to an end.
GINGER!
MORE SOUP RECIPES
Roasted Tomato Soup with Grilled Cheese Crouton Skewers (a classic)
Easy Creamy Cauliflower Soup (healthy and comes together in a flash)
Crockpot Ginger and Turmeric Immune-Boosting Soup (make it in the morning and come home to dinner)
Butternut Squash, Pear and Pumpkin Soup with Crispy Sage (something different, yet delicious)
This post contains affiliate links and I may earn a small commission when purchases are made after clicking the links, at no cost to you. Thank you!
Vegan Ginger and Roasted Carrot Soup
Servings: 3-4
Prep time: 10 minutes
Cook time: 45 minutes
Ingredients:
- 4 medium carrots, peeled, washed and cut in half lengthwise
- olive oil
- salt
- pepper
- half of a yellow onion, diced
- one inch chunk of ginger, grated
- 2 cloves garlic, grated/minced
- 1/2 tsp turmeric
- 1/4 tsp freshly grated nutmeg
- 1/2 of an apple, diced (I prefer Honeycrisp)
- 4 cups veggie stock*
- 3/4 cup canned coconut milk
- coconut yogurt and parsley for topping (optional)
Instructions:
- Preheat oven to 375 degrees Fahrenheit.
- Add carrots to a baking sheet lined with parchment paper, drizzle with one tablespoon olive oil and sprinkle generously with salt and pepper. Roast in the oven for 25 minutes, turning once. Carrots should be slightly caramelized around the edges.
- In the meantime, heat two tablespoons olive oil in a medium saucepan over medium-low heat. Add the onion and cook until it begins to soften, about five minutes and then add the garlic, ginger, turmeric, nutmeg, half a teaspoon salt and a quarter teaspoon pepper. Stir until you begin to smell the spices, approximately one minute. Add the apple and cook for another minute.
- Transfer carrots from the baking sheet to the saucepan. Pour in the stock and bring up to a boil. Turn heat down and simmer for at least 15 minutes.
- Use an immersion blender to puree the soup in the saucepan. Alternatively, carefully transfer the soup to a blender, blend until smooth and then return to saucepan.
- Add the coconut milk, stir and let it warm through and then ladle into a bowl and top with coconut yogurt and fresh parsley, if desired.
NOTES:
*If you would like a thinner soup, add in an extra 1-2 cups water along with the 4 cups of stock. Simmer for a little longer to develop the flavours of the soup.
The post Roasted Carrot Soup with Ginger (Vegan) appeared first on Never. Not. Eating..
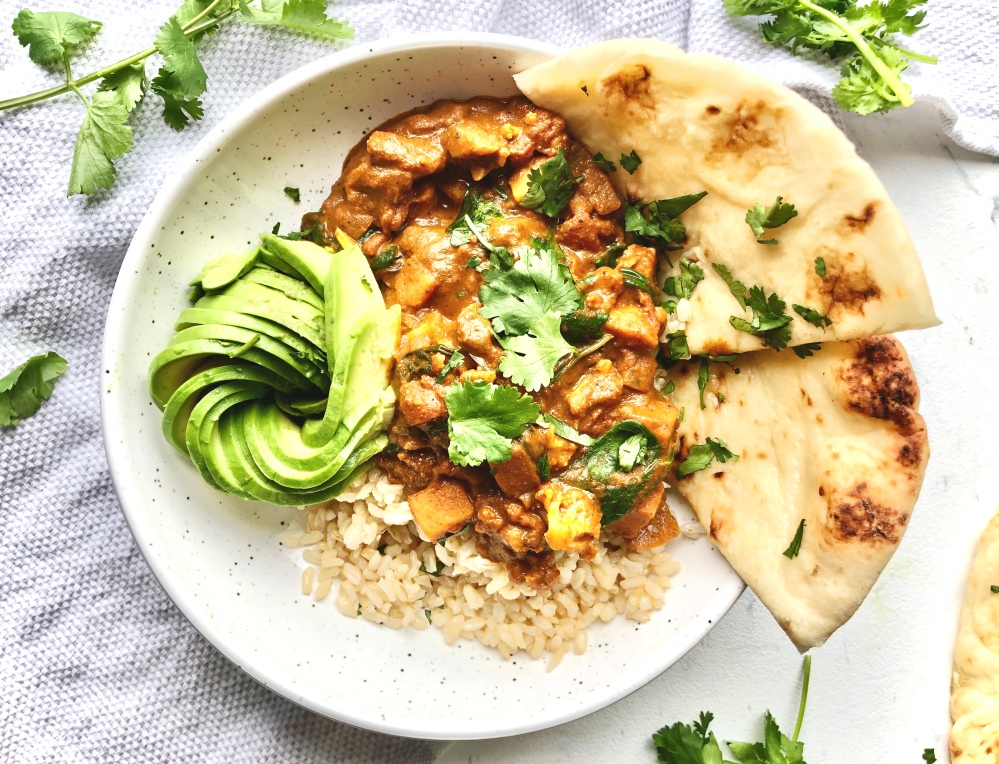
]]>The post Cauliflower and Sweet Potato Curry appeared first on Never. Not. Eating..
]]>
I’m lucky to live in the most multicultural country in the world, in a city that embraces diversity and highlights it on every corner. I’m able to walk through the downtown core and fulfill cravings of any kind with just a few steps. We are a nation rich in culture, and thus rich in cuisines from around the world, and I’m grateful for the opportunity to gain new perspectives through the city’s eats.
This curry dish is by no means traditional. I haven’t had the pleasure of learning, first-hand, what it takes to put together an amazing Indian-style curry, but I do eat a lot of food (like, a lot!), and this is my take on curry, with a few twists. What I do know is that a decent chunk of the Indian population is vegetarian, and it’s exciting that a dish without meat can be so fulfilling and hearty. My Cauliflower and Sweet Potato Curry is meatless, but you can always add your choice of meat protein (or tofu, or paneer), if that’s your thing!
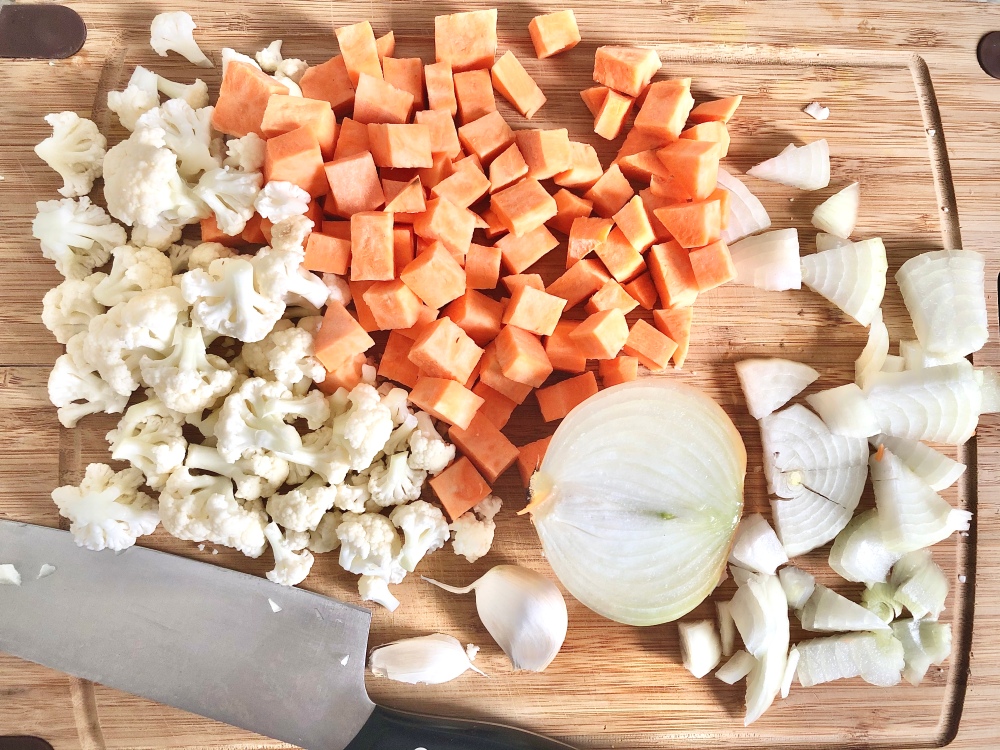
Because there is a bit of prep work that goes into making a curry, I like to do all of the chopping and measuring first so that everything is ready to go into the pot at the proper time. So, let’s start with the vegetables. You will need about one and a half cups of both, sweet potatoes and cauliflower florets. I like to chop both into smaller size pieces so they cook through in the time it takes the curry to develop. You will also need an onion, baby spinach and some minced garlic. Flavour!
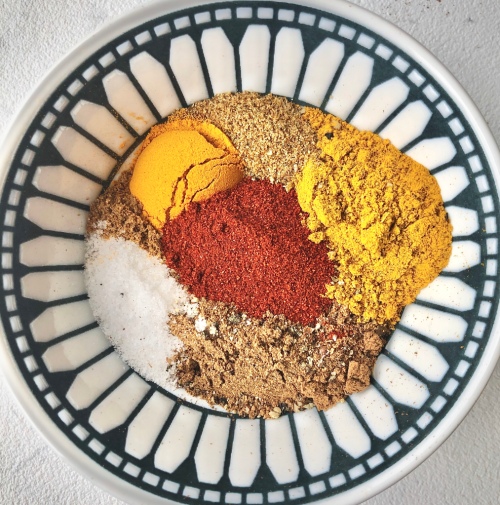
It is a good idea to also have the spices ready. This prevents one of the spices from burning while you try to measure out all of the rest. I chose to use curry powder, garam masala, cumin, cayenne (optional), coriander, turmeric, paprika, salt and pepper for this recipe. As soon as they hit the pan, your house will fill with the most wonderful aroma!
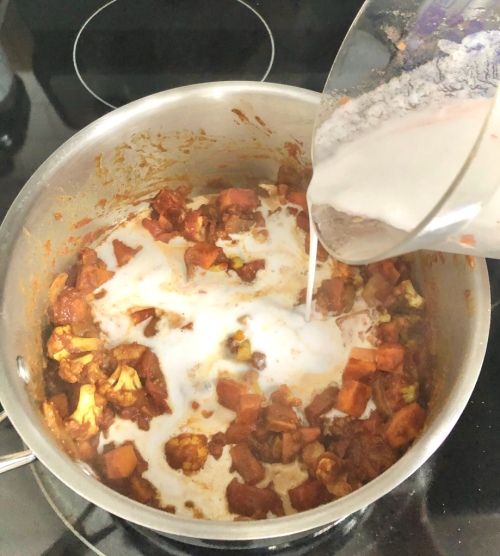
The base of the sauce is made up of diced tomatoes (you can use fresh or canned), full-fat coconut milk, and cashew milk. Obviously the cashew milk isn’t a typical base in a curry, but I promise it gives it a creaminess and smooth flavour that you won’t be mad about. I always like to use the Silk brand. You may substitute this for any other milk of your choice – coconut milk, almond milk or even regular milk if you consume dairy.
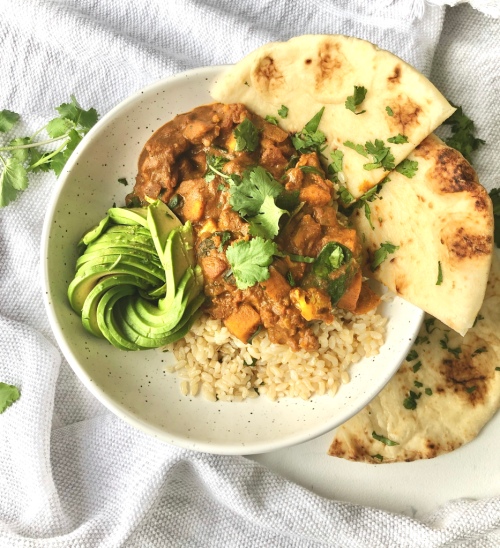
There are a few more ingredients to prep and then it is time to cook! You will need some tomato paste to help thicken and enrich the flavour of the curry, some coconut flour to act as another thickener (this is optional) and some lime to finish it off and brighten it up. Of course toppings like avocado and cilantro are always encouraged.

This curry, like all other curries are best served with rice and naan bread. Two carbs, one girl. Just the way I like it.
Cauliflower and Sweet Potato Curry
Servings: 4
Prep time: 15 minutes
Cook time: 30 minutes
Ingredients:
- 1/2 yellow onion, diced
- 1.5 cups cauliflower florets
- 1.5 cups sweet potato, small dice
- 2 cloves garlic, minced
- 2 tsp curry powder
- 1 tbsp garam masala
- 1 tsp cumin
- 1 tsp paprika
- 1/2 tsp coriander powder
- 1/2 tsp turmeric powder
- 1/4 tsp cayenne (optional)
- 1 tbsp tomato paste
- 2 cups diced tomatoes (fresh or canned)
- 3/4 cup canned coconut milk
- 3/4 cup cashew milk (may sub for coconut milk or almond milk, I prefer Silk brand)
- 1.5 tbsp coconut flour (optional)
- 2 big handfuls of spinach
- Juice of half a lime
- salt
- pepper
- olive oil
- Cooked rice and naan bread to serve with
- Avocado and fresh cilantro for topping (optional)
Instructions:
- Put 1.5 tablespoons of olive oil in a large pot over medium-low heat. Add the onion and let it cook down until it is transparent. About 5 minutes.
- Add the cauliflower and sweet potato to the pot and allow vegetables to begin to soften. This takes about 8-10 minutes, stirring often.
- Add the minced garlic, curry powder, garam masala, cumin, paprika, coriander, turmeric, cayenne (if using), 1/2 teaspoon of salt and a few grinds of fresh black pepper. Stir for a few seconds, coating all of the vegetables with the spices. Quickly add the tomato paste and mix again to coat the veggies.
- Add in the diced tomatoes and allow everything to simmer together for another 10 minutes.
- Pour in the coconut milk, the cashew milk and add in the coconut flour. Stir well and simmer for at least 15 minutes, or until the curry has developed and thickened.
- Toss in the spinach and let the heat of the pot wilt it down. This does not take long.
- Turn the heat off and add a squeeze of lime to the curry. Mix it all together and spoon over cooked rice.
- Serve with warm, buttery naan bread, avocado, a sprinkling of fresh cilantro and an extra lime wedge.
NOTES:
Any protein would be a great addition to this dish. I would recommend tofu or paneer to maintain the vegetarianism, or chicken or shrimp if you eat meat.
The post Cauliflower and Sweet Potato Curry appeared first on Never. Not. Eating..
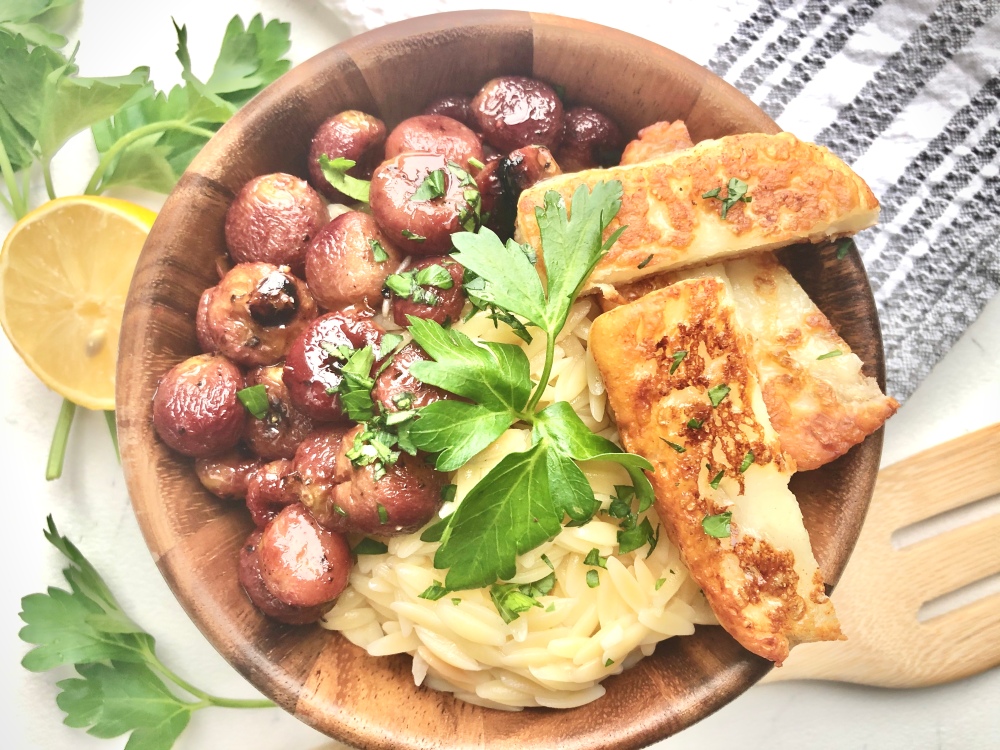
]]>The post Orzo, Halloumi and Roasted Grape Salad appeared first on Never. Not. Eating..
]]>
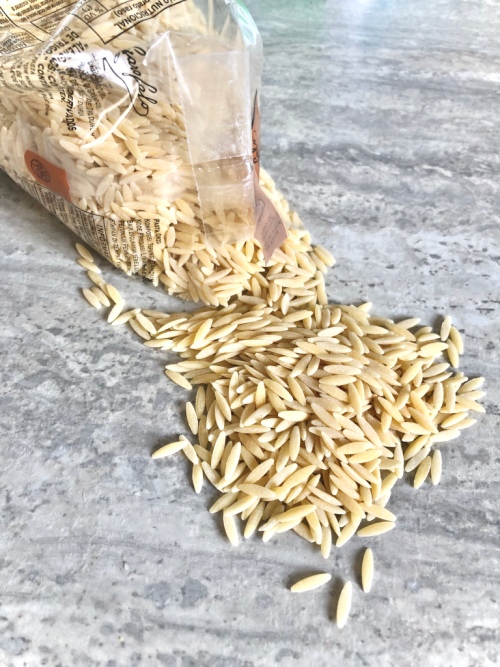
Enter: Orzo. A little rice-shaped pasta that absorbs flavours and makes a perfect side dish or salad.
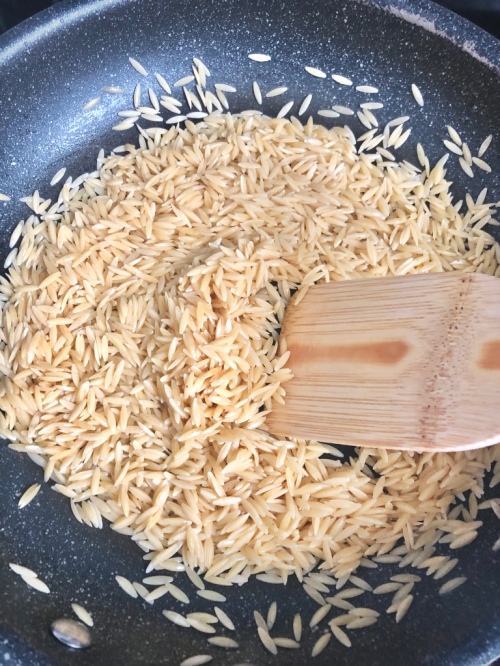
Cooking orzo is easy – Just add some olive oil to a saucepan and toast for a minute or two to help bring out it’s rich flavour. Add some finely minced garlic, salt and bring it to a boil in some water. Reduce and let it sim-simma for about 8 minutes until perfectly al dente. I dare you not to eat it straight out of the pan. Double doggy dare you.
Being a pasta, orzo originated in Italy, but I thought I’d give this dish a Middle Eastern spin by adding some sweet roasted grapes. If you have never roasted grapes, I’m about to change your life. Happy birthday.
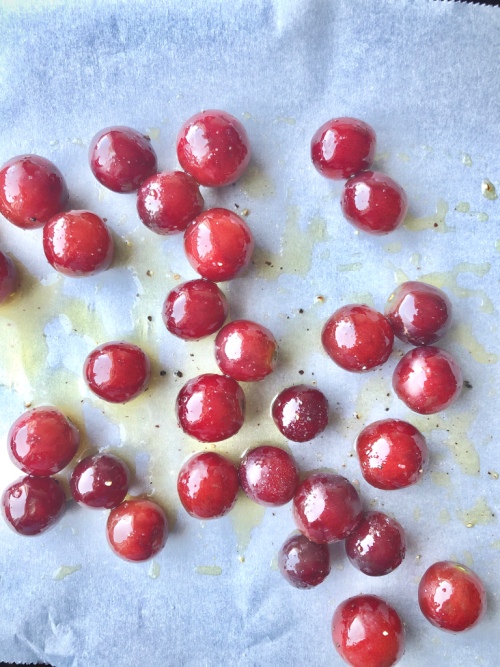
All these seedless red grapes require to bump their flavour up is a bit of olive oil, some salt and pepper and a 375 degree oven. Twenty minutes and their juices begin to release, the grapes blister and caramelize and develop a really rich and sweet flavour. They would make a great snack on their own, as a topping on some crusty bread with a soft cheese, or in any salad that needs a boost.

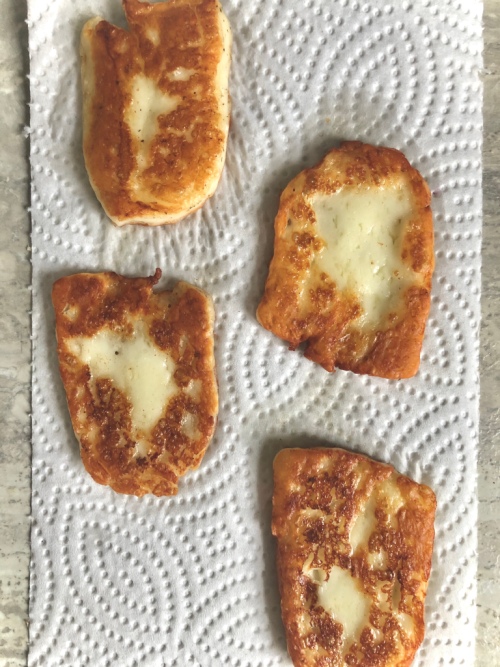
Another Middle Eastern element brought to this dish is the salty, tangy, pan-fried halloumi that pairs perfectly with the sweetness of the grapes and the creamy orzo. It’s difficult to state my favourite cheese, I mean, they are all so life-changing, but halloumi is definitely in the top three. You just put it in a pan set to medium-high heat with some olive oil and fry it up until golden brown on the outside and soft and melty on the inside. Don’t worry – it holds its shape and doesn’t make a mess of your pan! So yum.
To finish off this salad, whip up a vinaigrette with some freshly squeezed lemon, apple cider vinegar, za’atar, olive oil, salt and pepper and a whole bunch of freshly chopped parsley.
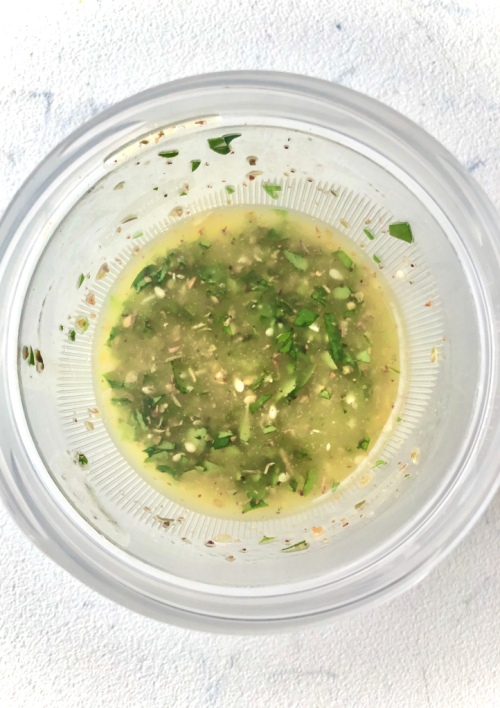
Drizzle it over the orzo, grapes and cheese and go to town. Honestly, I could demolish this salad with or without the dressing, it’s just that great.
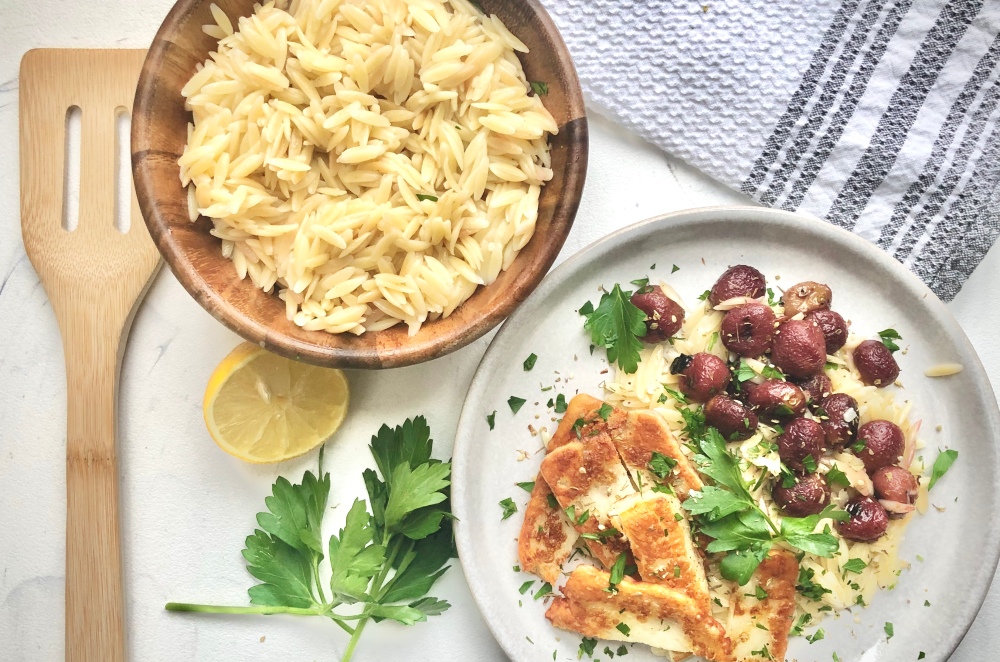
Super simple, super delicious. A perfect salad to pair with a grilled white fish or some buttery shrimp skewers. Also amazing on it’s own.

Orzo, Halloumi and Roasted Grape Salad
Serving size: 3-4 (as a side)
Prep time: 5 minutes
Cook time: 20 minutes
Ingredients:
- 1.5 cups washed seedless grapes
- olive oil
- salt
- pepper
- 1 cup orzo
- 1 garlic clove, minced
- 2 cups water
- 200 g halloumi cheese, sliced 1/4 inch thick
- Fresh parsley (for garnish)
For the dressing:
- 1.5 tbsp freshly squeezed lemon juice
- 1 tsp apple cider vinegar
- 1 tsp za’atar spice
- 2 tbsp finely chopped parsley
- 2 tbsp olive oil
- pinch of salt and pepper
Instructions:
- Preheat oven to 375 degrees F.
- Toss the grapes with one tablespoon of olive oil and sprinkle with a few pinches of salt and three to four grinds of fresh black pepper. Roast in the oven for twenty minutes, tossing halfway through. Grapes will blister and release their juices.
- While the grapes are roasting, add one tablespoon of olive oil to a large saucepan over medium-high heat. When hot, add the halloumi slices to the pan and fry for a few minutes on each side, or until golden brown. Remove and place on a paper towel to drain any extra oil.
- Turn the heat down to low and add the orzo to the same pan you were using for the halloumi. Toast for about two minutes, stirring frequently. Add in the garlic and continue to mix until fragrant, about thirty seconds. Pour in the water and a teaspoon of salt, bring to a boil and then lower heat, cover and simmer for 8-10 minutes, or until the orzo is cooked but still has a bite to it. Drain any excess water and rinse orzo with cold water over a fine mesh sieve.
- For the dressing: Combine all ingredients and shake together in a mason jar or use a whisk to combine.
- Assembly: Scoop the orzo onto a serving platter. Add the roasted grapes and the halloumi and drizzle the dressing over top. Start with a small amount and add more according to your taste. Garnish with more fresh parsley and a sprinkling of za’atar. Great served warm or cold!
The post Orzo, Halloumi and Roasted Grape Salad appeared first on Never. Not. Eating..
]]>The post Asian Noodles in a Peanut Sauce appeared first on Never. Not. Eating..
]]>
This recipe is the perfect Friday night, tired-from-a-long-work-week, make-in-thirty-minutes, uber yummy dinner. Jam-packed with flavour and containing all the the essentials that go into a meal – protein, carbs and fats. I got you.
The protein: Tofu is the main protein in this dish, but can easily be subbed for any meat protein if you are not a vegetarian, like moi. Chicken would be my suggestion.
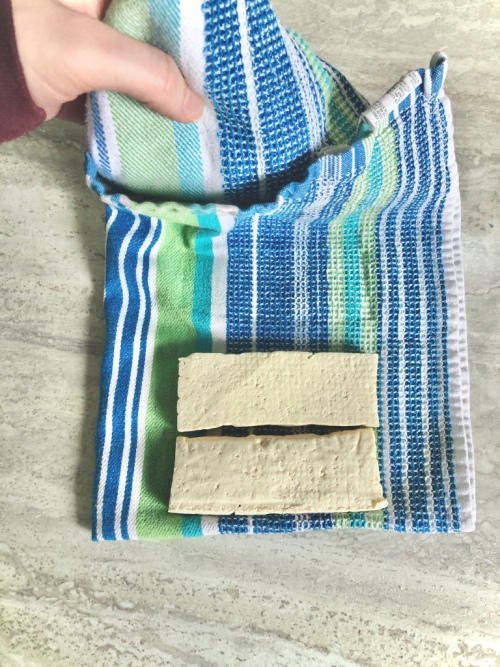
To prepare the tofu, start by pressing it. Place extra firm tofu in a folded tea towel and place something heavy on top, like a cast iron pan. Let it sit like this for about 30 minutes to help drain the extra liquid. This will help it crisp up when we pan fry it!
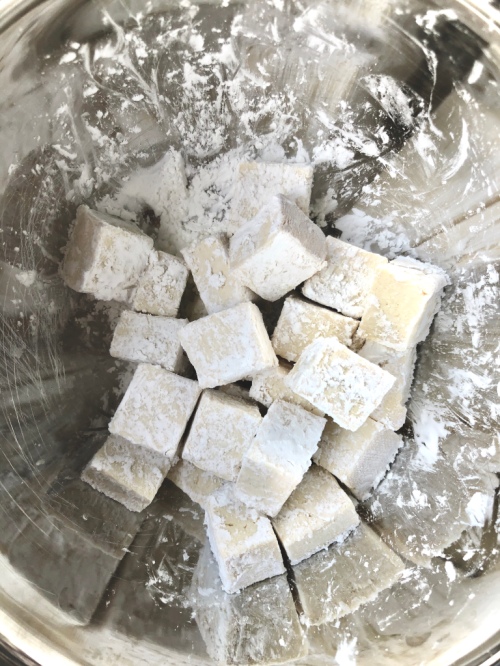
When it is fully pressed, toss it in some cornstarch and fry in some sesame oil on all six sides, until browned and crispy.

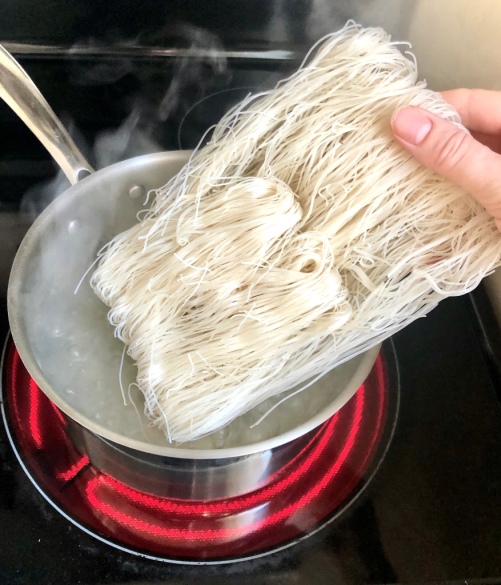
The carbs: The carbs in this recipe are the ones we want. Vermicelli noodles are made from rice, and the sugar snap peas and carrots lend a healthy dose of complex carbs.
I love cooking with vermicelli because it takes less than two minutes in a pot of boiling water and a little goes a long way!
As for the vegetables, I prefer the peas and carrots in this particular dish, but you should do what makes you happy. Broccoli, bok choy, red onion or brussel sprouts would also be good. Add them in raw, blanche them in some boiling water, or fry them up in some sesame oil! Keep the seasoning simple as the sauce is where the flavour will come from.
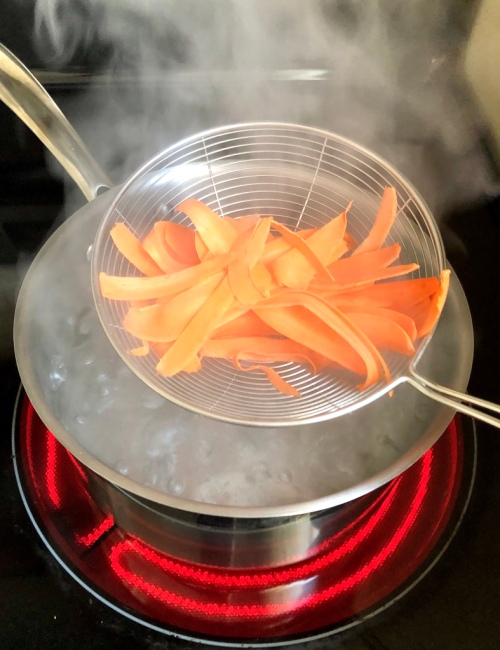
For the carrots, I like to “ribbon” them by using my vegetable peeler to cut super thin strips from one end to the other (after discarding the exterior layer). I toss these in boiling water for a minute and they become tender and you don’t get large, hard chunks of carrots in your dish!
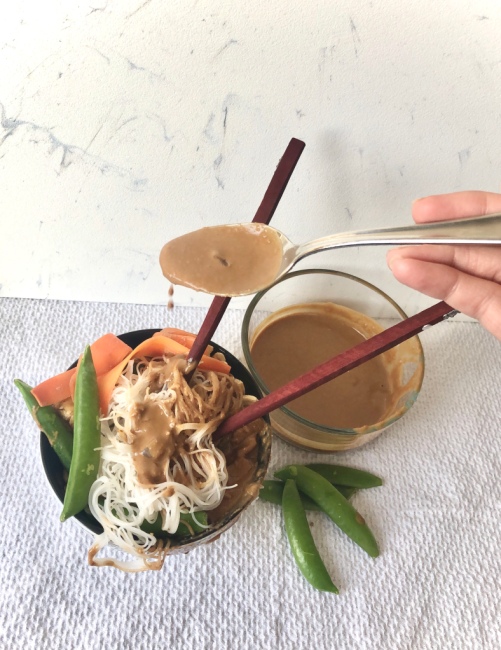
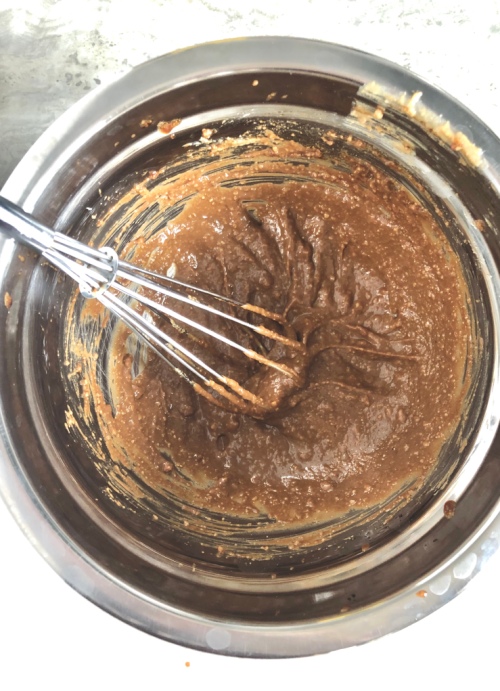
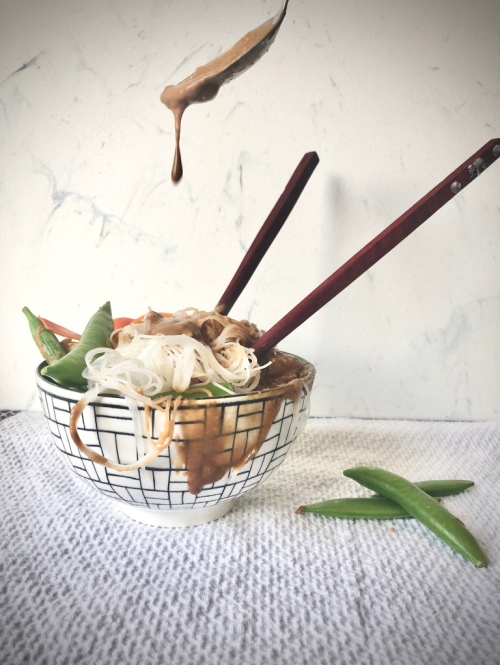
The fats: Since the sauce has a peanut butter base, the good fats in this recipe are in the sauce. Of course I like to use my Homemade Peanut Butter. It is whisked up with soy sauce, rice vinegar, lime juice, garlic and some red pepper flakes – if you are living that spicy life.
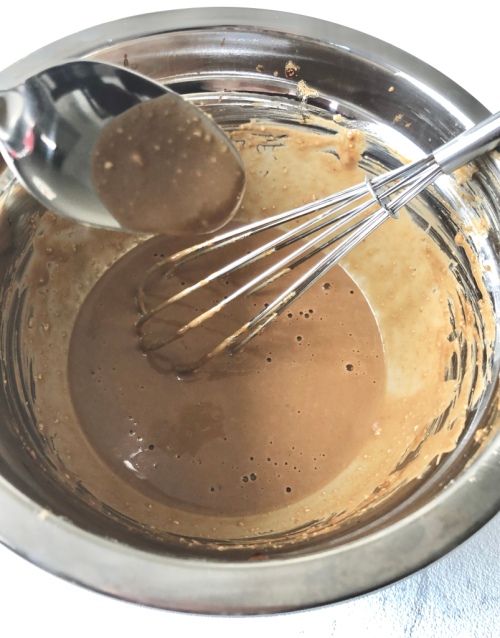
It makes the perfect drizzle-able consistency to just slather those noods without hesitation or regret. Try it!
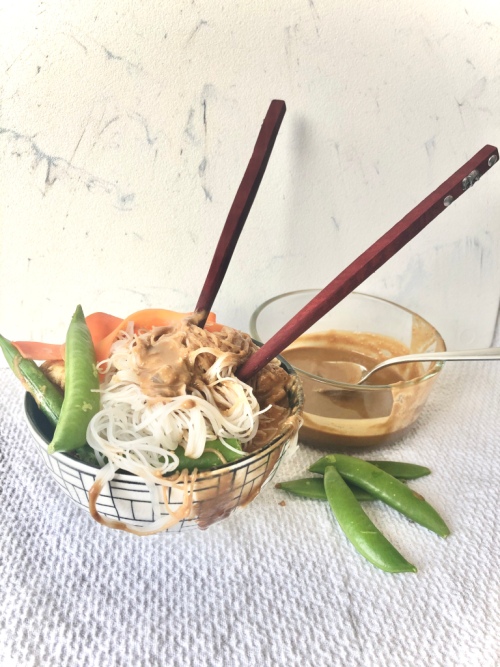
Pull it altogether in a bowl. Noodles topped with veggies, topped with tofu, topped with peanut sauce, topped with some extra crushed peanuts. Grab your chopsticks and let’s celebrate this day for ever and ever.
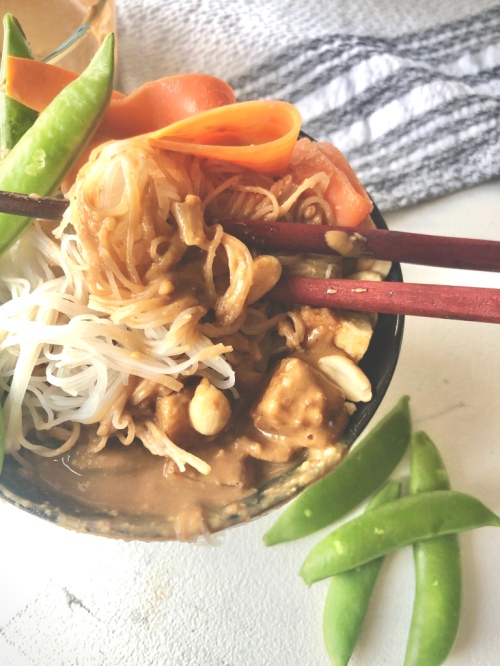
แซบ! (That’s “delicious” in Thai)
Asian Noodles in a Peanut Sauce
Serving size: 2
Prep time: 30 minutes (mostly for pressing the tofu)
Cook time: 5 minutes
Ingredients:
- 300 g extra firm tofu
- 1 tbsp cornstarch
- 2 tbsp sesame oil
- 1 cup sugar snap peas
- 1 large carrot, sliced or ribboned (see notes above)
- 100 g vermicelli rice noodles
- Chopped peanuts, for garnish
- 1 scallion, sliced thinly, for garnish
For the sauce:
- 1/4 cup peanut butter
- 1.5 tbsp soy sauce or tamari
- 1 garlic clove, finely minced
- 1 tbsp freshly squeezed lime juice (about half a lime)
- 1 tsp rice vinegar
- pinch of red chili flakes (optional)
- 2-4 tbsp cold water
Instructions:
- Wrap the tofu in a clean tea towel and place something heavy on top to press out all of the extra liquid. Let press for about 30 minutes.
- While the tofu is pressing, prepare the other ingredients. Start with the sauce – fill a small cup with cold water. Add a few ice cubes, mix and set aside. Whisk together peanut butter, soy sauce, garlic, lime juice, vinegar and chili flakes until combined and smooth. Remove the ice cubes from the cup and add 2-4 tablespoons of water to the sauce, one tablespoon at a time until you reach your desired consistency. Set aside.
- Dice the tofu and toss in a bowl with cornstarch until evenly coated. Add to a hot pan with sesame oil and cook over medium-high heat, turning to brown each of the six sides. Remove from pan and set aside.
- Bring a large pot of water to a boil. If you are ribboning your carrots, add to the pot for 1 minute and then remove with a slotted spoon. Add the vermicelli to the boiling water for about 1 minute and 45 seconds, stirring often with a fork to separate the noodles. Drain.
- Add the noodles to the bottom of two bowls. Top with sugar snap peas and blanched carrots (read notes above for other vegetable cooking options). Add tofu to bowl. Drizzle the sauce on top of everything and then add the crushed peanuts and scallions. Enjoy!
The post Asian Noodles in a Peanut Sauce appeared first on Never. Not. Eating..
]]>The post Pear, Mozzarella and Caramelized Onion Flatbread appeared first on Never. Not. Eating..
]]>
Ordering pizza has never really been something that I do very often. I guess because I don’t think about it. I guess because I like to cook. I guess because…I can make it myself?! And it’s SO easy, why wouldn’t I?? You are in full control this way. Healthy toppings or unhealthy toppings. Red sauce or white sauce. Meat or veggies. Cauliflower crust or wheat crust. You choose, babe. You choose.

So I like to call this recipe a “flatbread” because,
1. I don’t know the difference between flatbread and pizza (I won’t lie);
2. It comes across as more refined;
3. It sounds healthier for some reason, and;
4. It’s pretty flat, yo!
I start with just a basic dough recipe. Make this and chill it in a Ziploc bag overnight and the flavours meld together and it’s really quite magical. When you are ready to make some ‘za, pull it out of the fridge, roll it out and load it up with your choice of toppings, cook on high heat and in 10 minutes, you have amazing pizza.
The dough is simple. It is just flour (I use whole wheat), salt, olive oil, warm water and instant yeast. Toss it all into your stand mixer and then let it rise for an hour or two. This recipe will make one giant pizza, or three respectable-sized personal pizzas. I like to make three different types when I make this dough. Keep it interesting.
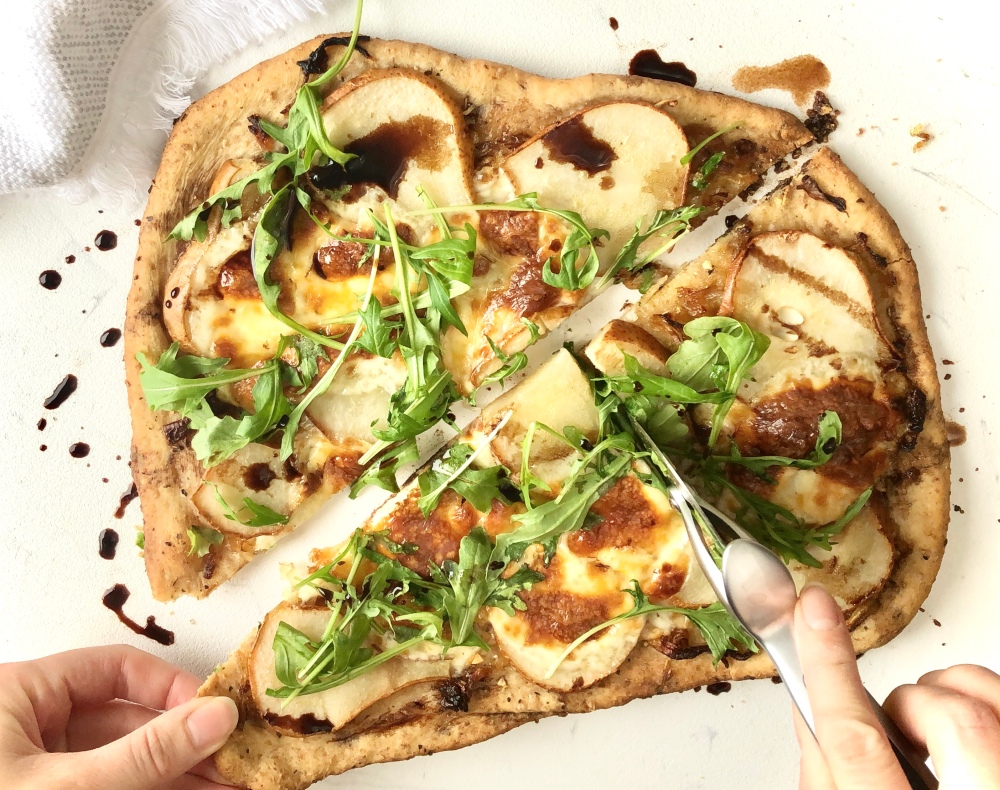
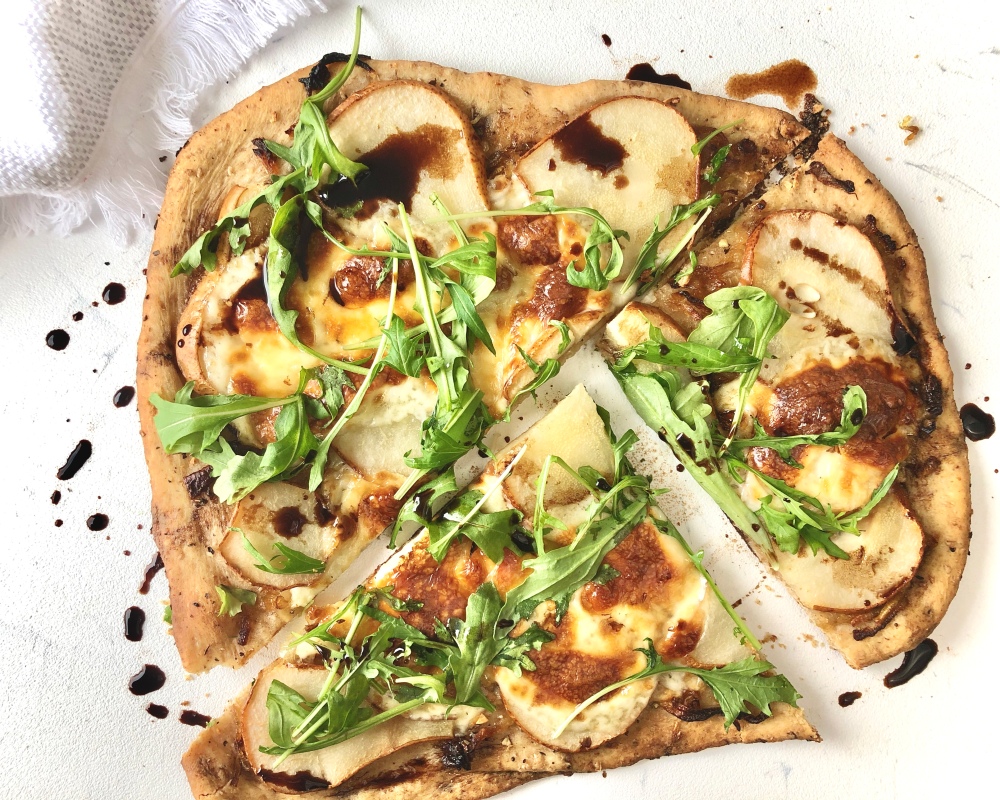
There are numerous combinations of toppings that I’ve tried in the past, and I am quite positive that I will be posting more flatbread recipes in the near future, but this one is in my Top 3. Sweet pears, flavourful caramelized onions, bubbly mozza cheese and peppery arugula. YUM! You literally cannot go wrong. Like, literally.
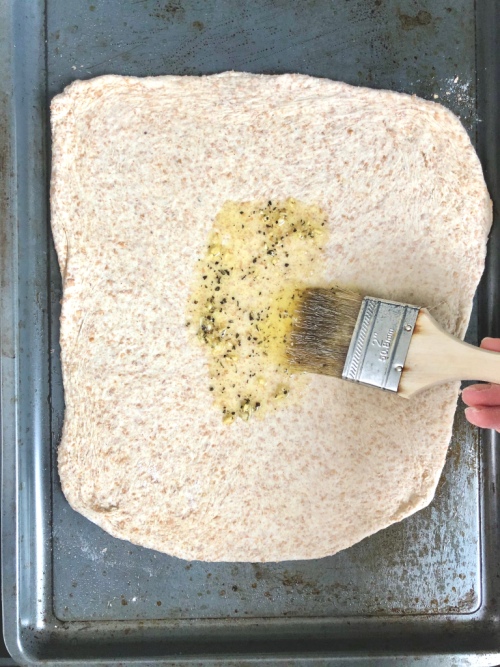
So grab your dough. Roll it out. Add my simple oil base (olive oil, garlic, dried basil, salt, pepper).
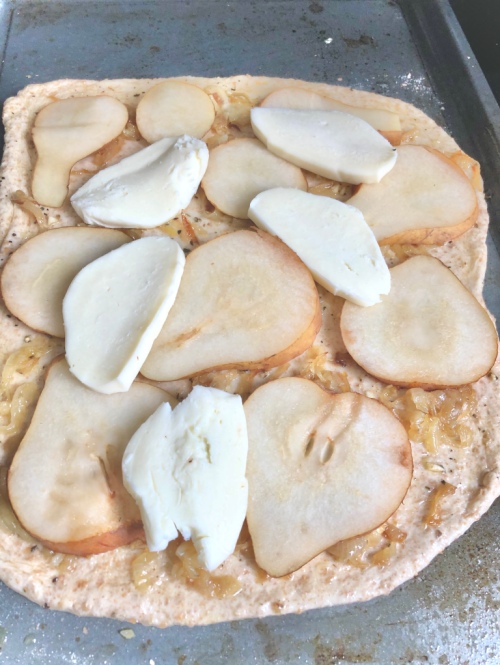
Top with onions, pears and cheese.
Bake at 500 degrees F. Remove. Arugula. Balsamic vinegar drizzle. Eat. Love your life.
Pear, Mozzarella and Caramelized Onion Flatbread
Serving size: 3-5 (Depending on whether you make it as a meal or a side)
Prep time: 12 hours (inactive time)
Cook time: 30 minutes
Ingredients:
Dough:
- 3/4 cup warm water
- 1 tsp active dry yeast
- 2 cups whole wheat flour
- 1/2 tsp salt
- 3 tbsp olive oil
Pizza:
- 4 tbsp olive oil, separated
- 1 large onion, sliced thinly
- 1 garlic clove, minced
- 1/2 tsp dried basil
- pinch of salt
- pinch of fresh pepper
- 2 bosc pears, sliced thinly
- 250 g mozzarella, cut into thin slices (fresh or balled mozzarella is best)
- arugula for topping
- balsamic vinegar for drizzling (optional)
Ingredients:
For the pizza dough:
- Sprinkle the yeast over the warm water and let sit for 10 minutes until the top looks foamy.
- Add flour and salt to a stand mixer bowl attached with the dough hook. Turn the speed on low and in a slow, steady stream, drizzle the olive oil in until fully incorporated. Pour in the water/yeast mixture and mix until fully incorporated. You may need to scrape down the sides to help it come together. Dough will be sticky. Coat a large mixing bowl with olive oil and turn the dough into the bowl. Cover bowl with plastic wrap and let rise in a warm area for two hours.
- After it has risen, you can roll it out and use immediately, but it is much better with more time to let the flavours develop. Place it in a large Ziploc bag and store in the fridge overnight or up to three days. Dough will continue to expand in the fridge.
For the pizza:
- Preheat oven to 500 degrees F.
- In a pan over low heat, add two tablespoons of olive oil and the sliced onion. Let the onion cook and caramelize for about 20 minutes, stirring every so often. If you wish to speed up this process, add small amounts of water to help the onions along.
- In a small bowl, whisk together the remaining two tablespoons of olive oil, the garlic, basil, salt and pepper. Set aside.
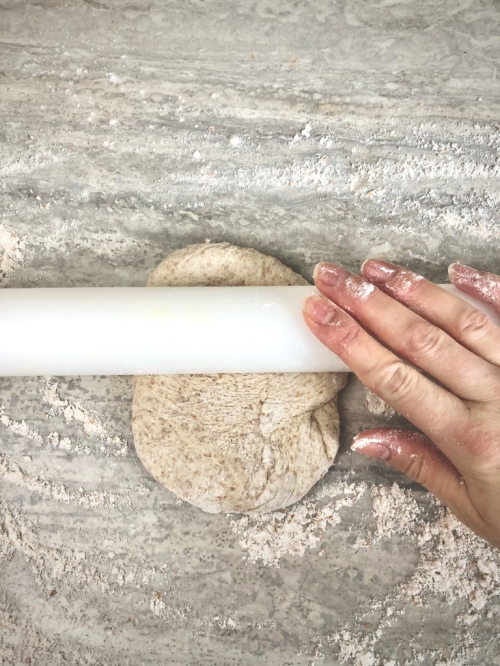
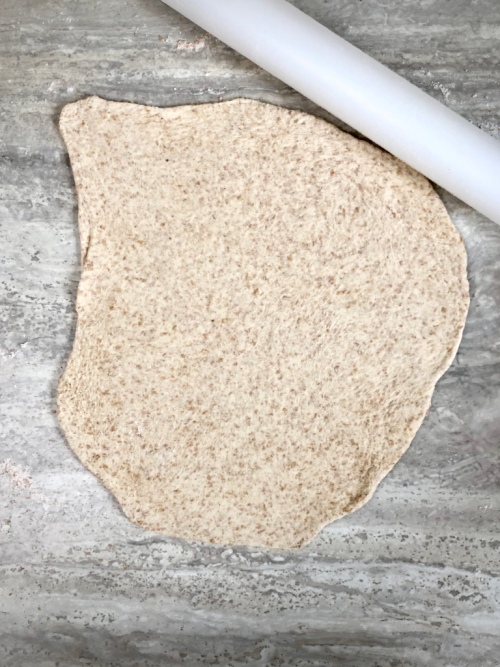
- Remove dough from fridge. Flour your surface and turn the dough out onto it. Use your hands to knead the dough for about 1 minute, or until it no longer sticks to your hands. At this point, you can either cut the dough into three even pieces and roll each into a ball, or make one large pizza ball with the entire dough.
- Using a floured rolling pin, start in the centre of your dough and roll outwards, turning your dough a quarter turn after every few rolls, trying to achieve a rectangular shape. Use your hands to pull and stretch the dough until it is about 1/4 inch thick. Lay the dough on a large baking sheet that has been brushed with olive oil.
- Brush the top of the dough with the olive oil and garlic mixture. Add the caramelized onions, sliced pears and then mozzarella slices. Bake in the oven for 10-14 minutes, or until crust has browned and the cheese bubbles. Top with arugula and a drizzle of balsamic vinegar. Cut with a pizza slicer and enjoy warm!
The post Pear, Mozzarella and Caramelized Onion Flatbread appeared first on Never. Not. Eating..
]]>The post Easy Butternut Squash Fettuccine “Alfredo” with Whipped Ricotta appeared first on Never. Not. Eating..
]]>- Smooth and rich like an alfredo but without the dairy and calorie count
- Vegetable bonus blended right into the sauce
- A lot less fat content than regular alfredo
- Cloud-like whipped ricotta (okay, it’s dairy, but some things are just worth it)
That is all. Hopefully you are convinced.

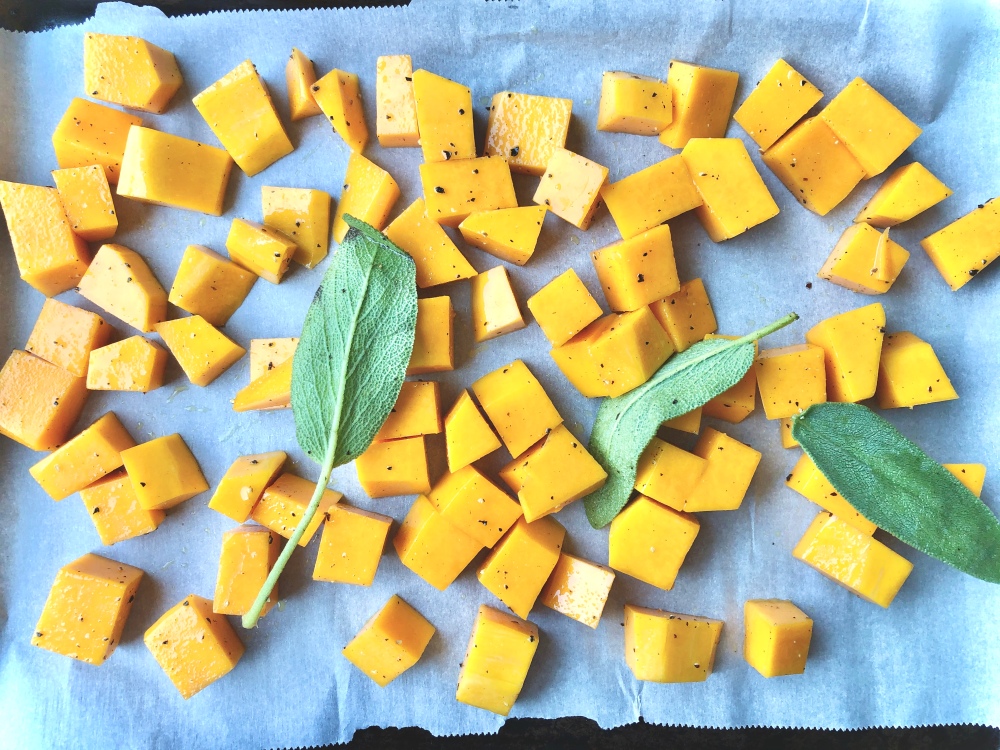
This recipe starts like any good vegetarian recipe – with a few cups of roasted vegetables. So sharpen your knife and start cubin’ up that butternut squash, add a few sage leaves, do the drizzy with some EVOO and season with S & P! Pop it in the oven and forget about it (well, for 20 minutes, until you have to give ’em a toss)!
In the meantime, throw some fettuccine into a pot of heavily salted boiling water and cook until al dente.
When the squash is slightly caramelized and tender, remove from oven and let’s start the transformation from solid –> liquid(ish). Grab your blender – I use my Ninja for everything…it is A.M.A.Z.I.N.G. – transfer the squash and some veggie stock and blend until smooth.
On the same sheet tray that you had the squash on, add two tablespoons of breadcrumbs and a quarter cup of chopped walnuts and put back into the oven to toast up. This only takes a few minutes, so watch carefully! When browned, remove from oven and toss in a few finely chopped sage leaves and some melted butter and set aside…YUM.
Let’s continue shall we…I’m drooling. Okay – grab a pan, heat some olive oil and saute some diced shallots until transparent. Add in a few cloves of minced garlic and it’s ready for the sauce. Pour in the butternut squash puree and add some more stock to the pan, cooking and stirring until smooth and combined.
Next, add half of a cup of canned coconut milk and simmer for a few minutes until sauce has thickened.
While the sauce is finishing, grab your ricotta from the fridge and beat with a hand mixer with 1 tablespoon of freshly squeezed lemon juice, a pinch of salt and a few grinds of pepper. Whip until it is smooth and creamy and spreadable and marvelous.

The Grand Finale: When the sauce coats the back of a spoon, it’s ready for it’s best friend – pasta – to join it in the pan. Toss the pasta around with a pair of tongs and be sure to coat every last strand with that velvety sauce. Turn the heat off and add a squeeze of lemon juice to bring it altogether.
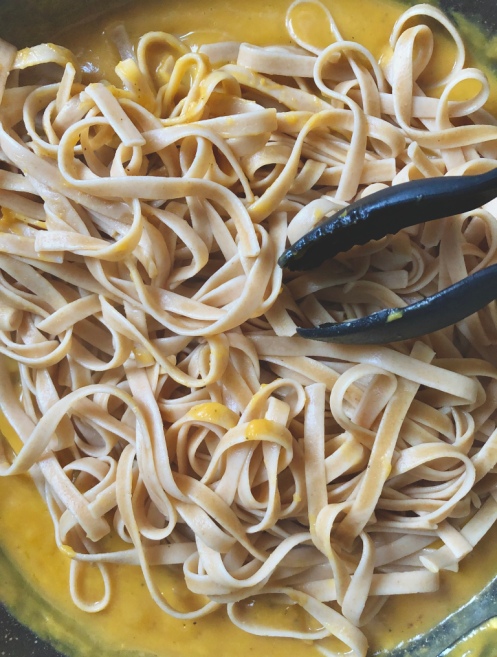
Plating: Start with the whipped ricotta. Maybe even be fancy and make a little “swoop” on your plate!

Next, add the fettuccine, and then top with the bread crumb/walnut mixture. And now it’s time to manger, manger (that’s French, mmmm kay?!)!

One question – Are you a “use a spoon to assist in the delicate twirling of the noodles around your fork” kind of person, or a “shove noodles in mouth as quickly as possible, I’m not worried about whether they are hanging from my mouth” kind of person? Because I’m definitely number two.

^ A twirling attempt…strictly for pictures.
Easy Butternut Squash Fettuccine “Alfredo” with Whipped Ricotta
Servings: 4
Prep time: 15 minutes
Cook time: 40 minutes
Ingredients:
- Olive oil
- 3 cups of butternut squash, cubed
- 6-8 sage leaves, separated
- 325 g fettuccine (or 4 serving sizes)
- 1/2 cup ricotta cheese
- 1.5 tablespoons fresh lemon juice, separated
- 2 tbsp bread crumbs
- 1/4 cup walnuts, finely chopped
- 1 tbsp butter, melted
- 1 cup vegetable stock, separated
- 1 shallot, finely diced
- 2 cloves garlic, minced
- 1/2 cup canned coconut milk
- salt and pepper to taste
Instructions:
- Preheat oven to 375 degrees F.
- Line a baking sheet with parchment paper and add squash, 1 tbsp olive oil, 3-4 sage leaves, a few pinches of salt and some fresh black pepper and toss to coat. Place in the oven and roast for 30-40 minutes or until you see slightly caramelized edges and squash is fork-tender.
- Meanwhile, bring a pot of heavily salted water to a boil and add fettuccine. Cook until the pasta is al dente (according to package directions…or taste one)! Reserve one quarter cup of the pasta water and then drain the fettuccine and set aside.
- For the whipped ricotta: Add ricotta, 1 tablespoon of lemon juice and a pinch of salt and pepper to a medium bowl. Use a hand mixer and whip on medium speed until ricotta is smooth and fluffy – about 3-4 minutes. Place in fridge to keep cool.
- For the crumb topping: On a baking sheet lined with parchment paper, toast the bread crumbs and walnuts in the oven for about 5-8 minutes, or until golden brown. Watch carefully so they don’t burn. Remove from oven and add 3-4 finely chopped sage leaves and the melted butter. Toss and set aside.
- When the squash is done cooking transfer to a blender (don’t discard the sage leaves, transfer to blender as well) and add 1/2 cup of vegetable stock. Blend until smooth.
- Heat a tablespoon of olive oil in a large pan over medium-low heat. Add the shallot and saute for a few minutes until it starts to turn translucent. Add the garlic and cook for 30 seconds, or until fragrant. Pour the blended squash into the pan and add the quarter cup of pasta water and the other 1/2 cup of stock, stirring for a few minutes until smooth. Add the coconut milk and simmer until it thickens and coats the back of a metal spoon. Squeeze a bit of lemon juice overtop of the sauce and then add the pasta. Turn the heat off and toss the pasta around until coated with the sauce.
- To plate, spread some whipped ricotta on the bottom of your plate. Add the pasta on top and then sprinkle with the bread crumb/walnut crumble. Bravo!
The post Easy Butternut Squash Fettuccine “Alfredo” with Whipped Ricotta appeared first on Never. Not. Eating..
]]>