The post Vegan Cilantro Lime Dressing appeared first on Never. Not. Eating..
]]>
WHAT IS VEGAN CILANTRO LIME DRESSING
Okay, I’ve been struggling big time. I love a creamy dressing, more than words can express, but usually they have a dairy base, and I’m just not down for that. Thank goodness I tested out this creamy Vegan Cilantro Lime Dressing using cashews instead, and it worked! It is just as creamy, dairy-free and so delicious. Therefore, you must give it a try!

WHY I LIKE THIS DRESSING
Other than because it is vegan, I love this dressing as it is multi-purpose. It’s not just for salads, but also is great for using as a dip or a drizzle on potatoes, French fries, buddha bowls, and so much more! It is also super healthy, packed with cilantro, which has a plethora of health benefits, including hosting a number of vitamins.
THE INGREDIENTS
This is the simplest dressing to make. It requires:
- Soaked cashews
- Cilantro
- Lime juice
- Salt
- Pepper
- Garlic

MAKING VEGAN CILANTRO LIME DRESSING
To make this dressing, simply pack all of the ingredients into a blender and whip up until smooth – it’s that easy! Add in a tiny bit of water at a time until you reach your desired consistency.
TIPS
- Make sure you soak your cashews for at least three hours. This will allow them to soften up and blend easily, resulting in a smoother, creamier dressing.
- Use the stems and leaves of your cilantro – less prep and more nutrition that way!
- After blending your ingredients, give the dressing a taste and add more salt, pepper, lime juice or cilantro, according to your taste.
SALAD RECIPES TO TRY
Jewelled Brussel Sprout Kale Salad (the perfect Fall side)
Candied Walnut Salad with Pear and Gorgonzola (another Fall favourite)
Beet and Orange Salad with Goat Cheese (fresh for summer)
TOOLS I USED TO MAKE THIS VEGAN CILANTRO LIME DRESSING
Click on the images below to see what I used for this recipe.


Vegan Cilantro Lime Dressing
Serving size: Makes 8oz
Prep time: 5 minutes
Inactive time: 3 hours
Ingredients
- 1/4 cup raw cashews, soaked for 3-4 hours in water
- 1 cup cilantro, packed (leaves and stems)
- juice of 1 lime (approximately 2 tbsp)
- 1 garlic clove
- 1/4 tsp salt
- pinch of pepper
Instructions
- First, drain the cashews from their soaking water and rinse well.
- Add the cashews, cilantro, lime juice, garlic, salt and pepper to a blender with two tablespoons of water and blend until creamy and smooth. If the dressing is too thick, continue to add more water, one tablespoon at a time until you’ve reached your desired consistency.
- Finally, try the dressing and add more salt and pepper to taste.
- Pour into an 8oz mason jar or a small, airtight container and store in the fridge for up to 4 days.

The post Vegan Cilantro Lime Dressing appeared first on Never. Not. Eating..
]]>The post Pink Hummus (Beetroot) appeared first on Never. Not. Eating..
]]>
WHAT IS PINK HUMMUS?
I’m a regular hummus lover for sure, but when you jazz it up by making it pink, it’s even better. I mean, you eat with your eyes first…am I right?!
This Pink Hummus is made with the legendary beetroot, meaning it is slightly sweet, yet earthy and aesthetically, it’s super vibrant! A definite show-stopper when brought to any party.
WHY I LOVE THIS HUMMUS
GOOD hummus is a labour of love, I’m not going to lie. However, the amount of time that hummus takes is mostly passive time. You don’t have to be in the kitchen during the entire process. And, it takes so long because this method of making hummus is going to give you the smoothest results, meaning the most delicious hummus.

Other than the smoothest, most velvety texture, I love this hummus because of the colour. It’s so fun and playful – perfect for kids or a crowd!
Also, I add roasted garlic to this recipe for maximum flavour and there’s nothing better than a head of roasted garlic, in my opinion.
THE INGREDIENTS
The ingredients to this recipe are simple, but it’s how you prepare them that really makes a difference. Here is what you will need:
- dry chickpeas
- beets
- tahini
- lemon juice
- garlic
- salt

HOW TO MAKE BEETROOT HUMMUS
The key to the smoothest hummus possible is using dry chickpeas. They take a while to prepare, so aim to make your hummus in the morning or early afternoon. First, you must soak the chickpeas overnight. By doing this, you will notice that they double in size and absorb a lot of that water.
In the morning, drain and rinse the chickpeas and add them to a large pot of water with some baking soda (to help soften them) and some salt. Bring to a boil and then reduce the heat to a low rolling boil, letting them cook for about an hour and a half, until they are nice and soft.

While the chickpeas are cooking, roast your beet in the oven by wrapping it in a piece of foil and placing it on a baking sheet. If you are adding garlic to the hummus (which I highly recommend), slice the top off the whole head of garlic to expose the top of each clove. Drizzle the cloves in olive oil, wrap the head in tin foil and roast in the oven for 45-55 minutes.
When the chickpeas are cooked, add them to a high-powered food processor, along with the tahini lemon juice, salt, garlic and the roasted beet. Blend for one minute until everything is incorporated, then scrape down the sides. Blend for another minute while drizzling in ice cold water until it is smooth and the texture is perfect.
TIPS WHEN MAKING PINK HUMMUS
- Even though this recipe only requires one cooked beet, I would roast more to top the hummus with, and to have on hand for a quick snack – I love my beets with a little bit of olive oil, feta cheese and some salt and pepper!
- Drizzle olive oil over top of the hummus before storing in the fridge to avoid discolouration or a “skin” forming on the top.
- Use a high-powered food processor to ensure your hummus whips up to the smoothest consistency. I have the Ninja food processor and I love it!

MORE VIBRANT RECIPES YOU’LL LOVE
3-Ingredient Strawberry Chia Jam (summertime in a jar)
Strawberry Honey Ginger Galette (a sweet pie with an unexpected bing-bang-boom!)
Simple Beetroot Pasta (more beets, but this time with pasta)
TOOLS I USED TO MAKE THIS PINK HUMMUS
Click on the images below to see what I used for this recipe.


This post contains affiliate links and I may earn a small commission when purchases are made after clicking the links, at no cost to you – thank you!
PINK HUMMUS (BEETROOT)
Serving size: Makes about 3 cups
Prep time: 10 minutes
Cook time: 1.5 hours
Passive time: 6-8 hours (overnight)
Ingredients
- 1 cup dry chickpeas
- 1/2 tsp baking soda
- salt
- 1 beet*
- 1 head of garlic (optional)
- juice of half a lemon (2 tbsp)
- 1/2 cup tahini
- olive oil
Instructions
- Place chickpeas in a bowl and cover with a few inches of water. Soak overnight or for 6-8 hours. When they are done soaking, proceed with the next steps.
- Preheat oven to 400 degrees F.
- Drain and rinse the chickpeas and place them in a medium-sized pot with baking soda and one teaspoon of salt. Cover with 2 inches of water and bring to a boil. If you see foam rising to the top, skim it off with a spoon and discard. Turn the heat down and simmer, covered, for an hour and a half, or until chickpeas are soft and tender – you can cook them for as long as two hours.
Preparing the beets
- In the meantime, get started on roasting your beet – place washed beet on a piece of tin foil and wrap it up like a present, making sure there are no holes in the foil where the steam can escape. Place on a baking tray in the oven for an hour and a half, or until the beet is tender enough to slide a butter knife easily into the centre.
Preparing the roasted garlic
- If you are adding garlic to the hummus – slice the top quarter of your head of garlic off and drizzle the top of the visible cloves with a tablespoon of olive oil. Wrap in a tin foil package, similar to the one you wrapped the beet in and place on baking tray with the beet and roast in the oven for 45-50 minutes. The cloves will caramelize and be super tender.
Putting it all together
- Remove and carefully open the tin foil packages. Let the beet sit for one minute and then use a paper towel to hold it in one hand and another paper towel to peel away the skin with your other hand. The skin should remove easily when the beet is fully cooked. Rinse the beet in cold water and slice into quarters.
- Add a few ice cubes to a small measuring cup filled with cold water and set aside. When the chickpeas are done cooking, drain, transfer to a food processor and add the tahini, lemon juice, half teaspoon of salt and the beet quarters. Squeeze three (or more to taste) of the roasted garlic cloves out and add to the food processor. Blend the ingredients for about one minute and then scrape down the sides of the processor. Remove ice cubes from measuring cup and measure out one-quarter cup of the ice-cold water. Turn the motor back on and slowly drizzle the water into the food processor and blend for another minute. Try the hummus and add more salt or lemon juice, if needed. Transfer to a serving bowl and top with a pinch of flaky sea salt, if desired.
Store the hummus in an airtight container in the fridge with a drizzle of olive oil that covers the surface to avoid discolouration and a “skin” developing.
NOTES:
*I recommend roasting more than one beet to have some for a meal later on.
The post Pink Hummus (Beetroot) appeared first on Never. Not. Eating..
]]>The post Sticky Vegan Orange Cauliflower appeared first on Never. Not. Eating..
]]>
WHAT IS VEGAN ORANGE CAULIFLOWER?
We’ve all heard of (and possibly tried) the famous Chinese orange chicken dish. It’s sticky, saucy and absolutely slammin’ with flavour! Since I don’t eat meat, I wanted to sub the chicken for a plant-based ingredient, and what’s more versatile than the humble cauliflower?! Nothing is – cauliflower wins, hands down.
Personally, I am in love with this dish and most dishes with cauliflower as the star. Eat it with rice, some green onions and your choice of protein – vegan or not!

THE INGREDIENTS
Although this recipe may seem intimidating, the ingredients and method are truly simple. I add a medium head of cauliflower to the batter (as outlined below), bake it, and then quickly coat it in the sauce after they are baked through.

The batter:
- Whole wheat flour
- Paprika
- Salt & pepper
- Plant-based milk
The Sauce:
- Juice from an orange
- Soy sauce or tamari
- Maple syrup, agave or honey (if not vegan)
- Garlic
- Rice vinegar
- Cornstarch
HOW TO MAKE STICKY VEGAN ORANGE CAULIFLOWER
After you have washed, dried and broken up your cauliflower into florets, you will want to coat them in the batter. Whisk together the flour, spices and milk, and dump the florets into the smooth mixture, coating fully. Spread them out on a parchment-lined baking sheet and bake for 25 minutes, turning halfway.

While the cauliflower bakes, mix the sauce ingredients together and add to a hot pan with some sesame oil. Create a slurry with the cornstarch and some water and add it to the sauce with the baked cauliflower. It will get nice and thick and ooey and gooey. It’s like a saucy, boneless chicken wing, minus the chicken. So good!
OTHER CAULI-FORWARD RECIPES
Sumac Roasted Cauliflower (a crowd-pleaser!)
Hot and Sweet Cauliflower Wings (an amazing substitution for regular wings)
Roasted Garlic Mashed Cauliflower (AS good as mashed potatoes)
Easy Creamy Cauliflower Soup (perfect for a cold winter day)

TOOLS NEEDED FOR THIS RECIPE


This post contains affiliate links and I may earn a small commission when purchases are made after clicking the links, at no cost to you. Thank you!
Sticky Vegan Orange Cauliflower
Serving size: 4-5
Prep time: 15 minutes
Cook time: 30 minutes
Ingredients
- 1 medium head of cauliflower, washed, dried and cut into florets
- 1 cup whole wheat flour
- 1 tsp paprika
- 1 tsp salt
- 1/4 tsp pepper
- 1 1/4 cup plant-based milk (I use oat milk)
- juice of one orange
- 1/4 cup soy sauce or tamari
- 1 tbsp maple syrup (or honey, if not vegan)
- 1 tsp rice vinegar
- 1 clove garlic, minced
- 1 1/2 tsp cornstarch
- 1 tbsp sesame oil
- 1 tsp sesame seeds
Instructions
- Preheat oven to 425 degrees Fahrenheit and line a baking sheet with parchment paper.
- For the batter: Whisk together the flour, paprika, salt, pepper and milk until smooth. Coat each cauliflower floret in the batter and shake off any extra. Place on prepared baking sheet and bake in the oven for 25 minutes, turning halfway through. While the cauliflower is baking prepare the sauce.
- For the sauce: Whisk together the orange juice, soy sauce, maple syrup, vinegar and garlic. In a separate bowl, whisk the cornstarch with two tablespoons of cold water to make a slurry.
- Heat the sesame oil in a large pan over medium-high heat. When the cauliflower is ready, add it to the hot pan with the sauce and cornstarch slurry. Mix continuously for a minute or two – the sauce should thicken immediately. Remove from heat, sprinkle with the sesame seeds and serve!
NOTES:
- This vegan orange cauliflower is great with rice and green onions
The post Sticky Vegan Orange Cauliflower appeared first on Never. Not. Eating..
]]>The post Candied Walnut Salad with Pear and Gorgonzola appeared first on Never. Not. Eating..
]]>
I have to admit, I’m a fruit person. Fruit is good on everything – pizza, salads, even sandwiches! I consistently put fruit in my salad, and this recipe is no different. Seasonal pears are so good, and when they are matched with a potent cheese and some sugary-sweet nuts, life is good!
INGREDIENTS IN THIS CANDIED WALNUT SALAD
- The fruit – I love, love, love pears, and Bartlett are my favourite when they are ripe and ready to eat. They are in season in the Fall and are a perfect replacement for your typical veg in any salad.
- The creamy and salty – If you are someone who scrunches their nose up when you think about blue cheese, I’m sorry, but HOW!? Sometimes you just need a stinky cheese. BUT, if you can’t get over it, then it can totally be replaced with any of your favourite cheeses in this recipe. Goat or feta would be exceptional!
- The sweet and crunchy – CANDIED WALNUTS. These are “cash money” as the young kids would say. They barely made it to the bowl with the rest of the ingredients because they kept making stops at my mouth on the way. They are absolutely my favourite part.

THE DRESSING
What would be a more perfect vinaigrette than maple syrup? Drizzle those greens in this dressing that’s made with dijon, 100% pure maple syrup, apple cider vinegar, some seasonings and olive oil. Perfection, if I do say so myself!
More Salads for your Diverse Needs
Beet and Orange Salad with Goat Cheese (fresh and vibrant!)
Make-Ahead Vegan Sweet Potato Salad (perfect for a family dinner)
Jewelled Brussel Sprout Kale Salad with Honey Dijon Dressing (the show-stopper)
Orzo Halloumi and Roasted Grape Salad (a fun twist on a side dish!)
This post contains affiliate links and I may earn a small commission when purchases are made after clicking the links, at no cost to you. Thank you!
Pear, Gorgonzola and Candied Walnut Salad
Serving size: 4
Prep time: 15 minutes
Ingredients
For the salad:
- About 4 handfuls tuscan kale, stems removed, washed and chopped
- 1/2 tbsp olive oil
- salt
- 1 cup walnut halves
- 1/4 cup packed brown sugar
- 3 tbsp butter
- 1 Bartlett pear, diced
- 1/4 cup gorgonzola cheese, crumbled
For the Dressing:
- 1 tbsp maple syrup
- 1/2 tbsp dijon mustard
- 1/2 tbsp apple cider vinegar
- pinch of salt
- pinch of pepper
- 2 tbsp olive oil
Instructions
For the salad:
- Preheat oven to 350 degrees Fahrenheit.
- Drizzle the olive oil on the kale as well as a pinch of salt and massage with fingers until kale turns a deep green colour, approximately 1 minute. Set aside.
- Place the walnuts on a baking sheet and toast in the oven for 5-8 minutes, or until lightly browned and fragrant. Watch carefully as they burn easily! Remove and set aside.
- In a small pot over medium heat, melt the butter and brown sugar, until the sugar starts to bubble. Add the walnuts and cook another 2 minutes. Spread the mixture onto a parchment lined baking sheet and immediately sprinkle with a few pinches of salt and pull apart with a fork. Let cool completely, about 10 minutes.
- Assemble the salad by placing the diced pear on top, followed by the gorgonzola and candied walnuts. Drizzle with the dressing and toss gently.
For the dressing:
- Combine all ingredients into a single serve blender and blend until combined, or, place in a small mason jar and shake well.

The post Candied Walnut Salad with Pear and Gorgonzola appeared first on Never. Not. Eating..
]]>The post Easy Za’atar Socca appeared first on Never. Not. Eating..
]]>
WHAT IS EASY ZA’ATAR SOCCA?
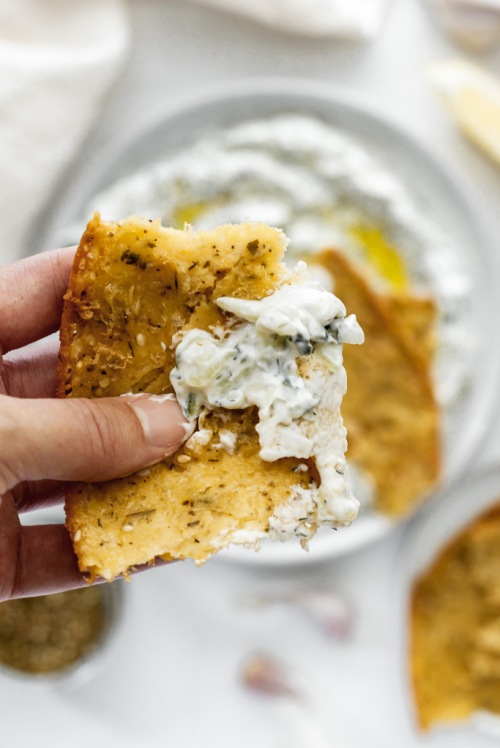
Crispy, gluten-free and the perfect vessel for dipping. I could ask for nothing more in my life. Socca is an Italian-French, crepe-like flatbread that is just so delicious. Try it with my Homemade Tzatziki recipe!
TIPS FOR MAKING SOCCA
The most important tool for perfecting this recipe, in my opinion, is a cast iron pan. It’s crucial to get the pan and oil scorching hot before pouring in the batter the ensure you achieve even heat distribution and crispy socca. Check out this one from Amazon.
What do you eat Socca with? If not just as is, then try it with your favourite dips, stews or curries. It is great for picking up sauce or just adding that missing piece to a meal!
This recipe only requires these three ingredients (salt and water don’t really count as an ingredient…right?!):
- chickpea flour
- za’atar
- olive oil
The easiest, most delicious gluten-free bread you will ever make!
This post contains affiliate links and I may earn a small commission when purchases are made after clicking the links, at no cost to you. Thank you for supporting me!
Easy Za’atar Socca
Serving size: Makes 2 large flatbreads
Prep time: 5 minutes
Cook time: 10-12 minutes
Ingredients:
- 1 cup chickpea flour
- 1/2 tsp salt
- 1 tsp za’atar
- 1 tbsp olive oil + more for the pan
- 1 cup water
Instructions:
- In a medium bowl, whisk together the flour, salt, za’atar, 1 tablespoon of olive oil and water until smooth. Set aside.
- Preheat oven to 450 degrees Fahrenheit. Coat the bottom of a cast iron pan with olive oil (about 2 tbsp) and place in the oven for 5 minutes to heat the oil. Remove carefully and pour in half of the batter, swirling the pan around to help spread it out. Cook in the oven for 10-12 minutes, or until edges turn brown and bread is cooked through. Remove from oven and repeat this process for the remaining half of the batter.
NOTES:
Socca is best when served immediately after cooking, but you can store in an airtight container in the fridge for a few days, if necessary.
The post Easy Za’atar Socca appeared first on Never. Not. Eating..
]]>The post Homemade Tzatziki appeared first on Never. Not. Eating..
]]>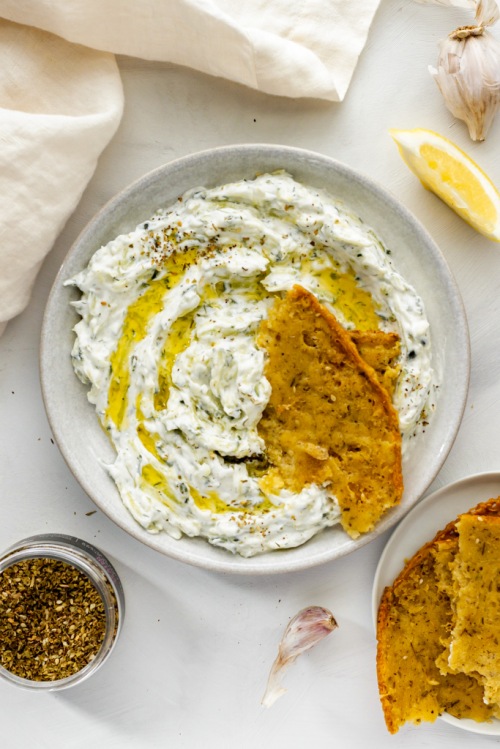
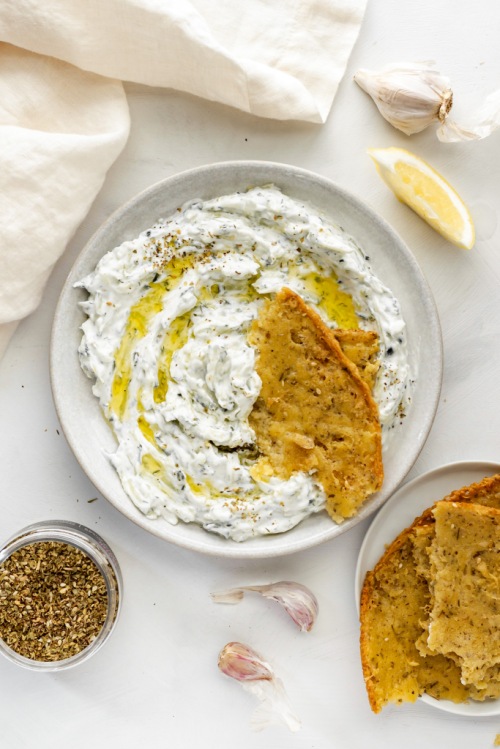
This tzatziki sauce is thick, creamy, refreshing and a great spread for wraps and gyros, or to go with falafel, fries, bread or vegetables. It’s the perfect match for anything that needs a creamy element! I love it with my Easy Za’atar Socca bread.
Tzatziki is popular around the Middle East and the Mediterranean, especially in Greece. It is my dream to travel to Greece one day and learn more about their cuisine, but until then, I will have this recipe on repeat, so I can pretend I’m there.
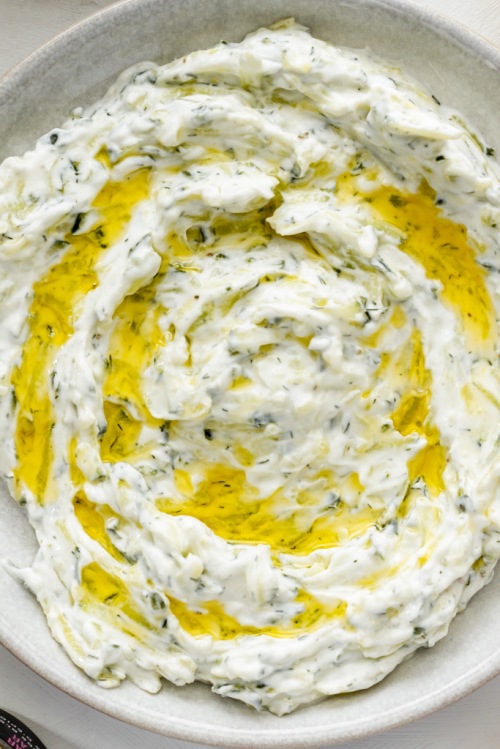
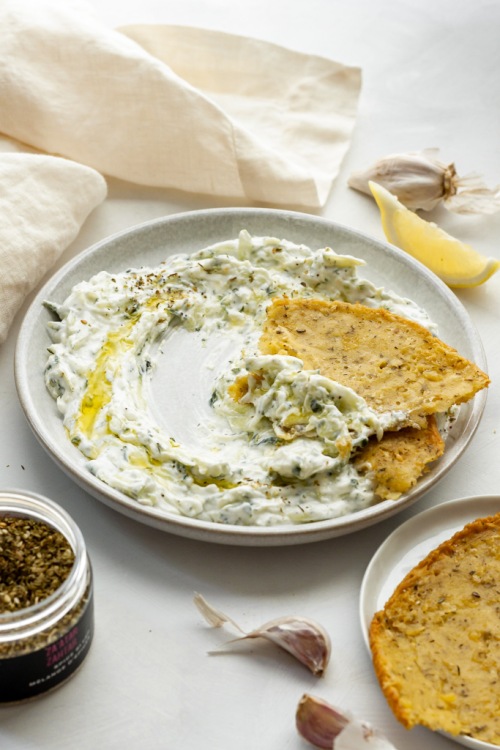
Tzatziki is simply a combination of yogurt, fresh herbs, lemon, cucumber, garlic, olive oil and salt. It’s a perfect summer dip, sauce or spread, as it’s cool and bright!
It is incredibly easy to whip up at home. Follow my recipe below, and feel free to add extras of your favourite ingredients!
Homemade Tzatziki
Serving size: Makes 1 cup
Prep time: 5 minutes
Ingredients:
- 1 cup cucumber, shredded
- 1 cup full-fat Greek yogurt
- 1 clove of garlic, grated
- zest of 1 lemon
- 1 1/2 tbsp freshly squeezed lemon juice
- 1 tbsp chopped dill
- pinch of salt
- olive oil (optional)
Instructions:
- Place cucumber in a clean tea towel or paper towel and squeeze the liquid out over a sink.
- Mix the cucumber, yogurt, garlic, lemon zest and juice, dill and salt in a bowl. Transfer to a small plate and use the back of a spoon to spread it out over the surface. Drizzle with a little bit of olive oil, if desired. Serve immediately.
- Store extra in an airtight container in the fridge for up to three days.

The post Homemade Tzatziki appeared first on Never. Not. Eating..
]]>The post Hot and Sweet Cauliflower Wings appeared first on Never. Not. Eating..
]]>
I put a pot of oil on the stove and waited. And waited, and waited, and waited. It didn’t start to boil, so I just kept waiting. Like I said, I knew NOTHING about cooking. All of a sudden, plumes of smoke started emerging from the pot. And, then I couldn’t breathe. The smoke filled the house and my roommates were like, “WTF Mate?!” It was so thick that it coated our lungs as we hacked up a storm. So, I carefully took the pot outside and stuck it in a pile of snow and ran far, far away.
Never have I tried frying again. Until today. Thank goodness for endless episodes of the Food Network that have guided me in my growth as a food fryer.
So, in case you have never fried before, here are my learnings:
- Oil doesn’t boil
- Do not fry food without a thermometer
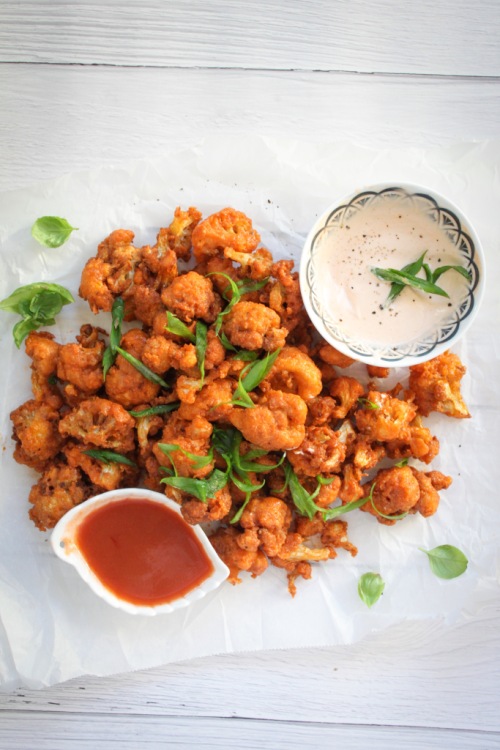
Now that the PSA is out of the way, let me introduce you to my first fry recipe – Cauliflower wings. We all know them. We all love them. But, I can’t tell you how many times I have tested recipes that have you bake these little guys, and they never create the texture that I want. That crispy AF texture. So, we fryin’ today.
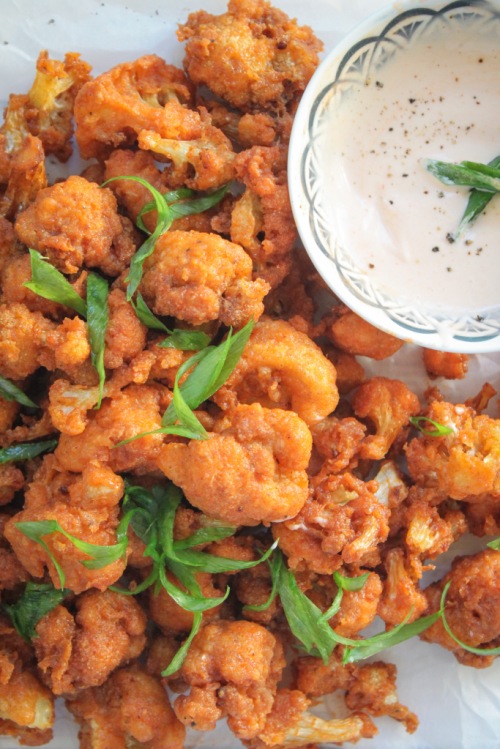
This recipe is really quick and surprisingly easy. You need to break off your cauli into smaller florets – the larger they are, the more water they absorb. Then, get that batter going – add some flour, cornstarch (my favourite “crisping” ingredient), paprika, chili powder, salt and pepper to a bowl and whisk. Next, pour in some canned coconut milk, mixed with another milk of choice – oat, cashew, almond, etc. Whisk it all together and you will get a nice batter. Give those florets a dunk and carefully place them into the pot of oil. Let them cook for about 3-4 minutes, until golden brown.
After you have fried all of the cauliflower, get your sauce ready. Combine a quarter cup of Frank’s Red Hot Sauce with 1 tablespoon of honey and slather over the wings. Give them a toss and they are ready.

If you are into dipping things into other things, then make my “Frank’s Aioli.” Mix about 1/2 teaspoon of Frank’s Hot Sauce with 2 tablespoons of mayo and give ‘er a few cracks of pepper and you’re Gucci.
I’m very pleased with my personal growth. Let me help you achieve your culinary fry goals with this recipe! Happy frying!
Hot and Sweet Cauliflower Wings
Servings: 4
Prep time: 15 minutes
Cook time: 15-20 minutes
Ingredients:
- Canola or vegetable oil, to fry
- 1 small head of cauliflower, broken into florest
- 1/2 cup whole wheat flour (or all-purpose)
- 1/4 cup cornstarch
- 1 tsp paprika
- 1 tsp chili powder
- 1 tsp salt, plus more for seasoning
- 1/4 tsp pepper
- 1/4 cup canned coconut milk (or skip and add 1 whole cup of ‘other’ milk)
- 3/4 cup milk of choice (cashew, coconut, oat, etc.)
- 1/4 cup plus 1/2 tsp Frank’s Red Hot Sauce (or your favourite hot sauce), separated
- 1 tbsp honey
- 2 tbsp mayonnaise
- Scallions, sliced, for topping (optional)
Instructions:
- Set up your frying station by pouring the oil into a dutch oven, or heavy pot. Have at least 3 inches of oil in your pot. Place a thermometer in the pot and turn the burner on medium-high.
- Whisk together the flour, cornstarch, paprika, chili powder, salt and pepper in a medium bowl.
- Mix together the two milks and pour over the dry ingredients. Whisk until combined and then add the cauliflower, stirring to coat with the batter.
- When your oil temperature reaches 350 degrees F, use metal tongs to carefully drop in a few of the coated cauliflower florets, making sure you don’t crowd the pot as it will significantly bring the temperature down. Fry for 3-4 minutes, or until golden brown. Remove carefully with a stainless steel spider and place on a paper towel lined plate. Immediately season with a pinch of salt. Wait until the oil comes back up to temperature before continuing with the rest of the cauliflower.
- To make the sauce, combine 1/4 cup hot sauce with 1 tablespoon honey. Transfer the cauliflower wings to a large bowl and drizzle the sauce over them. Toss to combine.
- To make the aioli, combine the mayonnaise with 1/2 teaspoon of hot sauce and a pinch of pepper. Stir to combine.
- Top with sliced scallions and serve immediately.
The post Hot and Sweet Cauliflower Wings appeared first on Never. Not. Eating..
]]>The post Roasted Tomato Soup with Grilled Cheese Crouton Skewers appeared first on Never. Not. Eating..
]]>
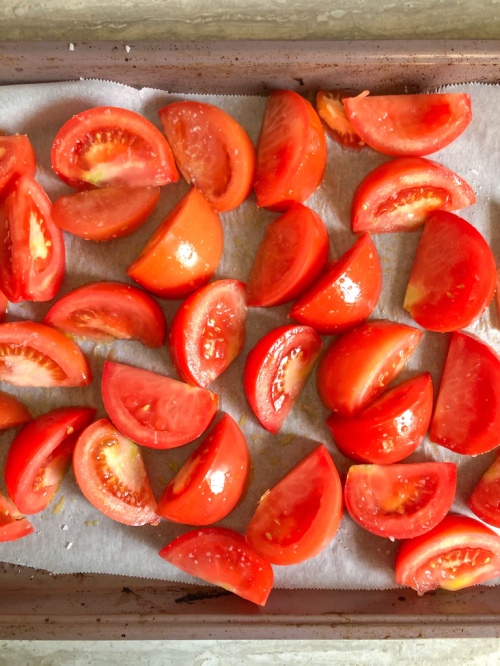
Tomato season is over where I am from, but soup season is just beginning, so I had to grab one more batch of fresh tomatoes to use to make this soup. It’s creamy and smooth and delicious. It’s just a warm, comforting classic.
My favourite part of this soup recipe is the roasted tomatoes. Roasting them just brings out a whole new flavour and caramelization that is always wanted. My second favourite part is the coconut milk, cuz that shizz creamy.
Here is what you will need for this super easy recipe:
- Tomatoes
- Onion
- Garlic
- Dried basil
- Salt
- Vegetable stock
- Canned coconut milk
- Bread slices
- A melting cheese, such as mozzarella
- A flavourful cheese, such as a sharp cheddar or gouda
I use my Simple Living Soup Maker to make this recipe. If you are a soupie, like me, you may want to invest in one. It’s my favourite way to make a post-work dinner. Soups are done in 30 minutes and it also makes smoothies, beverages, juices and batters. For this soup, I just throw everything in the soup maker after the roasting is done, turn it on and go watch Schitt’s Creek. The soup will be ready at the end of the episode. Also works with Friends, Sex and the City and The Big Bang Theory.

Who’s ready to get their slurp on?!
Roasted Tomato Soup with Grilled Cheese Crouton Skewers
Servings: 4
Prep time: 5 minutes
Cook time: 35 minutes
Ingredients:
- 4 large tomatoes, sliced into 1-inch wedges (I use vine tomatoes)
- 1/2 yellow onion, diced
- 2 cloves of garlic, peeled
- 1/2 tsp dried basil
- 2 cups vegetable stock
- 1 cup canned coconut milk
- salt
- olive oil
- 8 slices of bread (I like sourdough)
- 3 tablespoons of mayonnaise (or butter)
- 200 g cheese, shredded (I like to use a combination of mozzarella and cheddar)
- Fresh black pepper (for topping), optional
- Fresh basil (for topping), optional
Instructions:
- Preheat oven to 400 degrees Fahrenheit.
- Place tomatoes on a large baking sheet, drizzle with 1-2 tablespoons of olive oil and sprinkle with a few generous pinches of salt. Toss to coat and roast in the oven for 10 minutes. Remove and place the onion and garlic onto the baking sheet and toss again. Roast for another 10 minutes.
- Add the roasted tomatoes, garlic and onion to your soup maker along with the basil, vegetable stock and 1/4 teaspoon of salt. Place the lid on and set to “smooth.” Press “on.” Alternatively, place the tomatoes, garlic and onion into a large pot with the basil, vegetable stock and 1/4 teaspoon of salt. Bring to a boil and then reduce and let simmer for 15 minutes.
- While the soup is cooking, make the grilled cheese. Set a large pan over medium heat. Spread the mayo onto one side of each of the slices of bread. Build your sandwiches – bread (mayo side out), cheese, bread (mayo side out). Set your sandwich into the preheated pan and cook until golden brown on the first side, flip and repeat. Remove from pan and slice each sandwich into 8 crouton-sized cubes. Slide a skewer through the middle of each crouton. One sandwich will make two skewers with 4 croutons on each.
- (Skip to step 6 if using a soup maker) When the soup has simmered for 15 minutes, use an immersion blender to puree it. Alternatively, you can carefully pour it into a blender and blend until smooth, returning back to pot when done.
- Stir in the coconut milk. Taste and season accordingly. Ladle into four bowls and top each with two of the grilled cheese skewers, fresh black pepper and fresh basil, if desired.
The post Roasted Tomato Soup with Grilled Cheese Crouton Skewers appeared first on Never. Not. Eating..
]]>The post Pumpkin and Kale Pizza appeared first on Never. Not. Eating..
]]>
When an ingredient comes into season, you better believe I overdo it. Every. Single. Time. But seriously, that’s what we are supposed to do, right?! Eat local, eat seasonal. For our country, for our health.
The greatest part of this pizza is the pumpkin cream sauce. AKA the replacement tomato sauce. Garlic, thyme, homemade pumpkin puree, veggie stock, coconut milk. Simmer, simmer. Yes, please!

The crust – You can definitely buy store bought pizza dough and use that, but making your own dough is SO easy! You can find a recipe for flatbread in my blog post, found here.
The toppings – Originally, I made this pizza vegan, and I think I preferred it to the next one I made with mozzarella. The option is yours – leave out the cheese to have a completely vegan option (as seen below)!

Kale is another key topping here. As I always say, it is important to massage your kale before eating, and that applies to this recipe as well. Sprinkle it with some salt, drizzle with some olive oil and get in there with your fingers! It really helps to tenderize it and make it more pleasing to the palate.
Pumpkin – Along with the pumpkin cream sauce, I have also included roasted pumpkin chunks as a topping in this recipe. They add another layer and texture that does not disappoint and help give this ‘za it’s name!

This may just be a pizza recipe that you aren’t afraid to serve the kids!
Pumpkin and Kale Pizza
Serving Size: Makes 1 large pizza
Prep time: 20 minutes
Cook time: 45 minutes
Ingredients:
- 300 g homemade or store bought pizza dough
- 1 pie pumpkin, seeds removed and sliced into 3/4-inch wedges (or 1/2 cup pumpkin puree and 3/4 cup sliced and cooked pumpkin chunks)
- 2 cloves garlic, minced
- 2 sprigs of thyme, stem removed
- 1/4 cup vegetable stock
- 1/4 cup full-fat canned coconut milk
- 2 leaves of kale, washed, dried and chopped roughly
- 125 g fresh mozzarella, sliced (optional)
- salt
- olive oil
- fresh basil for topping (optional)
Instructions:
- Preheat your oven to 400 degrees Fahrenheit.
- Place your pumpkin wedges onto a baking sheet lined with parchment paper and drizzle with one tablespoon of olive oil and a few pinches of salt. Toss to coat. Roast in the oven for 30 minutes or until fork-tender, flipping halfway. Remove from oven and let cool for a few minutes. Peel the skin off and discard. Increase the oven temperature to 450 degrees.
- Place half of your roasted pumpkin pieces into a food processor or blender and blend until smooth. Slice the other half of the wedges into 1/2 inch pieces and set aside.
- Preheat a medium-sized saucepan over medium-low heat. Add one tablespoon olive oil followed by the minced garlic and thyme. Stir and let cook until fragrant (about 30 seconds). Add in 1/2 cup of the pumpkin puree and the vegetable stock. Stir until combined and let simmer for 2 minutes. Add the coconut milk and a pinch of salt and stir to combine. Let simmer on a low heat until the cream sauce thickens and coats the back of a spoon. Remove from heat.
- Place your kale into a bowl with one teaspoon of olive oil and a pinch of salt. Use your fingers to ‘massage’ the kale for one to two minutes. This helps to tenderize it. Set aside.
- Flour your work surface and roll out your pizza dough. Spoon on the cream sauce and spread it onto the dough until fully covered, leaving a 1/2-inch border all the way around. Distribute your cooked pumpkin pieces and your mozzarella slices (if using) on top of your pizza. Bake in the oven for 5 minutes, remove and add the massaged kale, and return to the oven for another 7-10 minutes or until crust begins to brown on the edges. Remove from oven and let cool for a few minutes before slicing.
- Top with fresh basil, if desired!
The post Pumpkin and Kale Pizza appeared first on Never. Not. Eating..
]]>The post Sweet Potato Fries appeared first on Never. Not. Eating..
]]>
This is a simple recipe. Simple, yet impactful. It took me a while to nail sweet potato fries. They are tricky little buggers. But, I’ve learned a few tricks along this long and winding road that have helped me up my SPG (Sweet Potato Game). Let me tell you what they are:

Trick #1 – Cornstarch. Dredge these fries with it to help with the crispy-factor. I use this trick with more than just potatoes, too. I ALWAYS sprinkle my tofu with cornstarch before frying it. It’s a surefire way to get that perfect texture on the exterior, and it’s gluten-free!
Trick #2 – Place your baking sheet into a hot oven for five minutes before dumping the SPF (Sweet Potato Fries) on it. When they hit the pan, they automatically start cooking and developing that gorg brown colour. It’s kind of like preheating a pan on your stovetop!
Trick #3 – Space out your SPFs. If you load a pan with too many fries, they won’t have room to crisp up, and will steam instead. Let them socially distance. It’s for the best.
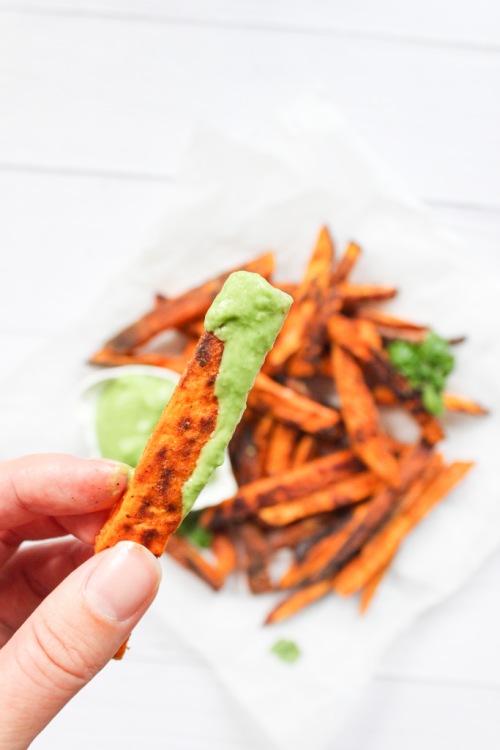
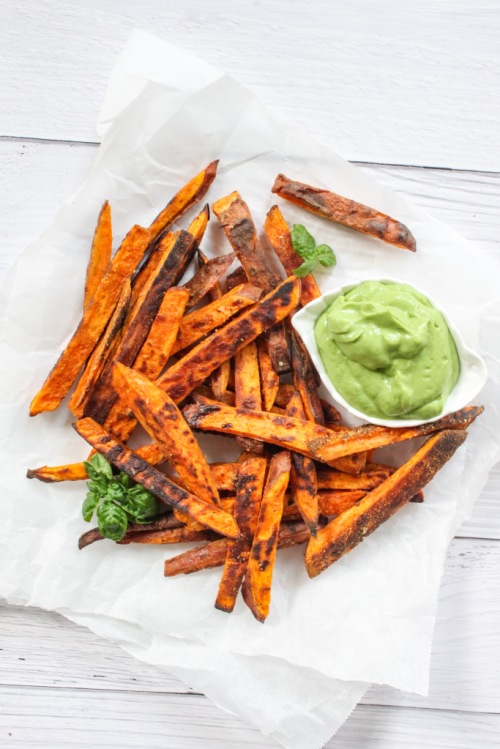
Well, now that I’ve given you all of my tricks, I only have one other thing to say – Dip these babies in my 5-Minute Good-on-Everything Green Sauce. Nothing else compares. Picture crispy sweet ‘tates dunkin’ in a pool of thick and creamy and greeny and herby and…freshy (?) sauce. And, then you eat them. Like, what?! A marriage of two extraordinary foods and memories that will last a lifetime.

If you make these SPF with my 5MGOETGS, take a pic and tag me on Instagram (@nevernoteatingca). I love seeing people make my recipes!
Also, if you understood that last paragraph, I applaud you.
Sweet Potato Fries
Serving size: 2
Prep time: 10 minutes
Cook time: 18 minutes
Ingredients:
- 1 large sweet potato, cut into long, 1/4 inch matchstick slices and patted dry
- 1 tbsp cornstarch
- 1/4 tsp paprika
- 1/4 tsp salt
- pinch of cayenne (optional)
- pinch of fresh black pepper
- olive oil
- sea salt, for topping
Instructions:
- Preheat oven to 425 degrees Fahrenheit. Place a large baking sheet into the oven while it preheats.
- In a small bowl, combine cornstarch, paprika, salt, cayenne and pepper.
- Add sweet potatoes to a large bowl and sprinkle the cornstarch mixture over them. Use your hands to toss the potatoes and dry ingredients together until coated.
- Carefully remove the baking sheet from oven and place sweet potato fries onto it. Be sure to space them out. Lightly drizzle some olive oil over the fries to help them crisp up.
- Bake for 10 minutes, flip and return to oven for another 5-8 minutes, or until browned and crispy.
- Finish with some flaky sea salt and serve with my 5-Minute Good-on-Everything Green Sauce.
The post Sweet Potato Fries appeared first on Never. Not. Eating..
]]>