The post Caramelized Pear Trifle appeared first on Never. Not. Eating..
]]>
WHAT IS A TRIFLE?
Trifle is an English dessert that usually includes alcohol-soaked cake, beneath layers of custard, fruit and whipped cream. There are many different ways to compose a trifle, but the key is for all of those beautiful ingredients to be layered in a glass bowl so they are visible to those who will be eating it.

THE LAYERS OF THIS CARAMELIZED PEAR TRIFLE
This may not be your traditional trifle, but nothing I do is traditional, so you’ll have to excuse me as I add my own flair to my recipes. This trifle includes four delicious layers – a winter spiced pear cake, gooey caramelized pears, a crunchy walnut crumble and fluffy vanilla whipped cream.
Winter Spiced Pear Cake – This cake is one of my favourites, as it’s actually completely vegan (if you want to make it on it’s own), and gluten-free! I add ginger, cinnamon and nutmeg, to give it that warm, cozy, winter appeal.
Caramelized Pears – You can’t have a caramelized pear trifle without caramelized pears! Finely diced pears warmed with brown sugar and cinnamon – these pears are to-die-for in this trifle, and on their own…by the spoonful!
Crunchy Walnut Crumble – Dessert isn’t dessert without a crunch factor, and this is it. Toasted walnuts tossed with melted butter and sugar bring this dessert to life!
Vanilla Whipped Cream – The perfect and prettiest topping to finish it all off!

HOW TO MAKE THIS DESSERT FULLY VEGAN
The cake itself is actually a fully vegan cake, so if you would like to keep this dessert vegan, follow the instructions below:
- Make the cake layer in the exact same way.
- For the caramelized pear and crunchy walnut layers – substitute regular butter for vegan butter.
- For the whipped cream, use canned coconut milk that has been chilling in the fridge for at least 24 hours, instead of whipping cream. Scoop the top, solid milk from the can and whip in the same manner as the recipe suggests!

THE PERFECT TIME TO MAKE THIS TRIFLE
When I think of pears, I often think of winter and warm spices. This trifle would definitely be a kick-ass dessert to serve during any fall or winter holiday – Thanksgiving, Christmas, New Year’s – you name it! Each individual component can be made the day before and then assembled prior to serving. This is definitely a dessert that feeds a crowd!
OTHER DELICIOUS LAYERED DESSERTS YOU MUST TRY:
Vegan Coconut Panna Cotta with a Mango Compote (made in individual serving cups!)
Dark Chocolate Almond Butter Bars (what’s better than nut butter + chocolate?!)
This post contains affiliate links and I may earn a small commission when purchases are made after clicking the links, at no cost to you. Thank you!
Caramelized Pear Trifle
*I highly recommend reading through this recipe in full first, before making.
Serving size: 8-10
Prep time: 45 minutes
Cook time: 35 minutes
Ingredients
For the spiced cake layer:
- 1 cup full-fat, canned coconut milk
- 1 tbsp apple cider vinegar
- 3/4 cup brown sugar, packed
- 1 banana, mashed
- 2 tsp vanilla
- 2 cups gluten-free flour, plus 1 tbsp for dusting cake pans, I use Bob’s Red Mill
- 1 tsp cinnamon, separated
- 1/2 tsp dried ginger
- 1/4 tsp nutmeg
- 1 tsp salt
- 3/4 tsp baking powder
- 1/2 tsp baking soda
For the caramelized pear layer:
- 2 tbsp unsalted butter (or vegan butter)
- 4 pears, small dice (I like to use Bartlett)
- 1/4 cup brown sugar
- 1/2 tsp cinnamon powder
- pinch of salt
For the crunchy walnut layer:
- 1 cup walnuts, chopped into small pieces
- 2 tbsp unsalted butter (or vegan butter), melted
- 1 tbsp brown sugar
- pinch of salt
For the vanilla whipped cream layer:
- 2 cups heavy whipping cream
- 2 tbsp powdered sugar
- 1 tbsp pure vanilla extract
Instructions
For the spiced cake layer:
- Preheat oven to 350 degrees Fahrenheit and prepare two, six-inch cake pans by buttering, lining the bottom with parchment, and dusting with some of the gluten free flour.
- Stir the apple cider vinegar into the coconut milk and set aside.
- Using a stand mixer or a hand mixer, beat together the brown sugar, banana and vanilla in a large bowl until combined.
- In a separate, medium bowl, sift the flour, cinnamon, ginger, nutmeg, salt, baking powder and baking soda.
- In a few additions, alternate between adding the dry ingredients and coconut milk to the banana mixture, beating until combined and smooth.
- Divide batter evenly between pans and bake for 25-30 minutes, or until inserted toothpick comes out clean.
- Let cool in pan for 5 minutes and then transfer to wire rack to finish cooling.
For the caramelized pear layer:
- Place all ingredients in a saucepan over medium-low heat and cook until the pears are soft, approximately 10 minutes. Remove from heat and set aside while preparing the remainder of the ingredients.
For the crunchy walnut layer:
- Preheat oven to 350 degrees Fahrenheit.
- Place walnuts on a parchment lined baking sheet and toast in the oven for 5-10 minutes, watching very carefully – they burn quickly! Remove when they are starting to look a bit more brown in colour and they become fragrant.
- Mix the walnuts with the melted butter, brown sugar and a pinch of salt and set aside.
For the vanilla whipped cream layer:
- Place a large bowl and beaters into the freezer for at least 15 minutes.
- Pour the heavy whipping cream into the cold bowl and beat on medium-high speed with the cold beaters, until soft peaks form. Add in the powdered sugar and beat again until medium peaks form (about 1-2 minutes in total). Add the vanilla and beat until just combined.
To assemble this Caramelized Pear Trifle:
- Slice the cake rounds into cubes and place 3/4 of them on the bottom of your glass trifle bowl.
- Spoon over half of the caramelized pears.
- Sprinkle half of the crunchy walnuts.
- Top with half of the whipped cream.
- Repeat steps 1-4 with the remaining ingredients and finish it off with a dusting of cinnamon on top! Enjoy!
I recommend serving this trifle immediately. It can be stored in the fridge for up to two days.

The post Caramelized Pear Trifle appeared first on Never. Not. Eating..
]]>The post Brown Sugar Candied Walnuts appeared first on Never. Not. Eating..
]]>
WHAT ARE BROWN SUGAR CANDIED WALNUTS?
Candied walnuts are a crunchy, crispy treat that make a perfect topper for many dishes. They are made by mixing walnuts into a caramel-like candy made from sugar and butter. When the walnuts are added to the hot sugar, the mixture coats the nuts, getting into all of their glorious nooks and crannies. After cooling, the candied walnuts become crunchy, sweet little bites of perfection!
WAYS TO USE BROWN SUGAR CANDIED WALNUTS
There are no limits to how to use candied walnuts. Here are my favourites:
- eat them on their own
- top salads with them
- add them as a topping on smoothie bowls
- mix them into oatmeal
- top yogurt with them

THE INGREDIENTS
As the title states, you only need three ingredients to make this simple recipe. All of which you likely have in your kitchen already:
- walnuts
- butter
- brown sugar
I also LOVE adding this flaky sea salt to them (this is totally optional – but, you should do it…trust me)!
TRY BROWN SUGAR CANDIED WALNUTS ON:
Pear, Gorgonzola and Candied Walnut Salad (so delicious and perfect for dinner parties)
Beet and Orange Salad with Goat Cheese (the perfect sweet and savoury side)
Power Boosting Smoothie Bowl (an extra crunch on top of a creamy smoothie bowl)

OTHER TOPPERS YOU NEED TO TRY
Avocado Croutons (perfect for salad)
Homemade Brown Butter Granola (amazing on yogurt or with a smoothie bowl)
Let’s make some candied walnuts!
This post contains affiliate links and I may earn a small commission when purchases are made after clicking the links, at no cost to you. Thank you!
Crunchy 3-Ingredient Candied Walnuts
Serving size: Makes 1 cup walnuts
Prep time: 5 minutes
Cook time: 15 minutes
Ingredients
- 1 cup raw walnuts, halved
- 1/4 cup packed brown sugar
- 3 tbsp butter
- flaky sea salt (optional)
- Preheat the oven to 350 degrees Fahrenheit.
- Place the walnuts on a baking sheet and toast in the oven for 5-8 minutes, or until lightly browned and fragrant. Watch carefully as they burn easily! Remove and set aside.
- In a small pot over medium heat, melt the butter and brown sugar until the sugar starts to bubble. Add the walnuts and cook another 2 minutes. Spread the mixture onto a parchment lined baking sheet and immediately sprinkle with a few pinches of salt and separate with a fork. Let cool completely, about 10 minutes, before enjoying!
Store in an airtight container.
The post Brown Sugar Candied Walnuts appeared first on Never. Not. Eating..
]]>The post Brown Butter Nutty Granola appeared first on Never. Not. Eating..
]]>- Christmas is coming
- You need a hostess gift
- You like nuts
Truly – this is the best, most perfect, thoughtful, fast, easy, cheap and delicious gift that you could give to someone for hosting you over the holidays. I wouldn’t lie to you. Scout’s honour.
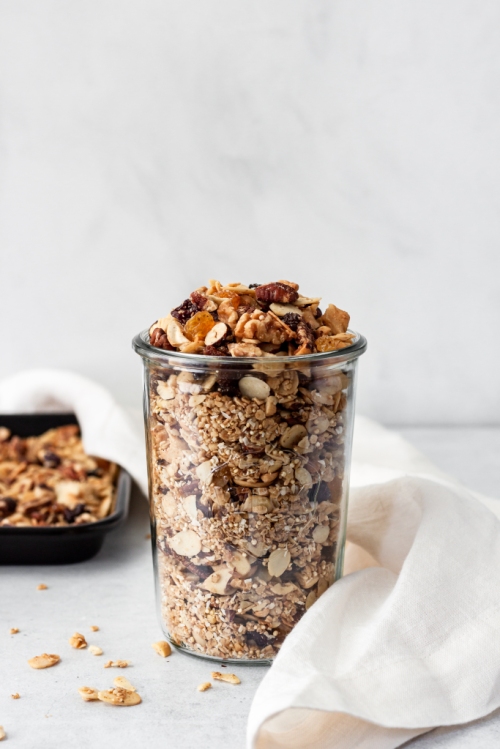
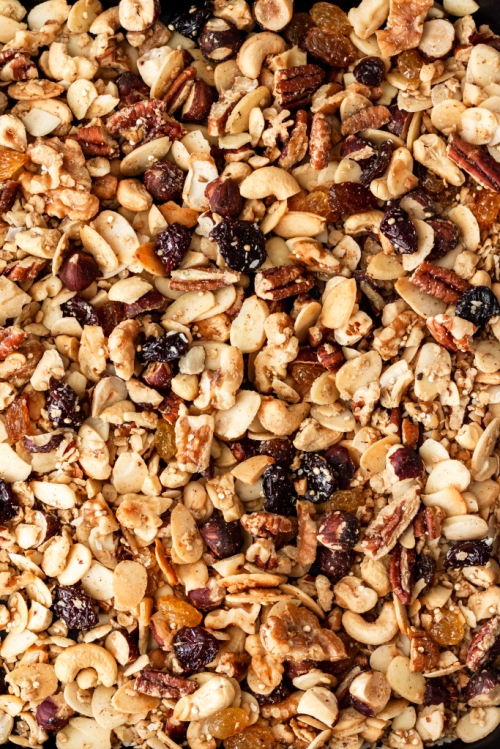
This granola recipe boasts all things Christmas – warm spices, toasted nuts, jeweled cranberries…and brown butter – the best part. Grab a few small mason jars and fill ’em up, tie some bows and get ready to have a handful of new best friends.
Alright, less talk, more granola.

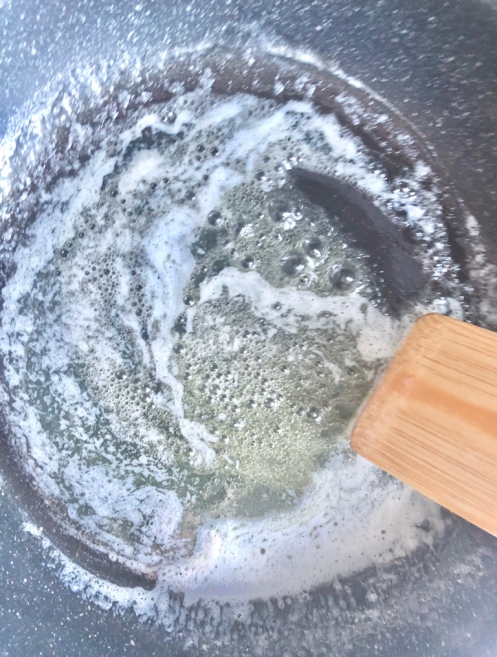
First step: Make the brown butter. Add a quarter cup of cold butter to a pan over medium-low heat. Let the butter foam up and become fragrant, stirring often.
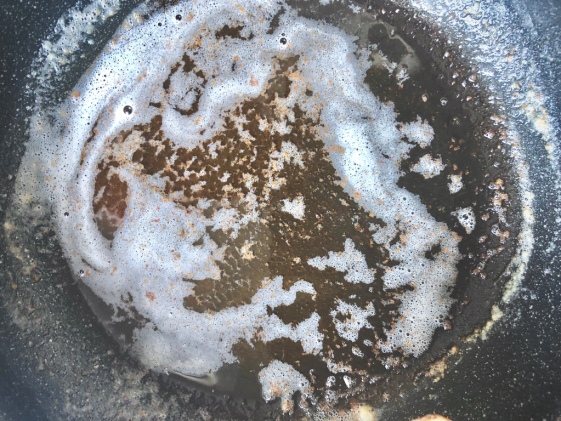
It will begin to develop brown bits on the bottom of the pan (5 minutes or so) – remove from heat and let cool (put it in the fridge or freezer to speed up this process).
Secondly: Grab the biggest bowl you own. We’re not messin’ around.
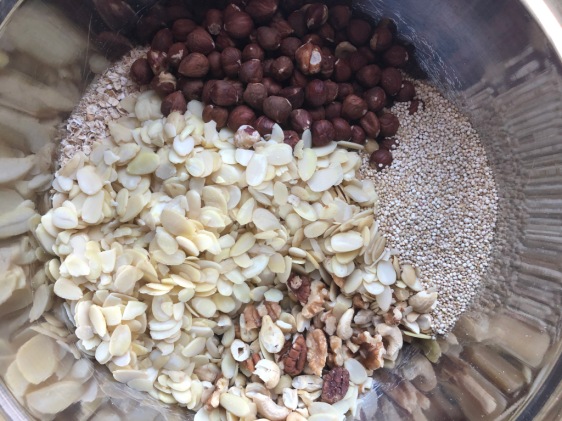
Dump in 2 cups of rolled oats, 6 cups of your favourite types of nuts (I do one cup pecans, one cup walnuts, one cup cashews, two cups slivered almonds and one cup hazelnuts) and half of a cup of quinoa. Set aside.
Next: In a small measuring cup, whisk together three-quarters of a cup of maple syrup, the cooled brown butter, half a teaspoon vanilla, half a teaspoon cinnamon and a quarter of a teaspoon of nutmeg.
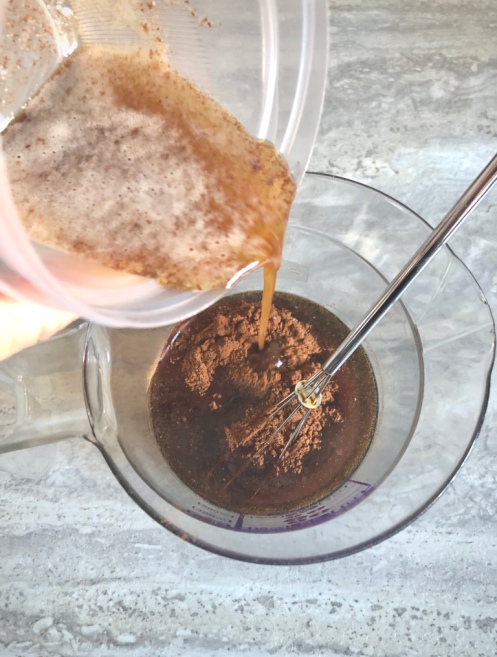
Pour over the nut mixture and stir, making sure everything is coated nicely.
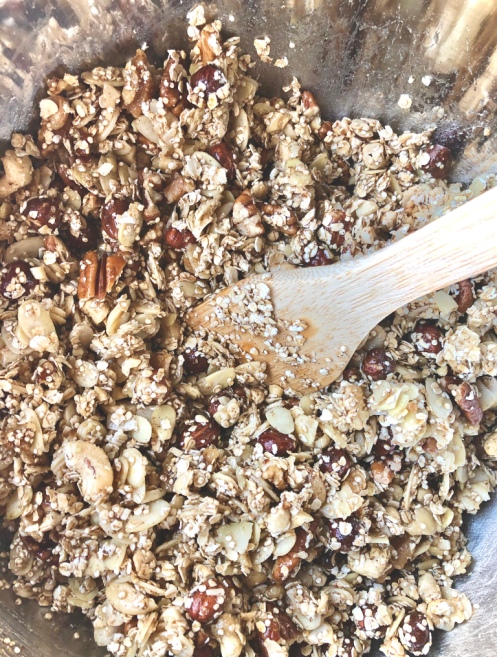
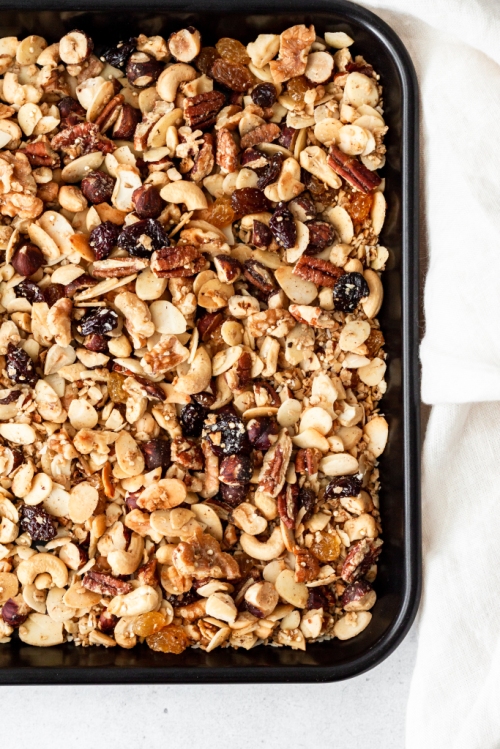
Transfer to a baking sheet that is lined with aluminum foil and bake in a 375 degree oven for 30-35 minutes, stirring often to prevent burning. Add large coconut flakes for the last two minutes of baking. Remove from oven and add some golden and sultana raisins as well as a handful of dried cranberries and a bunch of flaky sea salt. Cool for twenty minutes before putting into jars or storing in airtight containers.
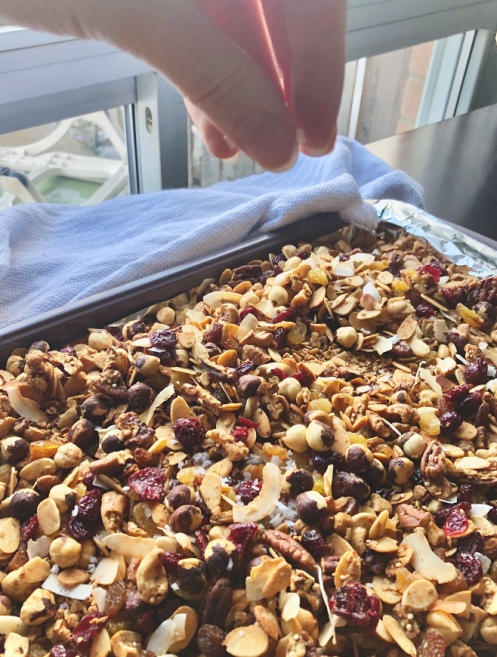
*I highly recommend using heavy duty aluminum foil for this as thinner foil can rip easily when you are stirring the granola. No one likes tin flakes in their food!
Brown Butter Nutty Granola
Yield: 8 cups
Prep time: 10 minutes
Cook time: 35 minutes
Ingredients:
- 1/4 cup cold butter
- 2 cups quick (or rolled) oats
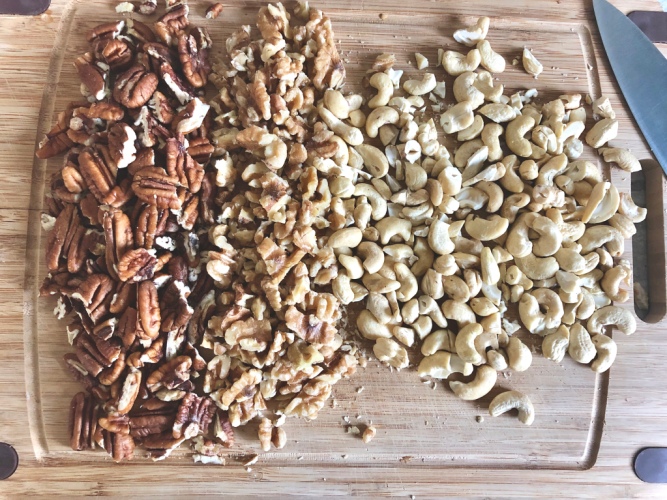
- 1 cup pecans, rough chop
- 1 cup walnuts, rough chop
- 1 cup cashews, rough chop
- 2 cups slivered almonds
- 1 cup hazelnuts, rough chop
- 1/2 cup raw quinoa
- 3/4 cup pure maple syrup
- 1/2 teaspoon vanilla
- 1/2 teaspoon cinnamon
- 1/4 teaspoon nutmeg
- 1/2 cup large flake coconut
- 1/3 cup sultana raisins
- 1/3 cup golden raisins
- 1/3 cup dried cranberries
- 1/2 tbsp – 1 tbsp flaky sea salt
Instructions:
- Add butter to a medium-sized pan over medium-low heat. Cook, stirring often, until you see brown bits begin to form on the bottom of the pan (about 5 minutes). Remove from heat immediately and cool completely (speed up cooling process in fridge or freezer). Do not burn the butter!
- Preheat oven to 375 degrees Fahrenheit and line a large baking sheet with heavy duty aluminum foil.
- In a very large mixing bowl, add the oats, nuts and quinoa.
- In a small measuring cup, measure out the maple syrup. Add the cooled brown butter, vanilla, cinnamon and nutmeg and whisk until combined. Drizzle over the nut mixture and toss until everything is coated. Spread evenly on the foil-lined baking sheet. Bake granola in oven for 35 minutes, stirring frequently to avoid burning. During the last five minutes, add the flaked coconut. The granola is ready when everything is a golden brown colour.
- Remove from oven and add the raisins, cranberries and sea salt to taste (don’t skip the salt!!!).
- Let cool completely before storing in an airtight container.
The post Brown Butter Nutty Granola appeared first on Never. Not. Eating..
]]>The post Easy Butternut Squash Fettuccine “Alfredo” with Whipped Ricotta appeared first on Never. Not. Eating..
]]>- Smooth and rich like an alfredo but without the dairy and calorie count
- Vegetable bonus blended right into the sauce
- A lot less fat content than regular alfredo
- Cloud-like whipped ricotta (okay, it’s dairy, but some things are just worth it)
That is all. Hopefully you are convinced.

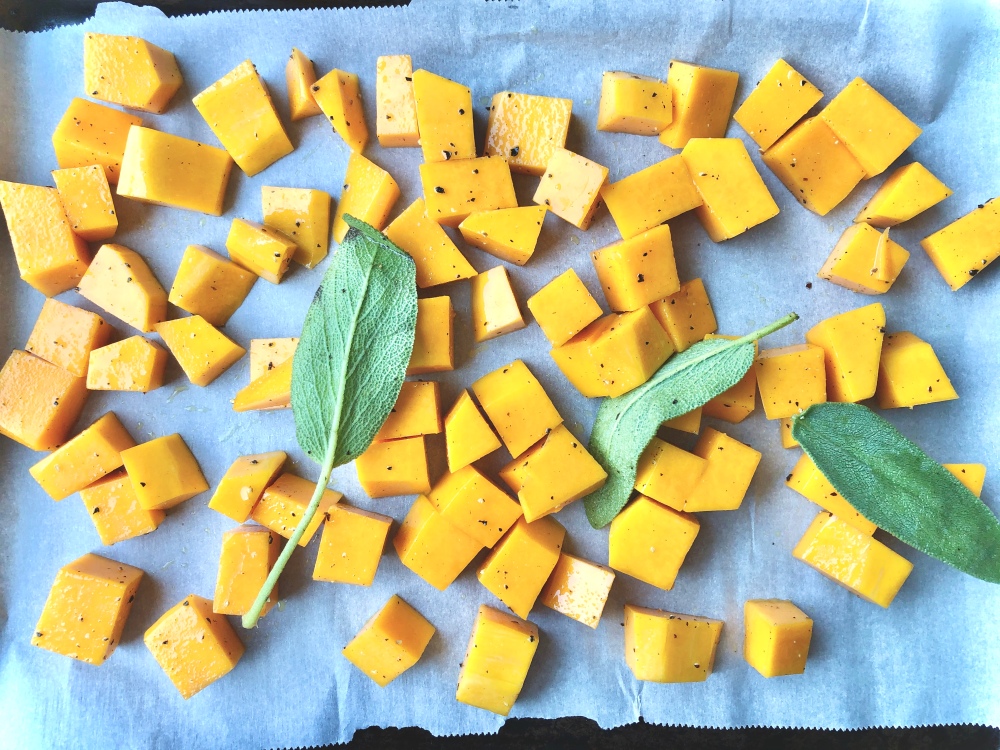
This recipe starts like any good vegetarian recipe – with a few cups of roasted vegetables. So sharpen your knife and start cubin’ up that butternut squash, add a few sage leaves, do the drizzy with some EVOO and season with S & P! Pop it in the oven and forget about it (well, for 20 minutes, until you have to give ’em a toss)!
In the meantime, throw some fettuccine into a pot of heavily salted boiling water and cook until al dente.
When the squash is slightly caramelized and tender, remove from oven and let’s start the transformation from solid –> liquid(ish). Grab your blender – I use my Ninja for everything…it is A.M.A.Z.I.N.G. – transfer the squash and some veggie stock and blend until smooth.
On the same sheet tray that you had the squash on, add two tablespoons of breadcrumbs and a quarter cup of chopped walnuts and put back into the oven to toast up. This only takes a few minutes, so watch carefully! When browned, remove from oven and toss in a few finely chopped sage leaves and some melted butter and set aside…YUM.
Let’s continue shall we…I’m drooling. Okay – grab a pan, heat some olive oil and saute some diced shallots until transparent. Add in a few cloves of minced garlic and it’s ready for the sauce. Pour in the butternut squash puree and add some more stock to the pan, cooking and stirring until smooth and combined.
Next, add half of a cup of canned coconut milk and simmer for a few minutes until sauce has thickened.
While the sauce is finishing, grab your ricotta from the fridge and beat with a hand mixer with 1 tablespoon of freshly squeezed lemon juice, a pinch of salt and a few grinds of pepper. Whip until it is smooth and creamy and spreadable and marvelous.

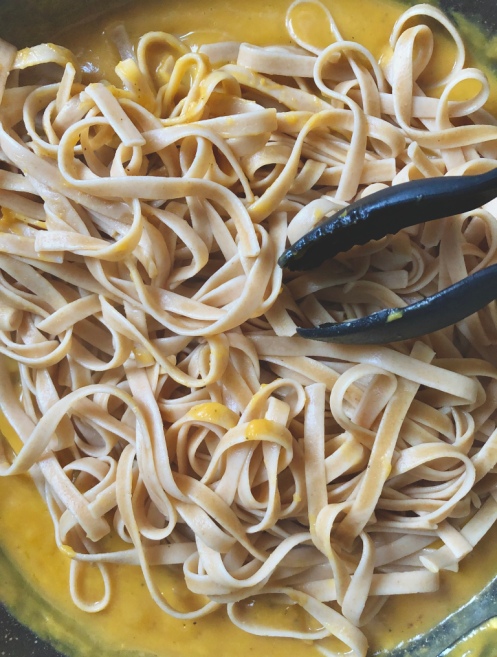
The Grand Finale: When the sauce coats the back of a spoon, it’s ready for it’s best friend – pasta – to join it in the pan. Toss the pasta around with a pair of tongs and be sure to coat every last strand with that velvety sauce. Turn the heat off and add a squeeze of lemon juice to bring it altogether.
Plating: Start with the whipped ricotta. Maybe even be fancy and make a little “swoop” on your plate!

Next, add the fettuccine, and then top with the bread crumb/walnut mixture. And now it’s time to manger, manger (that’s French, mmmm kay?!)!

One question – Are you a “use a spoon to assist in the delicate twirling of the noodles around your fork” kind of person, or a “shove noodles in mouth as quickly as possible, I’m not worried about whether they are hanging from my mouth” kind of person? Because I’m definitely number two.

^ A twirling attempt…strictly for pictures.
Easy Butternut Squash Fettuccine “Alfredo” with Whipped Ricotta
Servings: 4
Prep time: 15 minutes
Cook time: 40 minutes
Ingredients:
- Olive oil
- 3 cups of butternut squash, cubed
- 6-8 sage leaves, separated
- 325 g fettuccine (or 4 serving sizes)
- 1/2 cup ricotta cheese
- 1.5 tablespoons fresh lemon juice, separated
- 2 tbsp bread crumbs
- 1/4 cup walnuts, finely chopped
- 1 tbsp butter, melted
- 1 cup vegetable stock, separated
- 1 shallot, finely diced
- 2 cloves garlic, minced
- 1/2 cup canned coconut milk
- salt and pepper to taste
Instructions:
- Preheat oven to 375 degrees F.
- Line a baking sheet with parchment paper and add squash, 1 tbsp olive oil, 3-4 sage leaves, a few pinches of salt and some fresh black pepper and toss to coat. Place in the oven and roast for 30-40 minutes or until you see slightly caramelized edges and squash is fork-tender.
- Meanwhile, bring a pot of heavily salted water to a boil and add fettuccine. Cook until the pasta is al dente (according to package directions…or taste one)! Reserve one quarter cup of the pasta water and then drain the fettuccine and set aside.
- For the whipped ricotta: Add ricotta, 1 tablespoon of lemon juice and a pinch of salt and pepper to a medium bowl. Use a hand mixer and whip on medium speed until ricotta is smooth and fluffy – about 3-4 minutes. Place in fridge to keep cool.
- For the crumb topping: On a baking sheet lined with parchment paper, toast the bread crumbs and walnuts in the oven for about 5-8 minutes, or until golden brown. Watch carefully so they don’t burn. Remove from oven and add 3-4 finely chopped sage leaves and the melted butter. Toss and set aside.
- When the squash is done cooking transfer to a blender (don’t discard the sage leaves, transfer to blender as well) and add 1/2 cup of vegetable stock. Blend until smooth.
- Heat a tablespoon of olive oil in a large pan over medium-low heat. Add the shallot and saute for a few minutes until it starts to turn translucent. Add the garlic and cook for 30 seconds, or until fragrant. Pour the blended squash into the pan and add the quarter cup of pasta water and the other 1/2 cup of stock, stirring for a few minutes until smooth. Add the coconut milk and simmer until it thickens and coats the back of a metal spoon. Squeeze a bit of lemon juice overtop of the sauce and then add the pasta. Turn the heat off and toss the pasta around until coated with the sauce.
- To plate, spread some whipped ricotta on the bottom of your plate. Add the pasta on top and then sprinkle with the bread crumb/walnut crumble. Bravo!
The post Easy Butternut Squash Fettuccine “Alfredo” with Whipped Ricotta appeared first on Never. Not. Eating..
]]>