The post Vegan Mocha Buttercream appeared first on Never. Not. Eating..
]]>
This recipe has the word “vegan” in front of it, but if you aren’t vegan or prefer to use dairy-based products, you can make 1:1 swaps at any point!
I love how simple, yet different this recipe is. If you are looking for a change from your normal chocolate and vanilla frostings, this is IT. Trust me, it’s so good.
The Ingredients
Here is what you will need:
- vegetable shortening
- vegan butter
- salt
- vanilla
- cocoa powder
- instant coffee
- powdered sugar
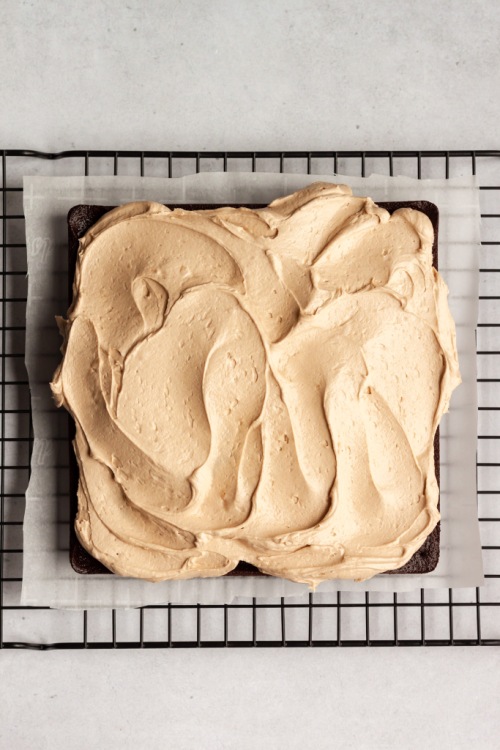
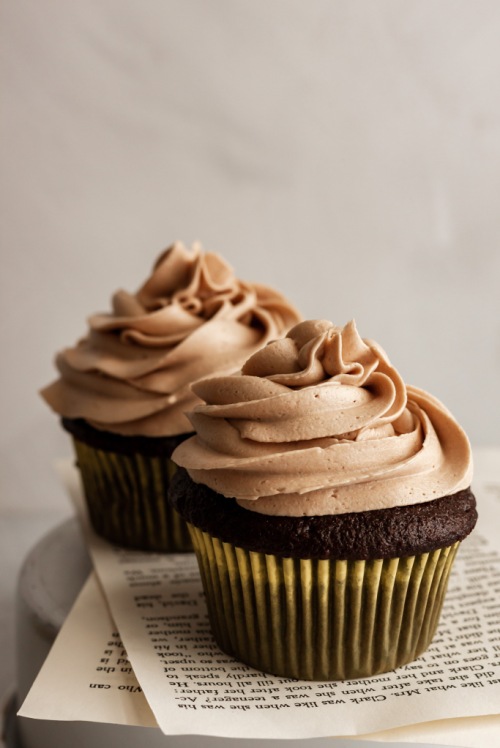
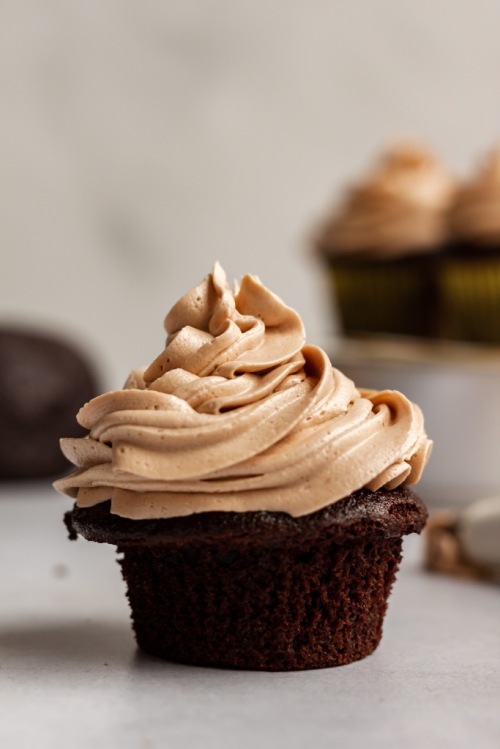
Use a stand mixer to bring all of the ingredients together and you will have a light, fluffy, perfect buttercream. It’s great for frosting cakes or cupcakes with. I love it on a rich chocolate cake!
Check out that swirly swirl!
This post contains affiliate links and I may earn a small commission when purchases are made after clicking the links, at no cost to you. Thank you!
Vegan Mocha Buttercream
Servings: Makes about 4 cups
Prep time: 10 minutes
Ingredients:
- 1/2 tbsp instant coffee
- 1/2 cup vegetable shortening*
- 1/2 cup vegan butter, softened**
- 1/2 tsp vanilla extract
- pinch of salt
- 2 teaspoons cocoa powder, sifted
- 4 cups powdered sugar
- 1-3 tbsp plant-based milk (I prefer oat milk, but you can use almond, cashew, coconut or soy)
Instructions:
- Stir the instant coffee together with three tablespoons of boiling water until dissolved. Set aside.
- Add the shortening and vegan butter to a stand mixer and mix with paddle attachment on medium speed until light and fluffy. Add in the vanilla, salt and cocoa powder and mix until combined.
- Add one cup of powdered sugar and turn the mixer on low. Pour in about half of the coffee and mix until incorporated. Add another cup of powdered sugar, followed by the rest of the coffee and continue mixing. Add the third cup of powdered sugar, followed by one tablespoon of the milk. Finally, incorporate the last cup of sugar and another tablespoon of milk, if needed. Beat until smooth and you have achieved your desired consistency. If the buttercream is too stiff, add the remaining tablespoon of milk and beat to incorporate.
- Use immediately or store in an airtight container in the fridge for up to 5 days.
NOTES:
*You can use all shortening if you do not have vegan butter.
**This can be substituted for regular, softened butter if desired.

The post Vegan Mocha Buttercream appeared first on Never. Not. Eating..
]]>The post Grilled Peaches with Cinnamon Coconut Whipped Cream and a Balsamic Reduction (Vegan & GF) appeared first on Never. Not. Eating..
]]>
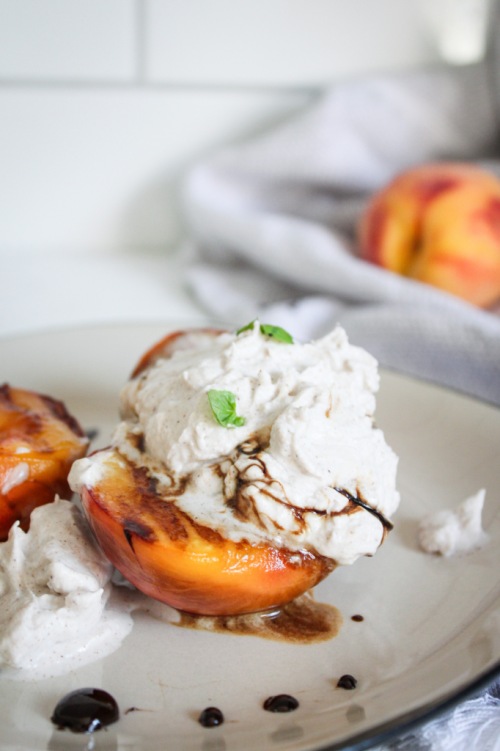
Okay, picture this – you are watching the abnormally late NBA playoffs (thanks, Covid), and you’re eating your wings, nachos and burgs. Halftime comes and you need something sweet. Why not fire up the BBQ and throw on some peaches? Dress them up with some coconut whip cream? A little sweet balsamic reduction? Yes, yes and yes. I vote yes.
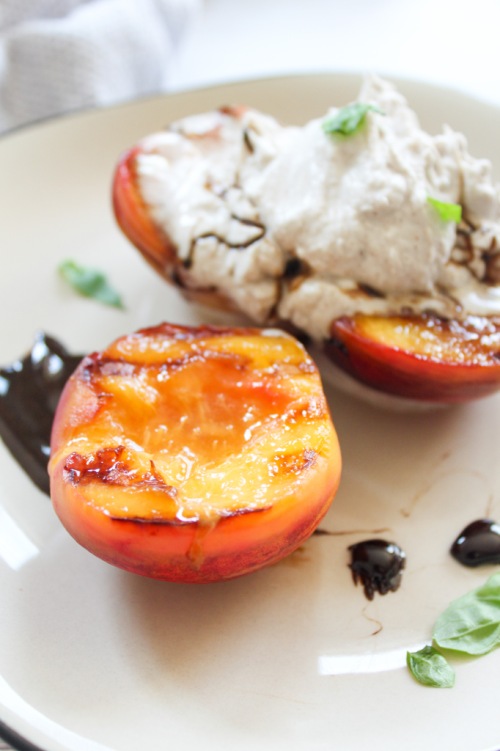
Even easier, you can use a cast iron grill pan on your stovetop. I use the one found here, and I love it! It’s perfect for those without a barbeque, or anyone who just wants an easier clean-up. All you need to do is set it over medium-high heat and brush the peaches with olive oil before cooking them for about 2-3 minutes per side. They will still develop those beautiful grill marks that you get on the Q, just with less hassle.
The coconut whip cream is my favourite. As a traditional whip cream lover, finding a vegan alternative was super exciting. This part is a bit tricky, as you need to find a can that solidifies properly when you store it in the fridge. I have found that 365 Everyday Value and Aroy-D are the best for this. To make the whipped cream, place a can of coconut milk in the fridge for at LEAST 24 hours. The longer, the better. Also, try not to shake the can too much before placing it in the fridge. The coconut milk and water will naturally separate, and we want to keep it that way, so shaking it before refrigerating it will slow the process of separation and then solidification.
When it is time to make the whipped cream, place your mixing bowl and mixers into the freezer to get super cold, about 15 minutes before you plan on beginning. Carefully open the can (without shaking) and scoop out the firm top part into your bowl. You will notice a clearer liquid at the bottom of the can (the water) – do not add this to the bowl. Save this and add to a morning smoothie! Add some cinnamon and vanilla to the coconut milk and whip until soft peaks form. Next, add in your sugar – I like to use maple syrup, but you can use powdered sugar as well. Continue beating until stiff peaks form. It is unlikely that they will become as stiff as regular whip cream, but sometimes I put the bowl in the freezer for ten minutes and re-whip for a few more seconds before serving. This usually does the trick!
For the balsamic glaze, place some balsamic vinegar with a dash of maple syrup into a small pot and bring to a gentle simmer. Let it reduce for about eight minutes. TIP: Keep the pot over the lowest heat up until you use the reduction, as it cools quickly and becomes very sticky.
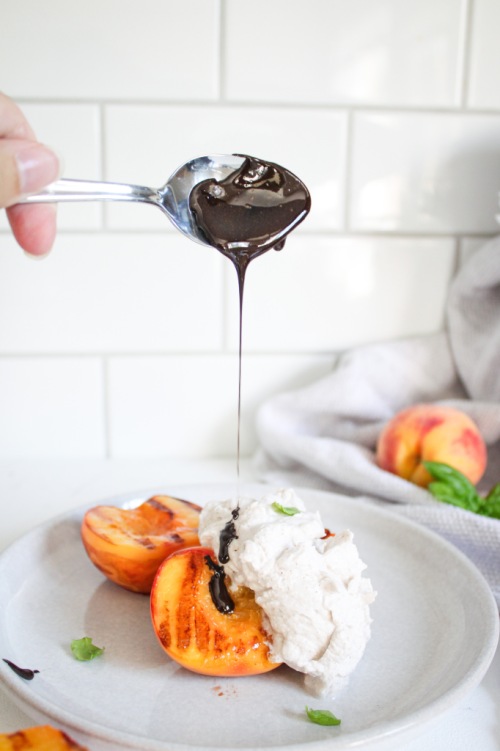
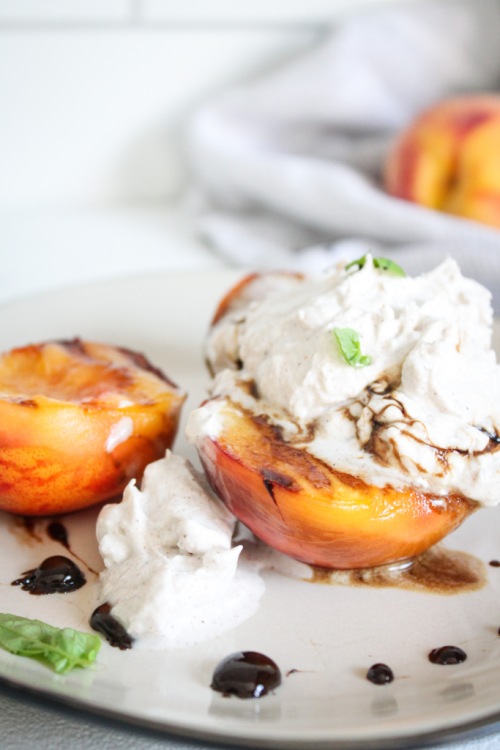
Now, grab a plate, put the peaches down, scoop on some whipped cream and drizzle with that lush reduction! It’s the freshest summer dessert one could ask for!
Grilled Peaches with Cinnamon Coconut Whipped Cream and a Balsamic Reduction (Vegan & GF)
Servings: 4
Prep time: 15 minutes
Cook time: 10 minutes
Ingredients:
- 1 14 oz can of full-fat coconut milk (I like Aroy-D and 365 Everyday Value), refrigerated for at LEAST 24 hours
- 1/2 tsp cinnamon powder
- 1/2 tsp pure vanilla extract
- 2 tbsp pure maple syrup (or confectioner’s sugar), divided
- 1/2 cup balsamic vinegar
- 4 peaches, halved and pits removed
- olive oil
Instructions:
- Place a medium bowl and your beaters into the freezer for at least 15 minutes.
- Remove the coconut milk from the fridge and carefully open it, without shaking. Scoop the top, white part into the cold bowl. You will see a clearer liquid at the bottom (the water), DO NOT add this to the bowl (save for morning smoothies). Add the cinnamon and vanilla to the coconut milk and whip on high until soft peaks. Add one tablespoon of syrup (or sugar) and whip again until stiff peaks form.* Place in the fridge while preparing the rest of the recipe.
- To a small pot over medium heat, add the balsamic and the remaining tablespoon of maple syrup. Bring to a gentle simmer and let cook down for about 8 minutes, stirring frequently. Turn the heat to the lowest setting to keep the reduction loose and drizzle-able. It cools quickly and becomes very sticky, so keeping it on the lowest heat prevents it from becoming taffy-like.
- Set your grill to medium-high heat and brush the peach halves with olive oil (I like to use my cast iron grill pan for this). Place the peaches cut side down onto your grill and cook for about 2 minutes, without touching them. Flip and cook for another three to four minutes, or until tender but not too soft.
- Place your peaches on a plate, top with the coconut whipped cream and drizzle with the balsamic reduction!
NOTES:
*Coconut whipped cream will not always create stiff peaks, as regular whipped cream does. It depends on how hot your kitchen is. If your whipped cream is looser, place the bowl back in the freezer for 10 minutes and re-whip for a few seconds when ready to plate.
The post Grilled Peaches with Cinnamon Coconut Whipped Cream and a Balsamic Reduction (Vegan & GF) appeared first on Never. Not. Eating..
]]>The post Vegan Coconut Panna Cotta with a Mango Compote appeared first on Never. Not. Eating..
]]>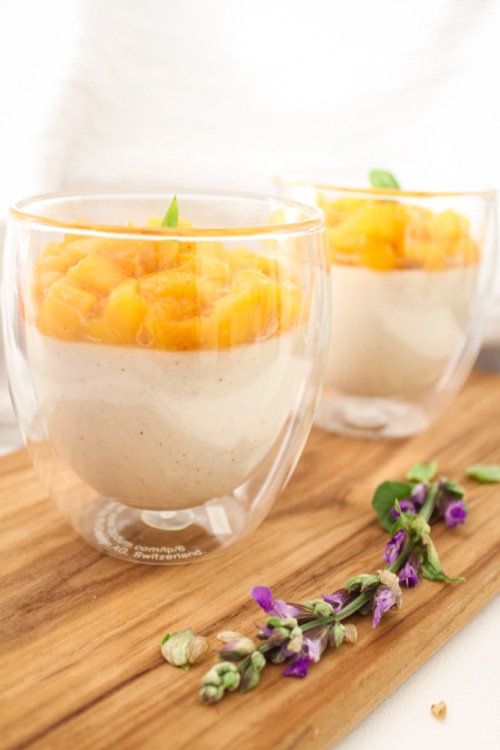
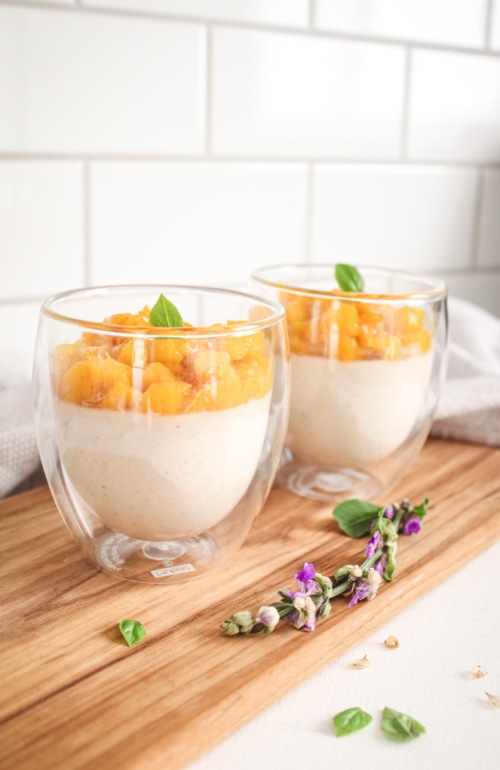
This vegan dessert mimics the OG Italian dessert. “Panna Cotta” means “Cooked Cream” in Italian, and I give you just that! Minus the cream, sub the coconut milk – My fav! It’s smooth, creamy, sweet and fruity. The perfect make-ahead dessert!

This dessert consists of two parts – the panna cotta and the fruit compote on top. For the panna cotta, you are going to need:
- Full-fat coconut milk
- maple syrup (or your choice of sugar)
- agar agar (a vegan gelatin)
- cinnamon
- nutmeg
- salt
For the compote, you will need:
- One mango
- cinnamon
- nutmeg
- salt
- citrus juice (lime or lemon)
- maple syrup
It may seem like a daunting task, but trust me…It’s the simplist dessert imaginable! It takes about 10 minutes to make each part and then all you have to do is wait until it sets up in the fridge! So easy. More delicious. Panna cotta pefection.
Here is the recipe.
Vegan Coconut Panna Cotta with a Mango Compote
Serving size: Makes 3 desserts
Prep time: 10 minutes
Cook time: 20 minutes
Set time: 1 hour
Ingredients:
For the Panna Cotta:
- 1 14-oz can of full-fat coconut milk
- 1/4 tsp cinnamon
- pinch of fresh nutmeg
- 3/4 tsp agar agar
- 1/4 cup maple syrup (or sugar of choice)
- pinch of salt
For the Mango Compote:
- 1 mango, small dice
- 1 tbsp maple syrup
- 2 tbsp freshly squeezed citrus juice (I use half lemon, half lime)
- pinch of cinnamon
- pinch of fresh nutmeg
- pinch of salt
Instructions:
- Bring the coconut milk to a boil in a small saucepan with cinnamon and nutmeg, watching carefully to avoid boiling over. Once boiling, add agar agar and reduce heat. Whisk for one minute and then add the maple syrup and salt. Simmer on low for another two minutes, whisking occasionally. Strain through a fine mesh sieve into a measuring cup with a spout. Divide into three dessert cups or stemless wine glasses and place in the fridge for at least an hour to set up.
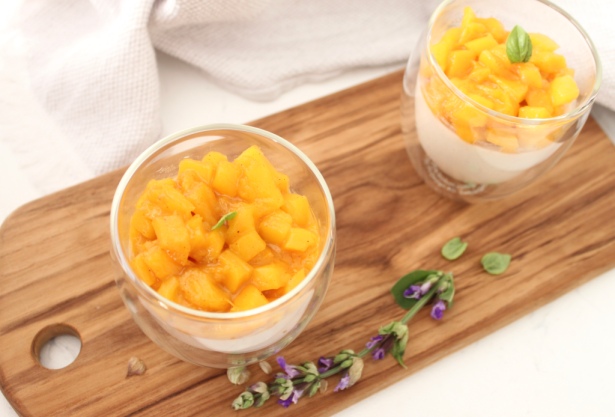
- In a small saucepan, add the mango, maple syrup, citrus juice, cinnamon, nutmeg and salt. Let simmer until it takes on a jam-like consistency, about 10 minutes. Let cool about 10 minutes before spooning on top of the set panna cotta. Eat warm, or place back in the fridge and enjoy cold (my favourite).
The post Vegan Coconut Panna Cotta with a Mango Compote appeared first on Never. Not. Eating..
]]>The post Vegan Blueberry Pomegranate Tart appeared first on Never. Not. Eating..
]]>
I’m the type of cook who discovers an ingredient and becomes obsessed with it for weeks at a time. Right now, it’s agar agar. The vegan version of gelatin. It’s literal happiness in powder-form. Have a favourite juice? Add agar agar and it turns that juice into a jiggly, wiggly treat. If you loved Jell-o as a kid, like me, you’ll love agar agar.
Whereas gelatin is made from animal collagen, agar agar is derived from seaweed. It is completely vegan and therefore a perfect ingredient to make jellies, gummies, tarts, preserves and much more.
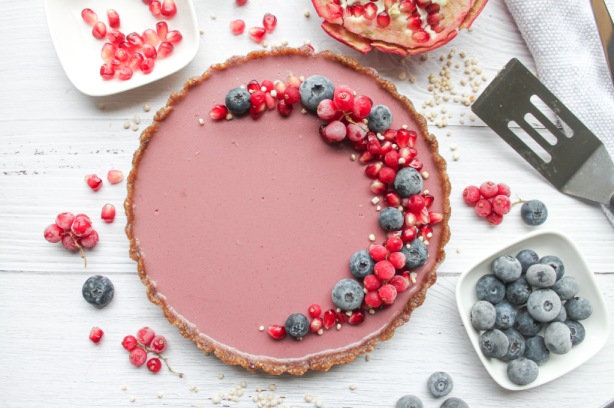
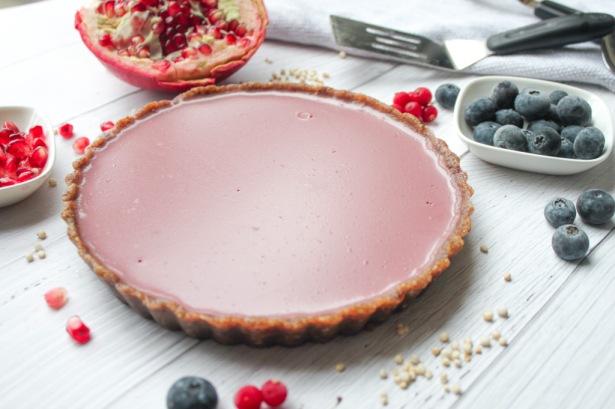
The crust of this tart was made by combining walnuts, pecans, dates, maple syrup, salt and vanilla in my food processor until the ingredients begin to stick together. This is then pressed into an 8-inch tart pan and thrown into the freezer while the filling is made.
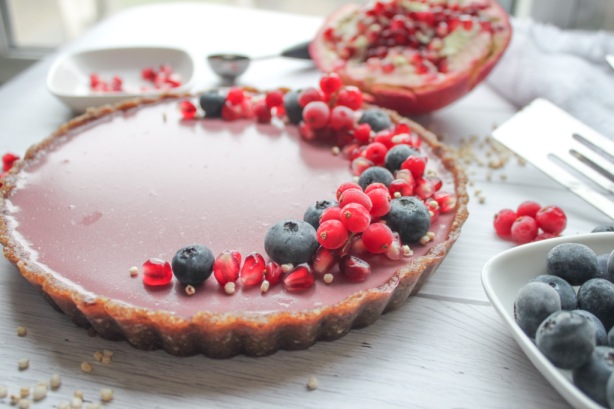
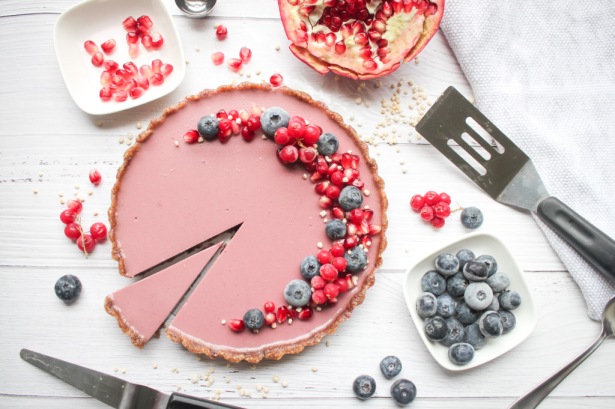
For the jelly filling, add the pomegranate-blueberry juice (I love the “Pom Wonderful” brand) to a saucepan with the full-fat canned coconut milk. Bring the liquids up to a boil, add the agar agar and then whisk the mixture until it’s fully dissolved. Lower the heat and add the salt and maple syrup and cook for a few more minutes. Strain the liquid over a measuring cup to make transferring to your tart shell easier and less messy. No one likes a mess.
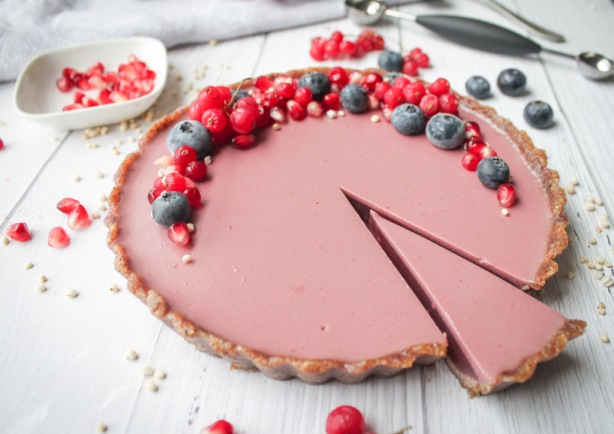
When the filling has cooled down for about 10-15 minutes, give it a quick whisk and then carefully pour it into the tart pan, over the crust. Transfer it to your fridge and let it set up for at least 3 hours. Waiting is the hardest part, but it gives you time to think about how you will decorate your tart! I like to show what is in my food when I plate it, so naturally, I topped this tart with pomegranate seeds and fresh blueberries. I also added some puffed quinoa for a slight colour contrast and a fun pop!
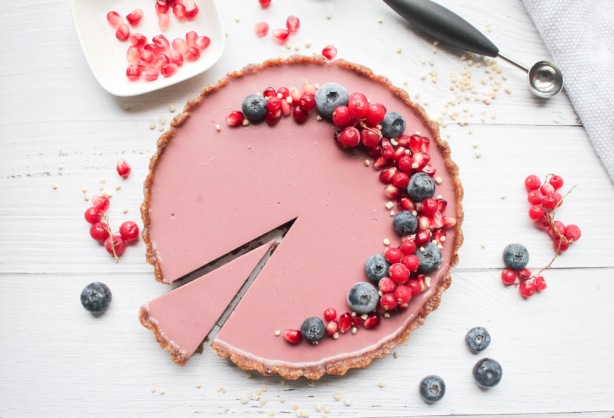
This tart is best if consumed within 24 hours.
Vegan Blueberry Pomegranate Tart
Yield: Makes an 8-inch tart
Prep time: 5 minutes
Cook time: 5 minutes
Chill time: 3 hours
Ingredients:
For the crust:
- 1/2 cup walnuts
- 1/2 cup pecans
- 1/4 tsp salt
- 6 dates, pitted
- 1/2 tsp vanilla
- 1 tbsp maple syrup
For the filling:
- 3/4 cup pomegranate-blueberry juice (or just straight pomegranate juice)
- 1 cup full-fat canned coconut milk
- 3/4 tsp agar agar
- 1/4 tsp salt
- 2 tbsp maple syrup
Instructions:
- To make the crust – Add all ingredients into a food processor and pulse until it begins to come together, about one minute. Press into an 8-inch tart pan and put in the freezer while you make the filling.
- For the filling – Add juice and coconut milk to a small saucepan and bring up to a boil. Once boiling, add the agar agar and whisk for one minute, or until the powder is completely dissolved. Reduce heat to a simmer and add the salt and maple syrup. Let simmer for 2 more minutes, whisking occasionally. Remove the liquid from the heat and strain through a fine-mesh sieve over a measuring cup with a spout. Let cool for at least ten minutes before carefully pouring over your tart crust. Let it set in the fridge for at least 3 hours before serving.
*This tart is best consumed within 24 hours.
The post Vegan Blueberry Pomegranate Tart appeared first on Never. Not. Eating..
]]>The post Healthy 5-Ingredient Peanut Butter Cups appeared first on Never. Not. Eating..
]]>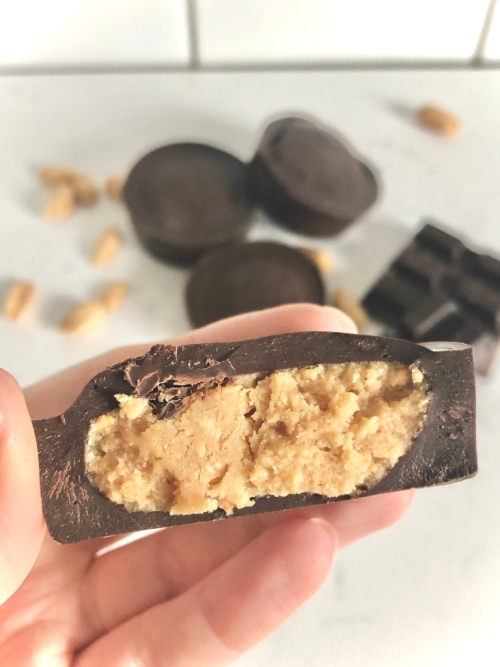
I can’t think of a better duo than chocolate and peanut butter, and I’m sticking close to home with this recipe. No fancy upgrades or add-ins. Just the classic – healthified. Dark chocolate and peanuts are both anti-inflammatory foods and coconut oil is said to enhance brain function. All-in-all, you can never go wrong with knowing exactly what is going into your food.
This simple and quick recipe requires five ingredients that you will likely already have in your pantry:
- Dark chocolate (At least 85%)
- Natural peanut butter (I use my Homemade Peanut Butter)
- Coconut oil
- Vanilla
- Maple syrup
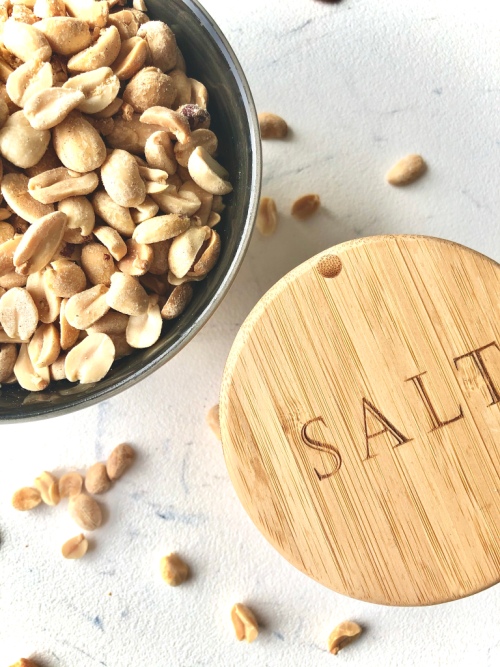
The first step is finding the best peanut butter for the filling. Look at the ingredient list on the peanut butter that you buy. The only ingredient listed should be “dry roasted peanuts.” And maybe “salt.” Otherwise, steer clear. Most peanut butters have a lot of sugar added and stabilizers to prevent oil separation. If you are trying to incorporate more healthy, whole foods into your diet, natural nut butters are best. If you are unimpressed with the price of these at your grocery store, click here to learn how to make your own in less than 10 minutes!
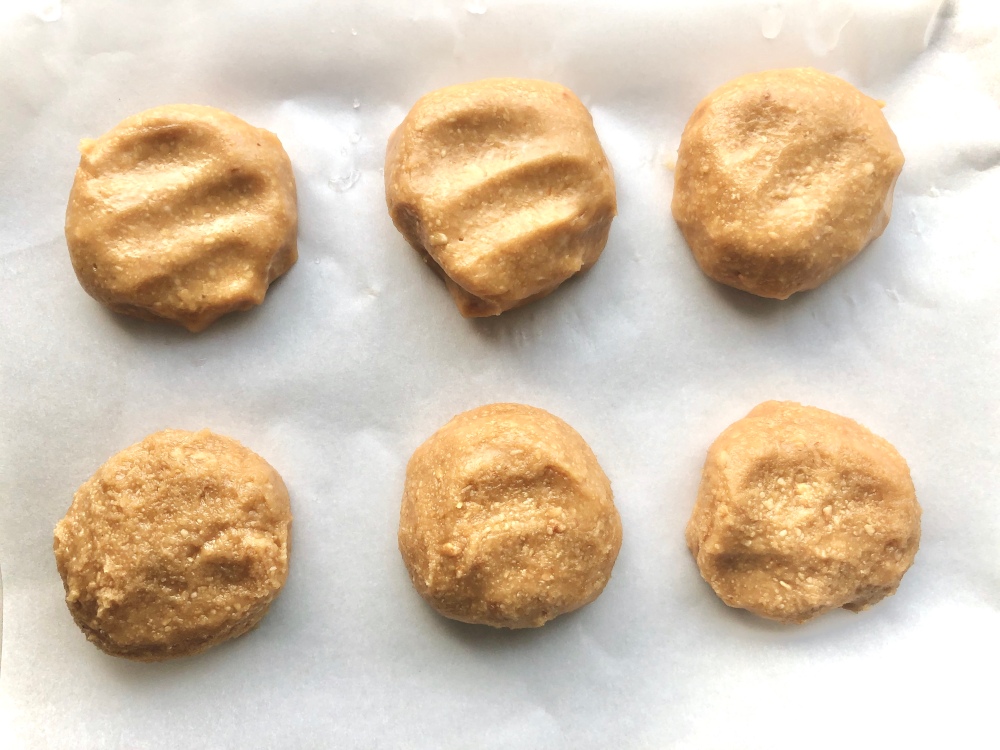
To make the filling, combine the peanut butter with the vanilla and maple syrup. Form into 1-inch balls and flatten on a large plate covered with a piece of parchment paper. Put in the freezer while you prepare the chocolate.
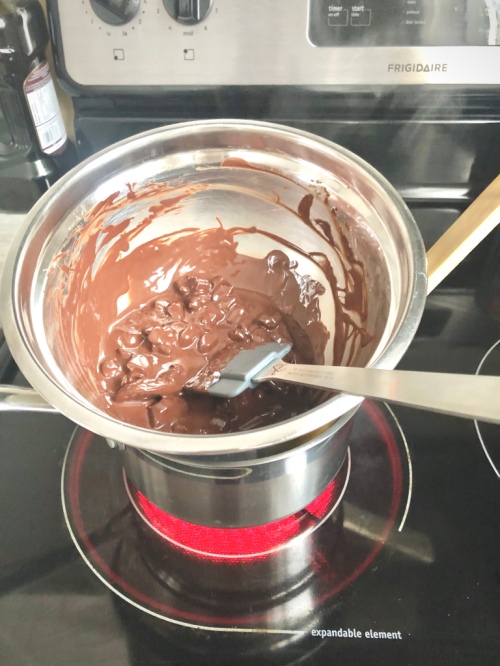
For the chocolate shell, set up a double boiler. Cut up your dark chocolate into small-ish pieces and place in a large, heat-proof bowl with coconut oil, reserving 2 ounces of the chocolate for later. Fill a small pot with about one inch of water and place over burner with the bowl of chocolate on top. Tip: Placing a wooden spoon in the pot before you put the bowl on top allows the steam to escape. Stir constantly with a rubber spatula until chocolate pieces have melted. Remove from heat and gradually add in the remaining 2 ounces of chocolate, stirring after each addition, until melted. This helps to temper the chocolate, giving it more of a glossy look when set and achieving a wanted “snap” when bitten into.
To mold the chocolates, I use this silicone muffin tray, which is beyond amazing. The pb cups come out perfectly. You can also use paper muffin liners if you don’t have a silicone tray.
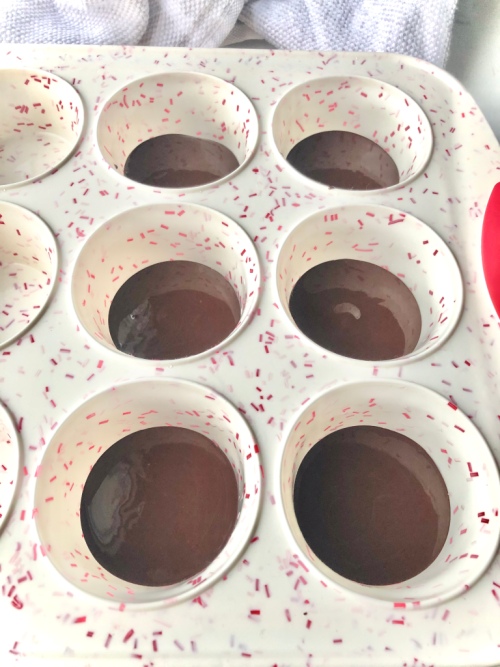
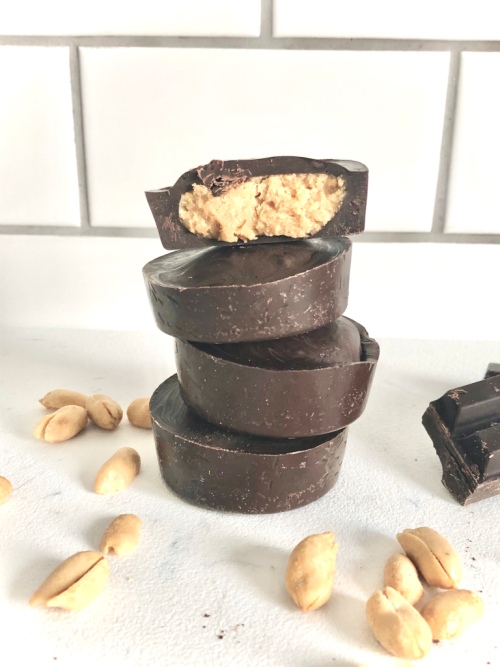
Pour enough of the melted chocolate into each cup (or liner) to coat the bottom. Remove the peanut butter discs from the freezer and place one in each cup, on top of the melted chocolate. Cover with more melted chocolate until the peanut butter is no longer visible. You may also add some flaky sea salt on top, if that’s your style. Place the pb cups in the fridge for about 15 minutes to set.

This recipe makes 6 large peanut butter cups. Store them in the fridge and remove them a few minutes before you want to chow down.
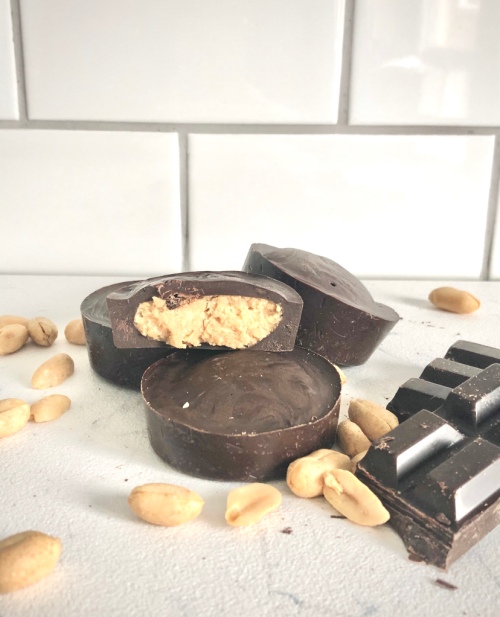
The perfect guilt-free post-dinner snack.
Healthy 5-Ingredient Peanut Butter Cups
Serving size: Makes 6 large peanut butter cups
Prep time: 25 minutes
Cook time: 5 minutes
Ingredients:
- 1/2 cup natural peanut butter
- 1 tbsp pure maple syrup
- 1/2 tsp pure vanilla extract
- 10 oz dark chocolate, separated and chopped into small pieces
- 1 tbsp coconut oil
Instructions:
- In a medium-sized bowl, mix together peanut butter, maple syrup and vanilla until combined. Form into six, 1-inch balls and flatten onto a plate lined with parchment paper. Place in freezer while you prepare the chocolate.
- Fill a small pot with one inch of water and place over a burner on medium-high heat. Bring water to a simmer. In a heatproof bowl, add 8 oz of the chocolate and the coconut oil. Place a wooden spoon in the pot with simmering water and the bowl on top of the pot. The spoon allows the steam to escape. Use a rubber spatula to constantly stir the chocolate until melted. Remove from heat.
- To temper the chocolate, slowly add in the remaining 2 oz of chocolate, one small chunk at a time, stirring until melted after each addition. This process takes a bit of time, but helps to set the chocolate properly.
- To a silicone muffin tray (or into muffin liners), pour in enough melted chocolate to just coat the bottom of six of the cups. Remove the peanut butter discs from the freezer and place one in each of the cups with chocolate. Top them off with the remainder of the melted chocolate, making sure to completely cover the peanut butter. Refrigerate for 15 minutes to set.
Store these in the fridge and remove a few minutes before serving.
The post Healthy 5-Ingredient Peanut Butter Cups appeared first on Never. Not. Eating..
]]>