The post Simple Beetroot Pasta appeared first on Never. Not. Eating..
]]>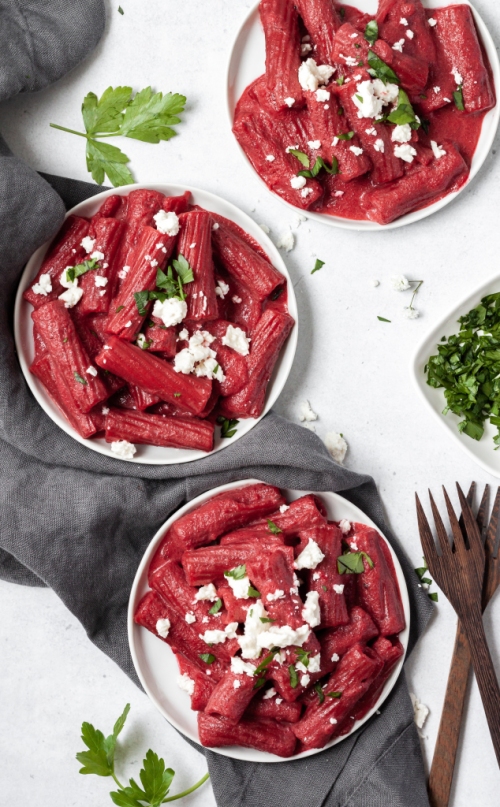
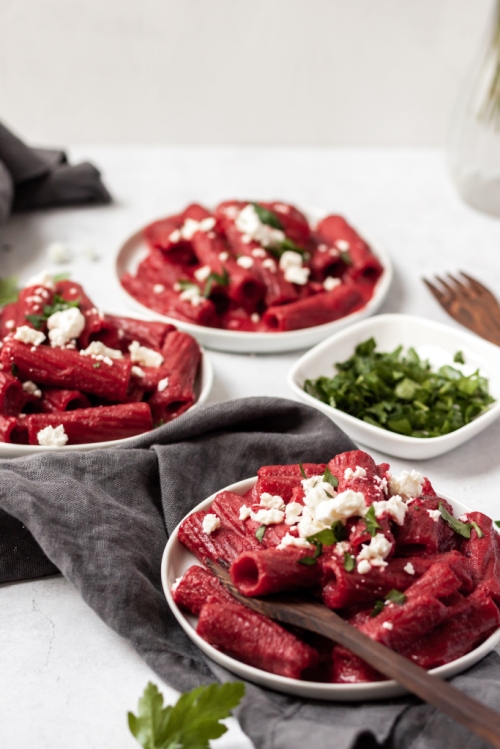
I’m always diverting from traditional pasta sauces because life is too exciting to do boring things. The method this recipe follows is the tried-and-true method I use for most of my pasta sauces, and it’s SO easy.
It requires the cooking of the star ingredient, in this case, beets, followed by the blending, seasoning and simmering. Not to mention the addition of coconut milk to make it extra creamy and delicious. That’s it! So easy. So good!
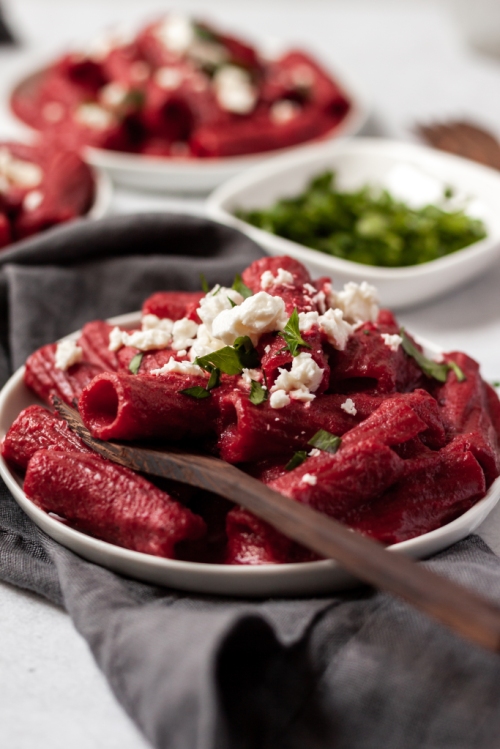
You can use whatever pasta you would like, but I prefer a rigatoni or tortiglioni as they have those gorgeous grooves to suck up and hold onto this vibrant sauce. My most favourite pasta to use can be found here.
It’s tortiglioni time to make this dish!
Simple Beetroot Pasta
Serving size: 4
Prep time: 5 minutes
Cook time: 45 minutes
Ingredients:
- 4 red beets, peeled and quartered
- 450 g pasta (I prefer tortiglioni)
- salt
- pepper
- 1 cup vegetable broth
- 1 tbsp olive oil
- 2 cloves garlic, minced
- 1 cup canned coconut milk
- 1/4 cup crumbled feta or goat’s cheese, for topping (optional)
- 2 tbsp parsley, chopped, for topping (optional)
Instructions:
- Bring a large pot of heavily salted water to a boil and add the beets, cooking until fork-tender (about 25-30 minutes).
- Use a wire spider (or a slotted spoon) to carefully remove the beets from the boiling water and transfer to a high-powered blender. Add the pasta to the same water the beets were cooking in and boil until ‘al dente.’
- Blend the beets with the broth and a pinch of pepper, until smooth.
- Add the olive oil to a large saucepan set over medium-low heat. When hot, add the garlic and saute for 30 seconds or until fragrant, being careful not to burn. Pour in the beet puree and simmer until smooth, stirring often. Pour in the coconut milk and let simmer until sauce thickens, approximately 8-10 minutes.
- Transfer the cooked pasta to the sauce and stir to coat and finish cooking. Add more salt and pepper to taste. *If you salted your pasta water enough, you may not need to add more salt at this point.
- Transfer pasta to a serving dish and top with the cheese and parsley, if using. Bon appetit!
The post Simple Beetroot Pasta appeared first on Never. Not. Eating..
]]>The post Sumac Roasted Cauliflower appeared first on Never. Not. Eating..
]]>
There’s no easier recipe, I promise you that. This whole-roasted cauliflower head is simple to prepare but complex on the palate! It’s vibe is very Middle Eastern – sumac, currants, pomegranates, pistachios. It’s visually stunning and a perfect side to go along with the rest of your dinner.
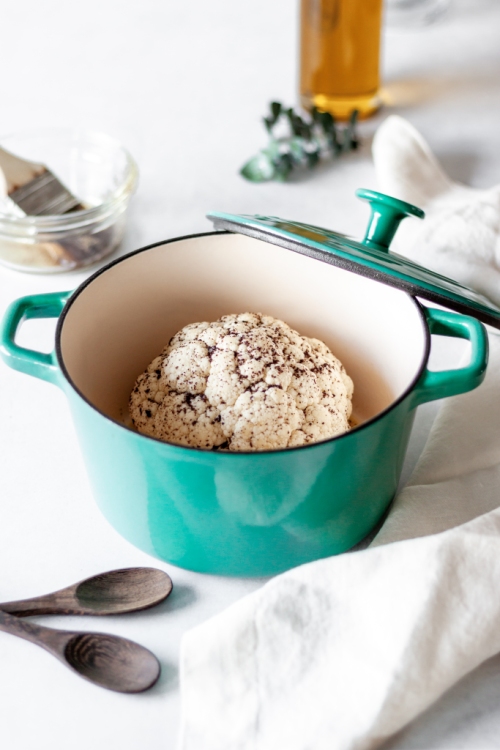
To prepare, combine the sumac, salt and olive oil, and pour over the cauliflower. Roast in a dutch oven (click here to see the one I use) for about 40 minutes until it is tender. Drizzle with the zingy-est chimichurri and top with all the fixings. Chef’s kiss!

Sumac Roasted Cauliflower
Serving size: 4-5 people
Prep time: 10 minutes
Cook time: 40 minutes
Ingredients:
- 1 medium head of cauliflower
- 1/2 cup olive oil
- 1 tsp sumac
- 1/2 tsp salt
- 1/4 cup pomegranate arils, for topping
- 1/4 cup pistachios, shelled and chopped, for topping
- 1/4 cup feta cheese, for topping
- 2 tbsp dried currants, for topping
For the Chimichurri Sauce:
- 1/4 cup olive oil
- 1 tbsp red wine vinegar (or less if you don’t want it as tangy)
- 2 cups packed fresh herbs (I use basil, cilantro and parsley)
- 1-2 cloves of garlic
- pinch of salt
- pinch of red pepper flakes (optional)
Instructions:
- Preheat oven to 400 degrees Fahrenheit.
- Remove the leaves of the cauliflower, rinse the head well and pat completely dry. Cut off the bottom part of the stem to make the cauliflower level and have a flat surface to sit on.
- In a small bowl, combine the olive oil, sumac and salt. Place the cauliflower head upside down into a dutch oven. Pour 1/2 of the olive oil mixture onto the bottom and allow it to drip down into the crevices of the cauliflower. Turn over and pour the rest on the top, using a pastry brush to help coat the sides. Put the lid on and then place in the oven to roast for 40 minutes or until fork-tender. Cook time depends on the size of your cauliflower.
- While the cauliflower is roasting, prepare the chimichurri. Add all ingredients to a blender and blend until smooth. Taste and adjust seasonings as necessary.
- Place currants in a small bowl and cover with boiling water to rehydrate them. Let sit for at least 5 minutes before draining.
- Transfer the cooked cauliflower to a serving platter. Drizzle with the chimichurri and top with the pomegranate arils, pistachios, currants and crumbled feta cheese. Serve immediately!
The post Sumac Roasted Cauliflower appeared first on Never. Not. Eating..
]]>The post Coconut Lime Cilantro Rice appeared first on Never. Not. Eating..
]]>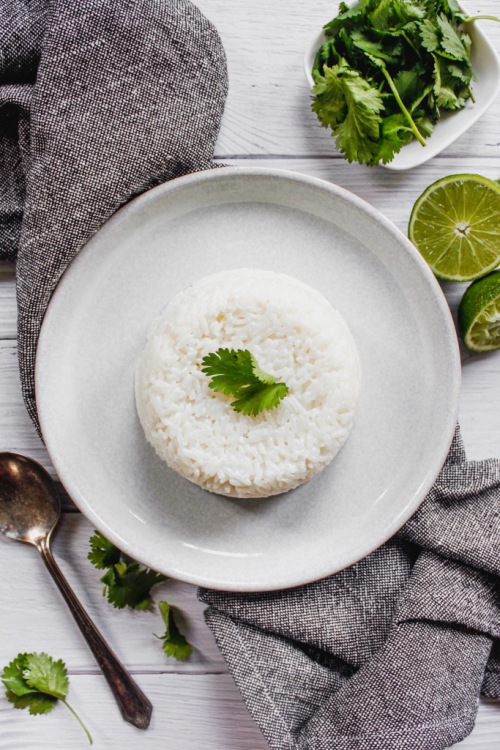
I traveled to SE Asia during the summer of 2017. Those were the days, man. It was like 6 weeks of pure foodie inspiration. Rice, curries, fresh fruit, toasties from the 7/11…If you know, you know.
The abundance of carbs I ate while there was record-breaking, and the best part is, I didn’t gain a pound…I actually lost weight. Afterall, you step outside and instantly sweat off a few kilos in the 50-degree weather. And now, I have a plethora of different rice dishes under my belt!
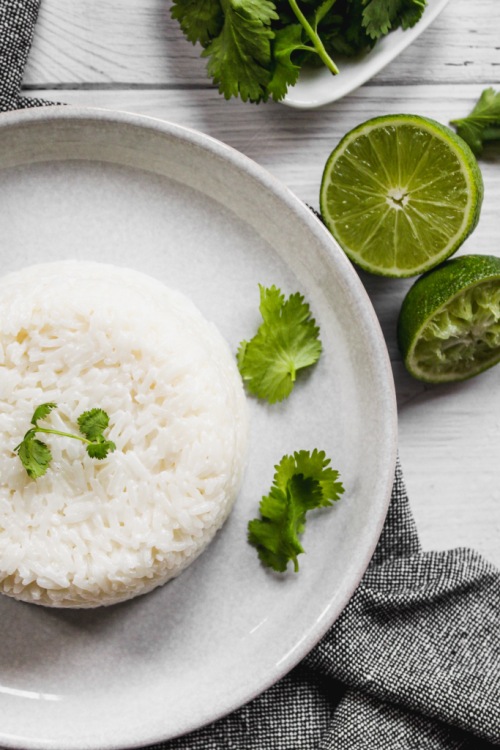
So let’s chat about this coconut rice dish. I just love coconut ‘er-thang! This rice makes for a perfect side dish to any meal – It has a creamy quality to it and it takes minutes to whip up. Here is what you will need:
- jasmine rice
- coconut milk
- salt
- lime
- cilantro
Let’s get started!
Coconut Lime Cilantro Rice
Serving size: 3-4
Prep time: 5 minutes
Cook time: 10 minutes
Ingredients:
- 1 cup jasmine rice
- 1 cup canned coconut milk
- 1 cup water
- salt
- juice of 1/2 lime
- 2 tbsp fresh cilantro, chopped
Instructions:
- Add rice, coconut milk, water and a generous pinch of salt to a saucepan and bring up to a boil. Turn heat to low, cover and simmer for 10 minutes (or according to rice package directions).
- Remove from heat and add the lime juice and cilantro to the rice, fluff with a fork to combine.
- Serve immediately.
NOTES:
*Add a touch of honey to the rice while cooking for a hint of sweetness.
The post Coconut Lime Cilantro Rice appeared first on Never. Not. Eating..
]]>The post Roasted Tomato Soup with Grilled Cheese Crouton Skewers appeared first on Never. Not. Eating..
]]>
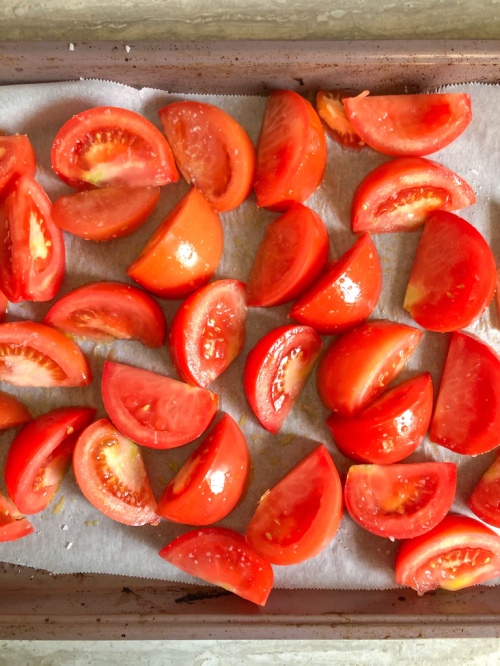
Tomato season is over where I am from, but soup season is just beginning, so I had to grab one more batch of fresh tomatoes to use to make this soup. It’s creamy and smooth and delicious. It’s just a warm, comforting classic.
My favourite part of this soup recipe is the roasted tomatoes. Roasting them just brings out a whole new flavour and caramelization that is always wanted. My second favourite part is the coconut milk, cuz that shizz creamy.
Here is what you will need for this super easy recipe:
- Tomatoes
- Onion
- Garlic
- Dried basil
- Salt
- Vegetable stock
- Canned coconut milk
- Bread slices
- A melting cheese, such as mozzarella
- A flavourful cheese, such as a sharp cheddar or gouda
I use my Simple Living Soup Maker to make this recipe. If you are a soupie, like me, you may want to invest in one. It’s my favourite way to make a post-work dinner. Soups are done in 30 minutes and it also makes smoothies, beverages, juices and batters. For this soup, I just throw everything in the soup maker after the roasting is done, turn it on and go watch Schitt’s Creek. The soup will be ready at the end of the episode. Also works with Friends, Sex and the City and The Big Bang Theory.

Who’s ready to get their slurp on?!
Roasted Tomato Soup with Grilled Cheese Crouton Skewers
Servings: 4
Prep time: 5 minutes
Cook time: 35 minutes
Ingredients:
- 4 large tomatoes, sliced into 1-inch wedges (I use vine tomatoes)
- 1/2 yellow onion, diced
- 2 cloves of garlic, peeled
- 1/2 tsp dried basil
- 2 cups vegetable stock
- 1 cup canned coconut milk
- salt
- olive oil
- 8 slices of bread (I like sourdough)
- 3 tablespoons of mayonnaise (or butter)
- 200 g cheese, shredded (I like to use a combination of mozzarella and cheddar)
- Fresh black pepper (for topping), optional
- Fresh basil (for topping), optional
Instructions:
- Preheat oven to 400 degrees Fahrenheit.
- Place tomatoes on a large baking sheet, drizzle with 1-2 tablespoons of olive oil and sprinkle with a few generous pinches of salt. Toss to coat and roast in the oven for 10 minutes. Remove and place the onion and garlic onto the baking sheet and toss again. Roast for another 10 minutes.
- Add the roasted tomatoes, garlic and onion to your soup maker along with the basil, vegetable stock and 1/4 teaspoon of salt. Place the lid on and set to “smooth.” Press “on.” Alternatively, place the tomatoes, garlic and onion into a large pot with the basil, vegetable stock and 1/4 teaspoon of salt. Bring to a boil and then reduce and let simmer for 15 minutes.
- While the soup is cooking, make the grilled cheese. Set a large pan over medium heat. Spread the mayo onto one side of each of the slices of bread. Build your sandwiches – bread (mayo side out), cheese, bread (mayo side out). Set your sandwich into the preheated pan and cook until golden brown on the first side, flip and repeat. Remove from pan and slice each sandwich into 8 crouton-sized cubes. Slide a skewer through the middle of each crouton. One sandwich will make two skewers with 4 croutons on each.
- (Skip to step 6 if using a soup maker) When the soup has simmered for 15 minutes, use an immersion blender to puree it. Alternatively, you can carefully pour it into a blender and blend until smooth, returning back to pot when done.
- Stir in the coconut milk. Taste and season accordingly. Ladle into four bowls and top each with two of the grilled cheese skewers, fresh black pepper and fresh basil, if desired.
The post Roasted Tomato Soup with Grilled Cheese Crouton Skewers appeared first on Never. Not. Eating..
]]>The post Pumpkin and Kale Pizza appeared first on Never. Not. Eating..
]]>
When an ingredient comes into season, you better believe I overdo it. Every. Single. Time. But seriously, that’s what we are supposed to do, right?! Eat local, eat seasonal. For our country, for our health.
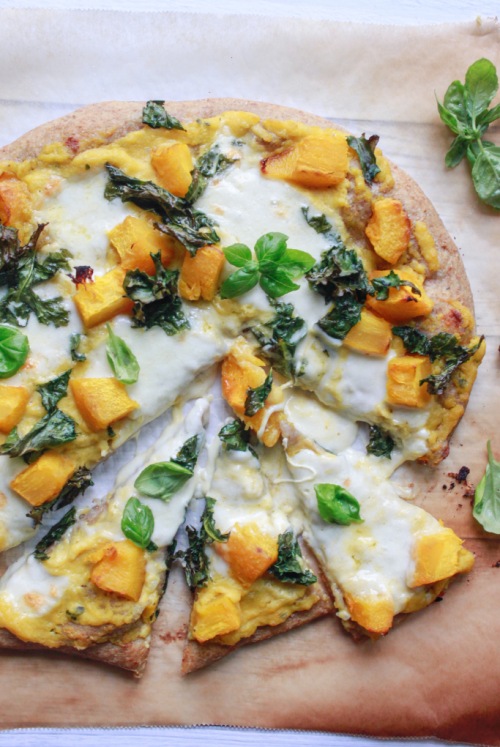
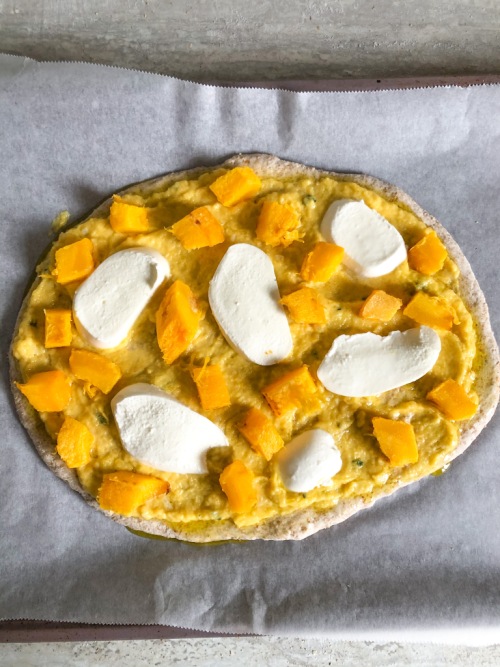
The greatest part of this pizza is the pumpkin cream sauce. AKA the replacement tomato sauce. Garlic, thyme, homemade pumpkin puree, veggie stock, coconut milk. Simmer, simmer. Yes, please!
The crust – You can definitely buy store bought pizza dough and use that, but making your own dough is SO easy! You can find a recipe for flatbread in my blog post, found here.
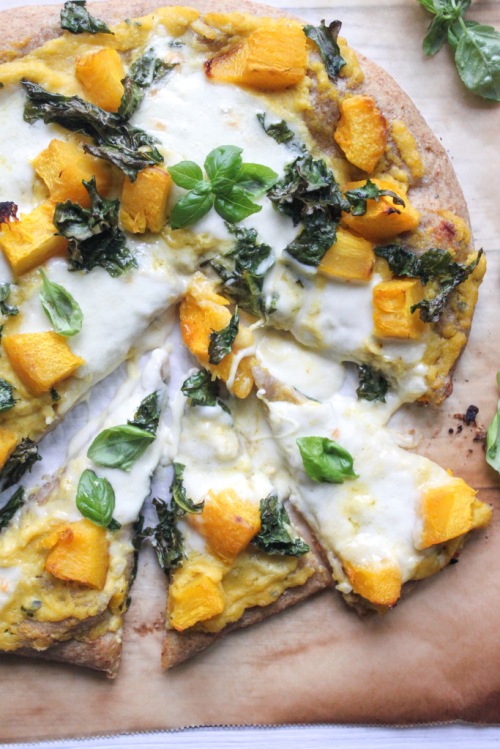
The toppings – Originally, I made this pizza vegan, and I think I preferred it to the next one I made with mozzarella. The option is yours – leave out the cheese to have a completely vegan option (as seen below)!
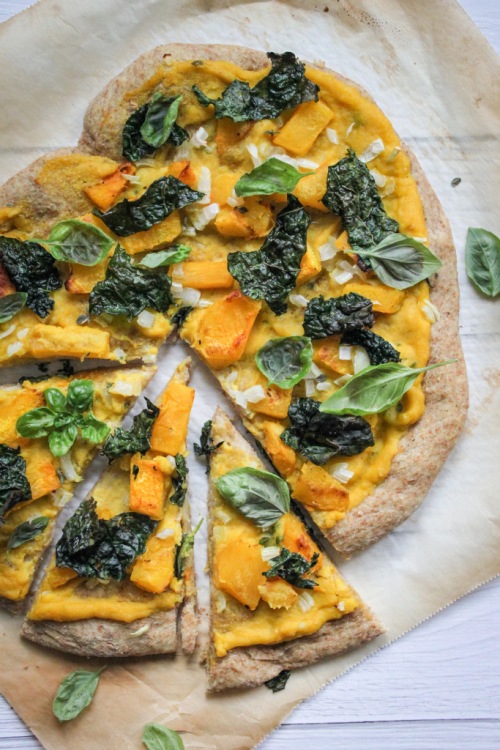
Kale is another key topping here. As I always say, it is important to massage your kale before eating, and that applies to this recipe as well. Sprinkle it with some salt, drizzle with some olive oil and get in there with your fingers! It really helps to tenderize it and make it more pleasing to the palate.
Pumpkin – Along with the pumpkin cream sauce, I have also included roasted pumpkin chunks as a topping in this recipe. They add another layer and texture that does not disappoint and help give this ‘za it’s name!
This may just be a pizza recipe that you aren’t afraid to serve the kids!
Pumpkin and Kale Pizza
Serving Size: Makes 1 large pizza
Prep time: 20 minutes
Cook time: 45 minutes
Ingredients:
- 300 g homemade or store bought pizza dough
- 1 pie pumpkin, seeds removed and sliced into 3/4-inch wedges (or 1/2 cup pumpkin puree and 3/4 cup sliced and cooked pumpkin chunks)
- 2 cloves garlic, minced
- 2 sprigs of thyme, stem removed
- 1/4 cup vegetable stock
- 1/4 cup full-fat canned coconut milk
- 2 leaves of kale, washed, dried and chopped roughly
- 125 g fresh mozzarella, sliced (optional)
- salt
- olive oil
- fresh basil for topping (optional)
Instructions:
- Preheat your oven to 400 degrees Fahrenheit.
- Place your pumpkin wedges onto a baking sheet lined with parchment paper and drizzle with one tablespoon of olive oil and a few pinches of salt. Toss to coat. Roast in the oven for 30 minutes or until fork-tender, flipping halfway. Remove from oven and let cool for a few minutes. Peel the skin off and discard. Increase the oven temperature to 450 degrees.
- Place half of your roasted pumpkin pieces into a food processor or blender and blend until smooth. Slice the other half of the wedges into 1/2 inch pieces and set aside.
- Preheat a medium-sized saucepan over medium-low heat. Add one tablespoon olive oil followed by the minced garlic and thyme. Stir and let cook until fragrant (about 30 seconds). Add in 1/2 cup of the pumpkin puree and the vegetable stock. Stir until combined and let simmer for 2 minutes. Add the coconut milk and a pinch of salt and stir to combine. Let simmer on a low heat until the cream sauce thickens and coats the back of a spoon. Remove from heat.
- Place your kale into a bowl with one teaspoon of olive oil and a pinch of salt. Use your fingers to ‘massage’ the kale for one to two minutes. This helps to tenderize it. Set aside.
- Flour your work surface and roll out your pizza dough. Spoon on the cream sauce and spread it onto the dough until fully covered, leaving a 1/2-inch border all the way around. Distribute your cooked pumpkin pieces and your mozzarella slices (if using) on top of your pizza. Bake in the oven for 5 minutes, remove and add the massaged kale, and return to the oven for another 7-10 minutes or until crust begins to brown on the edges. Remove from oven and let cool for a few minutes before slicing.
- Top with fresh basil, if desired!
The post Pumpkin and Kale Pizza appeared first on Never. Not. Eating..
]]>The post Gluten-Free Zucchini Galette appeared first on Never. Not. Eating..
]]>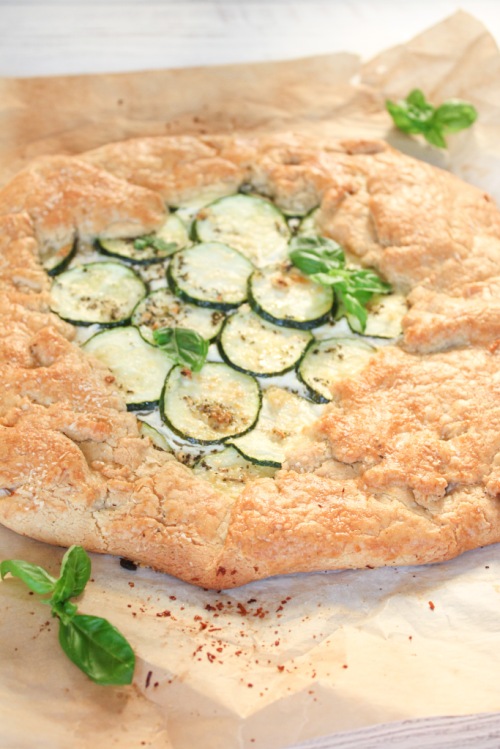
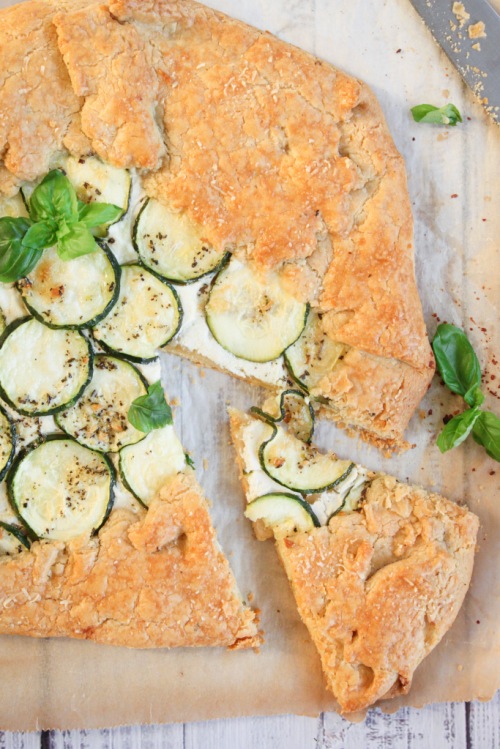
If you know me, you know I love a good galette. And I love mixing it up and creating both sweet and savoury galettes. I’ve tried everything from stone fruit to tomato to apple, and now, zucchini! You can literally wrap any produce in flaky pastry and 90% of the time it will be tasty. WORD.
I decided to make this galette gluten-free, mostly because I avoid gluten as much as I can, but also because I just bought an All-Purpose Gluten-Free Flour by Bob’s Red Mill that I was really excited to try. Of course, anything made with gluten-free flour has a different taste than that made with regular, wheat flour, but I must say, I was impressed with how this crust held together and how flaky it was. If you eat regular wheat flour, feel free to swap in some all-purpose in it’s place!
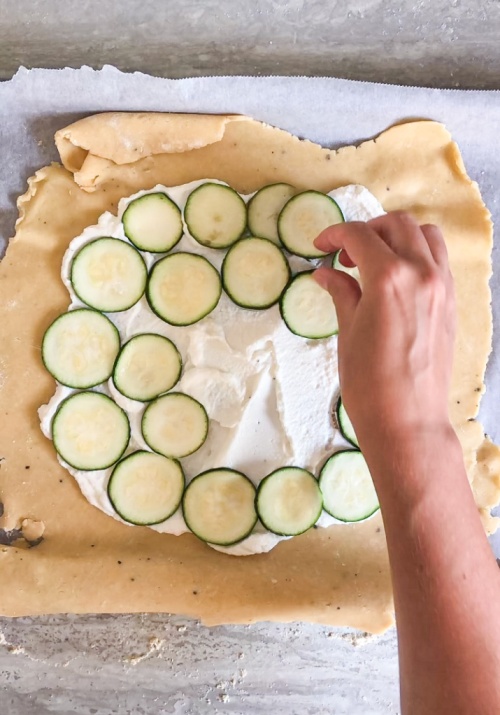
Let’s talk filling – Smooth, lemony ricotta. This is my favourite part. Extra creamy ricotta with lemon juice and zest, salt and pepper whipped together to make the dreamiest of beds for the lucky zucchini. Smear the crust with as little or as much as you want. The addition of lemon brings a brightness to the dish that makes it perfect for Spring or Summer.
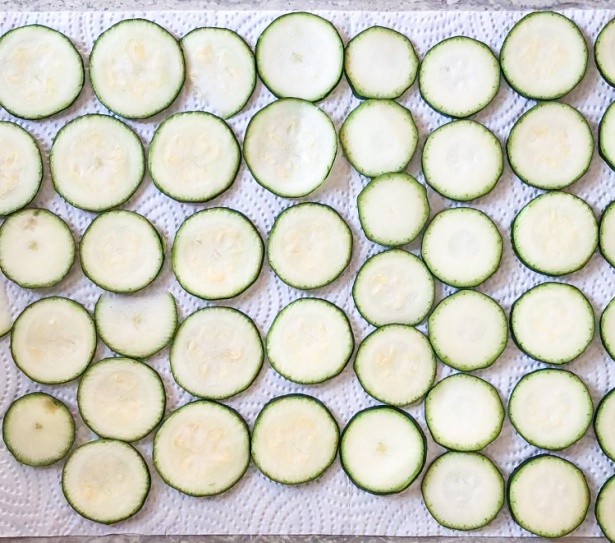
The leading actress here is the zucchini. A few important tips that will help you achieve the ideal galette would be to slice the zucchini about a quarter of an inch thick, making sure they are all the same thickness, place the slices onto paper towels for 30 minutes before assembling your tart and salt them well. This allows the (abundant) excess water to be pulled out, avoiding a soggy mess.

The dough – Finally, let’s talk about the dough. I used to be intimidated when making pastry dough, but it’s actually quite an easy skill to master. The most important part of pastry is to use very cold butter. If the butter is cold, it melts down slower into the flour and, in turn, creates air pockets, which make for flaky pastry. To ensure your butter is perfect, cut it into cubes and store it in the fridge up until you need to use it. After combining it with the flour and forming a disc shape, wrap it in plastic wrap and return it to the fridge to firm up again. After I roll out the dough and assemble the galette, I like to pop it in the fridge yet again for ten minutes. Tip: Assemble your galette, put it in the fridge and set your oven. When your oven is ready, the galette can go right from your fridge to that 400 degree heat!
That’s it…Not too complicated, right?!
Gluten-Free Zucchini Galette
Serving size: 4
Prep time: 15 minutes
Chill time: 30 minutes
Cook time: 30 minutes
Ingredients:
For the crust:
- 1 1/2 cups gluten-free flour
- 1/2 tsp salt
- 1/4 tsp black pepper
- 1/3 cup parmesan cheese, grated, plus more for topping
- 3/4 cup cold butter, cubed
- 1 tbsp white vinegar
- 3-5 tbsp ice-cold water
For the ricotta filling:
- 1 cup ricotta cheese (I use extra creamy)
- zest of one lemon
- 1 tbsp lemon juice
- a few grinds black pepper
- pinch of salt
- 1 small zucchini, sliced into 1/8-inch rounds
- 2 tbsp olive oil
- 1/2 tsp dried basil
- 1 clove garlic, minced
- 1 egg, beaten
Instructions:
For the crust:
- To a food processor, add the flour, salt and pepper and pulse a few times to combine. Add parmesan cheese and the cold butter and pulse again until dough resembles small pea shape crumbs (see photo). Add vinegar and two tablespoons of ice cold water and pulse. Continue to add water, one tablespoon at a time, until dough begins to come together. Typically, I use around four tablespoons in total. Dump the dough onto a piece of plastic wrap, form into a disc and then wrap and place in fridge to chill for 30 minutes.
- Prepare the zucchini by laying the rounds onto paper towels and sprinkling salt on the tops to draw out any excess water. Let sit for at least 30 minutes.
For the ricotta filling:
- To a small bowl, add the ricotta, zest, lemon juice, pepper and salt and mix to combine. Place in the fridge until ready to assemble.
For the rest of the galette:
- Combine olive oil, basil and garlic in a small bowl. Set aside.
- Flour your work surface and remove the dough from the fridge. Roll out into a circle about 1/4-inch thick. Carefully transfer the dough to a parchment lined baking sheet.
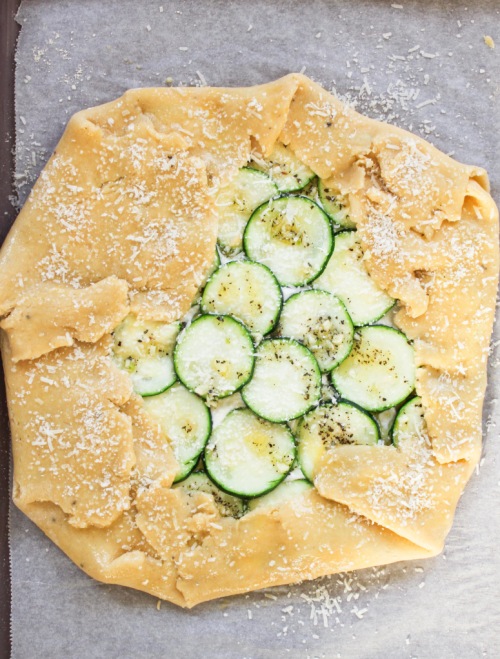
- Spread the ricotta mixture onto the dough, leaving a 2-inch border all the way around. Arrange the zucchini slices on top of the ricotta. Drizzle the olive oil mixture on top of the zucchini. Fold over the edges of the pastry. Preheat your oven to 400 degrees Fahrenheit and transfer the galette to the fridge for 10 minutes, or until the oven is ready. Right before placing the galette into the oven, brush the exposed pastry edges with the egg wash and sprinkle on some extra parmesan cheese, if desired. Bake for 25-30 minutes, or until galette is golden brown in colour.
The post Gluten-Free Zucchini Galette appeared first on Never. Not. Eating..
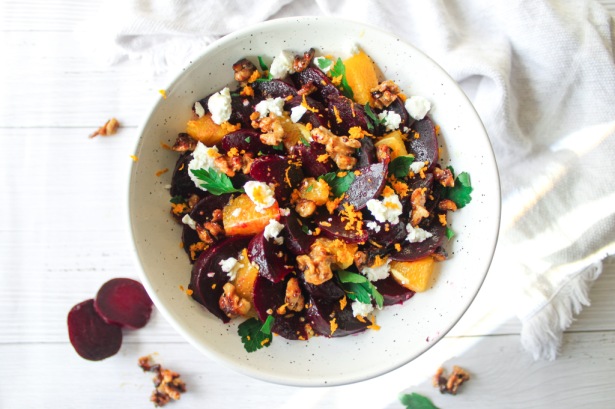
]]>The post Beet and Orange Salad with Goat Cheese appeared first on Never. Not. Eating..
]]>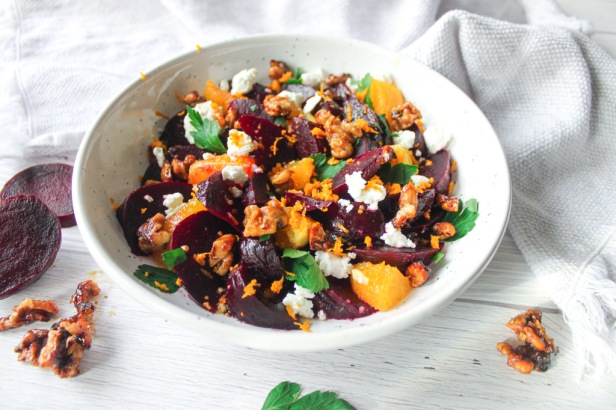
It may seem like an unorthodox pair, but I think the textures and flavours of each, balance the other out. The savoury beet, the sweet orange, the creamy goat cheese and the crunch of the toasted walnuts…money!
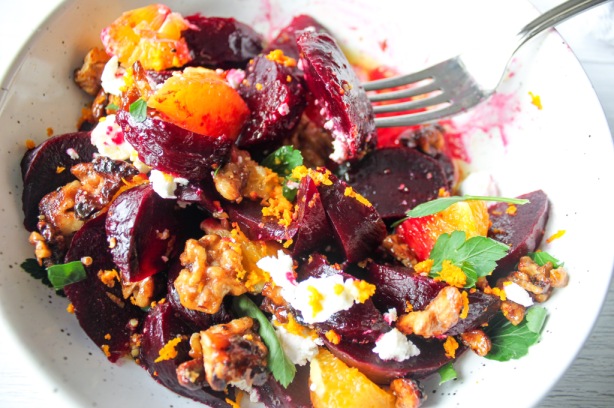
Beets are ridiculously good for you. They are packed with nutrients and are thought to control blood pressure, help prevent cancer and work as an anti-inflammatory. They are also so beautiful in appearance and taste, so it’s easy to use them in a number of dishes. I often use them to colour other foods, such as smoothie bowls. Bottomline – get some beets, they are pretty, healthy and yummy!
Beet and Orange Salad with Goat Cheese
Serving size: 3-4 (as a side)
Prep time: 10 minutes
Cook time: 1 hour 15 minutes
Ingredients:
For the dressing:
- 2 tbsp freshly squeezed orange juice
- zest of one orange
- 1/2 tbsp honey
- 1/2 tbsp dijon mustard
- 6 tbsp olive oil
- pinch of salt
- a few grinds of fresh black pepper
For the salad:
- 6 beets, washed
- 1 tbsp honey
- 1/4 cup walnuts, rough chop
- 1 orange, sectioned
- 1/4 cup goat cheese
- salt
- pepper
- fresh parsley for topping
Instructions:
- Preheat oven to 400 degrees Fahrenheit.
- Place beets on a large piece of tin foil and wrap into a package, making sure there are no open areas where the steam can escape. Place tin foil package on a baking sheet and then in the oven for an hour and fifteen minutes, or until a knife can easily be inserted. Remove from oven and carefully open the package. Let the beets sit for 1-2 minutes and then use two paper towels – one to hold the beet and one to rub off the skin – to peel the beets. Dice the cooked beets and place in a serving bowl. Reduce oven to 350 degrees.
- For the dressing – Add all dressing ingredients into a mason jar or container with a lid. Shake until fully combined. Set aside.
- Line your baking sheet with parchment paper. Lay your walnuts on the parchment and drizzle the honey over them. Toss to combine and spread out in a single layer. Bake in oven for 8-10 minutes, watching carefully to avoid burning. Remove from oven and let cool completely.
- Add your orange sections to the serving bowl with the beets. Drizzle with preferred amount of the dressing and toss. Taste and add another pinch of salt and pepper, if needed. Right before serving – crumble the goat cheese on top of the salad. Add the walnuts and fresh parsley. I suggest letting the salad sit in the fridge for at least an hour before serving.
The post Beet and Orange Salad with Goat Cheese appeared first on Never. Not. Eating..
]]>The post Butternut Squash and Kale Lasagne Roll-Ups appeared first on Never. Not. Eating..
]]>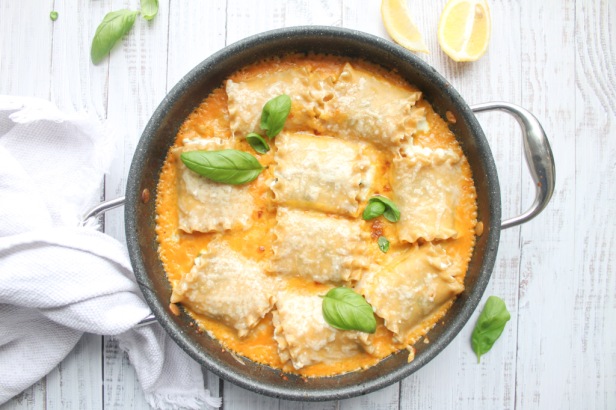
Thaz right. The layers in this lasagne aren’t lookin’ like a sedimentary rock, nuh uh. They are more like a snail shell. Yah feel me?!
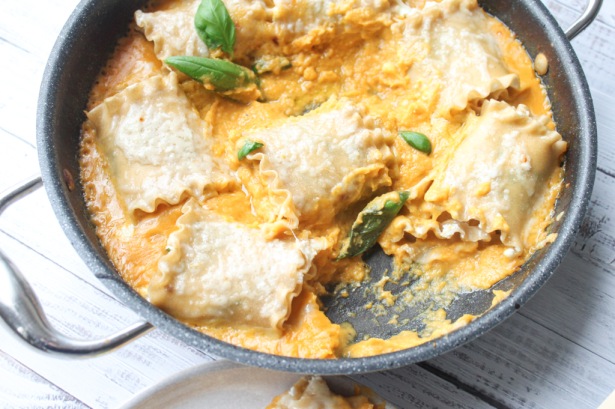
This is a lasagne revolution – the pasta sheet laid out, smothered with the toppings and then rolled up into a cute little present that takes a bath in squash. I mean sauce. I mean squash sauce. And, although I love the standard tomato sauce with all of my heart, squash sauce is my side piece and needs attention, too.
Okay, for reals – this lasagne dish is everything. It starts with the creamy sauce. Roasted butternut squash, pureed and then hit with some garlic, coconut milk and flavourful pasta water – an important ingredient for any great sauce. Nutritious kale and fluffy, whipped ricotta cheese on top of a perfectly cooked lasagne noodle, rolled up and finished off together in the oven with some extra parm on top for that nuttiness. DROOL.

This should be your next pasta night recipe.
Butternut Squash and Kale Lasagne Roll-Ups
Servings: Makes 10 rolls (feeds about 3 people)
Prep time: 20 minutes
Cook time: 50 minutes
Ingredients:
- 1 large butternut squash, diced into 1/2 inch cubes
- olive oil
- salt
- pepper
- 5 large kale leaves, thick stem removed (I prefer Tuscan Kale)
- 2 cups ricotta cheese
- 1 tbsp fresh lemon juice + more for serving (optional)
- 1 cup vegetable stock
- 1/4 tsp fresh (or packaged) nutmeg
- 10 lasagne sheets
- 2 cloves garlic, minced
- 1 cup canned coconut milk
- 1 cup fresh parmesan or mozzarella cheese, shredded
- fresh basil for topping (optional)
Instructions:
- Preheat your oven to 400 degrees Fahrenheit.
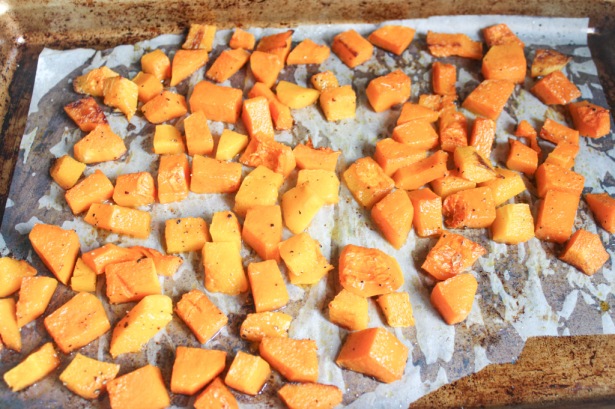
- Place the squash onto a parchment lined baking sheet. Drizzle with 1-2 tbsp olive oil and add a generous pinch of salt and a few grinds of fresh black pepper. Toss with your hands until coated and roast in the oven for 25-30 minutes, flipping once throughout the cooking time. Squash should be tender throughout.
- Lower the oven to 350 degrees Fahrenheit.
- While the squash is cooking, prepare your other ingredients. Chop the kale into small, bite-size pieces and massage with a little bit of olive oil. This helps to tenderize the kale.
- Use an electric mixer to beat the ricotta with 1 tbsp of lemon juice and a pinch of salt and pepper. Whip until smooth.
- Add the cooked squash to a food processor with the vegetable stock, nutmeg, 1/2 tsp salt and 1/4 tsp pepper. Blend until smooth.
- In the meantime, bring a large pot of heavily salted water to a boil and add the lasagne sheets. Cook according to package directions. Reserve 1/4 cup of the pasta water before draining.
- Set a large, oven-safe saucepan over medium-low heat and add 2 tbsp olive oil. Add the garlic and cook for 30 seconds, or until fragrant. Immediately add the squash puree from your food processor as well as the reserved pasta water and let simmer for 5 minutes, stirring frequently. Pour in the coconut milk and stir until smooth.
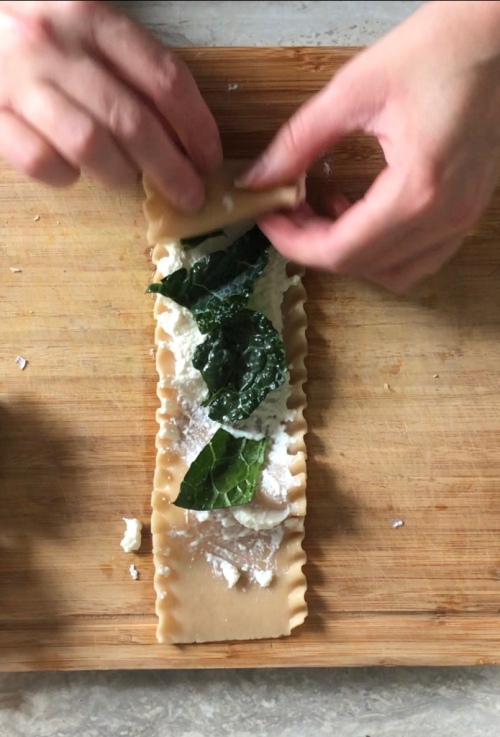
- Make the rolls by taking a sheet of the cooked lasagne, spreading the ricotta mixture on it, topping with a few pieces of kale and then rolling it up, starting at one end and working your way to the other. Tuck the roll into the squash sauce, placing the side with the seam down. Do this for all of the rolls.
- Evenly distribute the cheese overtop of the rolls and sauce. Bake in the oven for 10 minutes, or until the cheese is fully melted. Remove and let cool a few minutes before serving. Top with fresh basil and a squeeze of lemon!
The post Butternut Squash and Kale Lasagne Roll-Ups appeared first on Never. Not. Eating..
]]>The post Tortiglioni in Homemade Roasted Red Pepper Sauce appeared first on Never. Not. Eating..
]]>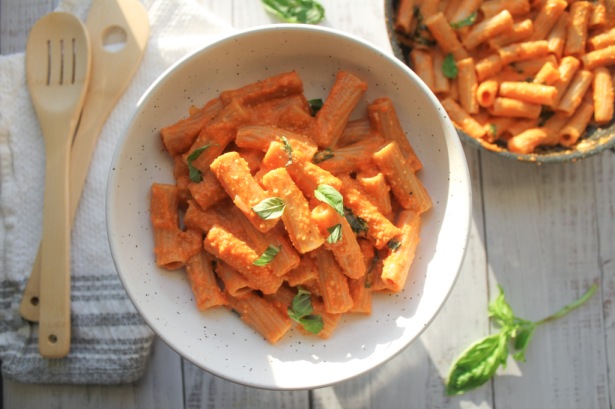
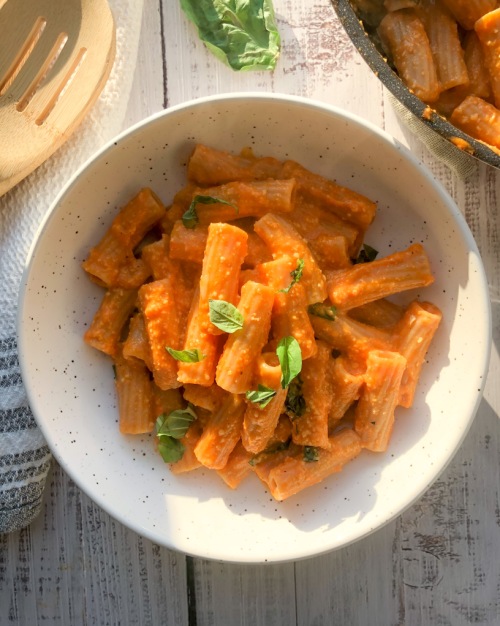
“Tortiglioni” is really hard to say. It looks kind of like rigatoni, so I may just stick with that if I ever have to say it out loud. I use Molisana’s spelt tortiglioni. It’s a brilliant pasta with beautiful grooves meant for soaking up luscious sauces and thus, this roasted red pepper sauce is thick and creamy and suck-up-able. It’s also vegan.
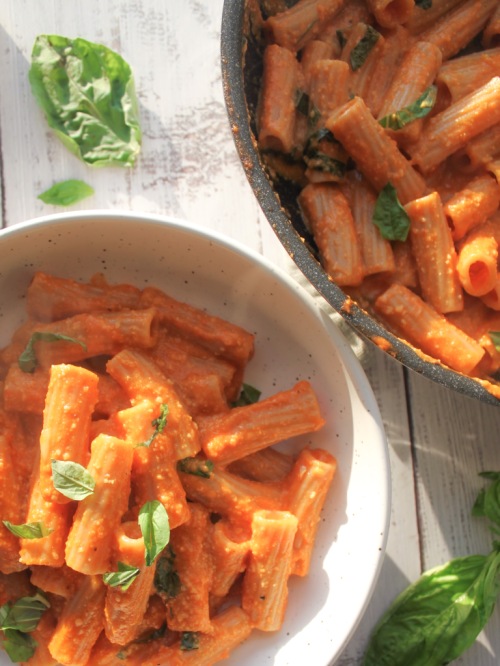
Now, I’m not saying the jarred, store-bought sauces aren’t practical and quick, but they don’t even come close to being as tasty as homemade sauce. And, sometimes you need to treat yo-self! This sauce is not-at-all daunting and all delicious. It may take longer than twisting open a lid and pouring, but it’s worth it. Today’s your day.
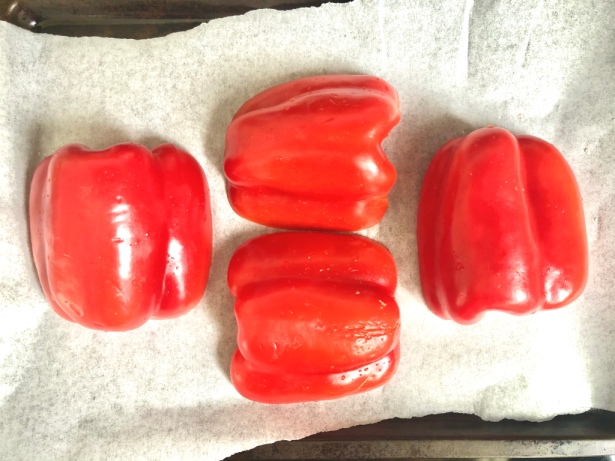
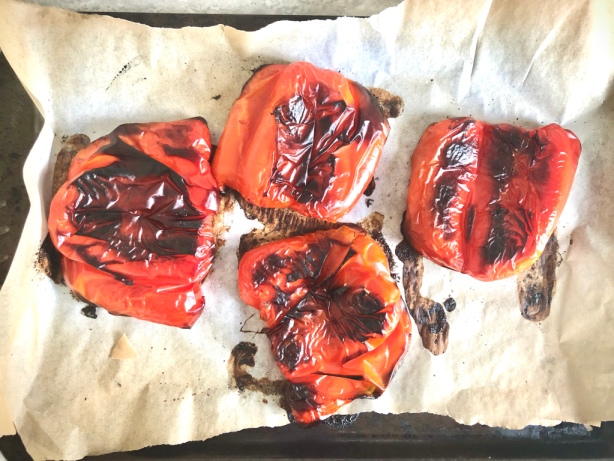
You are going to start with your red peppers – cut them in half, remove the seeds and place them cut side down on a baking sheet lined with parchment paper. Pop them into a 425 degree oven for about 30-40 minutes, flipping once, until their skin begins to blacken and they are completely soft throughout. Carefully peel the skin off and discard. Toss the peppers into your blender with some vegetable stock. To help thicken in a vegan-ified way, add half a cup of raw cashews as well. Season with some salt and pepper and blend up until creamy.
It a saucepan, heat up some olive oil and add a bunch of garlic. Add the creamy pepper sauce and thin it out with some of the water that the pasta has been cooking in. Let this simmer until your tortiglioni is done and then transfer the pasta right to the sauce. Giv’er a toss so that the pasta is completely coated, turn the heat off and add in some fresh basil and a little hit of lemon.
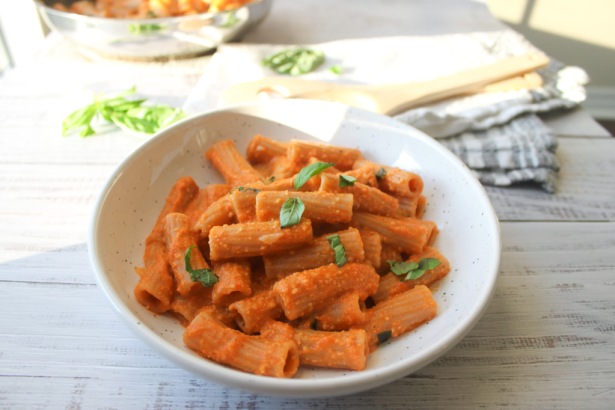
This pasta is so good the next day, too. If you eat dairy, I would also recommend dolloping some fresh ricotta on top while it is still warm. Drool.
I hope this recipe makes it to your kitchen. It is one of my absolute favourites. It’s also great for kids as the veggies aren’t noticeable and are blended right into the sauce. Any feedback is welcomed in the comment section below!
Tortiglioni in Homemade Roasted Red Pepper Sauce
Serving size: 3
Prep time: 5 minutes
Cook time: 50 minutes
Ingredients:
- 2 large bell peppers, cut in half lengthwise and seeds removed
- 3 servings of tortiglioni (about 255 g)
- 1 cup vegetable stock
- 1/2 cup raw cashews
- 1/4 tsp salt
- a few grinds of fresh black pepper
- 2 tbsp olive oil
- 2 cloves garlic, minced
- 9-10 basil leaves, ribboned or sliced
- squeeze of lemon (optional)
Instructions:
- Preheat oven to 425 degrees Fahrenheit.
- Place the four pepper halves onto a baking sheet lined with parchment paper, cut side down, and roast in oven for 30-40 minutes, flipping once. Peppers should have black areas and be soft throughout. Peel the outer skins off and discard.
- Bring a large pot of heavily salted water to a boil and add tortiglioni. Cook according to package directions, until al dente. Reserve 1/4 cup of the pasta water for the sauce before draining.
- Place the roasted peppers, vegetable stock, cashews, salt and pepper into a blender and blend until smooth.
- In a large saucepan, heat the olive oil over medium-low heat. Add the garlic and cook for 30 seconds until fragrant. Pour in the pepper sauce, stir and then add in the reserved pasta water. Let the sauce simmer for a few minutes and then add the cooked pasta, stirring to coat.
- Turn the heat off and add the basil and a squeeze of lemon juice. Serve with more basil on top.
The post Tortiglioni in Homemade Roasted Red Pepper Sauce appeared first on Never. Not. Eating..
]]>The post Lemon Caper Pasta appeared first on Never. Not. Eating..
]]>
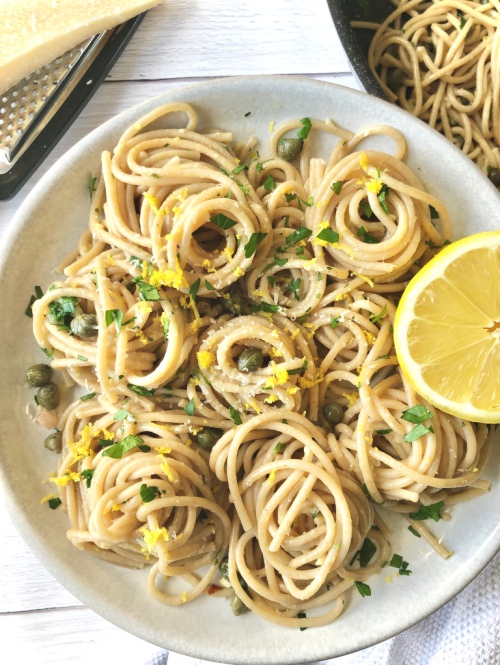
They say you should wake up everyday and still make your bed and get dressed while in self-isolation. They say it helps individuals feel more accomplished and more productive. So I’ve been rising and shining. I get up, straighten out my duvet, pick up all of my little decorative pillows and arrange them at the head of my bed. I put on my yoga pants (better than pajamas?!), slip on a cozy sweater and wash my face. Later, I praise my ambition and appreciate my yoga pant choice because, pasta. THIS pasta. Lemon Caper Pasta. The best pasta in all the lands. And it pairs perfectly with my stretchy pants.
REASONS TO MAKE LEMON CAPER PASTA
This is a perfect dish to make if:
- you want a date night idea
- you need a quick meal
- you like flavour
- you like food
- you are quarantined
- you are a human
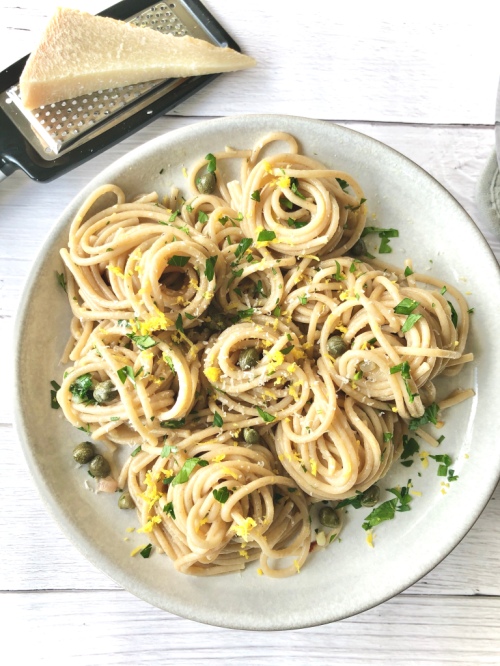
A luscious pasta coated in a white wine-butter sauce with melty parm, briney capers and fresh citrus.
The Pasta
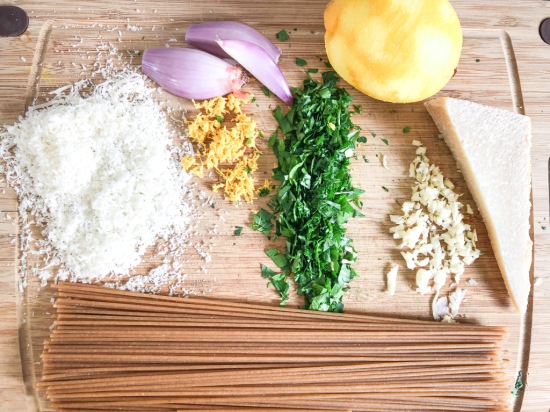
For the pasta, you can really use whatever you have. Here, I’ve used a whole wheat semolina pasta. It’s a bit heartier and nuttier than white pasta. It’s also healthier and is usually my go-to, as well as any spelt pastas.
The capers give this recipe a delicious salty, briney punch. If you don’t want to venture off to the grocery store, you can buy capers here. You can also substitute them for green olives.
It has BOLD flavours. DELICIOUS flavours. CRAVE-WORTHY flavours.
Do you ever meet someone who is really attractive, smart AND kind? Yup. That is this recipe in pasta-form. It’s not impastable. It exists, right here.
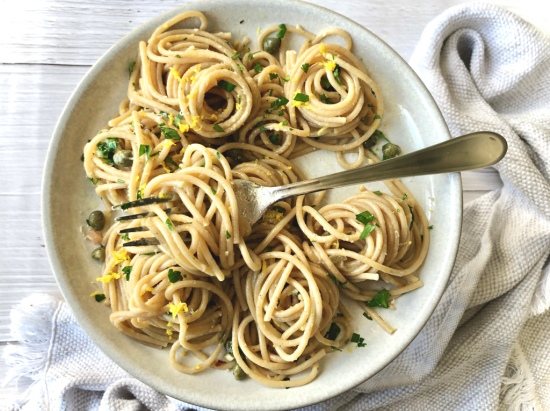
Come and spaghet it.
OTHER IDEAS SIMILAR TO LEMON CAPER PASTA:
Simple Beetroot Pasta (for a fun, colourful meal)
Creamy Vegan Mushroom Rigatoni (a wholesome meal)
Butternut Squash and Kale Lasagna Roll-Ups (a great way to hide vegetables for the kids)
Tortiglioni in Roasted Red Pepper Sauce (Nonna will be proud)
Lemon Caper Pasta
Serving size: 2
Prep time: 5 minutes
Cook time: 20 minutes
Ingredients:
- 2 servings of choice pasta (approx. 180 g)
- salt
- 2 tbsp olive oil
- 1 shallot, diced
- 2 cloves garlic
- 1/3 cup white wine
- 1 tbsp butter
- 1/3 cup fresh, grated parmesan, plus more for topping
- 1/4 tsp chili flakes (optional)
- 1/2 tbsp caper brine (optional)
- 2 tbsp capers
- zest of one lemon
- juice of half a lemon (approx. 2 tbsp)
- 1/4 cup chopped parsley
- fresh ground pepper
Instructions:
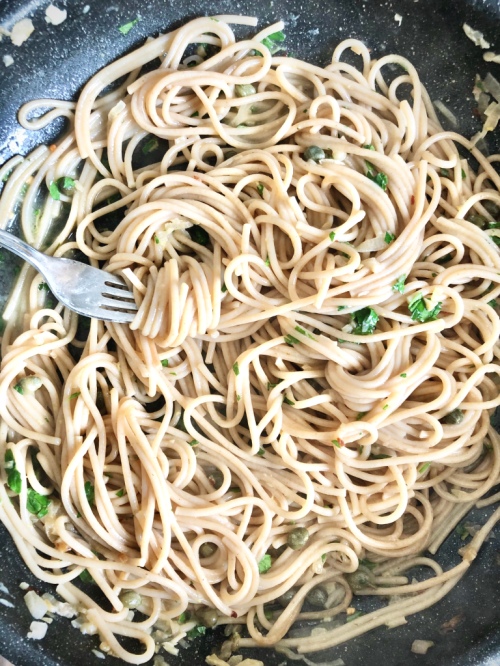
- Fill a large pot with water and bring to a boil. Salt the water generously and add the pasta. Cook according to package directions, until ‘al dente.’ Reserve about 1/3 cup of the pasta water before draining.
- Meanwhile, add olive oil to a large skillet over low heat. When pan is warm, add the shallot and stir for a few minutes until tender. Add garlic and stir for about 30 seconds until fragrant. Pour the white wine into the pan and increase the heat to medium-high. Let the wine reduce for about 5 minutes, or until you can no longer smell the alcohol. When reduced by about half, add the butter and stir to incorporate. Reduce the heat again to medium-low.
- When the pasta is done, add it right to the pan along with the reserved pasta water. Add the parmesan and chili flakes to the pan and toss everything together.
- Turn the heat off and add the caper brine, capers, lemon zest, lemon juice, parsley and a few grinds of fresh black pepper. Toss to combine, dish onto two plates and top with more parmesan, if you would like.
The post Lemon Caper Pasta appeared first on Never. Not. Eating..
]]>