The post Strawberry Honey Ginger Galette appeared first on Never. Not. Eating..
]]>
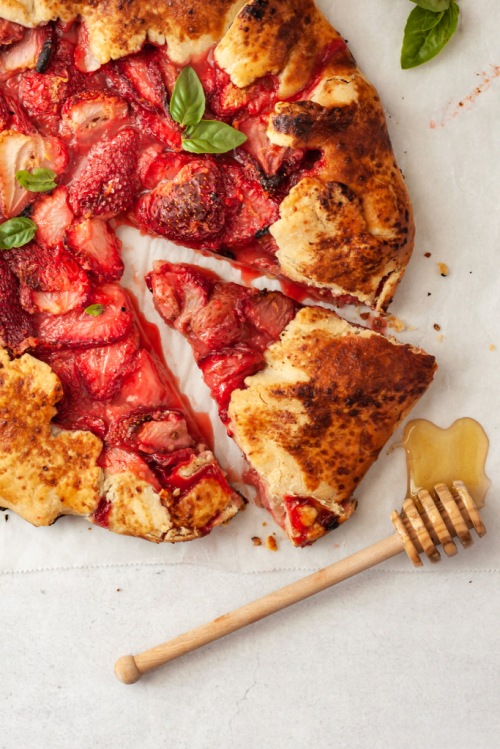
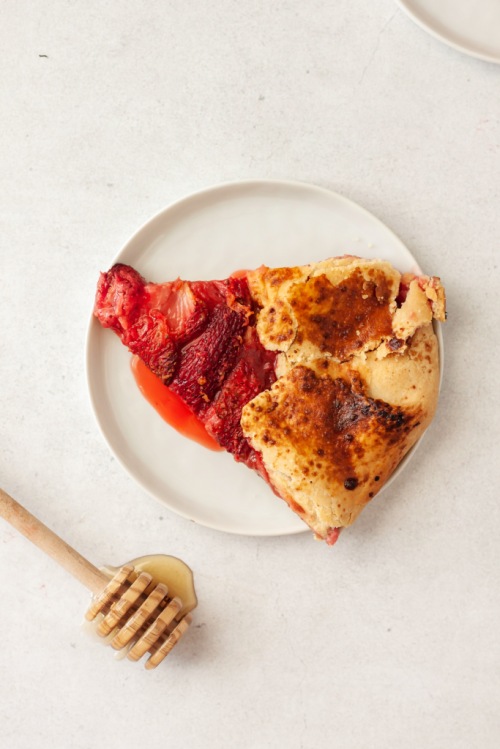
WHAT IS A STRAWBERRY HONEY GINGER GALETTE?
Sometimes I just need a WAHBAM, hit-me-in-the-face kind of dessert and I think this is it. We all know and love the humble strawberry, but sometimes she gets lonely all by herself. Therefore, I introduced her to a new friend in this recipe and they form a perfect match. Strawberry + ginger = BFFs.
I’ll be straight up with you – if you don’t like ginger, this recipe probably isn’t for you, however, I’m okay with you leaving it out. I’ll allow it, just this once. But, if you do like ginger, then why not switch up your summer dessert game? It adds a little kick that only ginger can give and I’m here for it.
THE INGREDIENTS
This recipe is not complicated. It’s actually quite simple, and requires minimal ingredients. Here is what you will need:
For the Dough:
- Flour
- Butter
- Salt & Ginger powder
For the filling:
- Strawberries
- Fresh ginger
- A lemon
- Honey
- Cornstarch
- An egg + sanding sugar (for the egg wash)
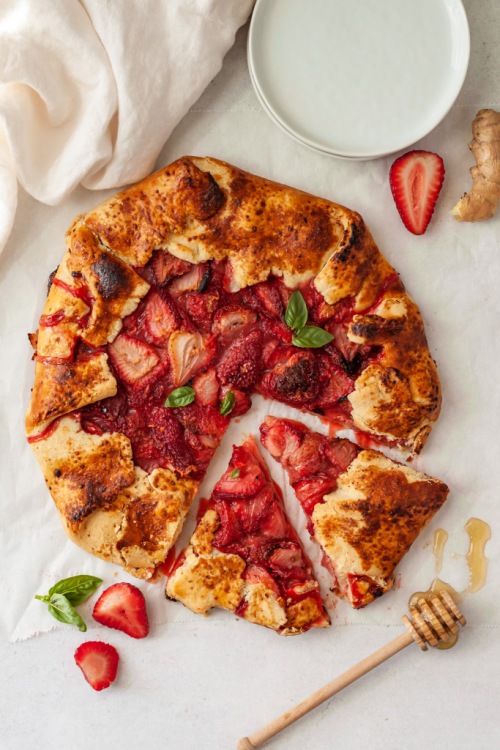
THE PASTRY DOUGH
You can definitely use store-bought pie dough for this, but why would you when making it yourself is uber easy?! All you need to do is throw all ingredients into a food processor and it comes together in a jiffy. You then roll it out, fill it up, fold it over, bake it and it becomes a gorgeously rustic little galette that will please all of your ginger-loving friends.
To ensure your pie dough is extra flaky when baked, you need to make sure your butter is super cold. I like to cube up the required amount and put the cubes in the freezer while I measure out the rest of the ingredients. This allows the butter to melt slower and create pockets of air that form those gorgeous layers in your crust.

THE FILLING
Firstly, you are going to want to prepare your strawberries. If they are smaller, halve them, and if they are larger, I like to cut them into thirds to have nice, big pieces in the galette. They will shrink down as they cook, so keep this in mind!
When your strawberries are ready, place them in a bowl with the other filling ingredients and that is *literally* it. Let it sit to thicken up while you roll out your dough – how easy is that?!
OTHER GLUTEN-FREE RECIPES
Gluten-Free Crepes with an Apple Cinnamon Compote (the perfect weekend breakfast)
Chocolate Chai Ganache (a luscious cake filling)
Gluten-Free Stone Fruit Galette (another open face pie for you to enjoy)
Gluten-Free Zucchini Galette (another galette, but a more savoury option)
TOOLS NEEDED TO MAKE THIS STRAWBERRY HONEY GINGER GALETTE
Click on the images below to see what I use for this recipe.


This post contains affiliate links and I may earn a small commission when purchases are made after clicking the links, at no cost to you – Thank you!
STRAWBERRY HONEY GINGER GALETTE
Serving size: 7-8
Prep time: 30 minutes (much of this is inactive time)
Cook time: 30 minutes
Ingredients:
- 1 1/2 cups all purpose flour
- 1/2 tsp salt
- 1/2 tsp ginger powder
- Half cup + 1 tbsp butter, cubed and very cold*
- 1.5 pounds fresh strawberries, halved
- zest of one lemon
- 1 1/2 tbsp lemon juice
- 1/2 – 1 tbsp fresh ginger, minced**
- 1 tbsp cornstarch
- 2 tbsp honey
- 1 egg, beaten
- 1 tbsp sugar (optional)
Instructions:
- Start with the dough by adding the flour, salt and ginger powder to a food processor and pulse to combine. Add the cold butter and continue to pulse until dough begins to resemble peas. Drizzle in one tablespoon of ice cold water and continue to pulse until the dough comes together. This may require an extra tablespoon or so of water, but make sure to add it slowly. Finally, form dough into a disc, cover in plastic wrap and refrigerate for 30 minutes.
- While the dough is resting, create the filling. Combine the strawberries, zest, lemon juice, ginger, honey and cornstarch in a bowl with a pinch of salt and set aside.
- Place the dough disc onto a lightly floured surface and roll it out to 1/8-inch thick. Carefully transfer to a parchment lined baking sheet. Scoop the filling into the middle of the pie dough with a slotted spoon, trying to avoid adding the excess liquid. Spread the filling out, leaving a 1.5 inch border all the way around. Work your way around the perimeter, folding the edges of the dough overtop of the filling. Place the entire baking sheet in the fridge to firm up the butter again, while the oven preheats.
- Preheat your oven to 400 degrees Fahrenheit.
- When your oven is ready, remove the galette from the fridge and brush the pastry edges with the beaten egg. Sprinkle the sugar over the egg wash and bake for 30-35 minutes, or until crust is golden brown. Remove from oven and let cool for 10 minutes before serving!
NOTES:
*I like to cube my butter ahead of time and place it in the freezer while I prep the other ingredients.
**Depending on how much of a kick you want from the ginger, I would measure it according to the people you are serving. If you just want a hint of ginger, put in 1/2 tbsp. If you want to really taste it, add up to 1 tbsp.
The post Strawberry Honey Ginger Galette appeared first on Never. Not. Eating..
]]>The post Gluten Free Stone Fruit Galette appeared first on Never. Not. Eating..
]]>
I’m sadly shedding a tear over here as stone fruit season is slipping away. It feels like peaches have only been around for a few weeks, so I’m not sorry that I am bombarding you with a million recipes. And, you need to make this one NOW, before the peaches are gone and it’s too late – get on it!
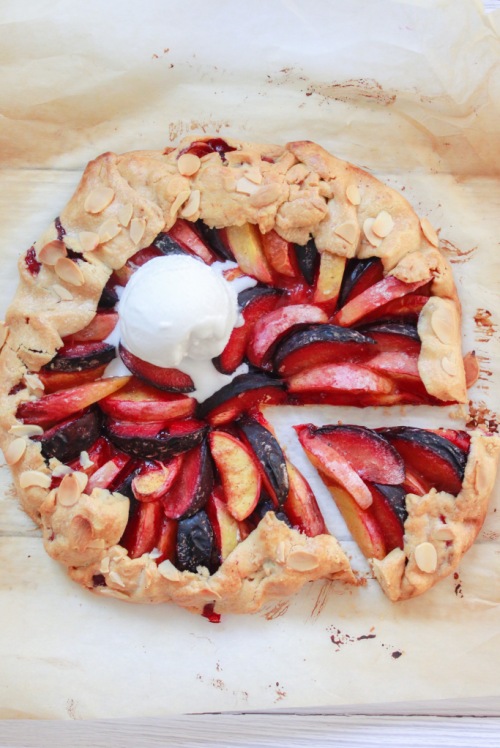
WHAT IS A GLUTEN FREE STONE FRUIT GALETTE?
If you’ve been following my blog for a while, first of all thank you, I love you, secondly, you know I do a lot of gluten-free stuff and this galette is no exception. Sometimes people think things that are gluten-free don’t taste as good as the glutinous stuff, but I’m here to tell them they’re wrong – WRONG! This crust is still flaky and delicious. So, if taste isn’t compromised, and you had to choose between a gluten-free dessert or a wheat flour dessert…Which one are you going for? I thought so.
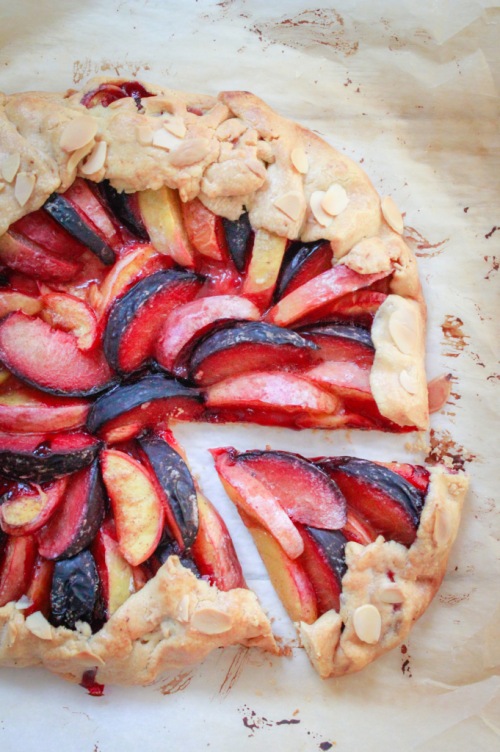
Let’s start by talking about stone fruit. If you are unsure, stone fruit is any fruit with a stone in it. We’re talkin’ peaches, nectarines, plums, cherries, apricots, etc. – you can literally use any of those for this galette. My only recommendation is, if you choose to use apricots, you should add a tablespoon or two of sugar to the fruit as fresh apricots can be very tart. I chose to use peaches, nectarines and plums as those fruits are currently at their peak where I live.
THE PASTRY DOUGH
I think making pastry intimidates people. It intimidates me sometimes, which is why I am always stunned when it turns out so well. Despite being gluten-free, this crust is still everything a great crust should be – flaky, buttery, light, golden. It also rolls out so easily. It’s worth a shot, gluten-free or not – did you catch the rhyme?
WHY SHOULD YOU MAKE THIS GLUTEN FREE STONE FRUIT GALETTE?
If you aren’t convinced to make this yet, I have one further piece of information that may help – TIME. It takes hardly any of it. Seriously, I can understand looking at something like a galette and thinking, “that looks too intense for me,” but this isn’t like that – I promise. The dough takes about 5 minutes to put together, and then it chills in the fridge for 30 minutes. The fruit just needs to be chopped and mixed with a few simple ingredients and also needs to sit for a bit. After that, all you need to do is roll out the dough, place the fruit on top and bake – easy peasy.
THE INGREDIENTS
Like I said, this galette is so easy to make. Moreover, it requires minimal ingredients that come together quickly. Here’s what you need to pick up from your grocery store (like, today!):
For the crust:
- Gluten-Free All Purpose Flour (I prefer Bob’s Red Mill)
- Salt
- Butter
For the Filling:
- Stone fruit of your choice (peaches, plums, nectarines, etc.)
- Cornstarch
- A lemon
- Cinnamon
- Nutmeg
- Salt
- An egg (for the egg wash)
- Sliced almonds (to top, optional)
OTHER MUST-TRY GALETTE RECIPES
Strawberry Honey Ginger Galette (for a unique dessert when you’re feeling sassy)
Gluten Free Zucchini Galette (another fun option, but this time – savoury)
TOOLS NEEDED TO MAKE THIS GLUTEN FREE STONE FRUIT GALETTE
Click on the images below to see what I use for this recipe.
This post contains affiliate links and I may earn a small commission when purchases are made after clicking the links, at no cost to you – Thank you!
GLUTEN FREE STONE FRUIT GALETTE
Serving size: 8-10
Prep time: 15 minutes
Chill time: 30 minutes
Cook time: 30 minutes
Ingredients
For the crust:
- 1 1/4 cup gluten-free flour
- 1/2 tsp salt
- 3/4 cup cold unsalted butter, cubed
- 1 tbsp vinegar
- ice-cold water
For the filling:
- 4 cups of stone fruit (approximately 5-6 medium-sized fruits, I used 2 peaches, 1 nectarine and 2 plums)
- 1 tbsp cornstarch
- 1 tbsp lemon juice
- 1/2 tsp cinnamon
- pinch of nutmeg
- pinch of salt
- 1 egg, beaten
- 2 tbsp slivered almonds (optional)
Instructions
For the crust:
- Add the flour and salt to a food processor and pulse a few times to combine. Toss in the cold cubed butter and pulse again until dough resembles small peas. Add the vinegar and one tablespoon of ice-cold water and pulse. If needed, add more water, half tablespoon at a time until larger pieces of dough come together – this usually takes me 1.5 to 2 tablespoons of water to achieve. Be careful not to add too much water or dough will be too sticky.
- Turn dough out onto a piece of plastic wrap and use your hands to form dough into a disc. Wrap and place in fridge to chill for 30 minutes.
For the filling:
- Add all of the filling ingredients to a bowl and stir to combine. Set aside while the dough finishes chilling.
Assembling:
- Firstly, make sure you flour your work surface well. Place the dough on floured surface and sprinkle more flour on top of the dough, as well as on your rolling pin. Roll out dough to about 1/4-inch thick. Carefully transfer it to a parchment lined baking sheet and arrange the stone fruit slices on top, in a circular formation, leaving a one-inch border all the way around. Fold the edges over the fruit and place the baking sheet back into the fridge, setting the oven to 400 degrees Fahrenheit to preheat.
- When the oven is ready, remove the galette from the fridge and brush the beaten egg over the exposed pastry edges and top with a few sliced almonds, if desired. Bake the galette for 25-35 minutes, or until crust is golden brown. Be sure to let it cool for 5 minutes before serving, as the fruit can be very hot.
NOTES
This galette is best when eaten immediately, but can be stored in an airtight container in the fridge for up to 3 days.
This recipe is less-sweet, so add a tablespoon or two of sugar to the fruit when combining with the other ingredients if you would like a sweeter dessert.
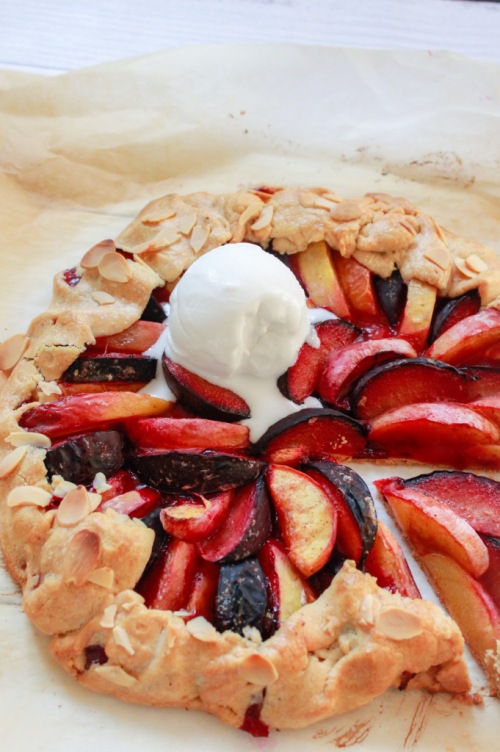
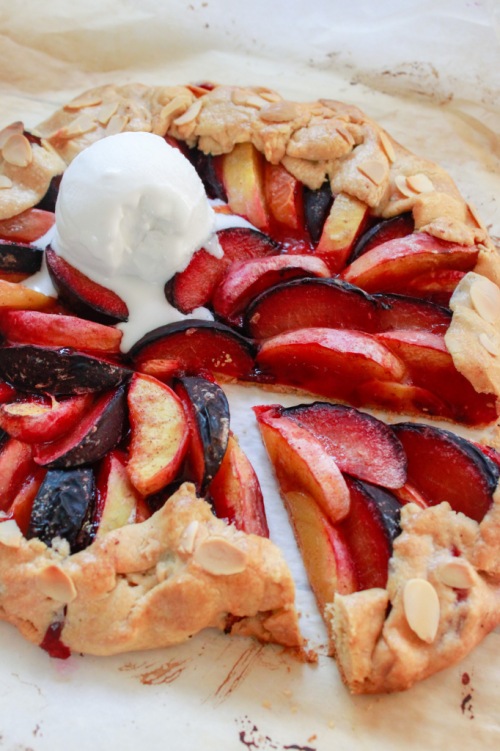
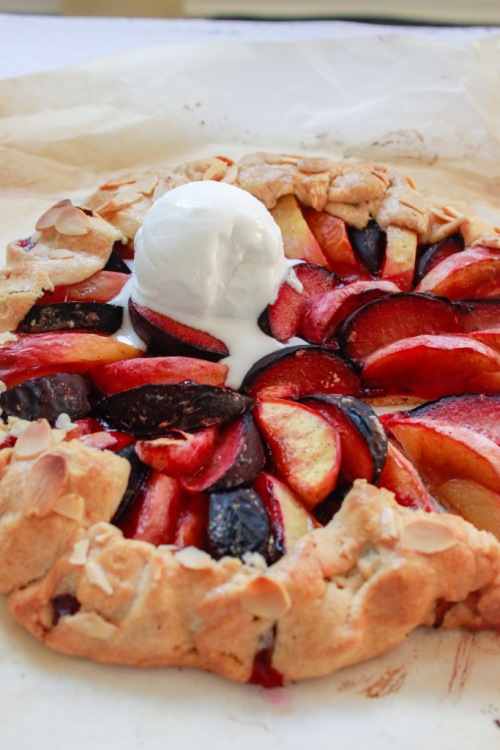
Try with a scoop of vanilla bean ice cream!
The post Gluten Free Stone Fruit Galette appeared first on Never. Not. Eating..
]]>The post Lemony Vegan Basil Pesto appeared first on Never. Not. Eating..
]]>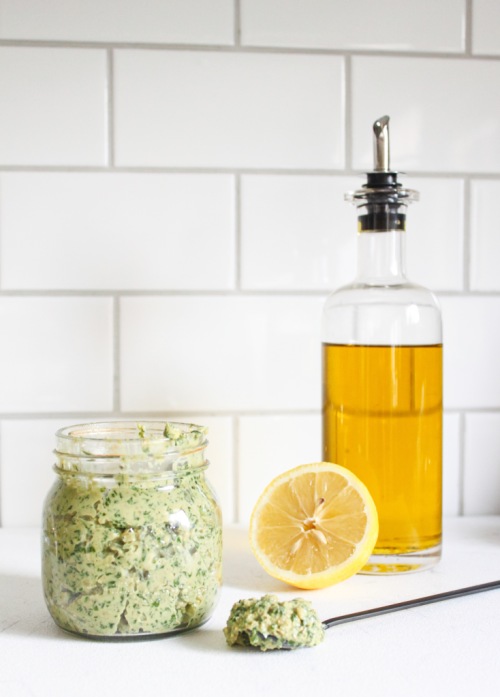
Pesto is a highly underused food, IMO. It is so versatile – from a sauce for pasta or pizza to a simple spread for toast, it is a complete flavour bomb!
Traditionally, pesto is made with five key ingredients: Basil, pine nuts, parmesan, olive oil and garlic (plus salt, but that doesn’t count). And, you want to know the greatest thing about pesto? The ingredients are easily adaptable. That is why turning it vegan is so easy to do.
The herbs – Basil is traditional in pestos, and I stick with it in this recipe as well. However, it can easily be swapped out for any leafy green such as parsley, cilantro, spinach or a combination of these. It depends on what you have, what you like and how adventurous you are!
The nuts – Pine nuts are typically what you find in pesto, but since one bag costs more than my monthly gym membership, I usually switch them for another type of nut. I love walnuts and I chose to use them in this recipe. Pecans would also be good for a sweeter turn-out. Toasting the nuts prior to using them in a pesto also adds another dimension of flavour.
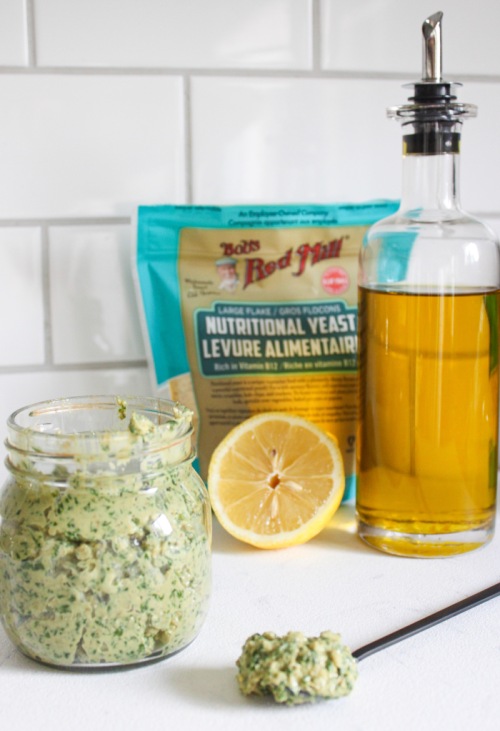
The cheese – Pesto is made with a dry-aged cheese, like parmesan. You can, however, sub it for a cheese of your choice, like romano or even an old sharp cheddar. Since this recipe is vegan, I am using the cheesiest vegan ingredient I know of – Nutritional Yeast. Nutritional Yeast is an inactive yeast that is very cheesy in flavour and is packed with a number of healthy nutrients including: Thiamine, Riboflavin, Niacin, Vitamin B6, Folate and my favourite, Vitamin B12. I am almost positive it is the only vegetarian food you can find that has B12 in it, which makes me love it even more! The one I use can be found here.
The oil – Use extra virgin olive oil. There are no exceptions for this ingredient. Make it a good olive oil, too, like this one.
Garlic – Same.
Acid – I like to put lemon juice as well as the zest into my pesto. It gives it a ‘zip’ of freshness that adds brightness and vibrancy to any dish!
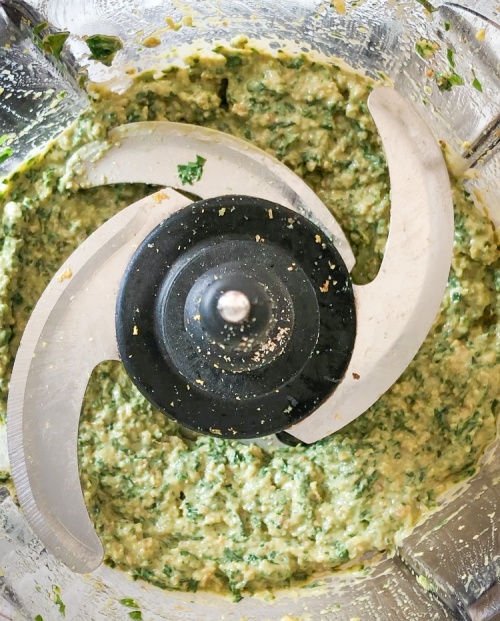
The process of making pesto can be completed in many ways. Traditionally, it is made by cutting all of the ingredients together with a sharp knife and then pouring the olive over them. It could also be made in a mortar and pestle. I like to use my food processor to save on time.
Whichever ingredients you choose to use and whichever method you bring them together in, I hope you get to enjoy pesto this summer. There is nothing better!
Lemony Vegan Basil Pesto
Serving size: Makes about 1/2 cup
Prep time: 10 minutes
Ingredients:
- 2.5 cups packed fresh basil, washed and dried
- 1/2 cup walnuts
- 1 clove garlic
- 1/4 tsp sea salt
- 2 tbsp nutritional yeast
- zest of one lemon
- 1.5 tbsp fresh lemon juice
- 1/4-1/3 cup good extra virgin olive oil
Instructions:
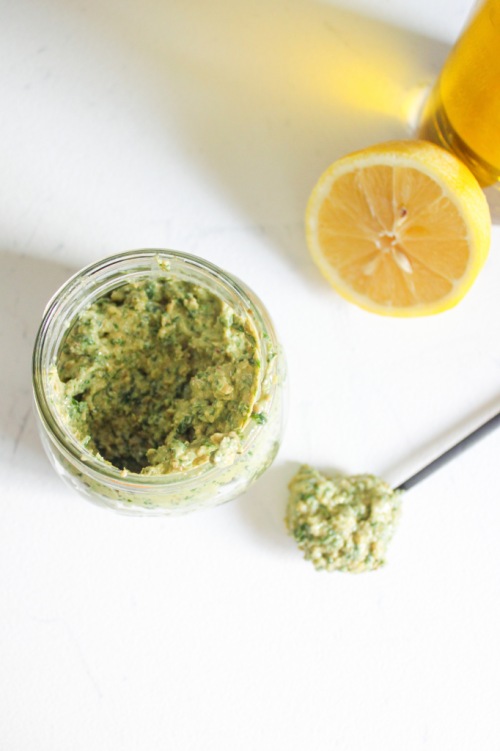
- To your food processor, add the basil, walnuts, garlic, salt, nutritional yeast and lemon zest. Pulse until the mixture has broken down into smaller pieces. Add the lemon juice and set your processor to blend. While blending, drizzle in the olive oil slowly. If you want a thicker pesto, add 1/4 cup of oil. If you are looking for a thinner sauce, continue to add more oil until you have reached your desired consistency. Taste and adjust seasonings (salt, lemon juice) accordingly.
This is best used immediately, but can be stored in an airtight container in the fridge for up to three days.
The post Lemony Vegan Basil Pesto appeared first on Never. Not. Eating..
]]>The post Heirloom Tomato, Pesto and Ricotta Tart appeared first on Never. Not. Eating..
]]>
When I was a kid, I would (regularly) eat an entire tomato, one bite at a time, sprinkling on salt between mouthfuls. I knew what was up. My love for tomatoes hasn’t changed in the least. I honestly don’t even believe in sandwiches without them. That may be why I developed this fresh, juicy, delicious, tomato-forward tart that screams summer and brings me back to my childhood. Try it out if you were anything like me as a child (or adult).

Let’s start with the star of the show – Tomatoes. You really can use any kind for this recipe, however, I really love the colour variance that heirloom tomatoes provide…It makes the tart look stunning. I prefer to use a range of sizes as well…from the large, funny-shaped ones to the teeny, tiny, mini ones. If you make this tart in the summer, heirloom tomatoes are the way to go. If it is past their season though, it would be better to use your regular supermarket hybrid tomato, as heirlooms don’t travel well.

Secondly, pesto. Traditionally, a delicious mix of basil leaves, pine nuts, garlic, lemon juice, olive oil, salt and parmesan cheese. I make a vegan-style pesto that I prefer to use with this recipe (click here for the recipe), but you can use your favourite one. Store bought is a good option throughout the winter.

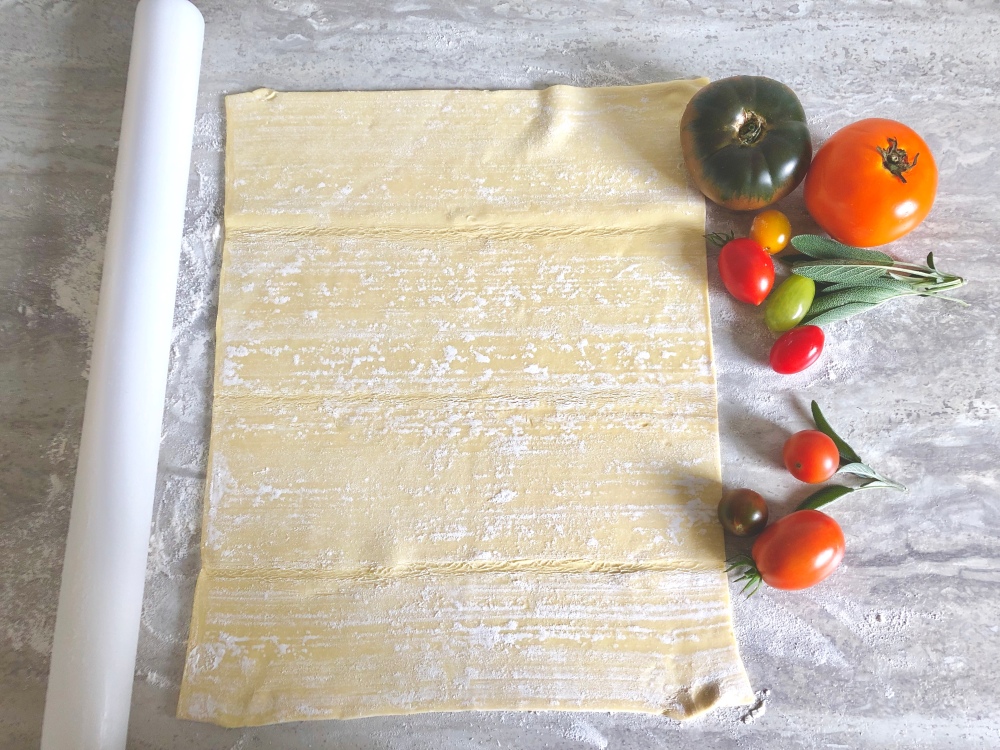
The Puff – the base of this tart is made with puff pastry. This stuff is magic. A little heat and it rises up, turns golden brown and develops crispy edges that are drool-worthy. You can buy it in the freezer section of any grocery store. Just take one sheet out of the freezer about an hour before making this recipe to allow it to defrost.
Finally – ricotta. An italian triumph and a perfect pair for tomatoes. Spread over the tart at your own will. No one should limit your ricotta intake.

Let’s get to it!

Heirloom Tomato, Pesto and Ricotta Tart
Servings: 6
Prep time: 15 minutes
Cook time: 30 minutes
Ingredients:
- 1 sheet of puff pastry, thawed
- 1/2 cup ricotta
- 5-7 tbsp my Lemony Vegan Basil Pesto (or store-bought)
- tomatoes (3 large, 1 medium, 10-15 cherry tomatoes)
- flaky sea salt
- fresh basil
Instructions:
- Preheat oven to 400 degrees F.
- On a lightly floured surface, roll the puff pastry out until it is about 1/4 of an inch thick and in a rectangular shape. Transfer dough to a parchment lined baking sheet.
- Spread the ricotta evenly over the pastry.
- Spoon 2-3 tablespoons of basil pesto over the ricotta layer.
- Begin placing your tomatoes, filling in the gaps with the smaller cherry tomatoes, and leaving a 1-inch border all the way around.
- Drizzle another 2-3 tablespoons of pesto overtop of the tomato layer.
- Fold the border of the pastry overtop of the tomatoes and pinch at the corners. Brush another tablespoon or two of pesto onto the edges of the puff pastry.
- Bake in the oven for 30 minutes, or until pastry has puffed up and is golden brown in colour.
- Remove from oven and sprinkle some flaky sea salt over top.
- Let cool for 5 minutes before slicing with a pizza cutter. Top with fresh basil and a few more drizzles of pesto (optional).
The post Heirloom Tomato, Pesto and Ricotta Tart appeared first on Never. Not. Eating..
]]>