The post Vegan Power Muffins appeared first on Never. Not. Eating..
]]>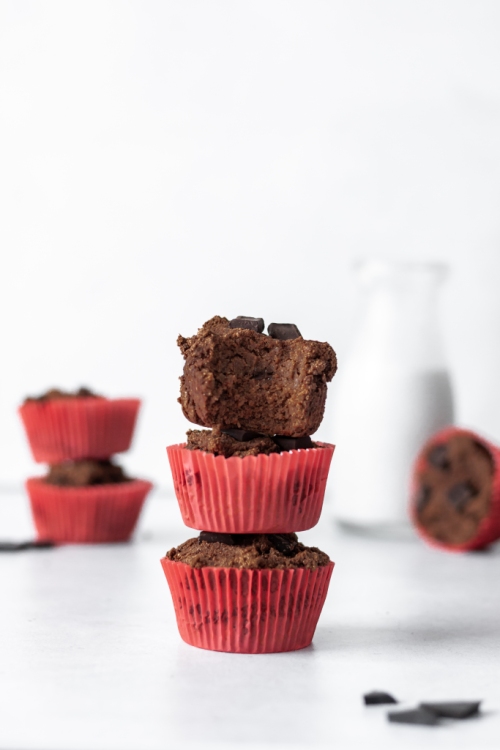
I LOVE muffins. Love, love, love them. But I’m always finding myself feeling bad after eating them, which is so silly. A girl can’t eat a muffin in the 21st century anymore without feeling all the sadness of the number of calories she just consumed. Life, eh?!
Luckily, this has inspired me to create some healthier muffins that not only will punch guilt in the face, but will also provide you will that extra energy boost and a protein POP for those slower mornings. Sign. Me. Up.
I love many things about these muffins: they are gluten-free, dairy-free, refined sugar-free and vegan. They are packed with healthy fats, fibre and protein. And, they are easy to make!
Let’s talk substitutions:
The fats: We know fats are important in baking. They keep things moist. Instead of butter, I’m swapping it out with some coconut oil. We all know the research on coconut oil, with its likeliness to improve hair, skin and nails, as well as boost brain health.
The binder: Typically, eggs are used to make everything stick together and to add structure in our baking. Since I wanted to keep this recipe vegan, we are subbing the eggs for chia seeds that have “gelled” in water. They create a gelatinous “paste” that mimics the job of an egg. Not to mention they have tons of fibre, good fats and protein.
The flour: You will rarely catch me eating white flour. Hell naw. Today, we are using coconut flour instead. Coconut flour definitely requires more liquid than your standard AP flour, and can be a bit tricky to work with, but the benefits are worth it. It’s gluten-free and promotes digestion with the ample amounts of fibre it provides.
The sweetness: I have made this recipe in two different ways. One way, I use JUST bananas to add a touch of sweetness, and the other, I add some maple syrup along with the bananas to satisfy that sweet tooth (naturally, of course). You can leave out the syrup if you prefer (just add an extra mashed banana).
Extras: There are a few other ingredients that I like to sneak into these muffins to give that extra little WAHBAM – coffee, maca and protein powder. Coffee brings out the chocolatey flavour, maca is healthy AF, and protein powder, well, I think that’s pretty clear. You can always leave these ingredients out if they are not for you!
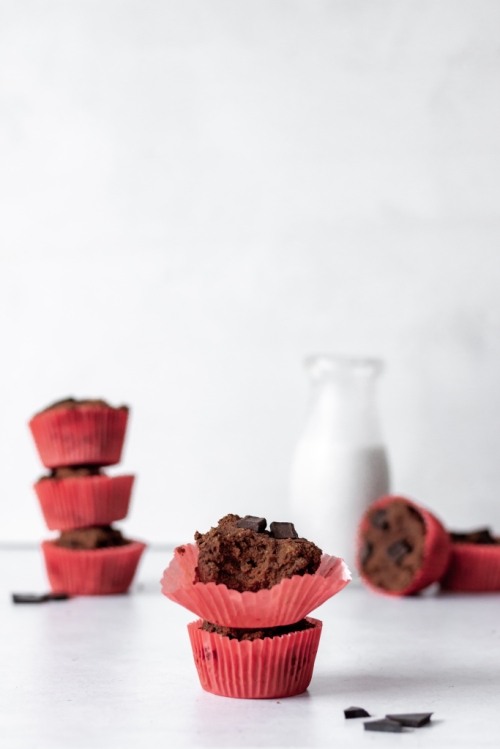
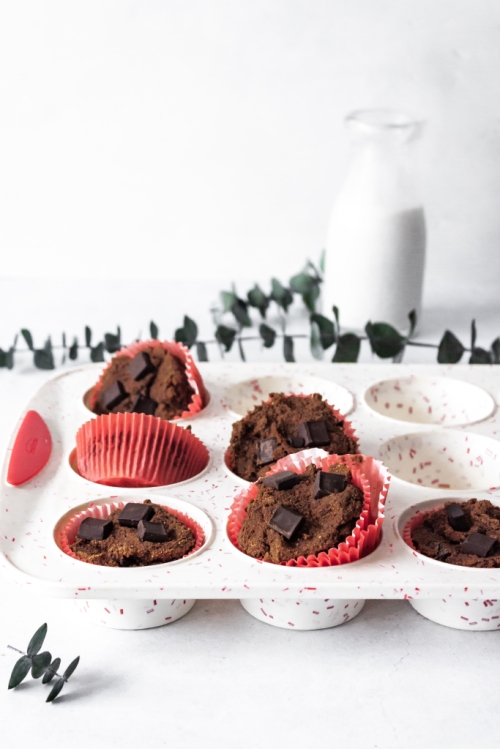
These muffins release nicely from the sides of the muffin liners. I love shopping on Amazon to find liners that go with my mood, or a celebration if I am bringing treats. I love these rose gold ones, or these fun ones that come with cute little toppers. If I am just baking for myself, I like to use my silicone mold to reduce waste and have an easy clean-up.
This post contains affiliate links and I may earn a small commission when purchases are made after clicking the links, at no cost to you. Thank you!
Vegan Power Muffins
Yield: Makes 12 muffins
Prep time: 5 minutes
Bake time: 30 minutes
Ingredients:
- 1/4 cup chia seeds
- 1/2 cup plant-based milk
- 1/2 tbsp apple cider vinegar
- 3 bananas, mashed
- 1/4 cup coconut oil, melted
- 1/2 cup smooth almond butter
- 1/2 tbsp pure vanilla extract
- 1/3 cup maple syrup
- 3/4 cup coconut flour
- 1/3 cup cocoa powder
- 1/2 tsp salt
- 1/2 tsp baking soda
- 1/2 tsp cinnamon
- 1 tbsp instant coffee (optional)
- 1 tsp maca powder (optional)
- 1 scoop (27 g) protein powder (optional)
- 3/4 cup dark chocolate chunks
Instructions:
- Preheat your oven to 350 degrees Fahrenheit. Line a muffin tin with 12 muffin cups.
- Mix the chia seeds with 2/3 cup of water in a small bowl and set aside to “gel,” at least 10 minutes.
- Mix the milk and apple cider vinegar and set aside.
- In a large bowl, use a hand mixer to beat together the bananas, coconut oil, almond butter, vanilla, maple syrup, chia seeds and milk/vinegar mixture, until smooth.
- In a medium bowl, whisk the coconut flour, cocoa powder, salt, baking soda, cinnamon, coffee, maca and protein powder (if using) until combined.
- Add the wet ingredients to the dry ingredients and beat until fully combined (batter will be thick). Fold in the chocolate chunks.
- Scoop the batter into the muffin liners and bake for 30-35 minutes, or until they look dry on the top and a toothpick comes out clean.
- Let cool in pan for 10 minutes before transferring to a wire rack to finish cooling. Store in an airtight container on the counter for up to three days, in the fridge for up to 5 days, or freeze for later.
Best served at room temperature or from the fridge!
The post Vegan Power Muffins appeared first on Never. Not. Eating..
]]>The post Sweet Potato Creme Brulee (Vegan, GF) appeared first on Never. Not. Eating..
]]>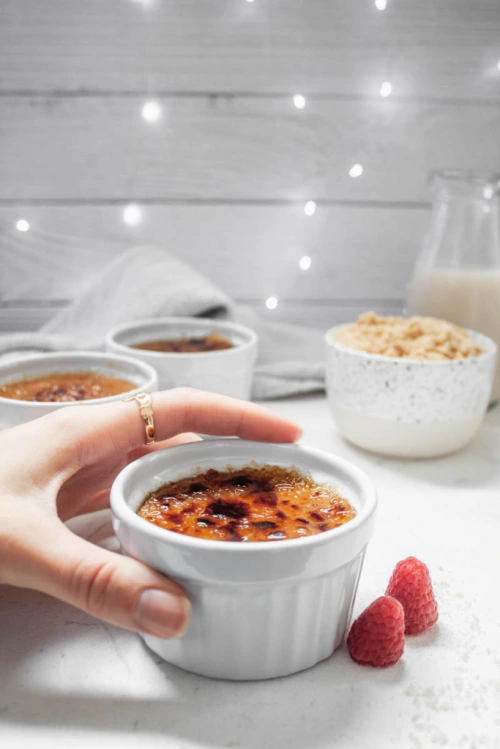
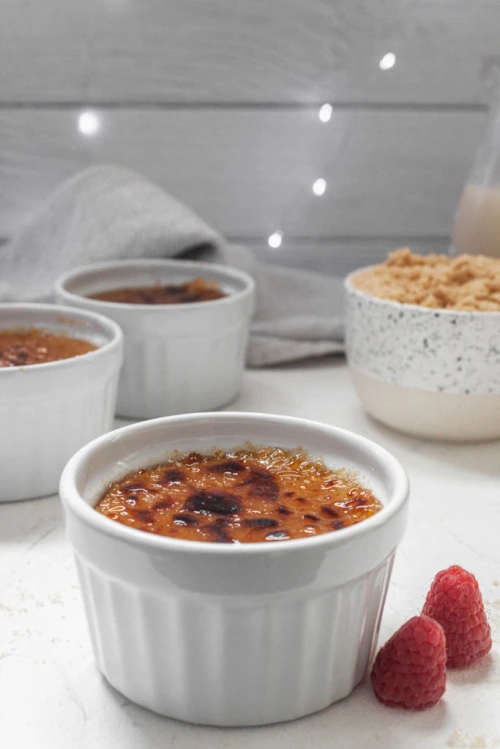
WHAT IS SWEET POTATO CREME BRULEE?
I really love sweet potatoes and I always have them at this time of year. I prefer them to white potatoes and always experiment with different ways of using them. This week, I turned them into the cutest little desserts, that are also dairy-free and gluten-free! ‘Cause who doesn’t love to be free?!

INGREDIENTS
So, real talk: My appreciation for coconut milk grows by the day. Nature seriously did us a solid by serving us coconuts, and I am down for it. You can very likely turn any animal-based recipe into a plant-based one with a simple can of coconut milk, just in case you were wondering!
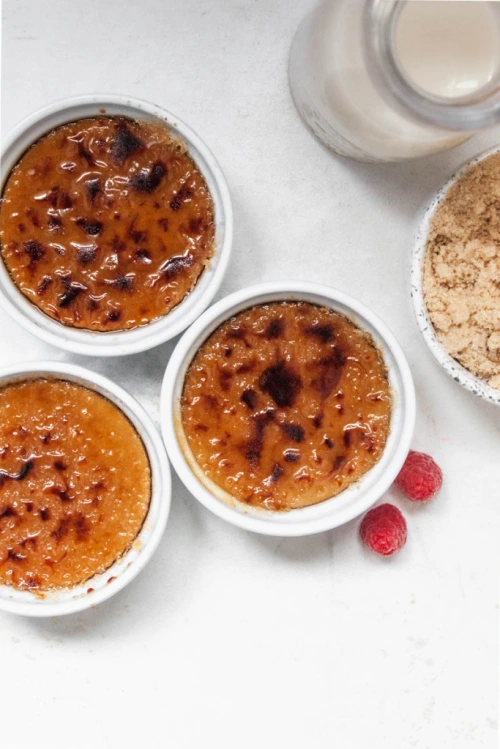
Coconut milk and sweet potatoes are the two main ingredients in this recipe. You will also need a sweetener, and since sweet potatoes and maple go really well together, I use syrup (that pure Canadian kind)! Some cinnamon and fresh nutmeg bring in the warm, cozy feelings of winter. Finally, the glue that holds it all together is the agar agar. Agar agar is basically a vegan gelatin. You can buy it on Amazon, or if you have any specialty grocery stores in your ‘hood, try that!
HOW TO MAKE SWEET POTATO CREME BRULEE
The first step is to roast the sweet potato. I really hate a mess (and I’m lazy), so I just pierce my potato with a fork a few times and stick it directly on the rack of my oven, place a piece of tin foil on the rack below it (to catch any drippings), set my oven to 400 degrees and walk away for an hour. You will see the potato begin to ooze out (yes, it’s normal) and that’s usually how you know it is ready. Stick a fork in it, just in case.
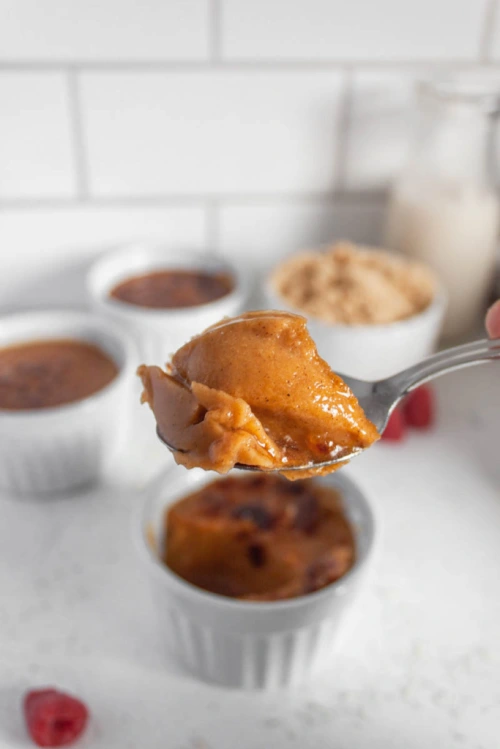
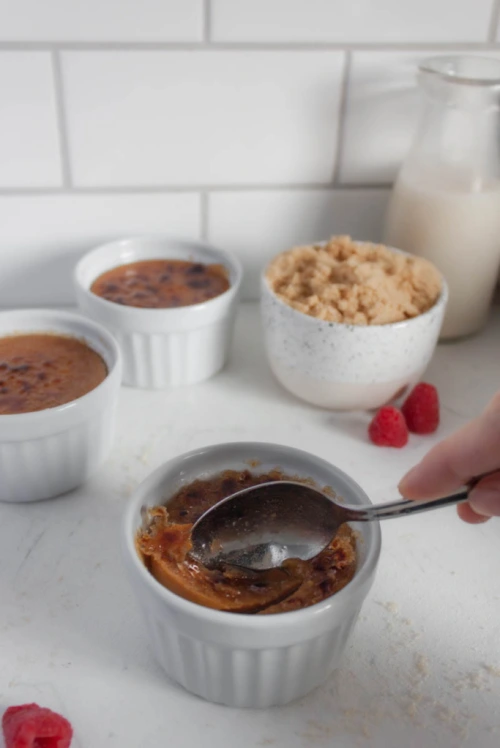
Next, you place the potato, milk and syrup in a blender and blend until smooth. Transfer to a pot with some salt and the spices and bring to a boil. Add the agar agar and reduce heat, whisking for about a minute to ensure the agar is completely combined. Strain the mixture and pour into small ramekins and when ready to serve, top with some sugar (I do a mix of white and brown) and torch!
Your holiday guests will love cracking the hardened sugar on top and diving in to this semi-healthy treat!
OTHER VEGAN DESSERTS
Vegan Whipped Cream (the perfect dessert topping)
Vegan Rice Crispy Chocolate Treats (a perfect bite-sized snack)
Chocolate Chai Ganache (amazing for cake decorating)
TOOLS I USED TO MAKE THIS RECIPE


Sweet Potato Creme Brulee (Vegan, GF)
Servings: 4
Prep time: 5 minutes
Cook time: 1 hour 10 minutes
Ingredients:
- 1 medium sweet potato
- 1 can full-fat coconut milk
- 1/2 cup coconut milk (I use Silk brand)
- 2 tbsp maple syrup
- 1 tsp cinnamon
- pinch of fresh nutmeg
- A pinch salt
- 1/2 tsp agar agar
- 1 tsp pure vanilla extract
- 4 tbsp sugar (I mix equal parts white and brown)
Instructions:
- Preheat oven to 400 degrees Fahrenheit. Pierce the sweet potato with a fork a few times. When oven is ready, place potato directly on the middle rack, and put a piece of tin foil on the rack below it, to catch any drippings. Bake for 1 hour, or until fork inserts easily into the centre. Carefully remove skin.
- To your blender, add the sweet potato, both coconut milks and the syrup. Blend until smooth and then transfer to a pot.
- Place the pot on the stove over medium-high heat. Add the salt, cinnamon and nutmeg and bring to a boil, stirring often. Once boiling, add the agar agar, lower the heat to a simmer and whisk continuously for one minute, or until the agar agar is completely dissolved. Remove from heat and whisk in the vanilla.
- Strain the mixture through a fine mesh sieve directly into four small ramekins. Place in the fridge to firm up for at least one hour.
- Right before serving, sprinkle the tops of each ramekin with one tablespoon of the sugar and use a kitchen torch to melt the sugar until it is a deep brown colour. Let it sit for a minute before serving.
- Crack the top with a spoon and enjoy!
The post Sweet Potato Creme Brulee (Vegan, GF) appeared first on Never. Not. Eating..
]]>The post Vegan Pumpkin Coconut Cake appeared first on Never. Not. Eating..
]]>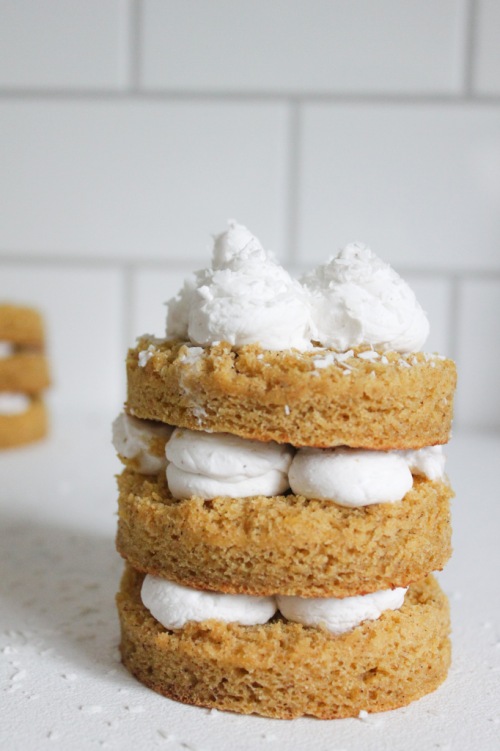
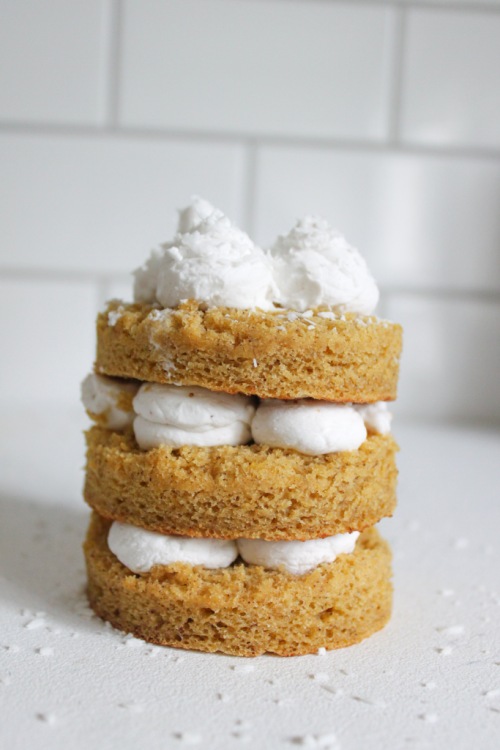
That’s right…Eggless, milkless, and as a bonus – glutenless! No bad foods allowed. A perfect Thanksgiving dessert for the upcoming long weekend!
This cake takes minutes to put together, minutes to bake, and seconds to eat. It is moist and fluffy and perfect. You can make individually stacked cakes (as seen in the photos), or you can make one, two-layered cake.
Here is what you will need for the cake:
- My homemade pumpkin puree (or store bought, but it’s just not as fresh)
- Gluten-free flour
- Apple cider vinegar
- Oat milk
- Pumpkin pie spice
- Salt
- Banana
- Brown sugar
- Vanilla
- Baking soda
- Baking powder
For the whipped coconut cream:
- Canned coconut milk
- Vanilla
- Cinnamon
- Salt
- Powdered sugar
To make the cake, prepare a baking pan by greasing it, lining the bottom with parchment paper and then sprinkling with flour. Combine the apple cider vinegar and oat milk and let sit for 5 minutes. This is a buttermilk substitute, which helps makes the cake fluffy and gives it a bit of a tang. Next, blend all of the ‘wet’ ingredients together – the pumpkin, banana, vanilla and brown sugar. In a separate bowl, sift together the flour, baking soda, baking powder, salt and pumpkin pie spice. Add the dry ingredients and milk mixture to the wet ingredients in four additions, starting with the flour. Pour into prepared baking pan. This will bake for around 12-15 minutes.
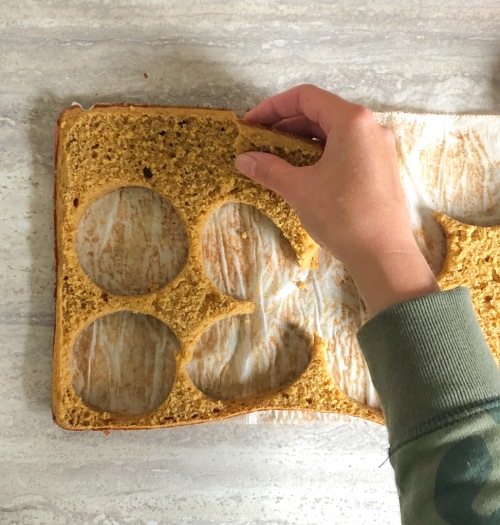
Once cooled, you can assemble you mini cakes (or one large cake) by using a round cookie cutter and cutting out circles to stack on top of one another. Alternatively, you can slice the cake down the middle and create a two-layered cake. This is a good option if you want to feed a larger party.
Baking this cake fills your house with all the smells of Fall and that, my friends, is never a bad thing! Happy baking!
Vegan Pumpkin Coconut Cake
Serving size: Makes three individual cakes or one, two-layer cake
Prep time: 10 minutes
Cook time: 12 minutes
Ingredients:
- 1/2 tbsp apple cider vinegar
- 1/2 cup oat milk (or any plant-based milk)
- 1 cup pure pumpkin (not pumpkin pie filling)
- 1 banana, mashed
- 1/2 cup brown sugar, tightly packed
- 1 tsp pure vanilla extract, separated
- 1.5 cups gluten-free flour
- 1 tsp baking soda
- 1 tsp baking powder
- 1 tsp pumpkin pie spice
- 1/2 tsp salt
- 1 14 oz can full-fat coconut milk (placed in the fridge for at least 24 hours)
- 2 tbsp powdered sugar
- 1/4 tsp cinnamon
- 2 tbsp dried coconut flakes, for topping (optional)
Instructions:
- Preheat the oven to 350 degrees Fahrenheit. Grease a 13 x 9 inch rectangular pan, line with parchment paper and dust with flour. Place a mixing bowl and electric mixer attachment into the freezer (to prepare for the whipped cream).
- Combine apple cider vinegar and oat milk together in a small bowl. Set aside.
- Beat pumpkin, banana, brown sugar and 1/2 tsp vanilla together in a large bowl until smooth.
- In a separate bowl, sift the flour, baking soda, baking powder, pumpkin pie spice and salt together.
- In four additions, add the flour mixture and oat milk to the wet ingredients, starting with the flour, and beating until combined.
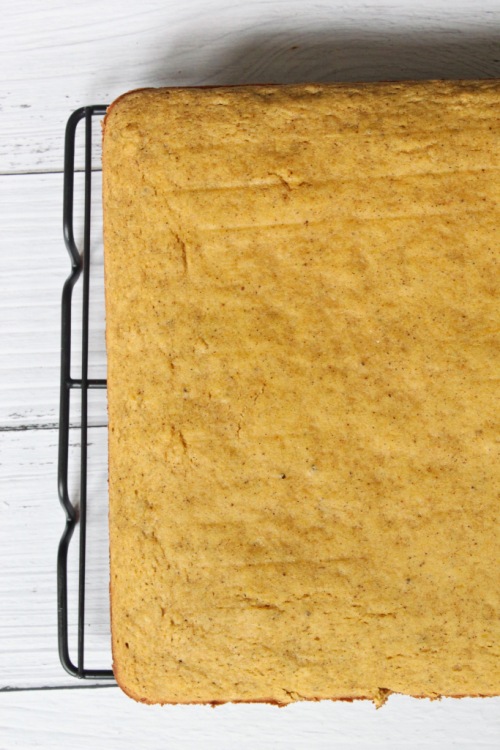
- Pour batter into prepared pan and bang the pan on the counter a few times to release any air bubbles. Bake for 12-15 minutes, or until an inserted toothpick comes out clean. Remove from oven and let cool in the pan for five minutes before flipping onto a wire rack to finish cooling completely.
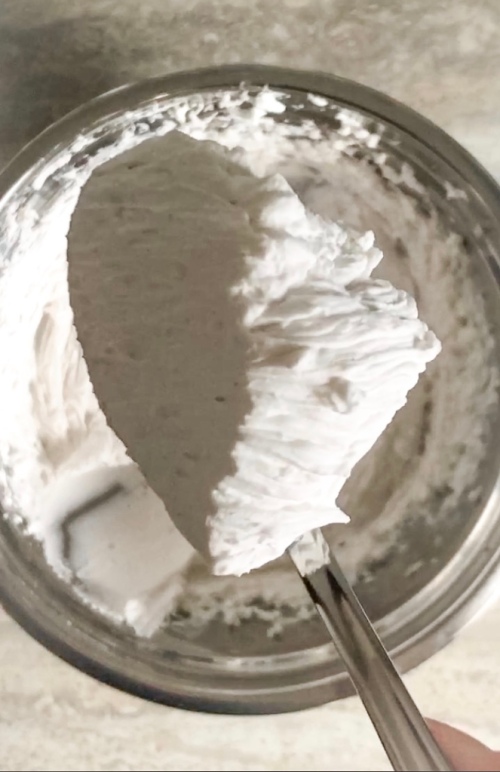
- While the cake cools, make the whipped cream. Remove the bowl and mixers from the freezer and carefully open the can of coconut milk from the fridge. Scoop the solid white part at the top of the can into a bowl (refrigerate the water at the bottom of the can and save for smoothies). Beat the coconut solids on medium speed for 30 seconds. Add the powdered sugar, the cinnamon, the rest of the vanilla and a pinch of salt. Beat for another minute until it is thick and creamy.
- When the cake is cool, use a round cookie cutter to cut out nine circles (or cut the cake in half to make two layers). Spread some of the whipped cream onto the first cut out circle. Top with the second and repeat. Add some whipped cream on top of the third circle and sprinkle with some of the dried coconut, if desired. Alternatively, if making one large cake, spread some of the whipped cream on the first layer of cake, top with the second layer and then dollop the rest of the whipped cream on top. Sprinkle with coconut flakes.
- Serve immediately or store in the fridge for up to 48 hours.
The post Vegan Pumpkin Coconut Cake appeared first on Never. Not. Eating..
]]>The post Chocolate Hummus appeared first on Never. Not. Eating..
]]>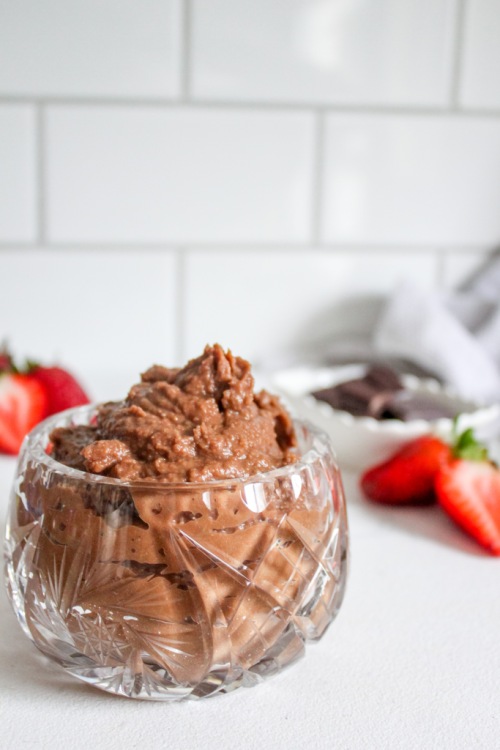
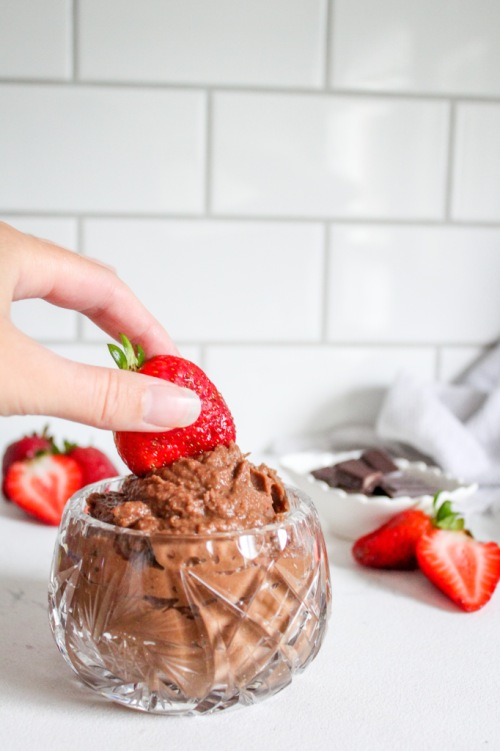
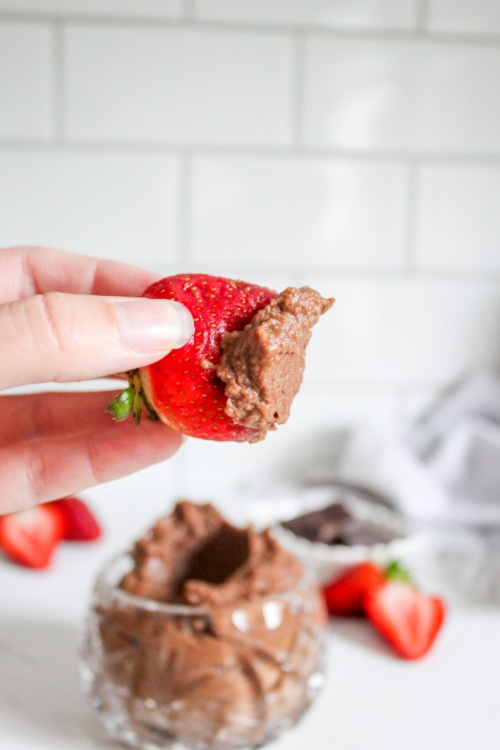
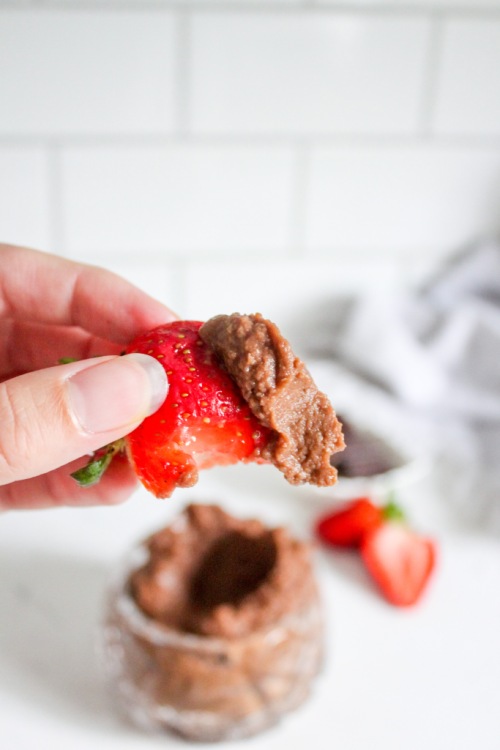
Y’all know I love a good healthy snack, and this is that. Full of protein, fibre, iron and CHOCOLATE. How do you eat chocolate hummus, you ask? Well, if not by the spoonful, then perhaps with fruits, on toast or alongside some salty pretzels. Follow your heart.
Here is what you will need for this recipe:
- Chickpeas (I always use dry chickpeas that I soak overnight and cook for an hour – they make dips much smoother than the canned stuff)
- Cocoa powder
- Maple syrup
- Vanilla
- Salt
This recipe is flexible, depending on your taste. If you love chocolate, you can choose to add more cocoa powder, or if you would like a subtler chocolate flavour, add less. Same with the sweetness level. If you enjoy really sweet desserts, add more syrup. If you are like me and prefer less sweet, add the amount you see in the recipe.
Let’s do the damn thing!
Chocolate Hummus
Serving size: Makes about 1 cup
Prep time: 5 minutes
Inactive time (for soaking): 8 hours
Cook time: 1 hour
Ingredients:
- 3/4 cup dry chickpeas (or 2 cups canned, rinsed very well)
- 3 – 4 tbsp cocoa powder
- 3 tbsp maple syrup (or more, to taste)
- 1/2 tsp pure vanilla extract (optional)
- 1/4 tsp salt
Instructions:
- If working with dry chickpeas (recommended for a smoother consistency), cover chickpeas with two inches of water and soak overnight. Drain, rinse and transfer to a medium-sized pot. Cover with two inches of water and bring to a boil. Reduce heat to a rolling simmer and cook chickpeas, lid off, for one hour or until tender. If working with canned chickpeas, skip this step.
- Add cooked chickpeas to a food processor, along with three tablespoons of cocoa powder, the syrup, salt and the vanilla, if using. Blend until smooth, scraping down the sides of your food processor every so often. Taste and add more cocoa or syrup, if desired.
- Transfer hummus to an airtight container if not serving immediately and store in the fridge for up to four days.
The post Chocolate Hummus appeared first on Never. Not. Eating..
]]>The post Homemade Cashew Milk appeared first on Never. Not. Eating..
]]>
Did you know that the majority of the world is lactose intolerant (around 65% of the population)? Doesn’t that seem strange to anyone else?! With all of the research around dairy products and their long-term effects, it has really put me off of drinking milk for the last decade. Luckily, you can milk a nut. Just kidding, nuts don’t have nipples.
But seriously, plant-based milks are a thing, and they are easy to make. They can sub in for anything you do with cow’s milk, but you don’t get the runs after drinking them…Score!
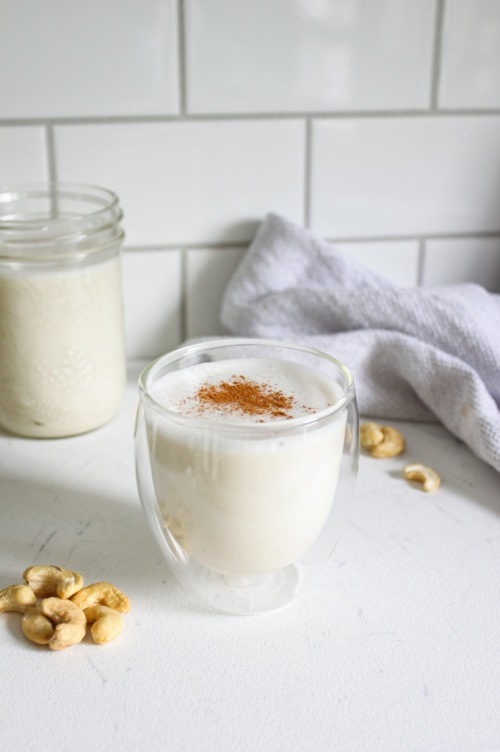
There are so many types of non-dairy milks out there nowadays – soy, almond, coconut, oat. But, my favourite is cashew. It’s so creamy and delicious.

To make cashew milk, you need two things – cashews and water. Easy peasy. You can also add flavourings, like vanilla, or sweeteners, like maple syrup or honey. The best part about homemade nut milk (other than how easy it is), is that you know exactly what is going into it, and also what isn’t going into it – preservatives. Yah, baby.
To begin, you need to soak one cup of raw cashews in water overnight. In the morning, drain and rinse the cashews, add them to your high-powered blender (or soup maker, which is what I use) with your choice of additions and blend until smooth. That’s literally it. You don’t even need to strain cashew milk, like you would almond milk.
I hope this post has inspired you to make your own cashew milk at home. It is significantly less expensive than store-bought, healthier for you and takes only minutes. Tag me on Instagram if you try out this recipe – @nevernoteatingca
Homemade Cashew Milk
Prep time: 2 minutes (plus overnight soaking)
Cook time: 2 minutes
Ingredients:
- 1 cup raw cashews
- 3 cups water
- pinch of salt (optional)
- 1 teaspoon vanilla extract (optional)
- 1 tablespoon maple syrup (optional)
Instructions:
- Place your cashews in a bowl and cover with water. Let them soak overnight.
- Drain the cashews and rinse thoroughly. Transfer them to a high-powered blender, or soup maker. Add three cups of water as well as the salt, vanilla and syrup, if using. If using a blender, blend for about one minute, or until completely smooth. If using a soup maker, set to “juice” and press ON/OFF.
- Pour into a large mason jar or a container with an air-tight lid. Store in the fridge for up to 4 days.
NOTES:
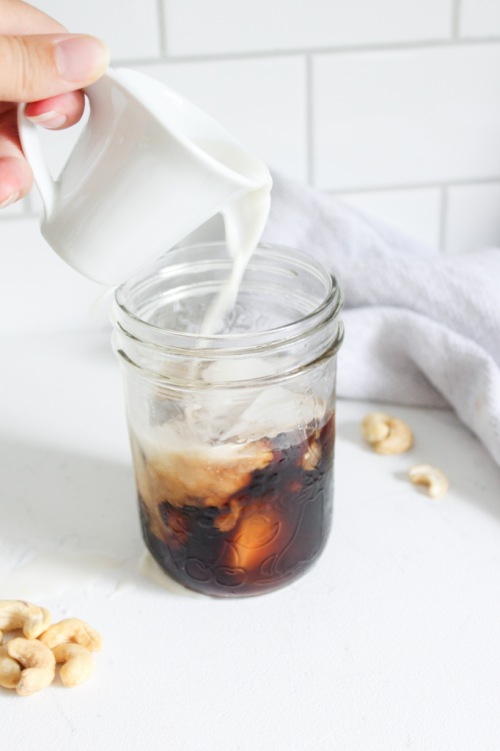
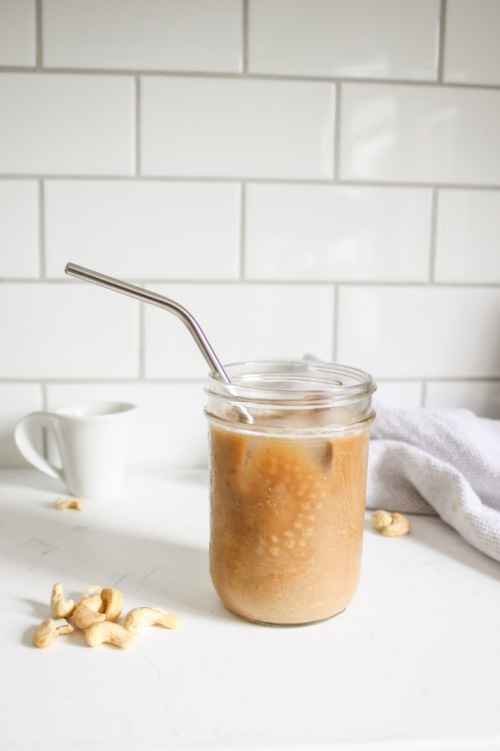
*I like to serve it with a dash of cinnamon or stir it into my morning cold brew over ice.
**Separation is normal…Shake well before serving!
The post Homemade Cashew Milk appeared first on Never. Not. Eating..
]]>The post Vegan Chocolate Bars appeared first on Never. Not. Eating..
]]>
Typically, I just snap off a few squares of dark chocolate and have that as an after-dinner snack, but sometimes, I like to switch it up! There are so many recipes that you can make using chocolate that are healthy, delicious and take only minutes to whip up. Like my Healthy 5 – Ingredient Peanut Butter Cups, for example. Or a 3 – ingredient brownie that I make using cocoa powder, bananas and nut butter. This chocolate bar recipe is no exception. It is quick, vegan and amazingly delicious. It tastes like a “Snickers” bar!
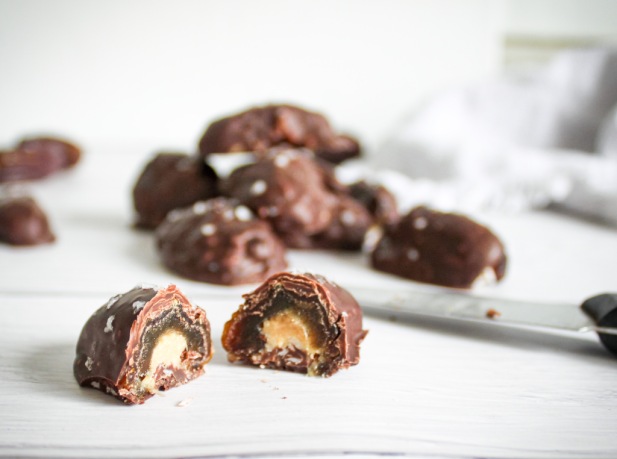
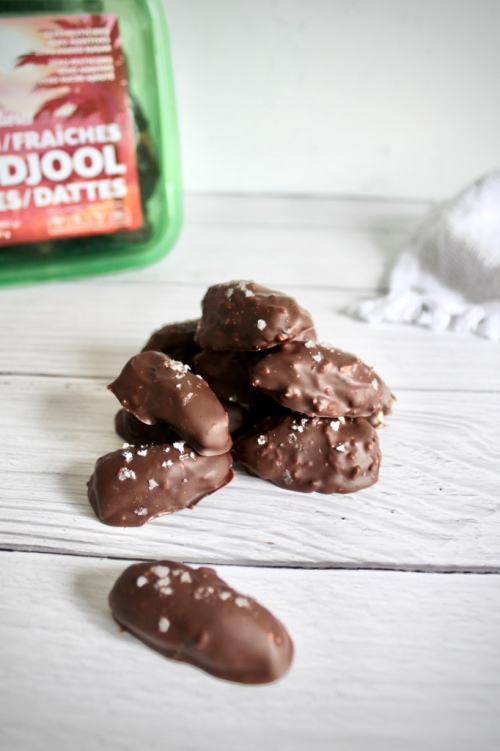
The MVP here is the Medjool Date. It’s caramel-y in texture and taste, and is the perfect vessel for the other ingredients. It’s also what gives these candy bars their sweetness, as there is no refined sugar added to this recipe. Nature’s perfect candy.

The chocolate: It is your choice whether you would like to make these bars completely vegan or not. If so, you can find vegan chocolate chips at the health section of your grocery store, or on Amazon, here. To start, melt your chocolate in a double boiler over simmering water, or carefully in the microwave in 20-30 second intervals, stirring in between. Try not to eat it out of the bowl at this point.
The assembly line: Set up your stations. It should go – dates, nut butter, shredded unsweetened coconut, melted chocolate and flaky sea salt. Now, we begin. Take a date, remove the pit and carefully tear it in half with your fingers. Use a knife to spread some nut butter over the open-side of one half and then dip the nut-buttered side into your coconut. Dip your filled date into the chocolate pool and use a spatula to help you coat the entire date. Scoop up the date with a fork and tap several times on the side of the bowl to let any excess chocolate drip off. Place your chocolate bar on a plate or tray lined with parchment and immediately sprinkle with a few flakes of sea salt. Continue with the rest of the dates and refrigerate for at least 15 minutes before enjoying!
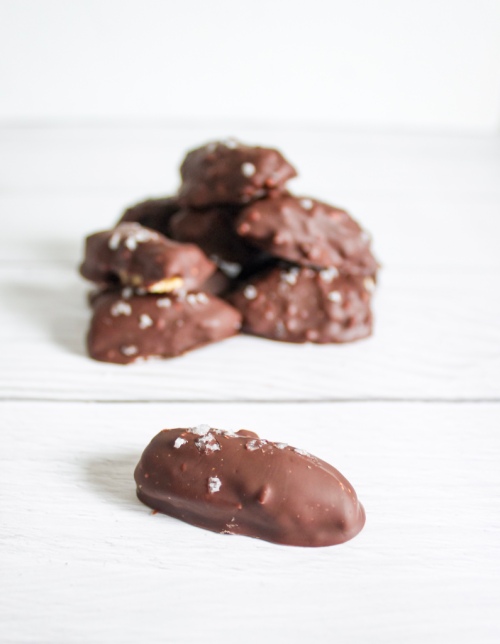
These are the perfect chocolate bar replacement. Chocolatey, caramely, ooey and gooey. And that sea salt just adds that extra hit of love. DROOL.
Vegan Chocolate Bars
Serving size: Makes 20 small bars
Prep time: 10 minutes
Cook time: 5 minutes
Chill time: 15 minutes
Ingredients:
- 140 g vegan dark chocolate
- 10 medjool dates, pitted and halved
- 1/4 cup nut butter (I prefer my Homemade Peanut Butter)
- 3 tbsp shredded unsweetened coconut
- flaky sea salt (optional)
Instructions:
- Fill a small pot with 2 inches of water and bring to a simmer on your stovetop. Place chocolate in a larger, heat-proof bowl and place the bowl on top of the pot, with a wooden spoon in between to let the steam escape. Stir regularly until the chocolate is melted. Remove from heat. Alternatively, you can melt your chocolate in the microwave by placing it in a microwave-safe bowl and melting for 20 – 30 second intervals, stirring in between, until smooth.
- Lay a piece of parchment paper on a small baking tray or a large plate and set aside.
- Take one half of a date and use a knife to spread nut butter on the open side of it. Dip the buttered side into the coconut flakes and then carefully place into the melted chocolate, using a spatula to help coat the entire date. Use a fork to scoop it up and tap on the side of the bowl a few times to allow extra chocolate to drizzle off. Place on prepared tray and sprinkle with a few flakes of sea salt. Repeat for the remainder of the dates.
- Place dates in the refrigerator for at least 15 minutes before serving. When they have cooled completely, transfer to an airtight container and store in the fridge.
The post Vegan Chocolate Bars appeared first on Never. Not. Eating..
]]>The post Vegan Blueberry Pomegranate Tart appeared first on Never. Not. Eating..
]]>
I’m the type of cook who discovers an ingredient and becomes obsessed with it for weeks at a time. Right now, it’s agar agar. The vegan version of gelatin. It’s literal happiness in powder-form. Have a favourite juice? Add agar agar and it turns that juice into a jiggly, wiggly treat. If you loved Jell-o as a kid, like me, you’ll love agar agar.
Whereas gelatin is made from animal collagen, agar agar is derived from seaweed. It is completely vegan and therefore a perfect ingredient to make jellies, gummies, tarts, preserves and much more.
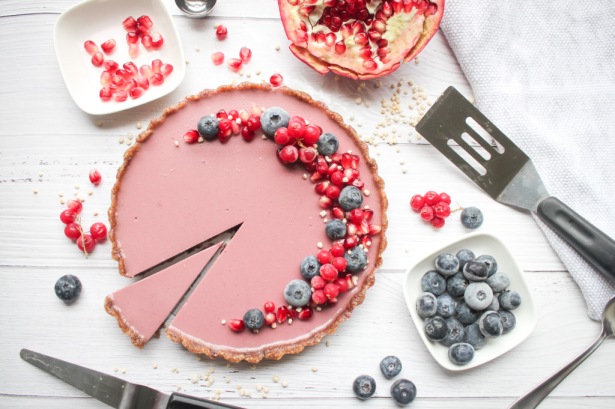
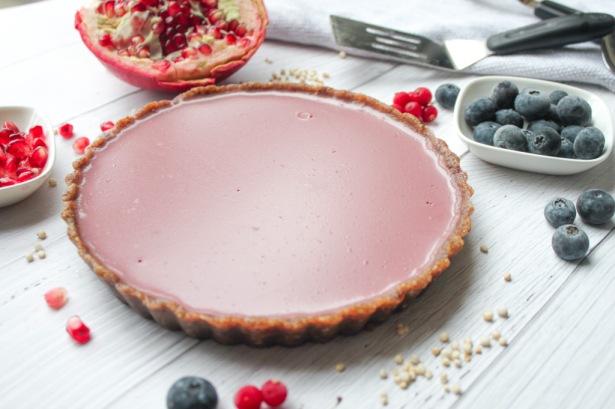
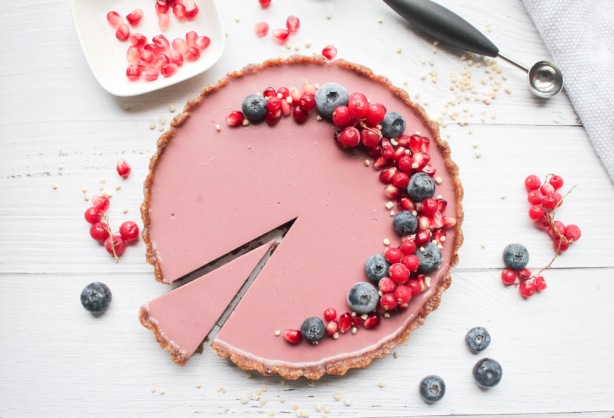
The crust of this tart was made by combining walnuts, pecans, dates, maple syrup, salt and vanilla in my food processor until the ingredients begin to stick together. This is then pressed into an 8-inch tart pan and thrown into the freezer while the filling is made.
For the jelly filling, add the pomegranate-blueberry juice (I love the “Pom Wonderful” brand) to a saucepan with the full-fat canned coconut milk. Bring the liquids up to a boil, add the agar agar and then whisk the mixture until it’s fully dissolved. Lower the heat and add the salt and maple syrup and cook for a few more minutes. Strain the liquid over a measuring cup to make transferring to your tart shell easier and less messy. No one likes a mess.
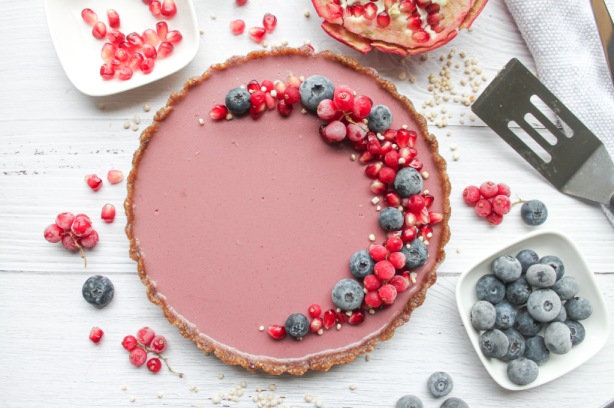
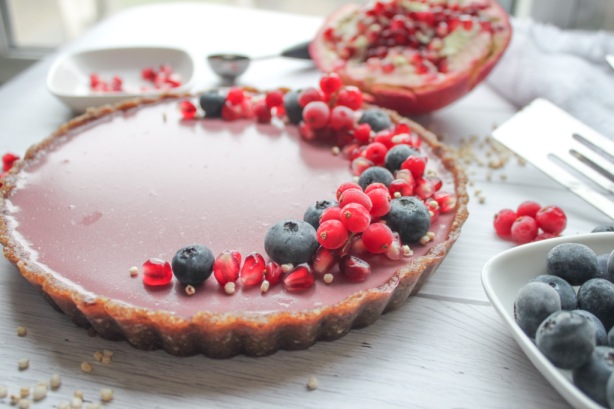
When the filling has cooled down for about 10-15 minutes, give it a quick whisk and then carefully pour it into the tart pan, over the crust. Transfer it to your fridge and let it set up for at least 3 hours. Waiting is the hardest part, but it gives you time to think about how you will decorate your tart! I like to show what is in my food when I plate it, so naturally, I topped this tart with pomegranate seeds and fresh blueberries. I also added some puffed quinoa for a slight colour contrast and a fun pop!
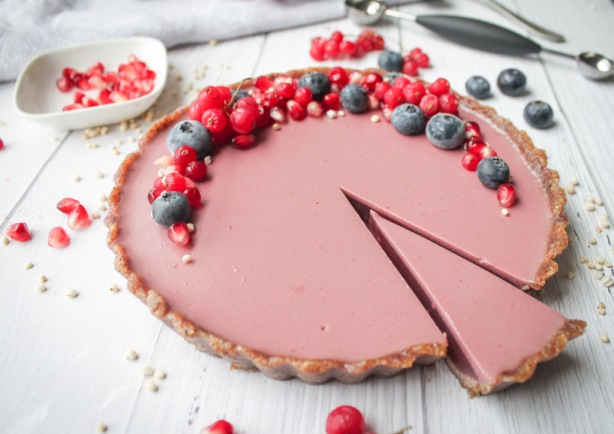
This tart is best if consumed within 24 hours.
Vegan Blueberry Pomegranate Tart
Yield: Makes an 8-inch tart
Prep time: 5 minutes
Cook time: 5 minutes
Chill time: 3 hours
Ingredients:
For the crust:
- 1/2 cup walnuts
- 1/2 cup pecans
- 1/4 tsp salt
- 6 dates, pitted
- 1/2 tsp vanilla
- 1 tbsp maple syrup
For the filling:
- 3/4 cup pomegranate-blueberry juice (or just straight pomegranate juice)
- 1 cup full-fat canned coconut milk
- 3/4 tsp agar agar
- 1/4 tsp salt
- 2 tbsp maple syrup
Instructions:
- To make the crust – Add all ingredients into a food processor and pulse until it begins to come together, about one minute. Press into an 8-inch tart pan and put in the freezer while you make the filling.
- For the filling – Add juice and coconut milk to a small saucepan and bring up to a boil. Once boiling, add the agar agar and whisk for one minute, or until the powder is completely dissolved. Reduce heat to a simmer and add the salt and maple syrup. Let simmer for 2 more minutes, whisking occasionally. Remove the liquid from the heat and strain through a fine-mesh sieve over a measuring cup with a spout. Let cool for at least ten minutes before carefully pouring over your tart crust. Let it set in the fridge for at least 3 hours before serving.
*This tart is best consumed within 24 hours.
The post Vegan Blueberry Pomegranate Tart appeared first on Never. Not. Eating..
]]>The post How to Create the Perfect Smoothie Bowl appeared first on Never. Not. Eating..
]]>
There’s just something about a creamy, texture-perfect bowl in the morning. It’s art, really.
Do you follow any of the most popular smoothie bowl accounts on Instagram? Their dreamy posts show the blending, spooning and topping of amazingly colourful, smooth and creamy bowls. This post is meant to teach you how to achieve a smoothie bowl that mimics that perfect texture and all of the other hacks that go along with creating the ultimate smoothie bowl, including product recommendations and links.
HOW TO CREATE THE PERFECT SMOOTHIE BOWL – TEXTURE
TEXTURE is one of the most important things about a smoothie bowl. Not too soupy so that it doesn’t support all of your delicious topping choices, and not too stiff so that it is “nice cream.” We are looking for that glorious in-between stage.

And here’s how: Choose a high-powered blender. The Vitamix is ah-mazing. I also love the Ninja food processor. This is really important as it needs to be able to pulverize frozen fruit.
CHOOSING THE RIGHT FRUITS
Secondly, choose fruits that “cream-up” well. Bananas (obviously) are the #1 choice. However, if for some reason you can’t have bananas, mangos are an excellent alternative. I buy fresh bananas, wait until they are slightly overripe and brown (but super sweet) and then peel them, cut them in half and freeze them. You can also cut them into rounds, but it’s much easier to know how much you are putting in if they are halved.
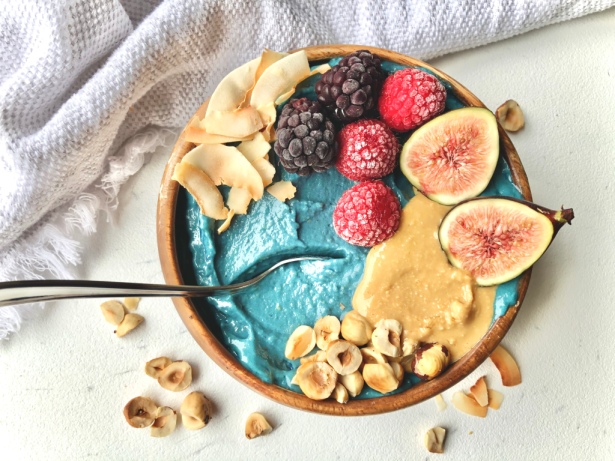
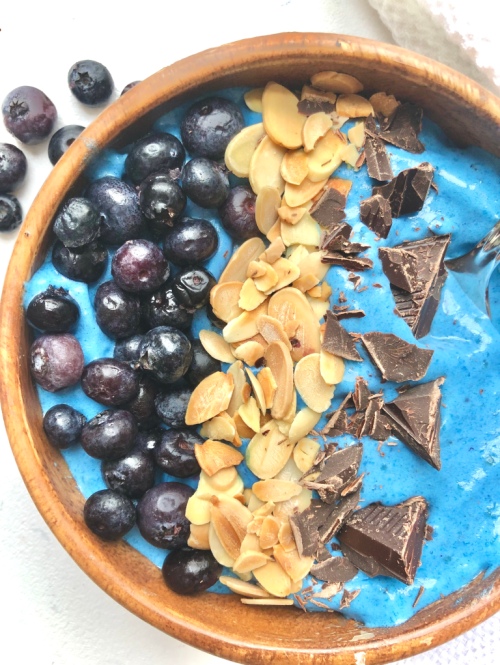
THE ADD-INS
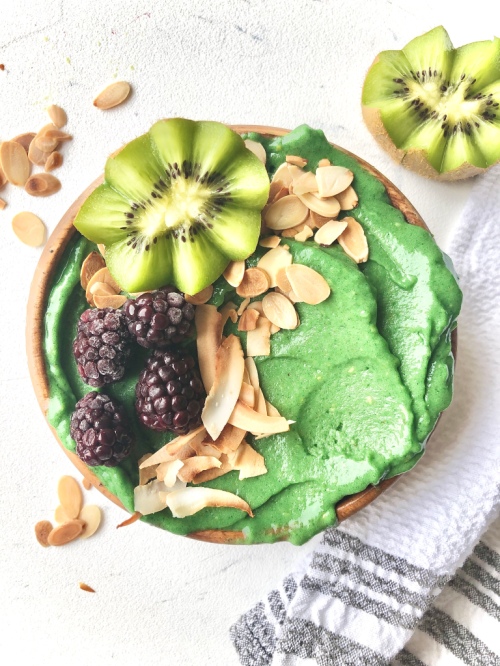
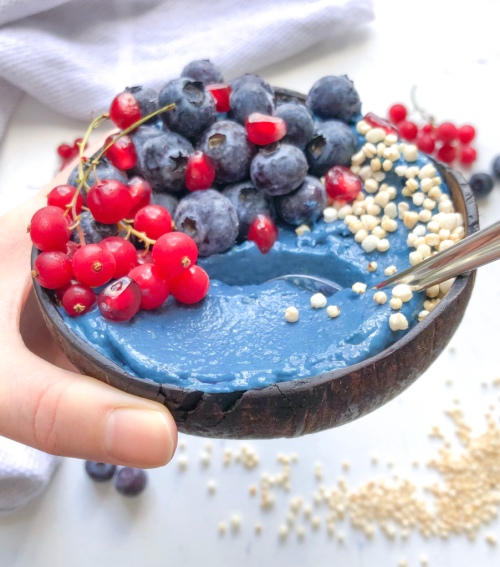
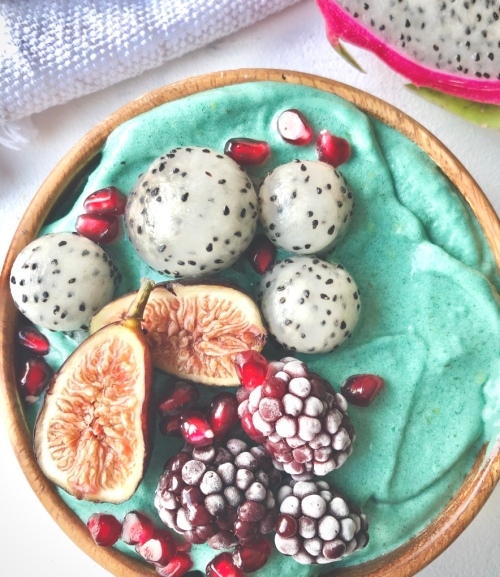
Add your frozen fruit choices to a blender/processor with all of your favourite superfoods. I have tried, tested and loved the following – Purple Sweet Potato Powder, Activated Coconut Charcoal, Maca Powder, Blue Spirulina Powder, and Green Spirulina Powder. Usually I choose two or three of them to add in one smoothie bowl. One colourful powder, one protein powder and Maca. Always.
BLEND IT UP!
Once you have your fruit and superfoods ready to go, pulse the blender a few times to start breaking up the fruit. Afterwards, blend on high, and while blending, slowly pour in the tiniest amount of non-dairy milk. This is the tricky part, as too much milk will make it too loose and none at all will make it nice cream (which is good, too). I would say start with one tablespoon and judge from there!
At this point, you need to continuously stop the blender to scrape down the sides of your bowl. Keep doing this until everything is well combined and smooth. Have faith in your smoothie…it will come together. Just do not over-mix as this will also loosen the texture.

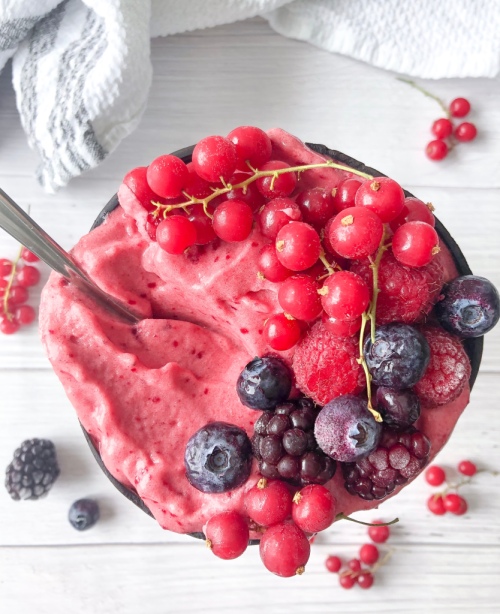
HOW TO CREATE THE PERFECT SMOOTHIE BOWL – TOPPINGS
When you have achieved the ultimate smoothie consistency, pour your art into a beautiful bowl and top with all of your favs. My tried and true recommendations are as follows: Hemp hearts, chia seeds, hazelnuts, frozen berries, homemade peanut butter, slivered almonds, granola and coconut flakes.

THE FROSTED BERRY LOOK
One of the most popular toppings you will see in Instagram photos are frozen berries. They develop this gorgeous pale-white layer on their surface after you remove them from your freezer and let them hang out on the counter for a few minutes. Some tricks to achieving this look that I have found work for me are:
- Not washing your berries before freezing them (either buy organic or wash AFTER you take pictures…hehe)
- Do not stack berries on top of each other in their container in the freezer- just one single layer is best
- Leave them in your freezer for longer than 24 hours to achieve this look
- After a day or two in your freezer, remove them for about 10-15 minutes (don’t use them) and then put them back into your freezer…the next time you pull them out, they will be perfect!
- When plating, use food tweezers to place carefully – the warmth of your fingers will melt the spots you touch

Now take some pictures and grab a spoon!

I hope this post helps you achieve your ideal smoothie bowl. Here is an example of a pretty standard recipe that I use when creating my own. Enjoy!
How to Create the Perfect Smoothie Bowl – Mauve Smoothie Bowl
Servings: 2
Prep time: 5 minutes
Ingredients:
- 2 frozen bananas
- 1/2 cup frozen mango
- 1 tbsp vanilla protein powder
- 1 tsp maca powder
- 2 tsp Purple Sweet Potato Powder, optional (you can replace with your favourite superfood powder)
- splash non-dairy milk
Instructions:
- To a high-speed food processor or blender, add frozen fruit, protein powder, maca and superfood powder. Pulse a few times and then blend. While blending, drizzle in the non-dairy milk. You only need a tiny amount. Blend until everything is combined and smooth, scraping down the sides a few times as it comes together.
- Transfer to a bowl and add toppings of your choice. Enjoy!
The post How to Create the Perfect Smoothie Bowl appeared first on Never. Not. Eating..
]]>The post Crockpot Ginger and Turmeric Immune-Boosting Soup appeared first on Never. Not. Eating..
]]>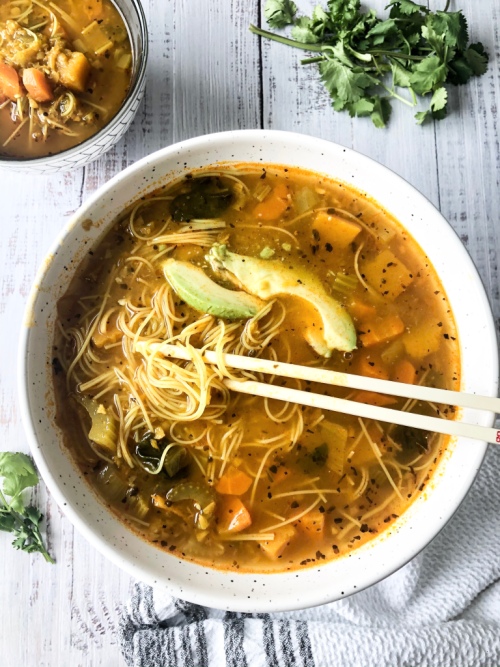
Although I love living in a country that experiences four diverse seasons, winter is always way too long. And as a teacher, it’s hard NOT to pick up a few illnesses during the winter season at school. This soup is my remedy. It has turmeric, an immune-boosting, detoxifying anti-inflammatory, and ginger, a nausea-relieving, cancer-fighting, all-round great-for-you root vegetable. Let’s fight that cold together!
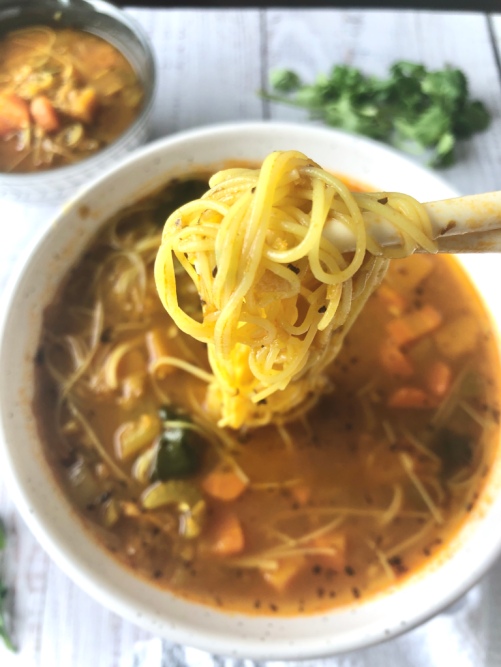
The best days are the ones where you get to walk through your front door, sniff the air and remember back to this morning when you threw your dinner into the crockpot, and now it’s ready for you. Now all you have to do is take your bra off, put your sweatpants on, grab your ladle and slurp away. MMMhhhhmmmmm.
I recommend having your veggies all chopped the night before, that way you can just throw them in the crockpot when you wake up and away you go. If you are a morning person, firstly, please tell me your secret, and secondly, morning chopping is also an option. Note: This recipe may also be made on the weekend.
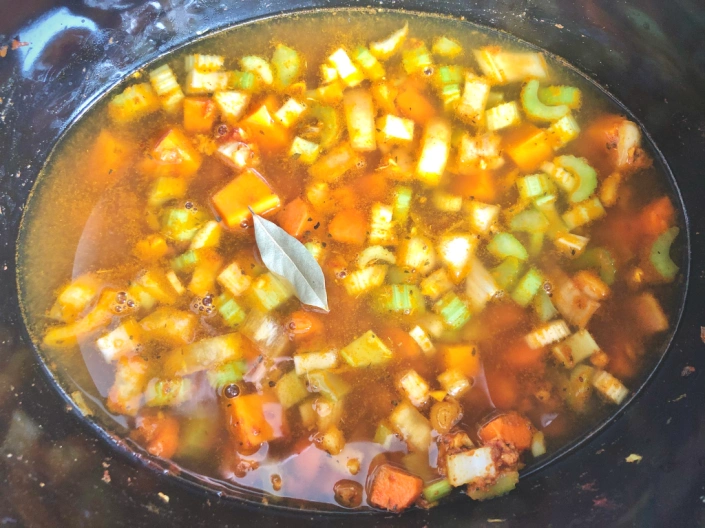
I always start this recipe by tossing my chopped onions into my crockpot with some olive oil, turning it to high heat and letting them warm up while I prep the rest of my ingredients. The heat begins to soften them before everything else enters the pot and starts to crowd them. After the onions have softened up slightly, I add in the garlic, ginger and spices and toast them up until fragrant. I then put everything else in the crockpot, put the lid on and say, “Bye, see you in a few hours. I love you. Keep warm.”
If you are still reading this:
- Thank you.
- I’m sorry.

Let’s make soup!
Crockpot Ginger and Turmeric Immune-Boosting Soup
Serving size: 6-8
Prep time: 30 minutes
Cook time: 3-4 hours
Ingredients:
- 2 tbsp olive oil
- 1 small onion, diced
- 3 cloves of garlic, minced
- 1 heaping tbsp ginger, minced
- 1 tsp dried basil
- 1/2 tsp dried oregano
- 2 tsps turmeric powder
- 1/2 tsp paprika powder
- 1 tsp salt
- 1/2 tsp pepper
- 2 tbsp tomato paste
- 1 cup carrots, diced (about 2 medium carrots)
- 1.5 cups celery, diced (about 4 stalks)
- 1 cup butternut squash, diced into 1/2 inch cubes
- 1 bay leaf
- 8 cups vegetable stock
- 1/2 cup red lentils
- 2 big handfuls baby spinach
- 100g vermicelli noodles (optional)
- Fresh cilantro or parsley for garnishing (optional)
Instructions:
- Turn your crockpot on high and add the olive oil and onion. Let this heat up while you prepare all of your other ingredients, about 10 minutes.
- Add the garlic, ginger, basil, oregano, turmeric, paprika, salt and pepper to the crock pot and stir around with a wooden spoon. Let the spices begin to toast and the garlic and ginger to become fragrant, about 4-5 minutes.
- Stir in the tomato paste until everything is coated.
- Add the carrots, celery, squash, bay leaf and stock. Put the lid on the crockpot and cook on high for 3-4 hours or on low for 5-6 hours.
- About 45 minutes before the end time, open lid and add in the lentils. Close the lid again and let cook for the remaining 45 minutes.
- When the soup is ready (vegetables are tender, lentils are cooked through), discard the bay leaf and taste, adjusting salt and pepper according to preference. Add the spinach and vermicelli noodles (if using), and put the lid on for 2 more minutes to soften.
- Ladle soup into bowls and top with freshly chopped herbs.
NOTES:
Avocado is also a great topping for this soup.
Store leftovers in an airtight container in the fridge for up to 5 days.
The post Crockpot Ginger and Turmeric Immune-Boosting Soup appeared first on Never. Not. Eating..
]]>The post Gooey Caramelized Banana Oatmeal appeared first on Never. Not. Eating..
]]>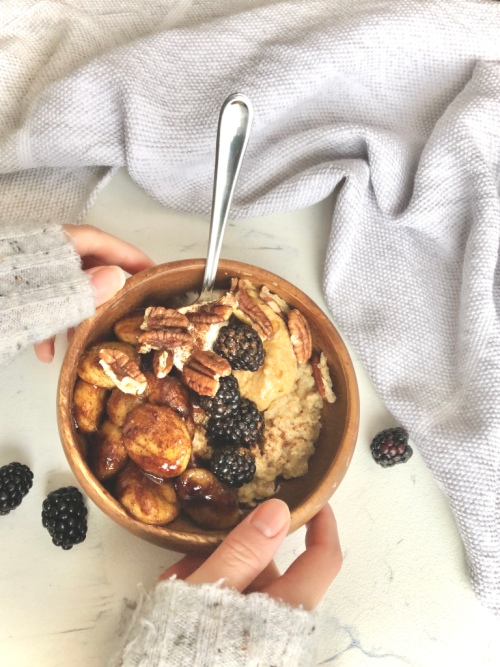
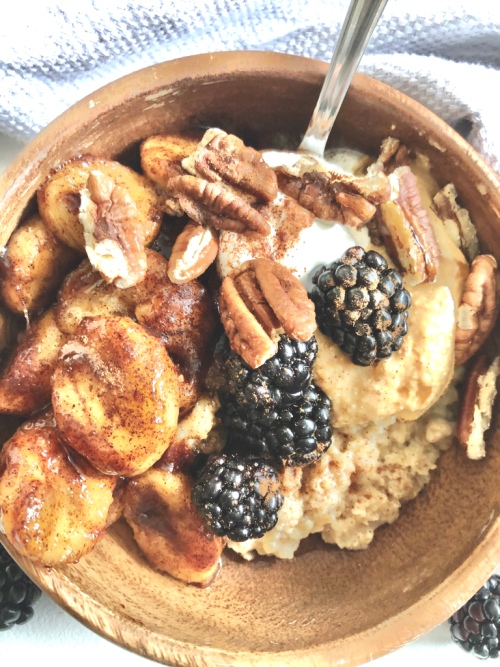
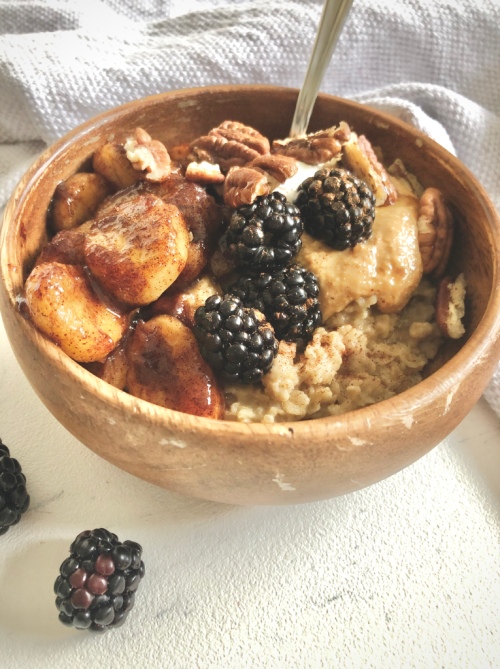
This oatmeal is a 100% plant-based, animal-friendly, environment-saving bowl of happiness. It has Sunday morning, sit by the window with a blanket and coffee, petting your dog, written all over it.
Unlike the rest of my family growing up, I never was an oatmeal lover. I found it to be bland and texturally challenging to my palate. My brother loved those packaged brands that you pour boiled water over and I just never understood it and I still don’t. My mom loved Cream of Wheat, and when served to me, I swear I’d have to cover the bowl with a thick layer of brown sugar if I was getting it down. I was an oatmeal outcast in my family.
It is time that I fit in. It’s time that oatmeal was revolutionized. I needed to make it enjoyable, so I covered it in cinnamon and maple syrup and dolloped nut butter on top with some fresh fruit and warm bananas and I think I’m part of the fam now. Fingers crossed.
This quest to assimilate with oatmeal lovers began with my understanding that I just didn’t enjoy oats cooked in water, SO, the first thing that changed was the cooking of the oats themselves. Cashew milk is my new fav, and salt is definitely needed to begin the transformation from yuck to yum. I also added some cinnamon right to the pot as well as maca powder for a healthy boost. The oatmeal comes to a boil with double the milk and then simmers for a few minutes until thick and creamy.
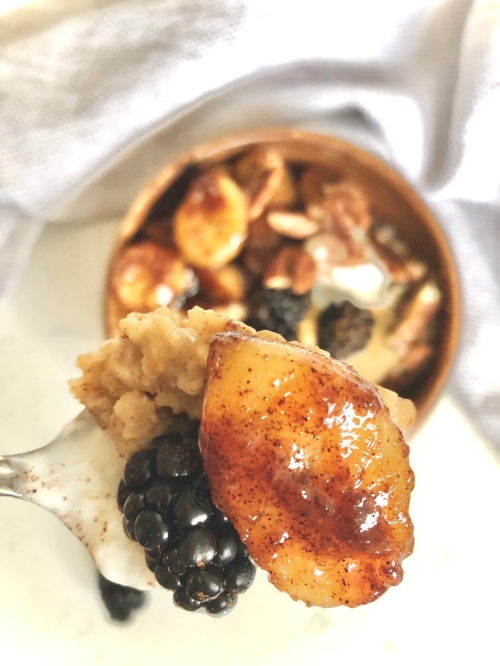
Separately, in a pan, I added coconut oil with maple syrup and some more cinnamon, brought this to a simmer and added my sliced bananas. These cook in the sauce and become sticky, gooey, delicious little bites to slather over to the oatmeal.

Finally, the topping queen works her magic with a creamy nut butter, fresh fruit to lighten things up, toasted pecans and a dollop of coconut yogurt to provide a very welcomed temperature contrast.
Now, that is an oatmeal that I can get behind!
I hope if you were like me and are upset about regular oatmeal, that this recipe inspires you to try again. Oatmeal lovers unite!
Gooey Caramelized Banana Oatmeal
Serving size: 1
Prep time: 2 minutes
Cook time: 6-7 minutes
Ingredients:
- 1/3 cup quick oats
- 2/3 cup non-dairy milk (I prefer cashew)
- 1/4 tsp salt
- 1 tsp cinnamon, separated
- 1/2 tsp maca powder (optional)
- 1/2 tbsp coconut oil
- 3 tbsp maple syrup
- 1 banana, sliced
- Optional toppings: Nut butter, coconut yogurt, toasted pecans*, fresh fruit
Instructions:
- To a small pot, add oats, milk, salt, 1/2 tsp cinnamon and maca powder. Bring to a boil and turn heat on low to simmer for 3-5 minutes, or until creamy.
- While the oats are cooking, add coconut oil, maple syrup and remaining 1/2 tsp cinnamon to a medium saucepan. Bring to a simmer and add the banana. Mix to coat bananas and continue to cook for 3-4 minutes, until bananas are soft and caramelized.
- Spoon the oatmeal into a bowl and top with bananas, nut butter, yogurt, toasted pecans, fresh fruit, a dash of cinnamon and a bit more maple syrup.
NOTES:
*Toast pecans in a 350 degree oven for 5-7 minutes, watching carefully to avoid burning.
The post Gooey Caramelized Banana Oatmeal appeared first on Never. Not. Eating..
]]>