The post Easy Peanut Butter Coconut Cake appeared first on Never. Not. Eating..
]]>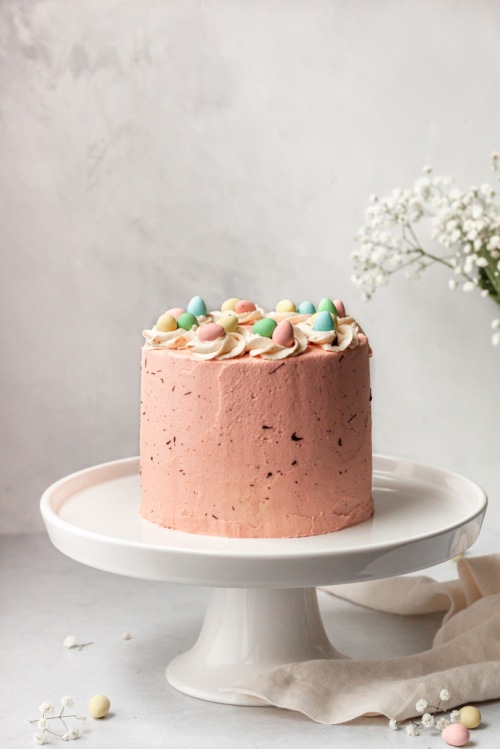
I immediately knew I needed to try to make my own version, and since Easter is around the corner, it seemed like the perfect cake to test out for the occasion.
WHAT IS PEANUT BUTTER COCONUT CAKE?
Let me let you in on a little secret – this is a cheater cake. That’s right, I zhuzhed- (how do you even spell that?! Do you know what I’m trying to say though?) up box cake. Sometimes Betty Crocker pulls through.
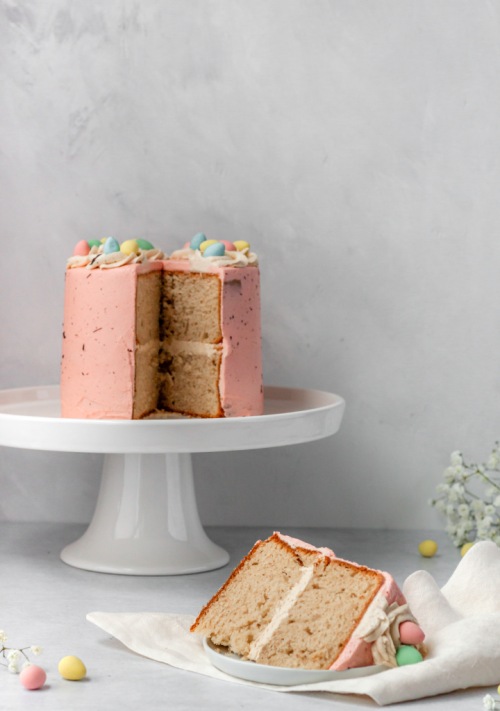
A few weeks ago I purchased a couple of boxes of Betty’s French Vanilla cake because it was on sale for $1.00 – what a steal! Now, I have the perfect use for it. All you need to do is add some peanut butter and swap the milk for coconut milk. It leaves you with this dreamy and decadent, fluffy cake. It’s an Easter miracle!
Oh, and the icing is also a peanut butter buttercream! You’re welcome.
THE INGREDIENTS
This is the simplest cake you will ever make! These are the ingredients you will need:
- boxed french vanilla cake
- eggs
- vegetable oil
- coconut milk (canned and full-fat)
- peanut butter
- icing sugar
- shortening
- butter
DECORATING THIS PEANUT BUTTER COCONUT CAKE
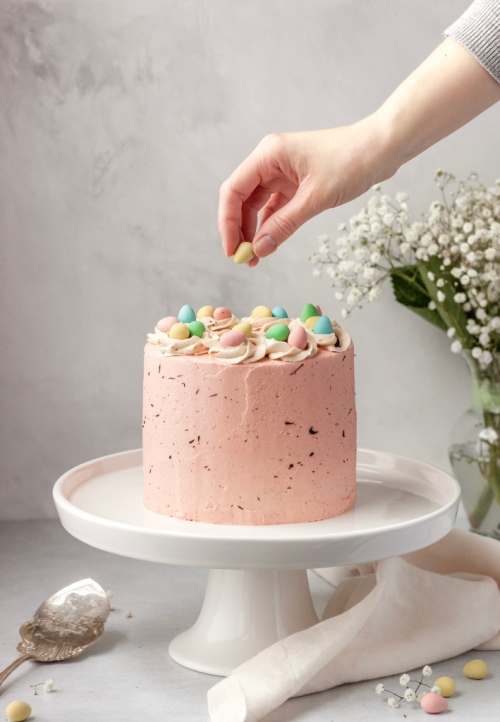
For the decoration, I used gel food colouring (a tiny bit of red) to dye my icing a pale pink colour, reserving a small amount of the original colour (which was slightly brown, from the pb) to create “nests” on top. I filled each nest with a few mini eggs and then melted down some chocolate, which I “flicked” onto my cake using a paintbrush to create a speckling.
Wishing you all a very happy spring and a lovely, cake-filled Easter, if you celebrate!
MORE EASY DESSERT RECIPES TO TRY
Gluten Free Stone Fruit Galette (a brilliant summer dessert)
Apple Cardamom Hand Pies with a Rum Glaze (just store-bought puff pastry and a quick filling)
Vegan Pumpkin Coconut Cake (pumpkin + coconut = goals)
TOOLS I USED TO MAKE THIS EASY PEANUT BUTTER COCONUT CAKE
If this recipe sounds like something you would want to make, click on the images below to see some helpful tools I used to get the job done.


This post contains affiliate links and I may earn a small commission when purchases are made after clicking the links, at no cost to you – thank you!
Easy Peanut Butter Coconut Cake
Servings: Makes four 6-inch cake layers (enough for two small cakes)
Prep time: 15 minutes
Cook time: 30 minutes
INGREDIENTS
- 2 boxes of French Vanilla cake mix (432 g each)
- 6 large eggs
- 3/4 cup vegetable oil
- 1 can full fat coconut milk (400 ml)
- 3/4 cup smooth peanut butter
For the icing:
- 1/2 cup vegetable shortening
- 1/2 cup butter, at room temperature
- 1 tbsp meringue powder (optional)
- 1/2 cup smooth peanut butter
- pinch of salt
- 4 cups powdered sugar
- 4-6 tbsp coconut milk
INSTRUCTIONS
- Preheat oven to 350 degrees Fahrenheit. Butter four 6-inch cake pans, line the bottoms with parchment paper and dust with flour.
- Firstly, dump the cake mix into a large bowl. Create a well in the middle of the mix and add the eggs and oil. Pour the coconut milk into a measuring cup and add water to bring it up to an even 2 cups. Pour into the bowl with the other ingredient and add the peanut butter. Mix all of these ingredients well with an electric mixer, starting on low and working up to medium speed, for about 1-2 minutes. Divide batter between the four cake pans – it works out to be approximately 450g per pan. Bake in the oven for 30-35 minutes, or until a toothpick comes out clean. Cool completely before icing.
For the icing:
- Combine the shortening, butter and peanut butter in a medium bowl and mix with an electric mixer until light and fluffy.
- Add the meringue powder (if using), the salt and one cup of powdered sugar and beat until combined, starting on low.
- Drizzle in one tablespoon of coconut milk and beat. Continue to alternate between adding one cup of powdered sugar and one tablespoon of milk until all of the powdered sugar has been used. If icing is too thick, continue to add half of a tablespoon of milk at a time until you have reached desired consistency.
ASSEMBLY TIPS
- Use a sharp serrated knife to level off the rounded top of each cake
- Place a large dollop in the middle of the first layer and gently push it out to the sides with an offset spatula until it is hanging off the edges
- Flip the second layer upside down before placing on top of the bottom layer
- Add another large dollop on the top of the cake and again, push the icing out to the sides with a back and forth motion, trying to avoid lifting the spatula in an upwards direction
- Once the top is levelled out, use the icing that spilled over the edge from the centre to fill in any gaps on the sides where the two layers meet, and add more icing to help cover the rest of the sides
I hope you enjoyed this easy cake recipe! If you have any feedback or comments, please leave them below! Don’t forget to follow me on Instagram @nevernoteatingca for more recipes, tips and tricks!
The post Easy Peanut Butter Coconut Cake appeared first on Never. Not. Eating..
]]>The post Gluten-Free Cereal Bars appeared first on Never. Not. Eating..
]]>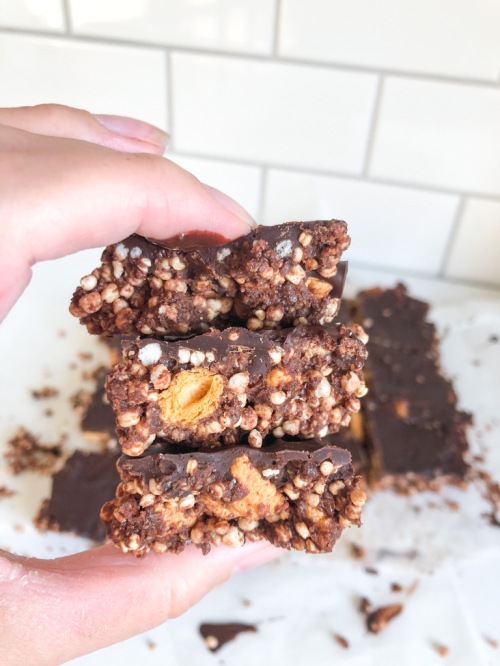
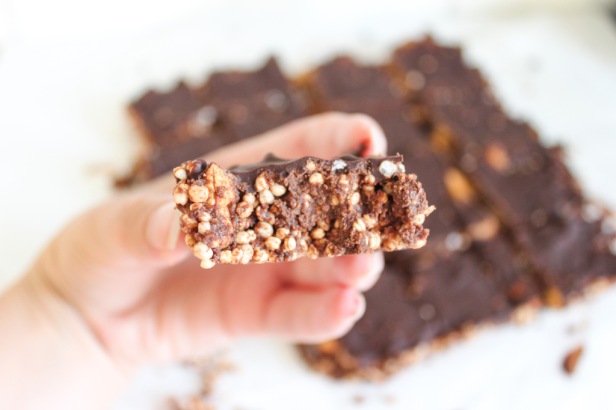
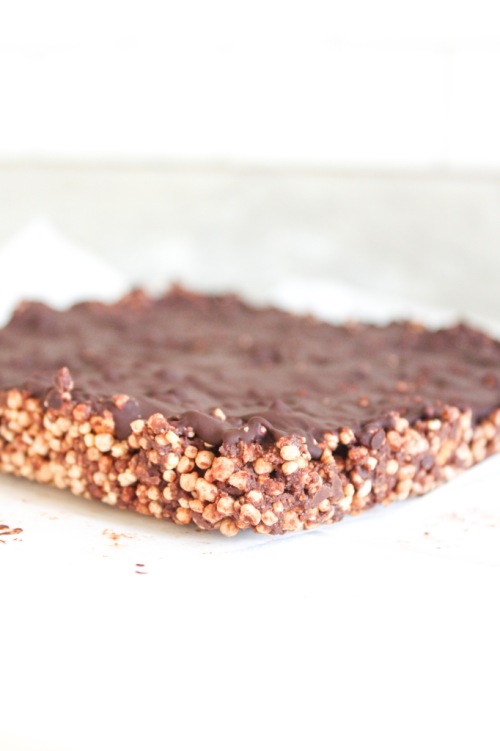
These chocolate cereal bars are crispy, crunchy and so satisfying. They have currently replaced my after-dinner-before-bedtime snack.
Here is what you will need to make them:
- Your favourite gluten-free cereal (I use a combination of Quaker Corn Squares and Puffed Quinoa)
- Peanut butter (try out my homemade peanut butter, found here)
- Pure vanilla extract
- Pure maple syrup
- Cinnamon
- Dark chocolate
- Flaky sea salt (optional)
These take minutes and are such a yummy treat. Check out the recipe below!
Gluten-Free Cereal Bars
Serving size: Fills an 8 x 8 inch square pan
Prep time: 5 minutes
Cook time: 8-10 minutes
Set time: 20 minutes
Ingredients:
- 200 g dark chocolate, divided
- 1/2 cup peanut butter
- 1/2 tsp pure vanilla extract
- 1/4 tsp cinnamon (optional)
- 1 tbsp pure maple syrup
- 1.5 cups corn square cereal*
- 1 cup puffed quinoa*
- Flaky sea salt (optional)
Instructions:
- Prepare an 8 x 8 inch square baking pan by lining it with two pieces of parchment paper for easy release.
- Over a double boiler, or in the microwave, melt 75 g of the chocolate in a medium-sized heat-resistant bowl. Once melted, add the peanut butter, vanilla, cinnamon and maple syrup. Stir to combine.
- Place the corn squares and puffed quinoa in a separate, large bowl. Pour the chocolate-peanut butter mix over and use your hands to incorporate the ingredients. Press into prepared baking pan.
- Melt the remainder of the dark chocolate and pour over cereal mixture. Spread evenly. Top with flaky sea salt, if desired. Place in the fridge to set for at least 20 minutes. Cut into squares and store in an airtight container in the fridge.
NOTES:
*Feel free to use your favourite gluten-free cereals
The post Gluten-Free Cereal Bars appeared first on Never. Not. Eating..
]]>The post Vegan Chocolate Bars appeared first on Never. Not. Eating..
]]>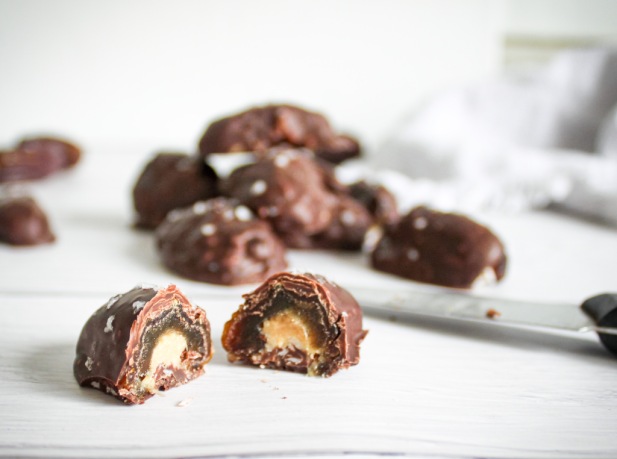
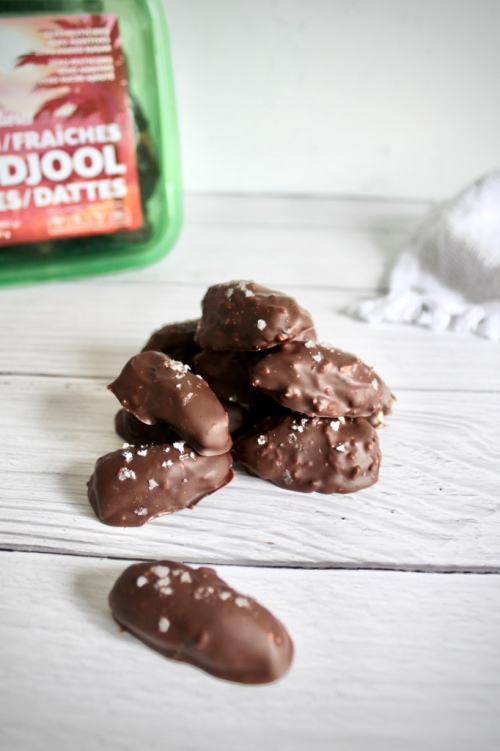
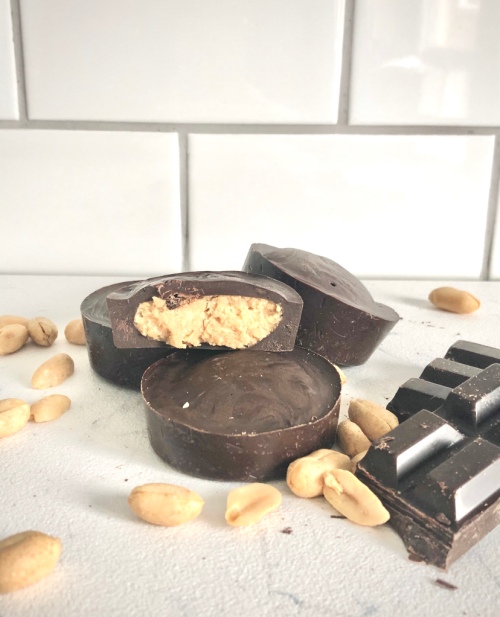
Typically, I just snap off a few squares of dark chocolate and have that as an after-dinner snack, but sometimes, I like to switch it up! There are so many recipes that you can make using chocolate that are healthy, delicious and take only minutes to whip up. Like my Healthy 5 – Ingredient Peanut Butter Cups, for example. Or a 3 – ingredient brownie that I make using cocoa powder, bananas and nut butter. This chocolate bar recipe is no exception. It is quick, vegan and amazingly delicious. It tastes like a “Snickers” bar!
The MVP here is the Medjool Date. It’s caramel-y in texture and taste, and is the perfect vessel for the other ingredients. It’s also what gives these candy bars their sweetness, as there is no refined sugar added to this recipe. Nature’s perfect candy.

The chocolate: It is your choice whether you would like to make these bars completely vegan or not. If so, you can find vegan chocolate chips at the health section of your grocery store, or on Amazon, here. To start, melt your chocolate in a double boiler over simmering water, or carefully in the microwave in 20-30 second intervals, stirring in between. Try not to eat it out of the bowl at this point.
The assembly line: Set up your stations. It should go – dates, nut butter, shredded unsweetened coconut, melted chocolate and flaky sea salt. Now, we begin. Take a date, remove the pit and carefully tear it in half with your fingers. Use a knife to spread some nut butter over the open-side of one half and then dip the nut-buttered side into your coconut. Dip your filled date into the chocolate pool and use a spatula to help you coat the entire date. Scoop up the date with a fork and tap several times on the side of the bowl to let any excess chocolate drip off. Place your chocolate bar on a plate or tray lined with parchment and immediately sprinkle with a few flakes of sea salt. Continue with the rest of the dates and refrigerate for at least 15 minutes before enjoying!
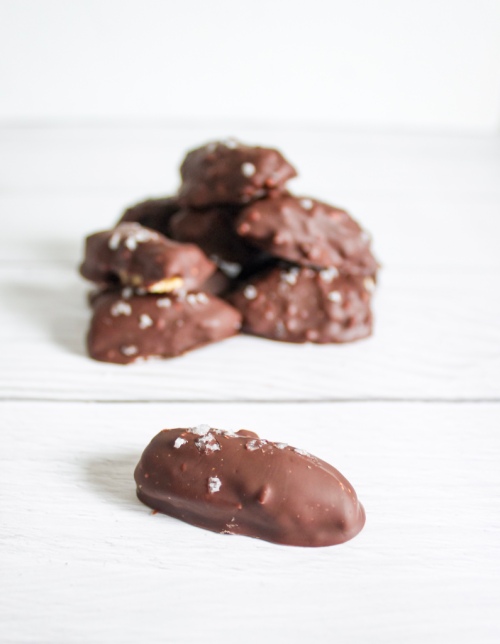
These are the perfect chocolate bar replacement. Chocolatey, caramely, ooey and gooey. And that sea salt just adds that extra hit of love. DROOL.
Vegan Chocolate Bars
Serving size: Makes 20 small bars
Prep time: 10 minutes
Cook time: 5 minutes
Chill time: 15 minutes
Ingredients:
- 140 g vegan dark chocolate
- 10 medjool dates, pitted and halved
- 1/4 cup nut butter (I prefer my Homemade Peanut Butter)
- 3 tbsp shredded unsweetened coconut
- flaky sea salt (optional)
Instructions:
- Fill a small pot with 2 inches of water and bring to a simmer on your stovetop. Place chocolate in a larger, heat-proof bowl and place the bowl on top of the pot, with a wooden spoon in between to let the steam escape. Stir regularly until the chocolate is melted. Remove from heat. Alternatively, you can melt your chocolate in the microwave by placing it in a microwave-safe bowl and melting for 20 – 30 second intervals, stirring in between, until smooth.
- Lay a piece of parchment paper on a small baking tray or a large plate and set aside.
- Take one half of a date and use a knife to spread nut butter on the open side of it. Dip the buttered side into the coconut flakes and then carefully place into the melted chocolate, using a spatula to help coat the entire date. Use a fork to scoop it up and tap on the side of the bowl a few times to allow extra chocolate to drizzle off. Place on prepared tray and sprinkle with a few flakes of sea salt. Repeat for the remainder of the dates.
- Place dates in the refrigerator for at least 15 minutes before serving. When they have cooled completely, transfer to an airtight container and store in the fridge.
The post Vegan Chocolate Bars appeared first on Never. Not. Eating..
]]>The post Healthy 5-Ingredient Peanut Butter Cups appeared first on Never. Not. Eating..
]]>
I can’t think of a better duo than chocolate and peanut butter, and I’m sticking close to home with this recipe. No fancy upgrades or add-ins. Just the classic – healthified. Dark chocolate and peanuts are both anti-inflammatory foods and coconut oil is said to enhance brain function. All-in-all, you can never go wrong with knowing exactly what is going into your food.
This simple and quick recipe requires five ingredients that you will likely already have in your pantry:
- Dark chocolate (At least 85%)
- Natural peanut butter (I use my Homemade Peanut Butter)
- Coconut oil
- Vanilla
- Maple syrup
The first step is finding the best peanut butter for the filling. Look at the ingredient list on the peanut butter that you buy. The only ingredient listed should be “dry roasted peanuts.” And maybe “salt.” Otherwise, steer clear. Most peanut butters have a lot of sugar added and stabilizers to prevent oil separation. If you are trying to incorporate more healthy, whole foods into your diet, natural nut butters are best. If you are unimpressed with the price of these at your grocery store, click here to learn how to make your own in less than 10 minutes!
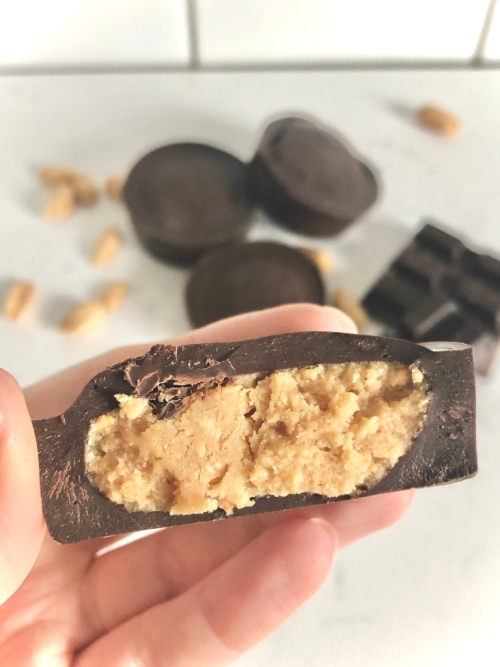
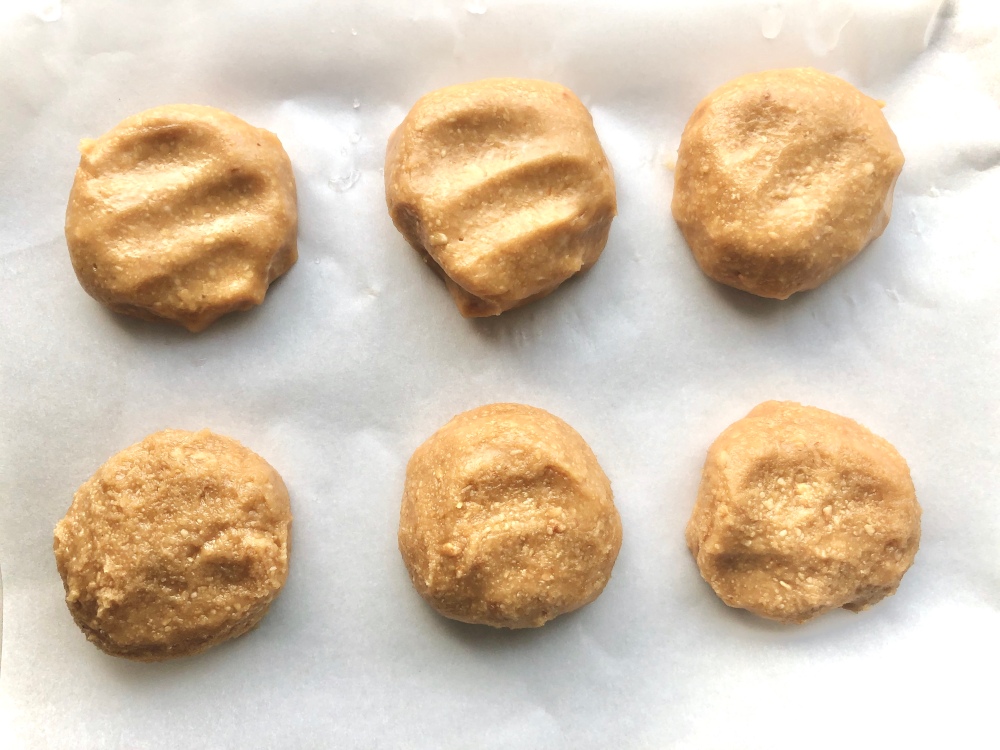
To make the filling, combine the peanut butter with the vanilla and maple syrup. Form into 1-inch balls and flatten on a large plate covered with a piece of parchment paper. Put in the freezer while you prepare the chocolate.
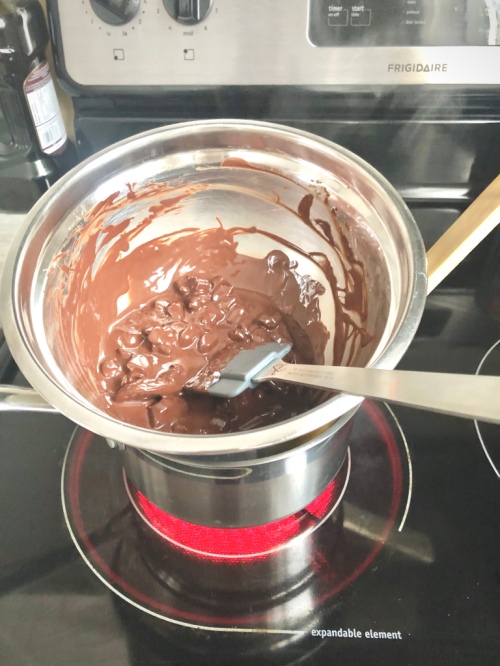
For the chocolate shell, set up a double boiler. Cut up your dark chocolate into small-ish pieces and place in a large, heat-proof bowl with coconut oil, reserving 2 ounces of the chocolate for later. Fill a small pot with about one inch of water and place over burner with the bowl of chocolate on top. Tip: Placing a wooden spoon in the pot before you put the bowl on top allows the steam to escape. Stir constantly with a rubber spatula until chocolate pieces have melted. Remove from heat and gradually add in the remaining 2 ounces of chocolate, stirring after each addition, until melted. This helps to temper the chocolate, giving it more of a glossy look when set and achieving a wanted “snap” when bitten into.
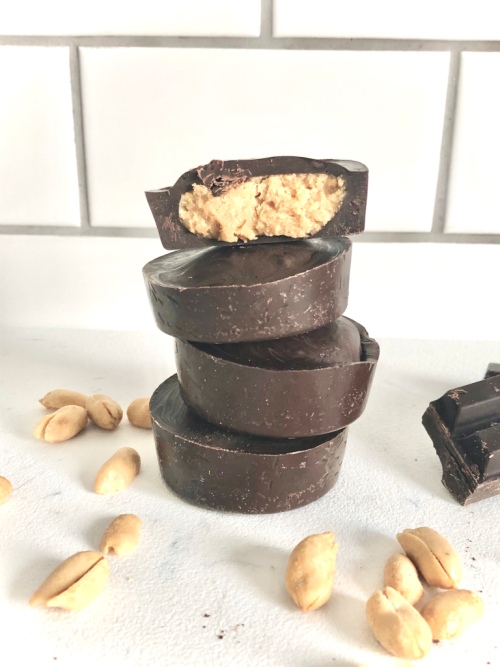
To mold the chocolates, I use this silicone muffin tray, which is beyond amazing. The pb cups come out perfectly. You can also use paper muffin liners if you don’t have a silicone tray.
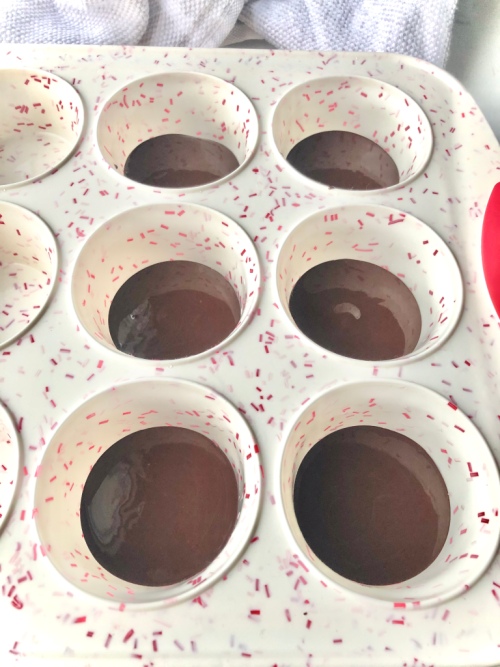
Pour enough of the melted chocolate into each cup (or liner) to coat the bottom. Remove the peanut butter discs from the freezer and place one in each cup, on top of the melted chocolate. Cover with more melted chocolate until the peanut butter is no longer visible. You may also add some flaky sea salt on top, if that’s your style. Place the pb cups in the fridge for about 15 minutes to set.

This recipe makes 6 large peanut butter cups. Store them in the fridge and remove them a few minutes before you want to chow down.
The perfect guilt-free post-dinner snack.
Healthy 5-Ingredient Peanut Butter Cups
Serving size: Makes 6 large peanut butter cups
Prep time: 25 minutes
Cook time: 5 minutes
Ingredients:
- 1/2 cup natural peanut butter
- 1 tbsp pure maple syrup
- 1/2 tsp pure vanilla extract
- 10 oz dark chocolate, separated and chopped into small pieces
- 1 tbsp coconut oil
Instructions:
- In a medium-sized bowl, mix together peanut butter, maple syrup and vanilla until combined. Form into six, 1-inch balls and flatten onto a plate lined with parchment paper. Place in freezer while you prepare the chocolate.
- Fill a small pot with one inch of water and place over a burner on medium-high heat. Bring water to a simmer. In a heatproof bowl, add 8 oz of the chocolate and the coconut oil. Place a wooden spoon in the pot with simmering water and the bowl on top of the pot. The spoon allows the steam to escape. Use a rubber spatula to constantly stir the chocolate until melted. Remove from heat.
- To temper the chocolate, slowly add in the remaining 2 oz of chocolate, one small chunk at a time, stirring until melted after each addition. This process takes a bit of time, but helps to set the chocolate properly.
- To a silicone muffin tray (or into muffin liners), pour in enough melted chocolate to just coat the bottom of six of the cups. Remove the peanut butter discs from the freezer and place one in each of the cups with chocolate. Top them off with the remainder of the melted chocolate, making sure to completely cover the peanut butter. Refrigerate for 15 minutes to set.
Store these in the fridge and remove a few minutes before serving.
The post Healthy 5-Ingredient Peanut Butter Cups appeared first on Never. Not. Eating..
]]>The post Spirulina Chia Parfait appeared first on Never. Not. Eating..
]]>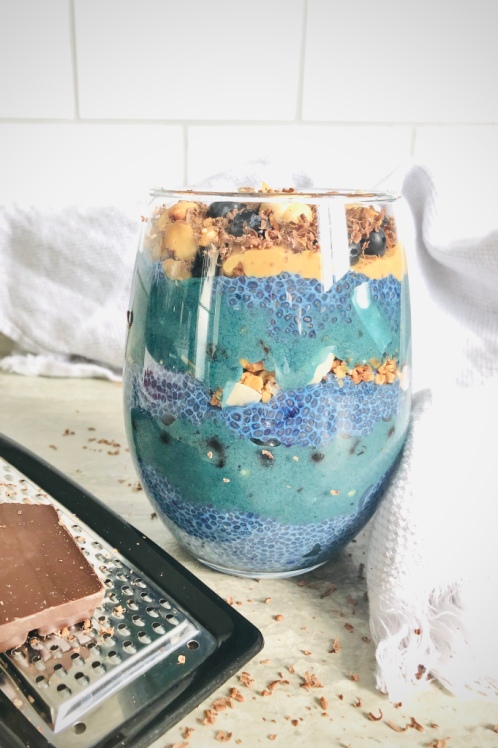
Chia seeds are my go-to when I’m trying to incorporate more fibre, healthy fats and protein. They are little sponges that absorb liquid like it’s nobody’s business, creating a thick “pudding” of sorts in just a short amount of time. I use the Costco brand chia seeds, found here.
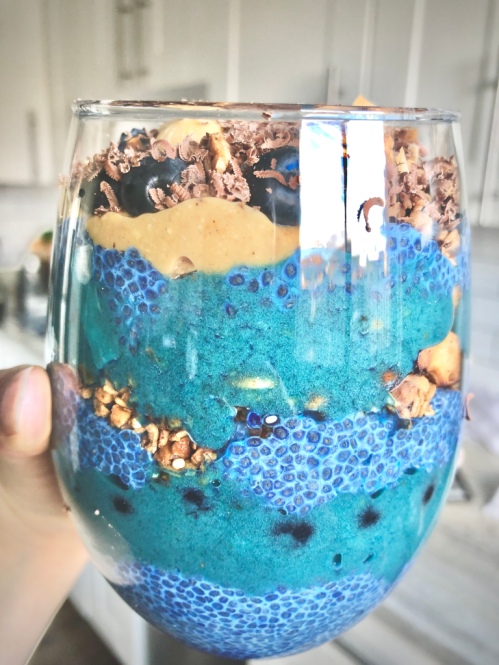
Here are the layers:
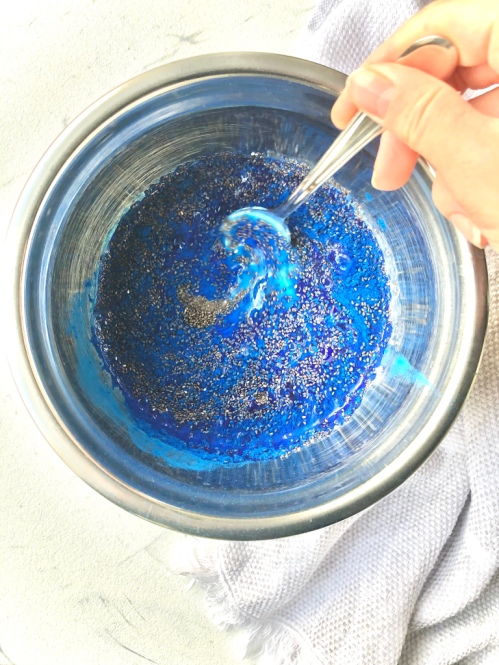
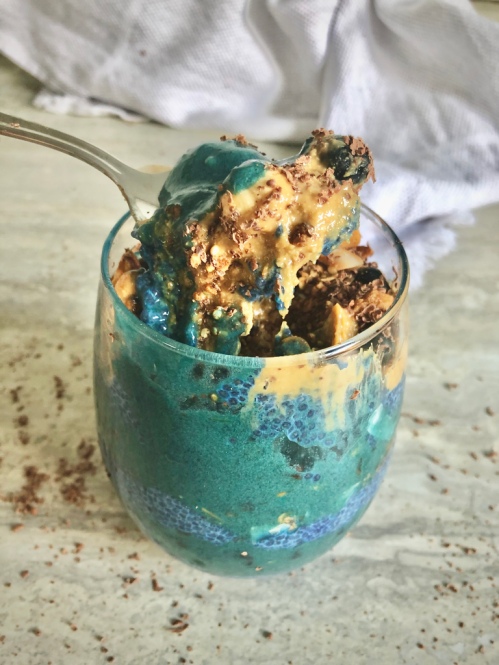
Layer 1: Chia pudding – the ratio I use for the pudding is 1:3, seeds:liquid. In a mixing bowl, add one-third cup chia seeds with three times the amount (one cup) of your favourite dairy-free milk (I prefer almond). Mix in half a teaspoon of blue spirulina (optional), half a teaspoon of pure vanilla extract and a pinch of salt. Place in the fridge while you prepare the other layers.
Layer 2: Frozen fruit smoothie – to a food processor (I have a ninja), add two frozen bananas, half a cup of frozen mango, a quarter teaspoon of green spirulina (optional) and a half teaspoon of blue spirulina (optional). Blend until smooth, adding a splash of dairy-free milk to get it going, and scraping down the sides every so often. The spirulina powders give it that amazing teal colour and are packed with healthy nutrients.
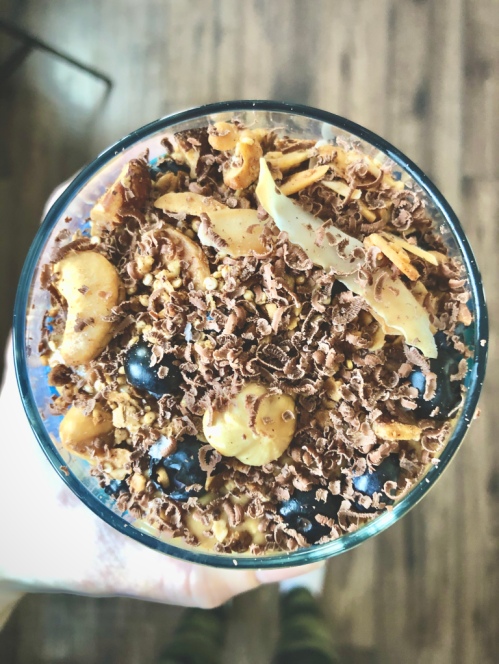
Layer 3: Fresh blueberries
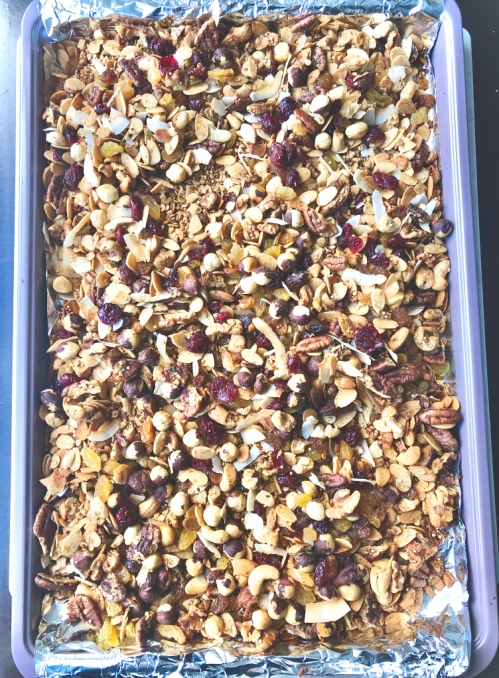
Layer 4: My Brown Butter Nutty Granola
Layer 5: Favoured toppings – My Homemade Peanut Butter, dark chocolate shavings, toasted coconut, etc.
Spirulina Chia Parfait
Serving size: 2
Prep time: 20 minutes
Ingredients:
- 1/3 cup chia seeds
- 1 cup dairy-free milk (I prefer almond), plus 1-2 teaspoons
- 1/2 tsp pure vanilla extract
- 1 tsp blue spirulina, separated
- salt
- 2 frozen bananas
- 1/2 cup frozen mango
- 1/4 tsp green spirulina
- Brown Butter Nutty Granola (optional)
- Homemade Peanut Butter (optional)
- Fresh fruit for topping
Instructions:
- In a medium-sized mixing bowl, whisk chia seeds, milk, vanilla, half of a teaspoon of blue spirulina and a pinch of salt. Place in the fridge to set for about 20 minutes while you prepare the other layers.
- To a food processor, add the bananas, mango, green spirulina powder and the remaining half teaspoon of blue spirulina powder. Pulse a few times and then blend, adding in 1-2 teaspoons of milk to help it along. Scrape down the sides as needed and blend until smooth.
- To build the parfait: In a Mason Jar or a short glass, scoop in a few spoonfuls of the chia pudding. Next, add the smoothie layer and top with granola. Repeat these layers and then add the fresh fruit, peanut butter and more granola.
The post Spirulina Chia Parfait appeared first on Never. Not. Eating..
]]>The post Homemade Peanut Butter appeared first on Never. Not. Eating..
]]>Do you, like me, eat PB by the spoonful?! After work, before the gym, as a snack, in bed…you know, whenever there’s an opportunity? Well then, keep reading!!
I used to go to the grocery store and peruse the health food section, desperately looking for a decent-priced nut butter, but was always disappointed. It’s SO expensive to buy any sort of spread, from peanut to tree nut. I would then be stuck purchasing the normal brand name butters (which are delicious, but who knows what goes into them)?! And then I thought, I should just make my own! How have I never thought of this before??? “How hard could it be?” I asked myself. Not hard. Not hard at all. It’s actually the opposite of hard. And the best part is I know everything that I am putting into my body. Amazing. Sometimes I have good ideas.
So here’s what you need:
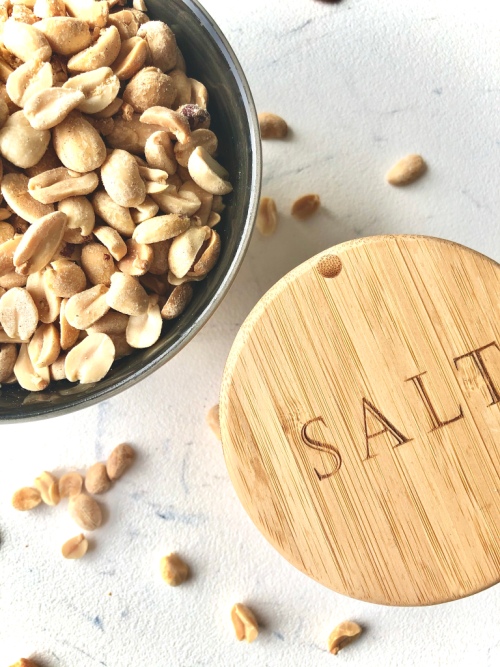
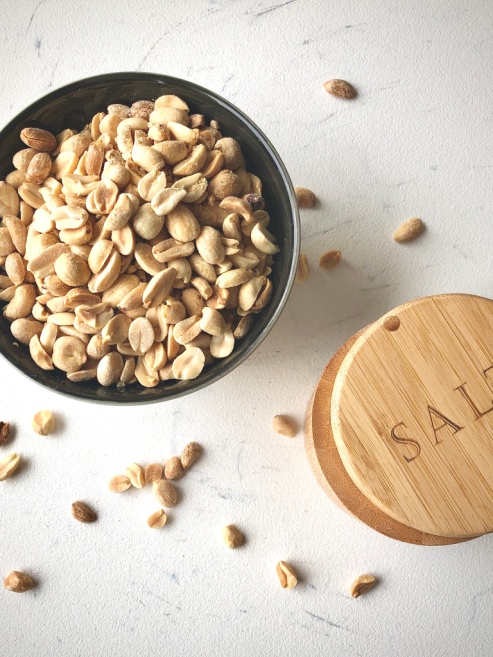
- Peanuts
- Salt
That’s it! Two ingredients. It’s really too good to be true.
So here we go: Put the peanuts in a food processor with the salt and blend. Seven and a half minutes later…DONE. You made peanut butter. No sugars, no stabilizers, no other additives. Just pure legume-y goodness. Yay!
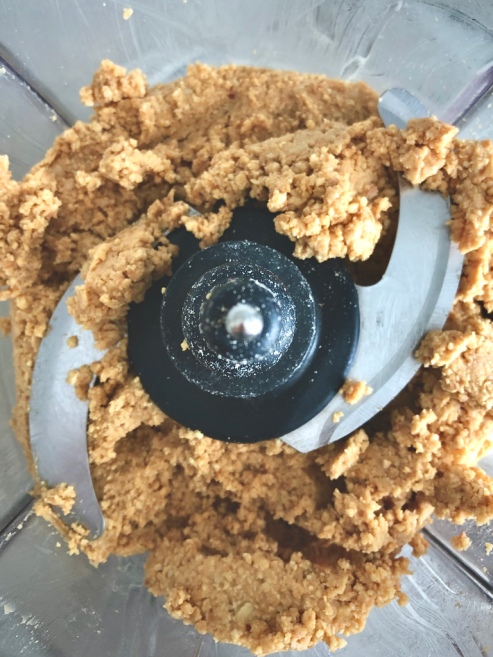
Okay. I’ll break it down a bit more for the non-believers. Step 1: Add about 4 cups of dry-roasted peanuts to a food processor with 1 teaspoon of salt. Pulse a couple of times to break up the peanuts and mix in the salt. It should look something like this:

Step 2: Set your food processor to “blend” and watch the magic happen. Blend for 2-3 minutes and stop to scrape down the sides with a spatula and give the motor a break.
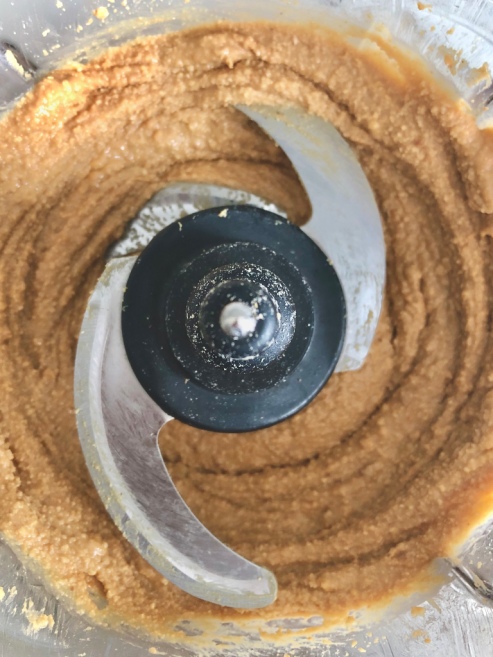
Step 3: Blend again for another 2-3 minutes, stopping once more to scrape and rest. You will see the consistency begin to change. The peanuts start to release their oils and the mixture becomes creamier and creamier.
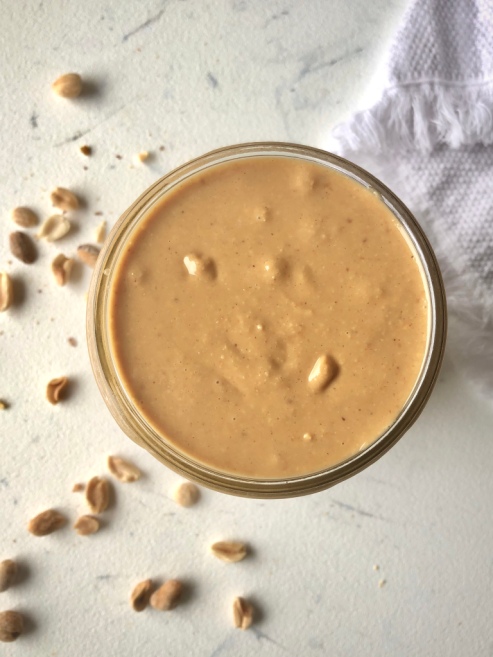
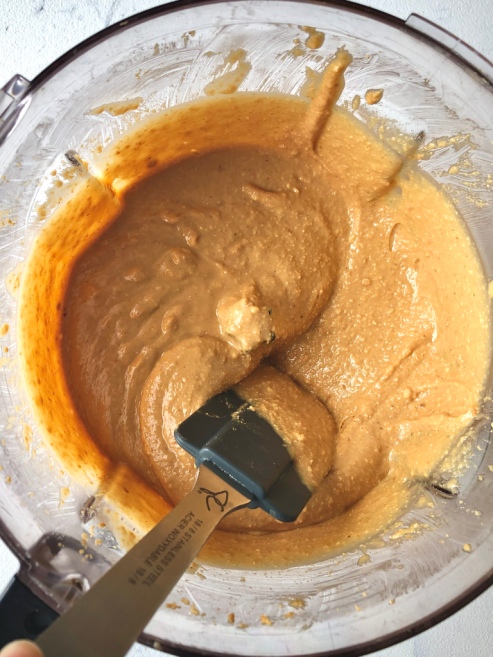
Step 4: Alright, now we blend until happy with the texture. I like my peanut butter pretty smooth, so usually I blend for a total of 8 minutes or so. You be the judge. Stop the food processor every so often to check the consistency. I like mine to look like this when done:
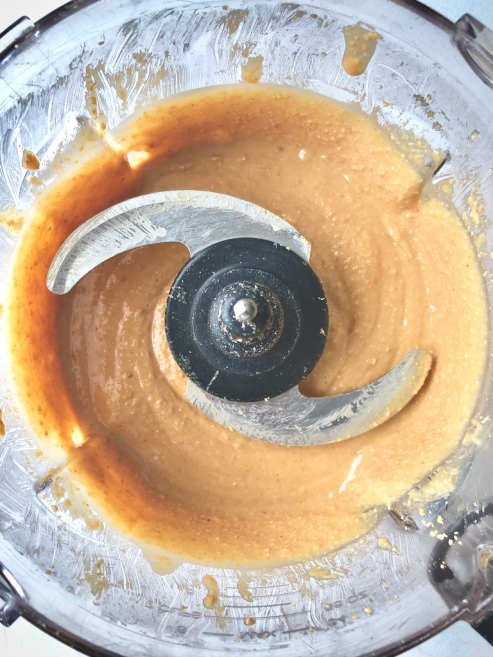
A few teeny, tiny pieces. But mostly smooth!
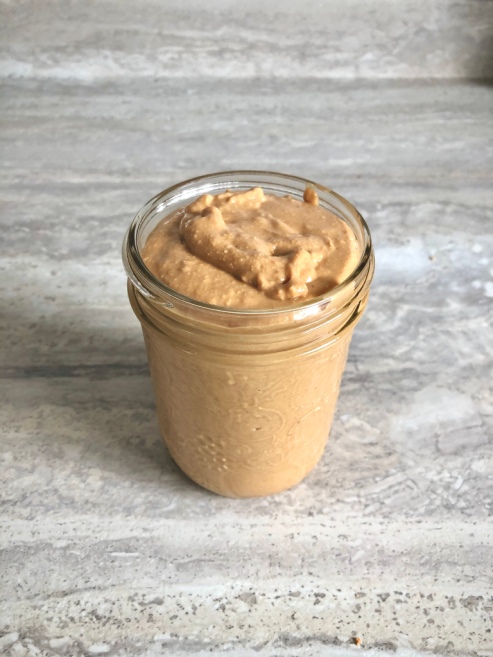
Drool! So yum. Pour this deliciousness into a mason jar and pop it into your fridge to stay fresh.
Homemade Peanut Butter
Servings: 2
Prep time: 1 minute
Cook time: 8 minutes
Ingredients:
- 4 cups dry-roasted peanuts*
- 1 tsp salt
Instructions:
- Place peanuts into a food processor with the salt and pulse a few times.
- Blend for about 7-10 minutes (depending on how smooth you want it), stopping the processor every few minutes to scrape the sides and give the motor a break.
- Pour into an air tight jar and store in the fridge.
Notes:
*You can buy peanuts already dry-roasted (unsalted), but it is always better to do this step yourself from raw peanuts in a 350 degree oven for about 15 minutes, checking every so often to avoid burning.
Additions: If you find this peanut butter is not sweet enough for you, you can always adjust by adding honey or sugar to the recipe.
The post Homemade Peanut Butter appeared first on Never. Not. Eating..
]]>