The post Roasted Garlic Mashed Cauliflower (Low-Carb) appeared first on Never. Not. Eating..
]]>We are officially entering Fall and that means, Thanksgiving. I’m a lover of enjoying seventy-four side dishes and can always forego the main one. I am always on the hunt for new and fun sides to add to any meal…especially those around the holidays!

This Roasted Garlic Mashed Cauliflower is the perfect side for Thanksgiving, Christmas, Easter…you name it! It’s low-carb and will please your keto and vegan family members. Bonus: It tastes just as good as mashed potatoes!
How to Make Vegan Roasted Garlic Mashed Cauliflower
I highly recommend a good food processor or blender. The Ninja Kitchen line is a great product and I use their food processor every single day. I make EVERYTHING in it – smoothie bowls, pestos, pastry doughs and this mashed cauliflower. It is an affordable alternative to the well-known Vitamix.

For this recipe, everything gets precooked, placed in your food processor and then blended until smooth – it’s THAT easy! Here is what you will need:
- One medium-sized head of cauliflower
- A head of garlic
- Vegetable broth
The Roasted Garlic
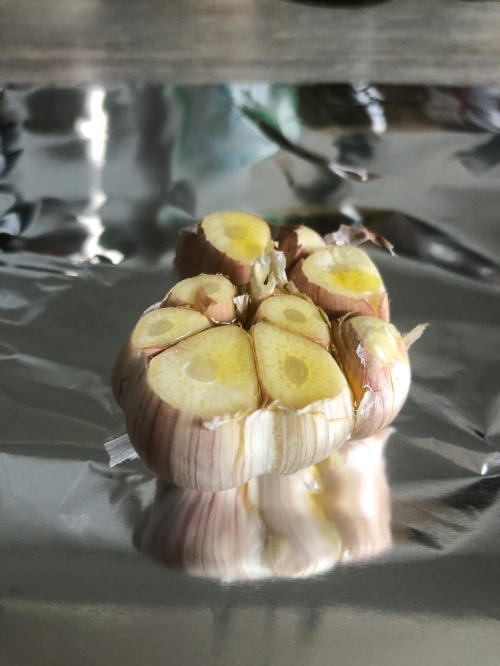
Let’s talk about the garlic – is there anything better?! For this recipe I love using roasted garlic, and although it may take longer, it’s so worth it. In addition, you will also have leftover cloves that you can use in other dishes that you will be serving (or just save them for another day). Roasting a head of garlic is a great move for large dinner parties or holiday gatherings.
To roast, all you have to do is cut off the top of the entire head of garlic, leaving the top of the cloves exposed. Drizzle the head with olive oil, wrap in tin foil and place on a baking sheet and into the oven for 45 minutes. If you want to save on time, you can mince your raw garlic, add to a pan over low heat with some olive oil for about 30 seconds to one minute, and use this in place of the roasted stuff in the recipe. Above all, don’t skimp on the garlic!
Cooking the Cauliflower
To cook the cauliflower, place the florets into a large pot with about a cup and a half of veggie stock. Cover and set your burner to high, and when the liquid starts boiling, turn the burner down slightly and let steam for about 5-10 minutes (depending on how small your florets are). They will be ready when they are fork-tender. Don’t overcook them because you will end up with mushy cauliflower instead of mashed cauliflower!
After you cook the garlic and cauliflower, all that’s left to do is throw it all into your food processor and watch it come together – Pillowy, low-carb clouds of heaven!

More Amazing Cauliflower Sides
Sumac Roasted Cauliflower (a showstopper)
Hot and Sweet Cauliflower Wings (perfect for game day)
East Creamy Cauliflower Soup (a winter hit)
This post contains affiliate links and I may earn a small commission when purchases are made after clicking the links, at no cost to you. Thank you!
Vegan Roasted Garlic Mashed Cauliflower
Servings: 4
Prep time: 10 minutes
Cook time: 45 minutes
Ingredients:
- 1 whole head of garlic
- medium head of cauliflower, broken into florets
- 1 1/2 cups vegetable stock
- salt
- pepper
- olive oil
- fresh thyme, for topping (optional)
Instructions
For the garlic:
- Preheat oven to 375 degrees Fahrenheit.
- Peel the outer layer of skin off of the garlic and slice the top of the head off (see photo above). Place on a piece of tin foil and drizzle the top with about one tablespoon of olive oil. Wrap the garlic up so that there are no holes for the steam to escape and place on a baking sheet and then in the oven for 45-55 minutes.
For the cauliflower:
- When the garlic has been roasting for about half hour, start your cauliflower. Place the florets into a large pot with the vegetable stock, cover and bring to a boil. Once boiling, reduce slightly to a rolling boil and allow the cauliflower to steam for 5-10 minutes, or until just fork tender – do not drain.
- Use a slotted spoon to transfer the cauliflower to a food processor or blender and add one tablespoon of the veggie stock that the cauliflower was cooking in.
- Remove the garlic from the oven and carefully unwrap. Use your fingers to squeeze out two of the cloves (or as many as you want!) and place in the food processor with the cauliflower and stock. Add in 1/4 teaspoon of salt and a few grinds of fresh black pepper and pulse everything to combine and then blend until smooth. Be patient and scrape down the sides often. You can add more of the veggie stock to help loosen it, but don’t add too much or else it will become mushy. Eventually, if you continue to blend and scrape, the mixture will become smooth without the added veggie stock.
- Taste and add more salt and pepper or another clove of garlic, if desired. I like to put more than 1/4 teaspoon of salt, but it is always better to start with less and add more, than to add too much for your taste.
- Transfer the cauliflower to a serving bowl, drizzle with some olive oil and top with fresh thyme, if desired.
The post Roasted Garlic Mashed Cauliflower (Low-Carb) appeared first on Never. Not. Eating..
]]>The post Grilled Peaches with Cinnamon Coconut Whipped Cream and a Balsamic Reduction (Vegan & GF) appeared first on Never. Not. Eating..
]]>
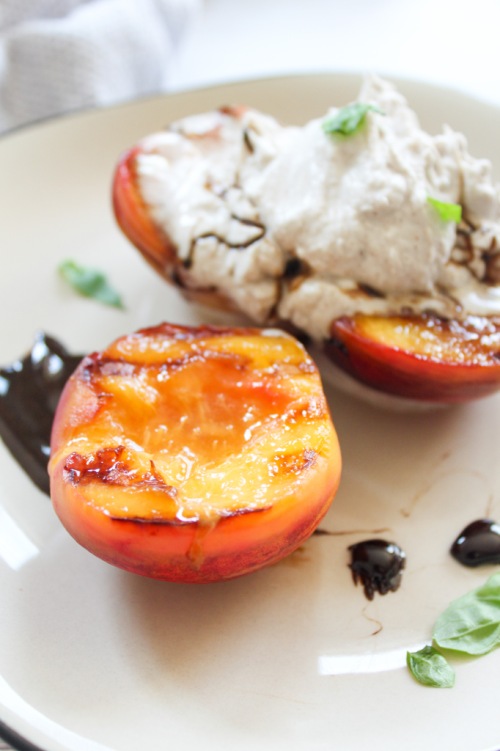
Okay, picture this – you are watching the abnormally late NBA playoffs (thanks, Covid), and you’re eating your wings, nachos and burgs. Halftime comes and you need something sweet. Why not fire up the BBQ and throw on some peaches? Dress them up with some coconut whip cream? A little sweet balsamic reduction? Yes, yes and yes. I vote yes.
Even easier, you can use a cast iron grill pan on your stovetop. I use the one found here, and I love it! It’s perfect for those without a barbeque, or anyone who just wants an easier clean-up. All you need to do is set it over medium-high heat and brush the peaches with olive oil before cooking them for about 2-3 minutes per side. They will still develop those beautiful grill marks that you get on the Q, just with less hassle.
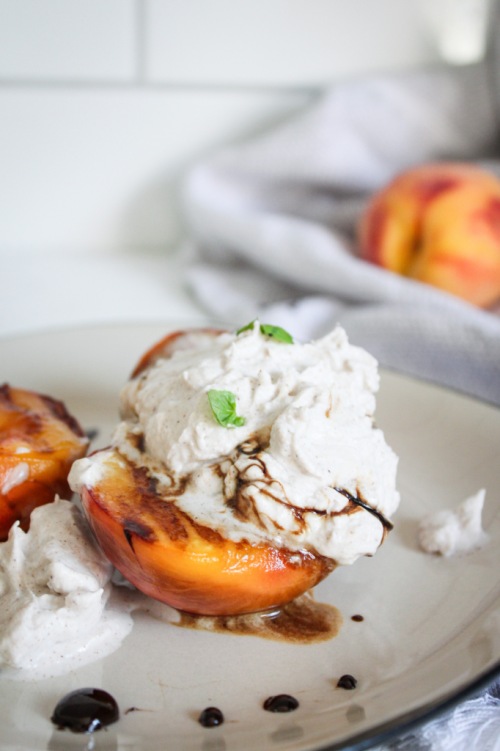
The coconut whip cream is my favourite. As a traditional whip cream lover, finding a vegan alternative was super exciting. This part is a bit tricky, as you need to find a can that solidifies properly when you store it in the fridge. I have found that 365 Everyday Value and Aroy-D are the best for this. To make the whipped cream, place a can of coconut milk in the fridge for at LEAST 24 hours. The longer, the better. Also, try not to shake the can too much before placing it in the fridge. The coconut milk and water will naturally separate, and we want to keep it that way, so shaking it before refrigerating it will slow the process of separation and then solidification.
When it is time to make the whipped cream, place your mixing bowl and mixers into the freezer to get super cold, about 15 minutes before you plan on beginning. Carefully open the can (without shaking) and scoop out the firm top part into your bowl. You will notice a clearer liquid at the bottom of the can (the water) – do not add this to the bowl. Save this and add to a morning smoothie! Add some cinnamon and vanilla to the coconut milk and whip until soft peaks form. Next, add in your sugar – I like to use maple syrup, but you can use powdered sugar as well. Continue beating until stiff peaks form. It is unlikely that they will become as stiff as regular whip cream, but sometimes I put the bowl in the freezer for ten minutes and re-whip for a few more seconds before serving. This usually does the trick!
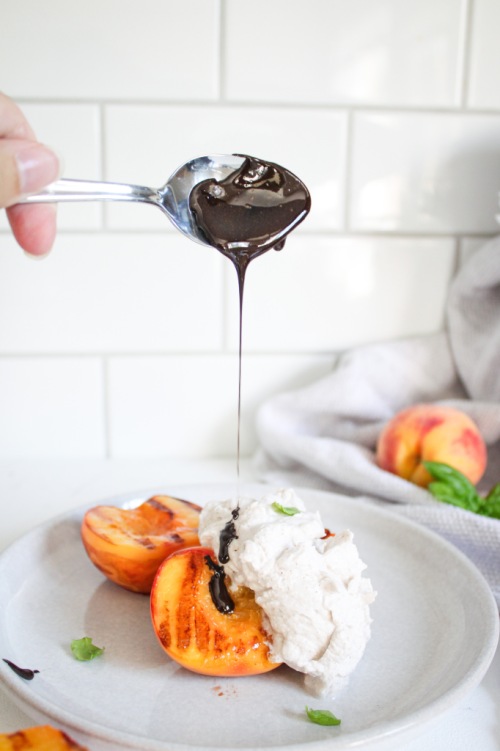
For the balsamic glaze, place some balsamic vinegar with a dash of maple syrup into a small pot and bring to a gentle simmer. Let it reduce for about eight minutes. TIP: Keep the pot over the lowest heat up until you use the reduction, as it cools quickly and becomes very sticky.
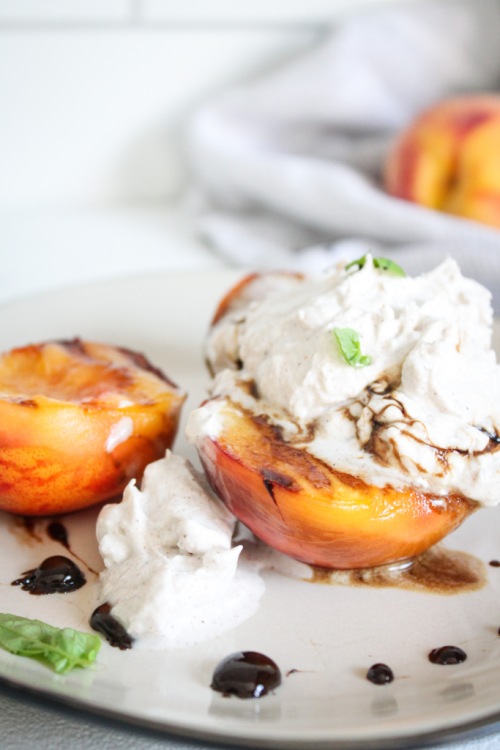
Now, grab a plate, put the peaches down, scoop on some whipped cream and drizzle with that lush reduction! It’s the freshest summer dessert one could ask for!
Grilled Peaches with Cinnamon Coconut Whipped Cream and a Balsamic Reduction (Vegan & GF)
Servings: 4
Prep time: 15 minutes
Cook time: 10 minutes
Ingredients:
- 1 14 oz can of full-fat coconut milk (I like Aroy-D and 365 Everyday Value), refrigerated for at LEAST 24 hours
- 1/2 tsp cinnamon powder
- 1/2 tsp pure vanilla extract
- 2 tbsp pure maple syrup (or confectioner’s sugar), divided
- 1/2 cup balsamic vinegar
- 4 peaches, halved and pits removed
- olive oil
Instructions:
- Place a medium bowl and your beaters into the freezer for at least 15 minutes.
- Remove the coconut milk from the fridge and carefully open it, without shaking. Scoop the top, white part into the cold bowl. You will see a clearer liquid at the bottom (the water), DO NOT add this to the bowl (save for morning smoothies). Add the cinnamon and vanilla to the coconut milk and whip on high until soft peaks. Add one tablespoon of syrup (or sugar) and whip again until stiff peaks form.* Place in the fridge while preparing the rest of the recipe.
- To a small pot over medium heat, add the balsamic and the remaining tablespoon of maple syrup. Bring to a gentle simmer and let cook down for about 8 minutes, stirring frequently. Turn the heat to the lowest setting to keep the reduction loose and drizzle-able. It cools quickly and becomes very sticky, so keeping it on the lowest heat prevents it from becoming taffy-like.
- Set your grill to medium-high heat and brush the peach halves with olive oil (I like to use my cast iron grill pan for this). Place the peaches cut side down onto your grill and cook for about 2 minutes, without touching them. Flip and cook for another three to four minutes, or until tender but not too soft.
- Place your peaches on a plate, top with the coconut whipped cream and drizzle with the balsamic reduction!
NOTES:
*Coconut whipped cream will not always create stiff peaks, as regular whipped cream does. It depends on how hot your kitchen is. If your whipped cream is looser, place the bowl back in the freezer for 10 minutes and re-whip for a few seconds when ready to plate.
The post Grilled Peaches with Cinnamon Coconut Whipped Cream and a Balsamic Reduction (Vegan & GF) appeared first on Never. Not. Eating..
]]>The post The Triple P’s – Pink Pitaya Pancakes (Vegan & GF) appeared first on Never. Not. Eating..
]]>
Not only is pink a pretty hue, but it has also made its mark on our planet. Pink ribbons are used to raise awareness for breast cancer, a pink shirt is a symbol for anti-bullying, and pink flowers and hearts are given to express one’s love for another.
Pink food is more enjoyable as well, and that’s a fact. Okay, fine…it’s not a fact, but it’s my very strong opinion and I dare you to challenge me!
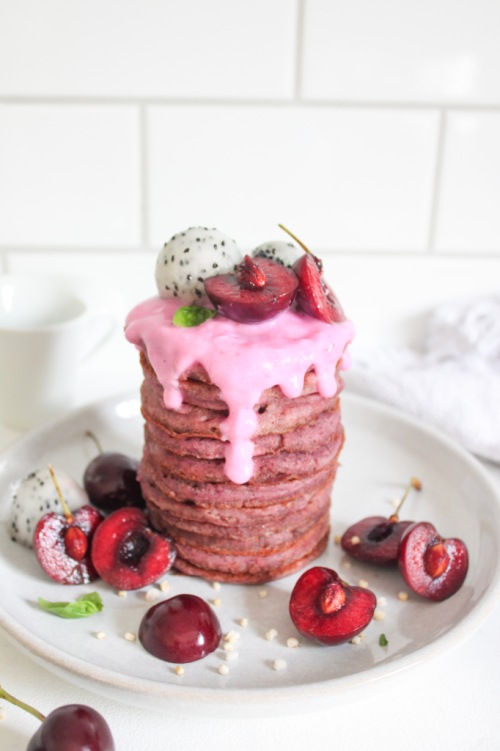
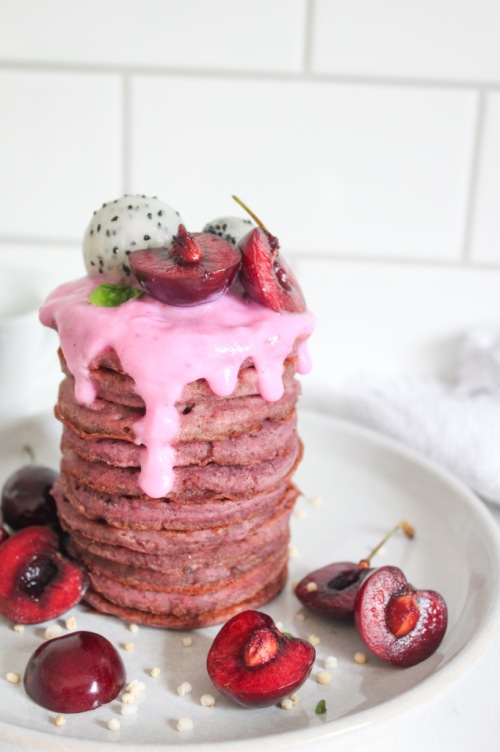
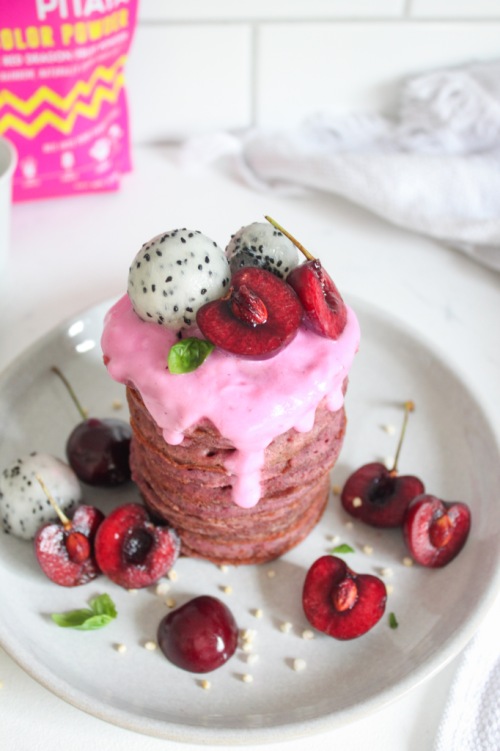
Anywho, since we now agree that pink food is better than non-pink food, I have a pretty sweet recipe for you – The Triple P’s! PINK PITAYA PANCAKES.
Since we’ve already discussed the importance of the colour pink, let’s talk about pitayas. If you don’t know, a pitaya is a fruit, commonly known as “dragonfruit” in North America. It has a pink skin with scale-like spikes shooting out of the exterior. It’s quite unique in appearance, and also quite beautiful. The inside of a pitaya can be white or a bright pink, with little black seeds, similar to that of a kiwi. It has a very mild taste and soft, fleshy texture. The pitaya I am using in this recipe is actually in powder form. The fruit is dried out and then finely ground so it can be used in smoothies, baking, and today – PANCAKES! You can find pink pitaya powder here.
And, these aren’t just any pancakes, peeps. These are gluten-free, vegan, and refined sugar-free! You. Are. Welcome. So, what replaces all of the glutenous, sugary, dairy-forward ingredients, you ask? Well, let’s start with the dry:
Buckwheat flour – I love, love, love using buckwheat flour as a substitute for all-purpose. It is NOT made out of wheat, and therefore is gluten-free. Buckwheat is actually a seed and it is ground up and sold in ‘flour’ form. I consider it to be the best GF flour for pancakes because it holds up and acts the most similar to regular flour. I also really like the nuttier taste.
Flax – Eggs are a typical pancake ingredient, but if I added them to this recipe then the pancakes wouldn’t be vegan. So instead, I use a flax ‘egg,’ which is literally just flax meal and water mixed together and left to sit for a few minutes to thicken up. It’s the perfect vegan binder.
Oat Milk – In any standard flapjack recipe, you will either find milk or buttermilk. And, again, since I’m going for vegan pancakes today, dairy products just don’t cut it. That’s why I have created my vegan ‘buttermilk’ by mixing some organic apple cider vinegar with oat milk instead of the baby cow elixir. You can also use white vinegar for this, if you don’t have ACV. Make sure you are using a certified gluten-free oat milk, as oats themselves do not have gluten in them, but often can be cross-contaminated with other glutenous products. If you can’t find a gluten-free oat milk, you can definitely use almond, cashew or soy milk instead!
Maple Syrup – Finally, the sweet stuff. Obviously white refined sugar is standard, but that shiz is so bad for you, man. I typically could eat these pancakes without any sugar, just because I’m sweet enough, but sometimes I like to add a little maple syrup to bring out the Canadian in me. It’s completely optional, but you do you. You can add more than what is called for if you like a sweeter pancake.
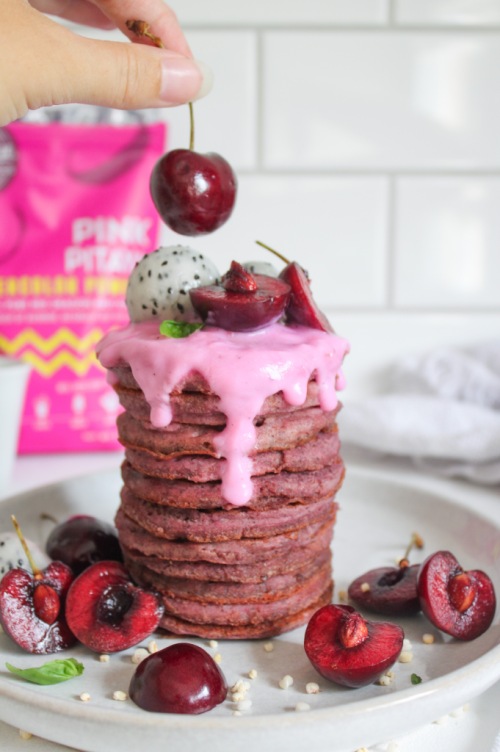
Alright, I think I’ve covered all of the important bases here. Let’s make some flippy flappies!
The Triple P’s – Pink Pitaya Pancakes (Vegan, GF)
Serving size: Makes about 15 small pancakes
Prep time: 10 minutes
Cook time: 15 minutes
Ingredients:
- 1 tbsp flax meal
- 1/2 tsp apple cider vinegar or white vinegar
- 3/4 cup gluten-free oat milk (or your preferred dairy-free milk)
- 1/2 cup buckwheat flour
- 1/2 tsp baking powder
- 1/4 tsp baking soda
- 1/4 tsp salt
- 1 tsp maca powder (optional)
- 1.5 tbsp pink pitaya powder (optional)
- 1-3 tbsp pure maple syrup (according to how sweet you want them, I do 1 tbsp)
- 1/2 tsp pure vanilla extract
- coconut oil
Instructions:
- To a small bowl, add flax meal and 2.5 tablespoons of water. Mix well and place in the fridge for at least 5 minutes.
- Add vinegar and plant-based milk to a measuring cup and stir. Set aside.
- To a medium bowl, add buckwheat flour, baking powder, baking soda, salt, maca powder and pitaya powder, if using. Whisk to combine and set aside.
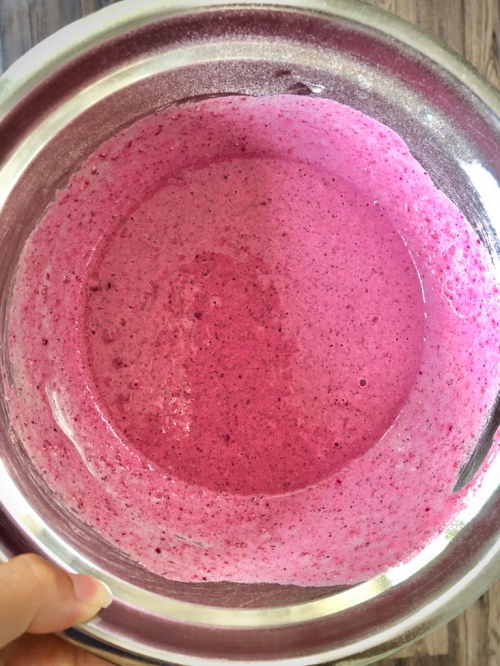
- Add the maple syrup and vanilla to the measuring cup with the vinegar and milk. Remove flax mixture from the fridge and add to the milk mixture as well. Stir and then pour into the dry ingredients. Whisk until combined.
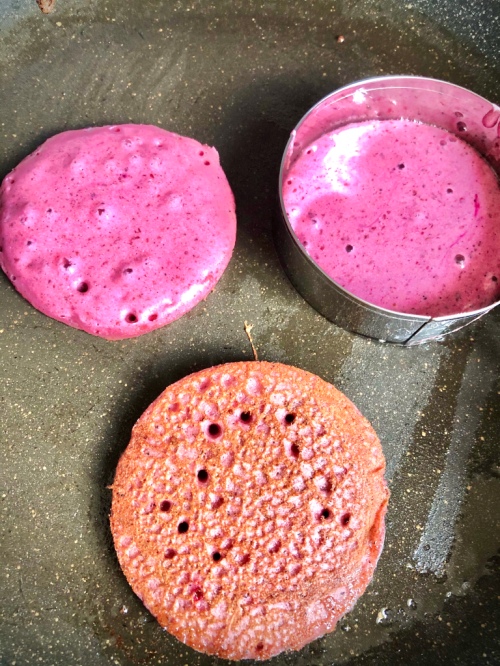
- Add about 1/2 tablespoon of coconut oil to a pan set over medium heat. When the oil is hot, use a ladle to pour some of the pancake batter into the pan. When bubbles begin to appear around the edges (about 1-2 minutes), flip the pancake and cook for 30 seconds to one minute more. Remove from heat and continue with rest of batter, adding more coconut oil as needed.
- Serve immediately or store in an airtight container in the fridge for up to three days.
NOTES:
I love serving these with fresh fruit, yogurt and pure maple syrup.
This recipe feeds approximately two people. You can double the recipe if feeding a larger family.
The post The Triple P’s – Pink Pitaya Pancakes (Vegan & GF) appeared first on Never. Not. Eating..
]]>The post Easy Creamy Cauliflower Soup appeared first on Never. Not. Eating..
]]>
I used my Simple Living Soup Maker to make this soup. If you haven’t heard of Simple Living and their products, you need to check them out! I love my soup maker – It makes dinners easy – heating, blending and cooking soups in 30 minutes! Their soup maker can also be used to make smoothies and alcoholic beverages…My fav! Not to mention it is so quick to clean and easy to store. The BEST.
If you don’t have a Soup Maker, you can use a large pot and then an immersion blender to puree the soup after it is done cooking.
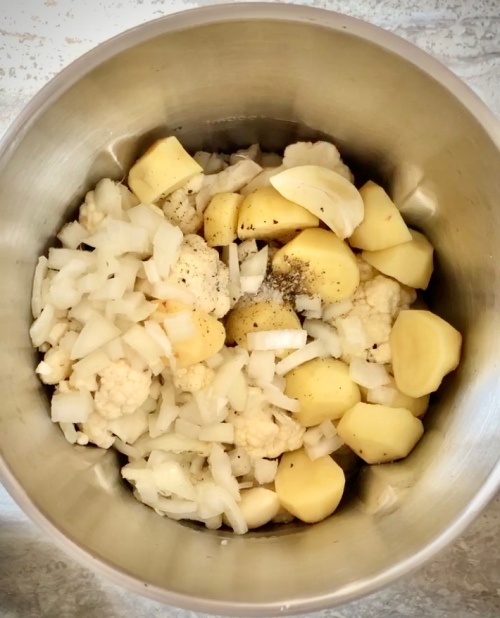
Let’s talk ingredients. Here is what you will need to make this flavourful soup:
- cauliflower
- a yellow or white potato
- yellow onion
- garlic
- dried/fresh sage
- vegetable broth
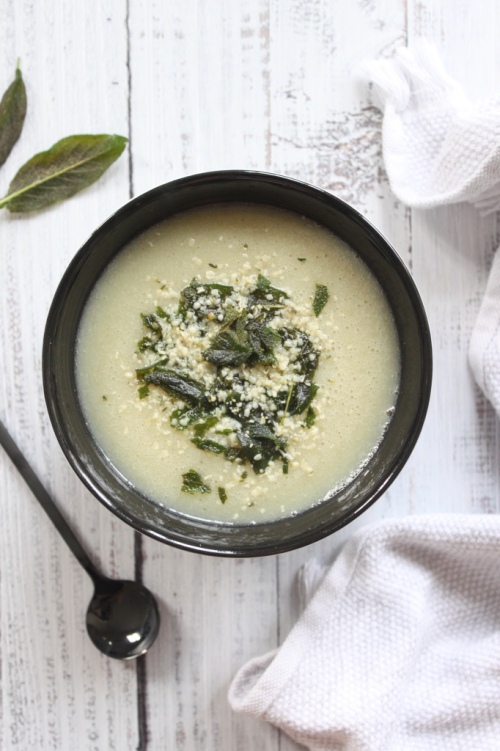
Everything goes into your Soup Maker and it gets set to “Smooth,” and then turned on. Half an hour later, the soup is hot, creamy and ready to serve.
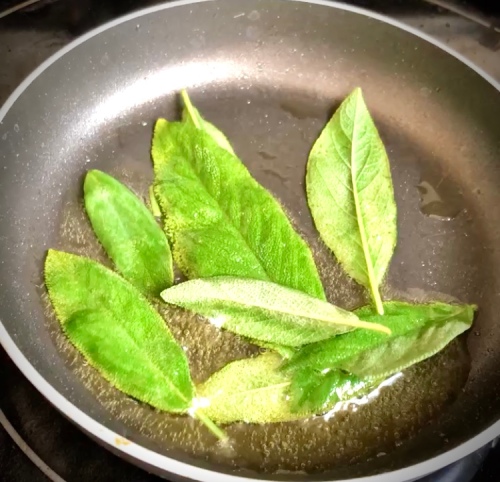
While the soup is cooking, I like to fry some fresh sage leaves to put on top. These are GOLD. All you have to do is add them to a hot pan with a thin layer of oil and fry until crispy! This only takes a minute or two. Drain them on some paper towels and when the soup is done, sprinkle them on top. So good!

This recipe is the perfect, healthy, post-work meal that will feed a family of four. It’s great for those long days at work, when you come home and need something quick to whip up. The Soup Maker makes it even more practical – I will never make soup in anything else again!
Easy Creamy Cauliflower Soup
Servings: 4
Prep time: 15 minutes
Cook time: 30 minutes
Ingredients:
- one small head of cauliflower, cleaned and broken into florets
- one medium yellow or white potato, cut into 1/2 inch chunks
- 1/2 yellow onion, diced
- 2 cloves garlic (minced, if cooking stovetop)
- 1/2 tsp dried sage
- 1/4 tsp salt
- a few grinds of fresh black pepper
- 3 cups of vegetable broth (plus 1/2 cup if cooking stovetop)
- olive oil
Instructions:
Soup Maker steps:
- Put all ingredients into your soup maker. Feel free to add more broth right up to the MAX line. Secure the lid and set to “Smooth.” Press “ON.” Once the soup is done, check the seasoning and add more salt/pepper if desired. Pour into bowls and drizzle with a splash of olive oil.
Stovetop steps:
- Add 1 tablespoon olive oil to a large pot over medium heat. Once the oil has warmed, add your onion and let cook, stirring occasionally, until soft – about 5 minutes. Add the garlic and stir frequently, cooking until fragrant – about 30 seconds to 1 minute. Add the cauliflower, potatoes, sage, salt and pepper to the pot. Pour in the vegetable broth and stir to combine. Bring up to a boil and then reduce the heat to a simmer. Cover and cook for 30 minutes.
- Once the soup is done and all vegetables are tender, blend the soup with an immersion blender until smooth. Alternatively, you can very carefully pour the soup into a blender, blend until smooth and then return to the pot. At this point, taste the soup and adjust salt and pepper accordingly. Serve immediately or store in airtight containers in the fridge for up to 3 days.
NOTES:
I like to top this soup with crispy sage leaves and hemp hearts. To fry fresh sage leaves, coat the bottom of a small pan with a thin layer of oil. Place the pan over medium-high heat, and when the oil is hot, drop the sage leaves in. They should sizzle immediately. Cook for 1-2 minutes or until crispy. Drain on paper towels before serving on top of the soup.
The post Easy Creamy Cauliflower Soup appeared first on Never. Not. Eating..
]]>The post Avocado Croutons appeared first on Never. Not. Eating..
]]>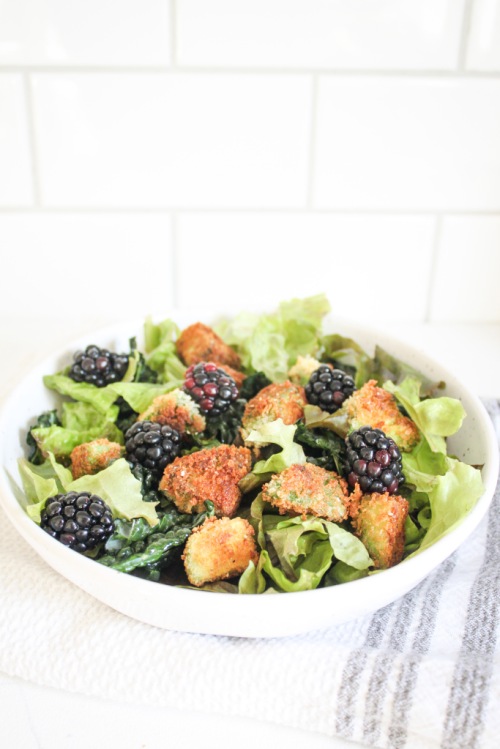
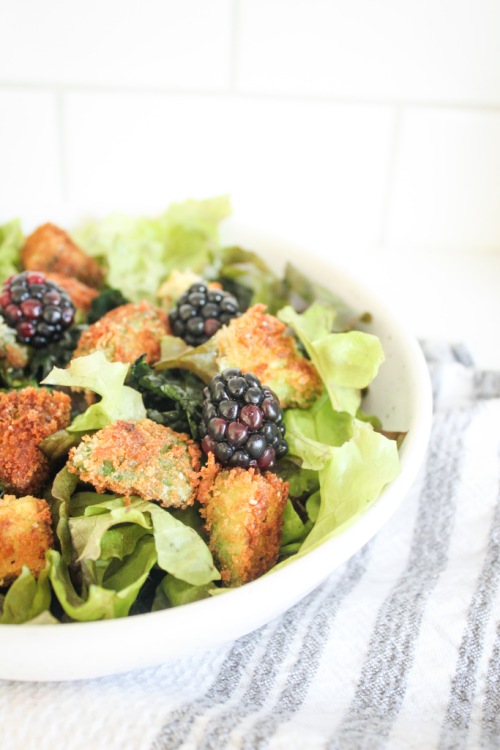
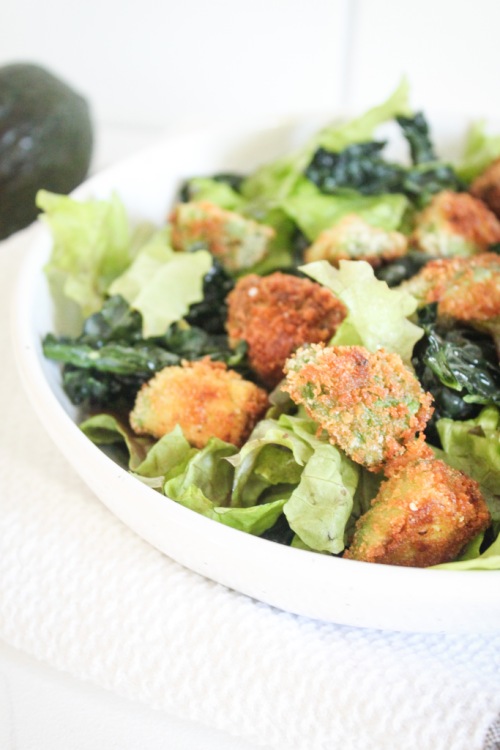
Not sure where this idea came from, but I’m grateful for it. Avocado croutons are my new regular croutons.
If you are tired of waiting for your avo to soften, make croutons! Or, if you just want croutons, make croutons!
All you will need is an unripe avocado, some Panko breadcrumbs, cornstarch, an egg and some salt and pepper to season.
Tip: When dicing your avocado, cut it in half, lengthwise and remove the pit by tapping it carefully with the sharp blade of your knife. Twist and it should pop right out. Place the avocado on your cutting board, cut side down and peel the skin off with your fingers. This will make it easier to achieve equal cubes when cutting! I suggest 9-12 cubes per half.
Tip #2: Season at every step. Season the avocado directly, season the breadcrumbs and season the croutons after they come out of the pan. Avocados are pretty bland, so adding salt turns up the flavour.
When life gives you avocados, make croutons.
Avocado Croutons
Prep time: 10 minutes
Cook time: 5 minutes
Ingredients:
- 1 unripe avocado (look for mostly darker skin with a few firm, green areas still), pit removed, skin off and diced into 1/2-inch cubes (about 9-12 cubes per half)
- salt
- pepper
- 3 tbsp cornstarch
- 1 egg, beaten
- 1/3 cup Panko breadcrumbs
- olive oil
Instructions:
- Set up your breading stations – have one bowl for the corn starch, the next bowl with the beaten egg and the final bowl with the Panko, mixed with 1/4 teaspoon of salt and a few grinds of fresh black pepper.
- Sprinkle your diced avocado with a pinch of salt and pepper and then toss carefully in the cornstarch. Ensure all sides have a light coating of cornstarch on them and then place into the egg and then into the Panko. Make sure all sides of the avocado are coated in the breadcrumbs.
- Add enough olive oil to generously coat the bottom of a large pan. Turn heat to medium-high, and when oil is hot, carefully drop each avocado piece into the oil, being careful not to crowd the pan. Cook for about 30 seconds-1 minute per side, or until browned. Make sure you turn the avocado to cook each side.
- Remove from pan and drain the croutons on paper towels.
Eat with your favourite salad, or on their own with your favourite creamy dipping sauce (like, ranch or chipotle mayo)!
The post Avocado Croutons appeared first on Never. Not. Eating..
]]>The post Tortiglioni in Homemade Roasted Red Pepper Sauce appeared first on Never. Not. Eating..
]]>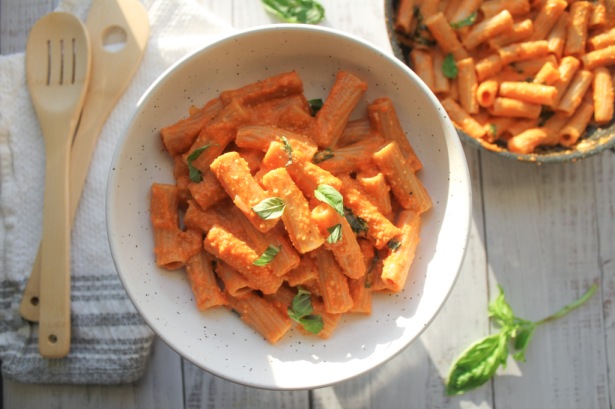
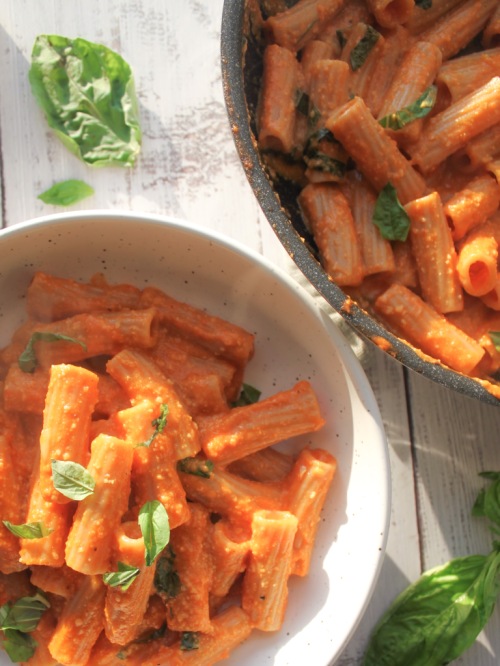
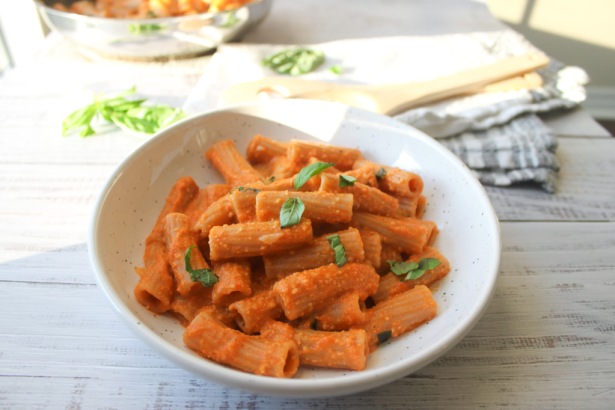
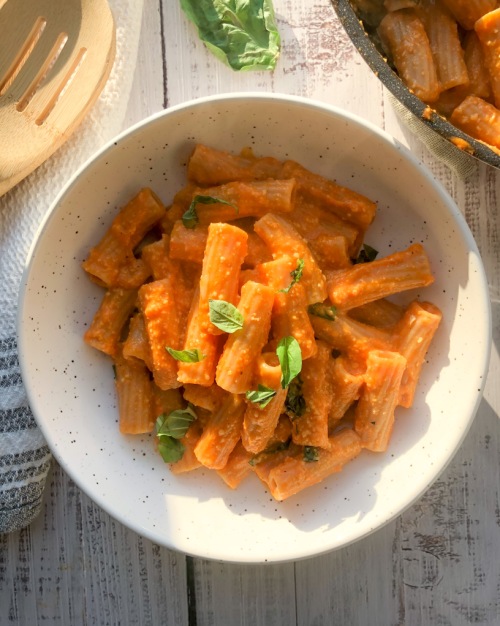
“Tortiglioni” is really hard to say. It looks kind of like rigatoni, so I may just stick with that if I ever have to say it out loud. I use Molisana’s spelt tortiglioni. It’s a brilliant pasta with beautiful grooves meant for soaking up luscious sauces and thus, this roasted red pepper sauce is thick and creamy and suck-up-able. It’s also vegan.
Now, I’m not saying the jarred, store-bought sauces aren’t practical and quick, but they don’t even come close to being as tasty as homemade sauce. And, sometimes you need to treat yo-self! This sauce is not-at-all daunting and all delicious. It may take longer than twisting open a lid and pouring, but it’s worth it. Today’s your day.
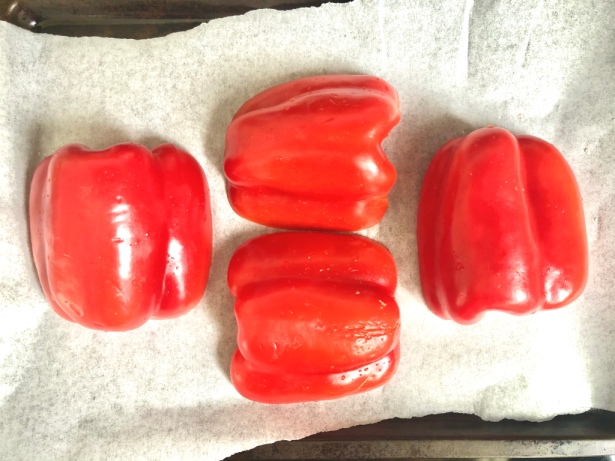
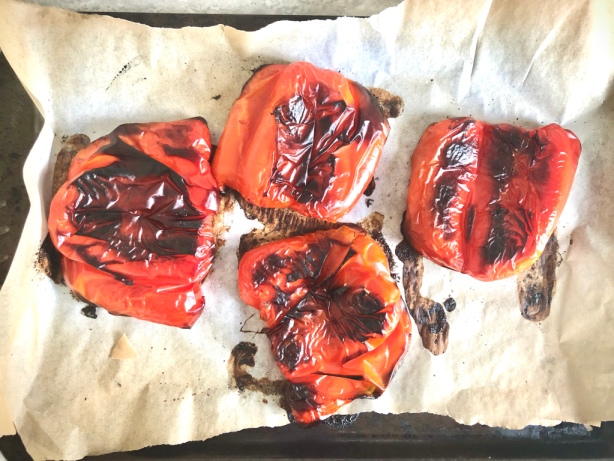
You are going to start with your red peppers – cut them in half, remove the seeds and place them cut side down on a baking sheet lined with parchment paper. Pop them into a 425 degree oven for about 30-40 minutes, flipping once, until their skin begins to blacken and they are completely soft throughout. Carefully peel the skin off and discard. Toss the peppers into your blender with some vegetable stock. To help thicken in a vegan-ified way, add half a cup of raw cashews as well. Season with some salt and pepper and blend up until creamy.
It a saucepan, heat up some olive oil and add a bunch of garlic. Add the creamy pepper sauce and thin it out with some of the water that the pasta has been cooking in. Let this simmer until your tortiglioni is done and then transfer the pasta right to the sauce. Giv’er a toss so that the pasta is completely coated, turn the heat off and add in some fresh basil and a little hit of lemon.
This pasta is so good the next day, too. If you eat dairy, I would also recommend dolloping some fresh ricotta on top while it is still warm. Drool.
I hope this recipe makes it to your kitchen. It is one of my absolute favourites. It’s also great for kids as the veggies aren’t noticeable and are blended right into the sauce. Any feedback is welcomed in the comment section below!
Tortiglioni in Homemade Roasted Red Pepper Sauce
Serving size: 3
Prep time: 5 minutes
Cook time: 50 minutes
Ingredients:
- 2 large bell peppers, cut in half lengthwise and seeds removed
- 3 servings of tortiglioni (about 255 g)
- 1 cup vegetable stock
- 1/2 cup raw cashews
- 1/4 tsp salt
- a few grinds of fresh black pepper
- 2 tbsp olive oil
- 2 cloves garlic, minced
- 9-10 basil leaves, ribboned or sliced
- squeeze of lemon (optional)
Instructions:
- Preheat oven to 425 degrees Fahrenheit.
- Place the four pepper halves onto a baking sheet lined with parchment paper, cut side down, and roast in oven for 30-40 minutes, flipping once. Peppers should have black areas and be soft throughout. Peel the outer skins off and discard.
- Bring a large pot of heavily salted water to a boil and add tortiglioni. Cook according to package directions, until al dente. Reserve 1/4 cup of the pasta water for the sauce before draining.
- Place the roasted peppers, vegetable stock, cashews, salt and pepper into a blender and blend until smooth.
- In a large saucepan, heat the olive oil over medium-low heat. Add the garlic and cook for 30 seconds until fragrant. Pour in the pepper sauce, stir and then add in the reserved pasta water. Let the sauce simmer for a few minutes and then add the cooked pasta, stirring to coat.
- Turn the heat off and add the basil and a squeeze of lemon juice. Serve with more basil on top.
The post Tortiglioni in Homemade Roasted Red Pepper Sauce appeared first on Never. Not. Eating..
]]>The post Lemon Caper Pasta appeared first on Never. Not. Eating..
]]>
They say you should wake up everyday and still make your bed and get dressed while in self-isolation. They say it helps individuals feel more accomplished and more productive. So I’ve been rising and shining. I get up, straighten out my duvet, pick up all of my little decorative pillows and arrange them at the head of my bed. I put on my yoga pants (better than pajamas?!), slip on a cozy sweater and wash my face. Later, I praise my ambition and appreciate my yoga pant choice because, pasta. THIS pasta. Lemon Caper Pasta. The best pasta in all the lands. And it pairs perfectly with my stretchy pants.
REASONS TO MAKE LEMON CAPER PASTA
This is a perfect dish to make if:
- you want a date night idea
- you need a quick meal
- you like flavour
- you like food
- you are quarantined
- you are a human
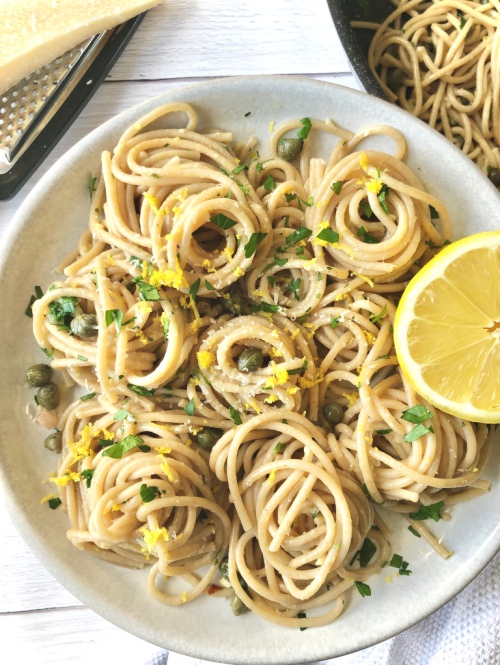
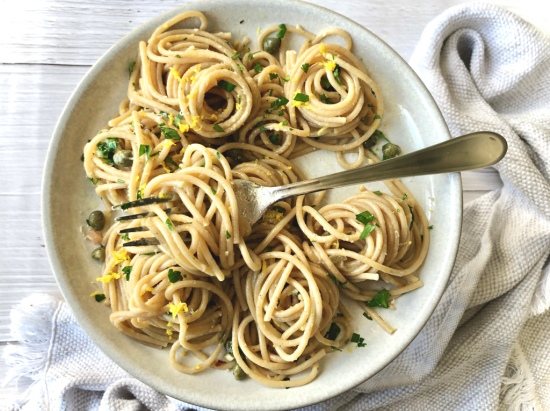
A luscious pasta coated in a white wine-butter sauce with melty parm, briney capers and fresh citrus.
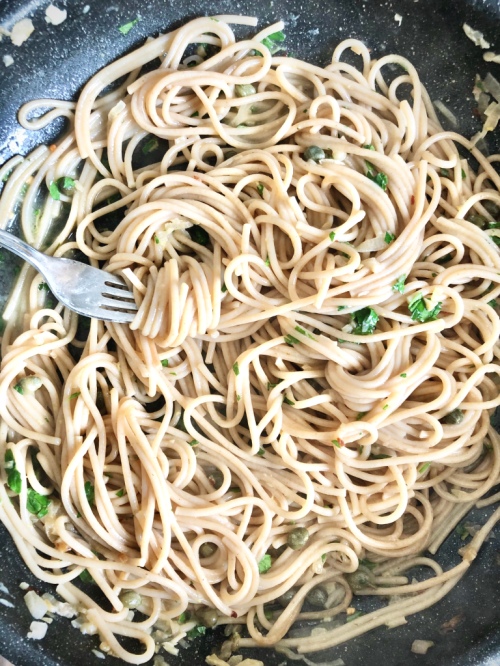
The Pasta
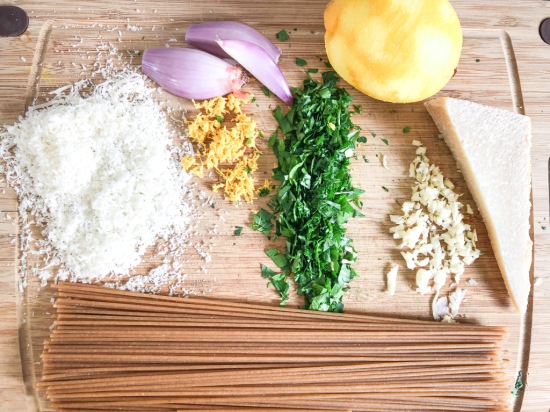
For the pasta, you can really use whatever you have. Here, I’ve used a whole wheat semolina pasta. It’s a bit heartier and nuttier than white pasta. It’s also healthier and is usually my go-to, as well as any spelt pastas.
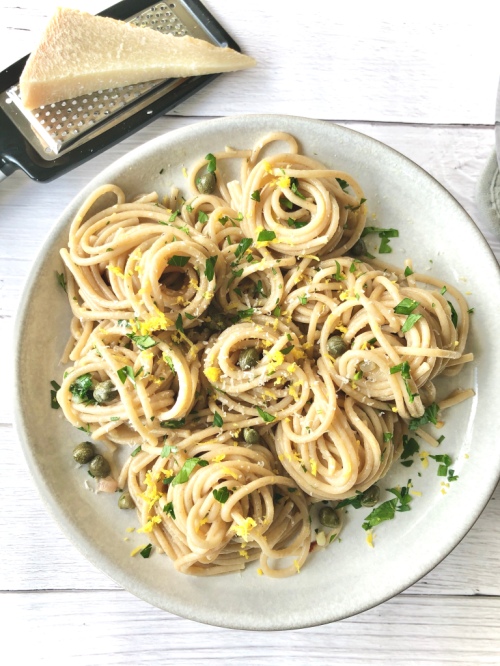
The capers give this recipe a delicious salty, briney punch. If you don’t want to venture off to the grocery store, you can buy capers here. You can also substitute them for green olives.
It has BOLD flavours. DELICIOUS flavours. CRAVE-WORTHY flavours.
Do you ever meet someone who is really attractive, smart AND kind? Yup. That is this recipe in pasta-form. It’s not impastable. It exists, right here.
Come and spaghet it.
OTHER IDEAS SIMILAR TO LEMON CAPER PASTA:
Simple Beetroot Pasta (for a fun, colourful meal)
Creamy Vegan Mushroom Rigatoni (a wholesome meal)
Butternut Squash and Kale Lasagna Roll-Ups (a great way to hide vegetables for the kids)
Tortiglioni in Roasted Red Pepper Sauce (Nonna will be proud)
Lemon Caper Pasta
Serving size: 2
Prep time: 5 minutes
Cook time: 20 minutes
Ingredients:
- 2 servings of choice pasta (approx. 180 g)
- salt
- 2 tbsp olive oil
- 1 shallot, diced
- 2 cloves garlic
- 1/3 cup white wine
- 1 tbsp butter
- 1/3 cup fresh, grated parmesan, plus more for topping
- 1/4 tsp chili flakes (optional)
- 1/2 tbsp caper brine (optional)
- 2 tbsp capers
- zest of one lemon
- juice of half a lemon (approx. 2 tbsp)
- 1/4 cup chopped parsley
- fresh ground pepper
Instructions:
- Fill a large pot with water and bring to a boil. Salt the water generously and add the pasta. Cook according to package directions, until ‘al dente.’ Reserve about 1/3 cup of the pasta water before draining.
- Meanwhile, add olive oil to a large skillet over low heat. When pan is warm, add the shallot and stir for a few minutes until tender. Add garlic and stir for about 30 seconds until fragrant. Pour the white wine into the pan and increase the heat to medium-high. Let the wine reduce for about 5 minutes, or until you can no longer smell the alcohol. When reduced by about half, add the butter and stir to incorporate. Reduce the heat again to medium-low.
- When the pasta is done, add it right to the pan along with the reserved pasta water. Add the parmesan and chili flakes to the pan and toss everything together.
- Turn the heat off and add the caper brine, capers, lemon zest, lemon juice, parsley and a few grinds of fresh black pepper. Toss to combine, dish onto two plates and top with more parmesan, if you would like.
The post Lemon Caper Pasta appeared first on Never. Not. Eating..
]]>The post Crockpot Ginger and Turmeric Immune-Boosting Soup appeared first on Never. Not. Eating..
]]>
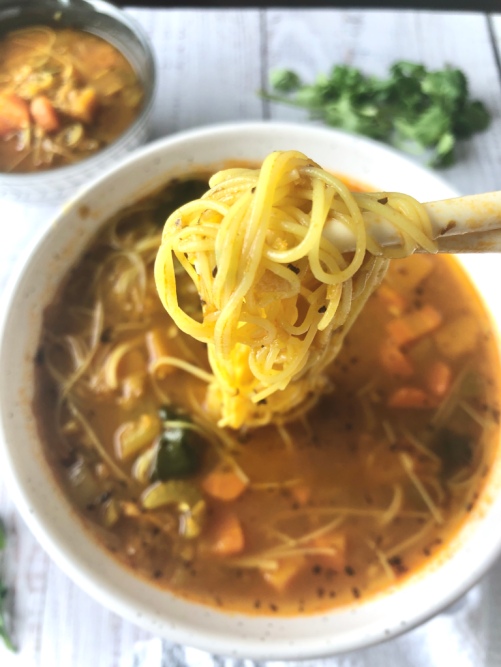
Although I love living in a country that experiences four diverse seasons, winter is always way too long. And as a teacher, it’s hard NOT to pick up a few illnesses during the winter season at school. This soup is my remedy. It has turmeric, an immune-boosting, detoxifying anti-inflammatory, and ginger, a nausea-relieving, cancer-fighting, all-round great-for-you root vegetable. Let’s fight that cold together!
The best days are the ones where you get to walk through your front door, sniff the air and remember back to this morning when you threw your dinner into the crockpot, and now it’s ready for you. Now all you have to do is take your bra off, put your sweatpants on, grab your ladle and slurp away. MMMhhhhmmmmm.
I recommend having your veggies all chopped the night before, that way you can just throw them in the crockpot when you wake up and away you go. If you are a morning person, firstly, please tell me your secret, and secondly, morning chopping is also an option. Note: This recipe may also be made on the weekend.
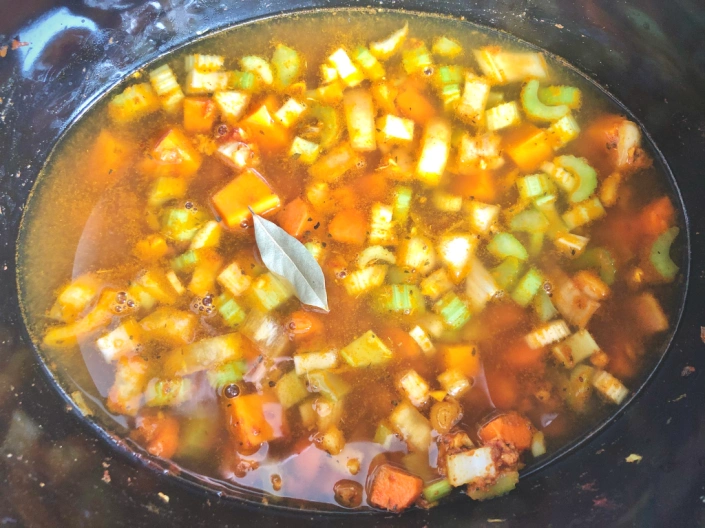
I always start this recipe by tossing my chopped onions into my crockpot with some olive oil, turning it to high heat and letting them warm up while I prep the rest of my ingredients. The heat begins to soften them before everything else enters the pot and starts to crowd them. After the onions have softened up slightly, I add in the garlic, ginger and spices and toast them up until fragrant. I then put everything else in the crockpot, put the lid on and say, “Bye, see you in a few hours. I love you. Keep warm.”
If you are still reading this:
- Thank you.
- I’m sorry.

Let’s make soup!
Crockpot Ginger and Turmeric Immune-Boosting Soup
Serving size: 6-8
Prep time: 30 minutes
Cook time: 3-4 hours
Ingredients:
- 2 tbsp olive oil
- 1 small onion, diced
- 3 cloves of garlic, minced
- 1 heaping tbsp ginger, minced
- 1 tsp dried basil
- 1/2 tsp dried oregano
- 2 tsps turmeric powder
- 1/2 tsp paprika powder
- 1 tsp salt
- 1/2 tsp pepper
- 2 tbsp tomato paste
- 1 cup carrots, diced (about 2 medium carrots)
- 1.5 cups celery, diced (about 4 stalks)
- 1 cup butternut squash, diced into 1/2 inch cubes
- 1 bay leaf
- 8 cups vegetable stock
- 1/2 cup red lentils
- 2 big handfuls baby spinach
- 100g vermicelli noodles (optional)
- Fresh cilantro or parsley for garnishing (optional)
Instructions:
- Turn your crockpot on high and add the olive oil and onion. Let this heat up while you prepare all of your other ingredients, about 10 minutes.
- Add the garlic, ginger, basil, oregano, turmeric, paprika, salt and pepper to the crock pot and stir around with a wooden spoon. Let the spices begin to toast and the garlic and ginger to become fragrant, about 4-5 minutes.
- Stir in the tomato paste until everything is coated.
- Add the carrots, celery, squash, bay leaf and stock. Put the lid on the crockpot and cook on high for 3-4 hours or on low for 5-6 hours.
- About 45 minutes before the end time, open lid and add in the lentils. Close the lid again and let cook for the remaining 45 minutes.
- When the soup is ready (vegetables are tender, lentils are cooked through), discard the bay leaf and taste, adjusting salt and pepper according to preference. Add the spinach and vermicelli noodles (if using), and put the lid on for 2 more minutes to soften.
- Ladle soup into bowls and top with freshly chopped herbs.
NOTES:
Avocado is also a great topping for this soup.
Store leftovers in an airtight container in the fridge for up to 5 days.
The post Crockpot Ginger and Turmeric Immune-Boosting Soup appeared first on Never. Not. Eating..
]]>