The post Cinnamon Vanilla Cashew Butter Recipe appeared first on Never. Not. Eating..
]]>WHAT IS CINNAMON VANILLA CASHEW BUTTER?
Well, I’m so glad you asked! It’s your regular nut butter with a gorgeous, put-me-in-the-holiday-mood kick! Who doesn’t love warm notes of cinnamon and dreamy vanilla? This nut butter is dressed up and ready for a night on the town. It’s all-natural and all-delicious!

WHY I LIKE THIS CINNAMON VANILLA CASHEW BUTTER
I am someone who is obsessed with nut butters, but ever since groceries have skyrocketed in price, peanut and other nut butters are basically unaffordable. I mean, seven dollars for a jar of peanut butter…are you nuts?! So now, I head to Costco, buy a large bag of cashews for cheap and makes TONS of nut butter with it. It’s much more cost effective, not to mention I can see everything going into it!

THE INGREDIENTS
Another great thing about this recipe is the minimal ingredients. Just three to be exact (not including salt). They are:
- raw cashews
- cinnamon
- vanilla
- pink Himalayan sea salt
HOW TO MAKE CINNAMON VANILLA CASHEW BUTTER
The first, and arguably, the most important step of this recipe is toasting the cashews. With an oven set to 350 degrees Fahrenheit, roast cashews for 5-8 minutes, checking often. Nuts burn easily and quickly, so it’s important that you keep an eye on them. Once they start turning light brown, remove them from the oven.
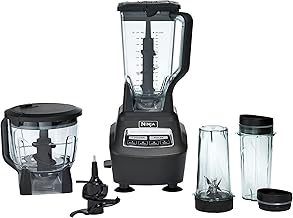
Now, you just add all of the ingredients to a food processor and blend until smooth, or until it reaches your desired consistency. Make sure you have a high processed blender, like the Vitamix, or the Ninja, and be patient with it! It takes about 15-20 minutes to become “butter,” so just trust the process.

TIPS
- Use 100% real vanilla – it’s much better than the artificial stuff
- Have a spatula while the nut butter is blending and scrape down the sides often
- Give the engine of your blender a break now and again to preserve it’s life
OTHER HEALTHY SPREADS YOU NEED TO TRY
Vegan Cilantro Lime Dressing (I put this stuff on everything)
Pink Hummus (perfect for date night or Valentine’s Day)
3-Ingredient Strawberry Chia Jam (would go perfectly with this cashew butter)
TOOLS I USED TO MAKE CINNAMON VANILLA CASHEW BUTTER
Click below to access the tools I used for this recipe:


Cinnamon Vanilla Cashew Butter
Servings: Makes approximately 1 cup
Prep time: 20 minutes
Cook time: 5 minutes
Ingredients:
- 2.5 cups raw cashews
- 1 tsp cinnamon powder
- 1/2 tbsp pure vanilla extract
- 1/4 – 1/2 tsp pink Himalayan sea salt (or just regular sea salt)
Instructions:
- Preheat your oven to 350 degrees Fahrenheit and place cashews on a baking sheet. Bake for 5-8 minutes, or until they begin turning a light golden brown colour. Watch carefully – they burn quickly!
- Once the cashews are toasted, add them to a food processor with the cinnamon, vanilla and 1/4 teaspoon of salt. Pulse a few times and then blend. Stop the motor every so often and scrap the sides down. It will look very grainy at first, but after about 15 minutes of blending and scraping, it will start to smooth out. The longer you blend, the smoother it becomes.
- Once the cashews have reached the texture you like, taste it and add more salt if desired. Spoon the butter into an airtight container and store in the fridge for up to 5 weeks.

The post Cinnamon Vanilla Cashew Butter Recipe appeared first on Never. Not. Eating..
]]>The post Pink Hummus (Beetroot) appeared first on Never. Not. Eating..
]]>
WHAT IS PINK HUMMUS?
I’m a regular hummus lover for sure, but when you jazz it up by making it pink, it’s even better. I mean, you eat with your eyes first…am I right?!
This Pink Hummus is made with the legendary beetroot, meaning it is slightly sweet, yet earthy and aesthetically, it’s super vibrant! A definite show-stopper when brought to any party.
WHY I LOVE THIS HUMMUS
GOOD hummus is a labour of love, I’m not going to lie. However, the amount of time that hummus takes is mostly passive time. You don’t have to be in the kitchen during the entire process. And, it takes so long because this method of making hummus is going to give you the smoothest results, meaning the most delicious hummus.

Other than the smoothest, most velvety texture, I love this hummus because of the colour. It’s so fun and playful – perfect for kids or a crowd!
Also, I add roasted garlic to this recipe for maximum flavour and there’s nothing better than a head of roasted garlic, in my opinion.
THE INGREDIENTS
The ingredients to this recipe are simple, but it’s how you prepare them that really makes a difference. Here is what you will need:
- dry chickpeas
- beets
- tahini
- lemon juice
- garlic
- salt

HOW TO MAKE BEETROOT HUMMUS
The key to the smoothest hummus possible is using dry chickpeas. They take a while to prepare, so aim to make your hummus in the morning or early afternoon. First, you must soak the chickpeas overnight. By doing this, you will notice that they double in size and absorb a lot of that water.
In the morning, drain and rinse the chickpeas and add them to a large pot of water with some baking soda (to help soften them) and some salt. Bring to a boil and then reduce the heat to a low rolling boil, letting them cook for about an hour and a half, until they are nice and soft.

While the chickpeas are cooking, roast your beet in the oven by wrapping it in a piece of foil and placing it on a baking sheet. If you are adding garlic to the hummus (which I highly recommend), slice the top off the whole head of garlic to expose the top of each clove. Drizzle the cloves in olive oil, wrap the head in tin foil and roast in the oven for 45-55 minutes.
When the chickpeas are cooked, add them to a high-powered food processor, along with the tahini lemon juice, salt, garlic and the roasted beet. Blend for one minute until everything is incorporated, then scrape down the sides. Blend for another minute while drizzling in ice cold water until it is smooth and the texture is perfect.
TIPS WHEN MAKING PINK HUMMUS
- Even though this recipe only requires one cooked beet, I would roast more to top the hummus with, and to have on hand for a quick snack – I love my beets with a little bit of olive oil, feta cheese and some salt and pepper!
- Drizzle olive oil over top of the hummus before storing in the fridge to avoid discolouration or a “skin” forming on the top.
- Use a high-powered food processor to ensure your hummus whips up to the smoothest consistency. I have the Ninja food processor and I love it!

MORE VIBRANT RECIPES YOU’LL LOVE
3-Ingredient Strawberry Chia Jam (summertime in a jar)
Strawberry Honey Ginger Galette (a sweet pie with an unexpected bing-bang-boom!)
Simple Beetroot Pasta (more beets, but this time with pasta)
TOOLS I USED TO MAKE THIS PINK HUMMUS
Click on the images below to see what I used for this recipe.


This post contains affiliate links and I may earn a small commission when purchases are made after clicking the links, at no cost to you – thank you!
PINK HUMMUS (BEETROOT)
Serving size: Makes about 3 cups
Prep time: 10 minutes
Cook time: 1.5 hours
Passive time: 6-8 hours (overnight)
Ingredients
- 1 cup dry chickpeas
- 1/2 tsp baking soda
- salt
- 1 beet*
- 1 head of garlic (optional)
- juice of half a lemon (2 tbsp)
- 1/2 cup tahini
- olive oil
Instructions
- Place chickpeas in a bowl and cover with a few inches of water. Soak overnight or for 6-8 hours. When they are done soaking, proceed with the next steps.
- Preheat oven to 400 degrees F.
- Drain and rinse the chickpeas and place them in a medium-sized pot with baking soda and one teaspoon of salt. Cover with 2 inches of water and bring to a boil. If you see foam rising to the top, skim it off with a spoon and discard. Turn the heat down and simmer, covered, for an hour and a half, or until chickpeas are soft and tender – you can cook them for as long as two hours.
Preparing the beets
- In the meantime, get started on roasting your beet – place washed beet on a piece of tin foil and wrap it up like a present, making sure there are no holes in the foil where the steam can escape. Place on a baking tray in the oven for an hour and a half, or until the beet is tender enough to slide a butter knife easily into the centre.
Preparing the roasted garlic
- If you are adding garlic to the hummus – slice the top quarter of your head of garlic off and drizzle the top of the visible cloves with a tablespoon of olive oil. Wrap in a tin foil package, similar to the one you wrapped the beet in and place on baking tray with the beet and roast in the oven for 45-50 minutes. The cloves will caramelize and be super tender.
Putting it all together
- Remove and carefully open the tin foil packages. Let the beet sit for one minute and then use a paper towel to hold it in one hand and another paper towel to peel away the skin with your other hand. The skin should remove easily when the beet is fully cooked. Rinse the beet in cold water and slice into quarters.
- Add a few ice cubes to a small measuring cup filled with cold water and set aside. When the chickpeas are done cooking, drain, transfer to a food processor and add the tahini, lemon juice, half teaspoon of salt and the beet quarters. Squeeze three (or more to taste) of the roasted garlic cloves out and add to the food processor. Blend the ingredients for about one minute and then scrape down the sides of the processor. Remove ice cubes from measuring cup and measure out one-quarter cup of the ice-cold water. Turn the motor back on and slowly drizzle the water into the food processor and blend for another minute. Try the hummus and add more salt or lemon juice, if needed. Transfer to a serving bowl and top with a pinch of flaky sea salt, if desired.
Store the hummus in an airtight container in the fridge with a drizzle of olive oil that covers the surface to avoid discolouration and a “skin” developing.
NOTES:
*I recommend roasting more than one beet to have some for a meal later on.
The post Pink Hummus (Beetroot) appeared first on Never. Not. Eating..
]]>The post Roasted Carrot Soup with Ginger (Vegan) appeared first on Never. Not. Eating..
]]>
WHAT’S IN ROASTED CARROT SOUP
My love for ginger will be very clear when, and if, you make this soup. It is very ginger-forward, but that’s not to say that you can’t tone it down if you aren’t quite at the same level. It’s just so good that when I was testing this recipe, I kept on grating, thought it would be too much, put it in anyways and LOVED it. But seriously, if you aren’t a ginger person, don’t put as much in. But still put in a little bit, because: flavour.
Carrots – It’s almost Easter, right? We have rabbits hoppin’ around, so we have to have carrots included in the menu. It’s just logical, plus I’m pretty sure every Canadian (and American) likely has a bag of carrots in their fridge. They have probably been there for a few months, because let’s be honest, carrots never expire (who’s with me?!). Furry hairs growing out of yours? Pff…that’s what a peeler is for. Plus, what else do you use carrots for other than soup? You know how hot that liquid is? Perfect for (really) old vegetables.
Honestly though, this soup is da bomb. The key is roasting the carrots first, before soupifying it. Oh, and ginger.
THE INGREDIENTS IN ROASTED CARROT SOUP
So, you’re going to need about 4 medium sized carrots – peeled, washed and quartered (cut in half lengthwise and then halve each of those halves, widthwise). You’re going to slather those babies with some EVOO and give them a little salt and pepper rub – pop them in the sauna and let them roast for about 25 minutes or until they are browned and caramelized on the edges. Yum, yum, yum.
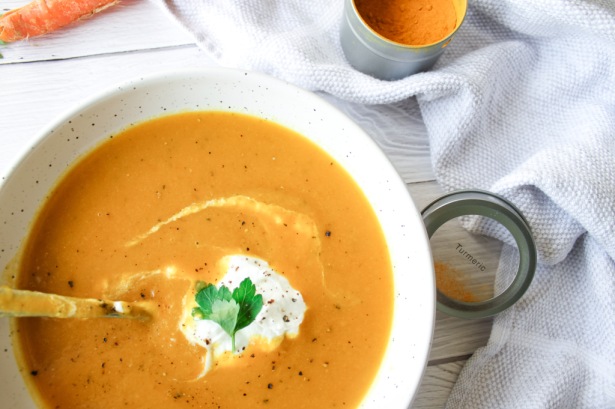
While the carrots are getting their spa treatment, throw some chopped onions into a pot with olive oil to cook down. Add the star of the show (ginger) and some garlic (best supporting actor), alongside some vibrant turmeric, freshly ground nutmeg (or the packaged stuff) and some salt and pepper. Stir, stir, stir.
Small dice a half of a sweeter type of apple – Granny Smith or Honeycrisp – and add it to the pot. When the carrots are done, add those in with some veggie broth and bring it up to a boil, then reduce and simmer for at least 15 minutes. The longer you simmer, the more flavourful!
At this point you can either whip out the ‘ol immersion blender, or throw it all (carefully) into your more modern blender, blend it up and pour back into the pot. I refuse to learn from experience (mainly because I prefer less dishes), so I always take the longer route and use my immersion blender. Hey, it works the pipes, okay?!
THE ENDING
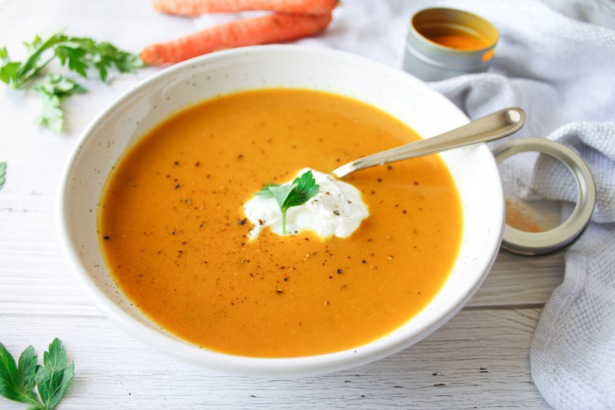
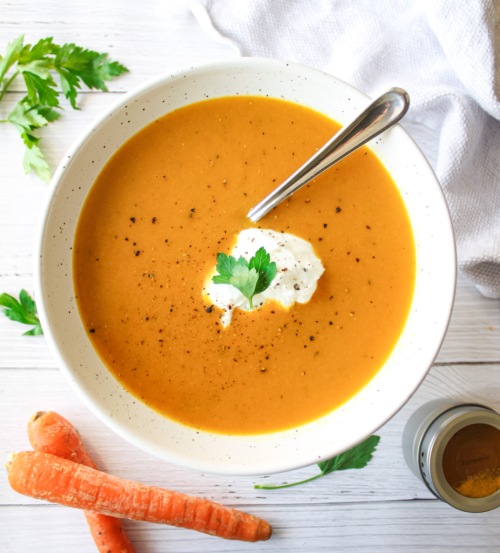
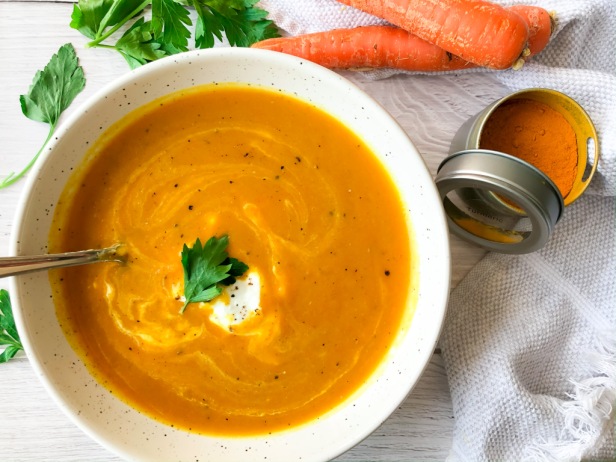
Now is the sweetest, most beautiful ending. Pour in three-quarters of a cup of canned coconut milk and watch the colour turn from an ugly, rusted mustard (picture it) to a beautiful, pale-orange colour. Very cantaloupe-esque, if you will.
Anyway…this is the perfect Easter starter. Whether you are celebrating this year or not, I highly recommend you try this soup. After all, summer is coming and you know what that means – souportunities are coming to an end.
GINGER!
MORE SOUP RECIPES
Roasted Tomato Soup with Grilled Cheese Crouton Skewers (a classic)
Easy Creamy Cauliflower Soup (healthy and comes together in a flash)
Crockpot Ginger and Turmeric Immune-Boosting Soup (make it in the morning and come home to dinner)
Butternut Squash, Pear and Pumpkin Soup with Crispy Sage (something different, yet delicious)
This post contains affiliate links and I may earn a small commission when purchases are made after clicking the links, at no cost to you. Thank you!
Vegan Ginger and Roasted Carrot Soup
Servings: 3-4
Prep time: 10 minutes
Cook time: 45 minutes
Ingredients:
- 4 medium carrots, peeled, washed and cut in half lengthwise
- olive oil
- salt
- pepper
- half of a yellow onion, diced
- one inch chunk of ginger, grated
- 2 cloves garlic, grated/minced
- 1/2 tsp turmeric
- 1/4 tsp freshly grated nutmeg
- 1/2 of an apple, diced (I prefer Honeycrisp)
- 4 cups veggie stock*
- 3/4 cup canned coconut milk
- coconut yogurt and parsley for topping (optional)
Instructions:
- Preheat oven to 375 degrees Fahrenheit.
- Add carrots to a baking sheet lined with parchment paper, drizzle with one tablespoon olive oil and sprinkle generously with salt and pepper. Roast in the oven for 25 minutes, turning once. Carrots should be slightly caramelized around the edges.
- In the meantime, heat two tablespoons olive oil in a medium saucepan over medium-low heat. Add the onion and cook until it begins to soften, about five minutes and then add the garlic, ginger, turmeric, nutmeg, half a teaspoon salt and a quarter teaspoon pepper. Stir until you begin to smell the spices, approximately one minute. Add the apple and cook for another minute.
- Transfer carrots from the baking sheet to the saucepan. Pour in the stock and bring up to a boil. Turn heat down and simmer for at least 15 minutes.
- Use an immersion blender to puree the soup in the saucepan. Alternatively, carefully transfer the soup to a blender, blend until smooth and then return to saucepan.
- Add the coconut milk, stir and let it warm through and then ladle into a bowl and top with coconut yogurt and fresh parsley, if desired.
NOTES:
*If you would like a thinner soup, add in an extra 1-2 cups water along with the 4 cups of stock. Simmer for a little longer to develop the flavours of the soup.
The post Roasted Carrot Soup with Ginger (Vegan) appeared first on Never. Not. Eating..
]]>