The post Gluten-Free Zucchini Galette appeared first on Never. Not. Eating..
]]>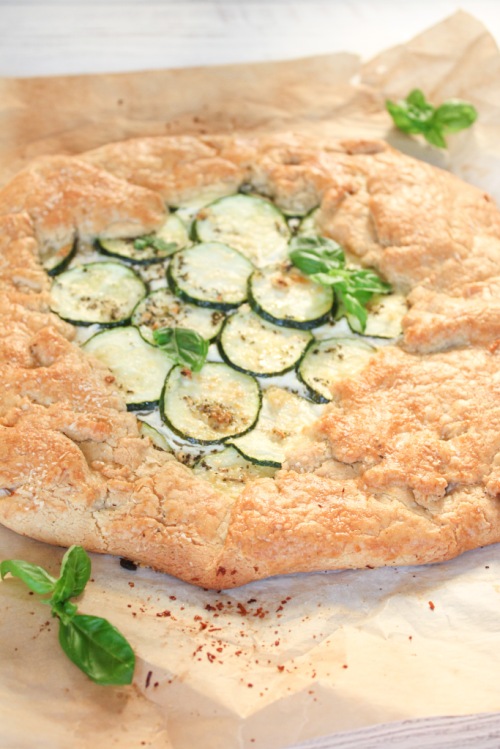
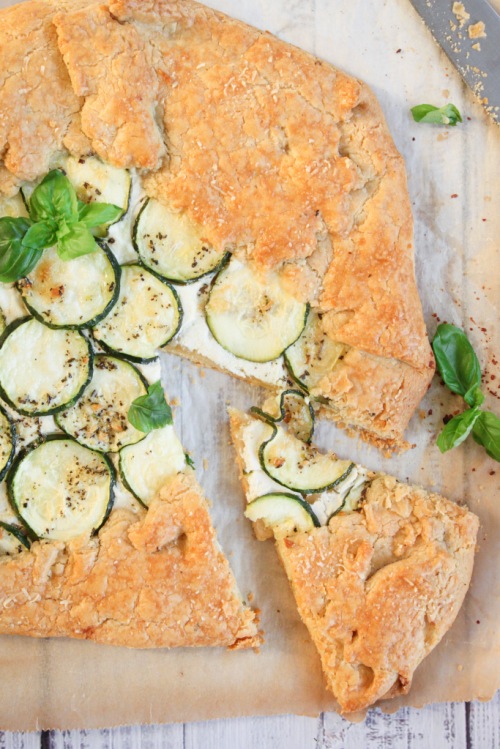
If you know me, you know I love a good galette. And I love mixing it up and creating both sweet and savoury galettes. I’ve tried everything from stone fruit to tomato to apple, and now, zucchini! You can literally wrap any produce in flaky pastry and 90% of the time it will be tasty. WORD.
I decided to make this galette gluten-free, mostly because I avoid gluten as much as I can, but also because I just bought an All-Purpose Gluten-Free Flour by Bob’s Red Mill that I was really excited to try. Of course, anything made with gluten-free flour has a different taste than that made with regular, wheat flour, but I must say, I was impressed with how this crust held together and how flaky it was. If you eat regular wheat flour, feel free to swap in some all-purpose in it’s place!
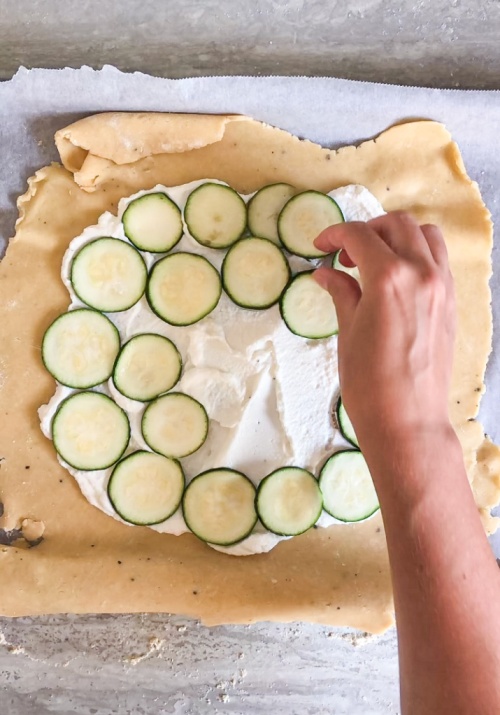
Let’s talk filling – Smooth, lemony ricotta. This is my favourite part. Extra creamy ricotta with lemon juice and zest, salt and pepper whipped together to make the dreamiest of beds for the lucky zucchini. Smear the crust with as little or as much as you want. The addition of lemon brings a brightness to the dish that makes it perfect for Spring or Summer.
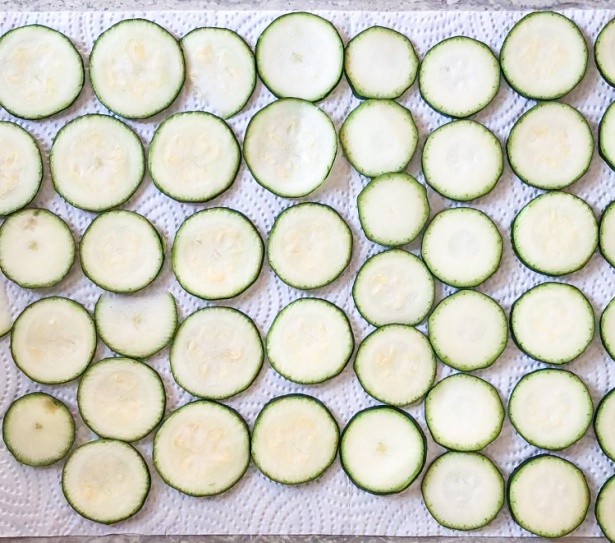
The leading actress here is the zucchini. A few important tips that will help you achieve the ideal galette would be to slice the zucchini about a quarter of an inch thick, making sure they are all the same thickness, place the slices onto paper towels for 30 minutes before assembling your tart and salt them well. This allows the (abundant) excess water to be pulled out, avoiding a soggy mess.

The dough – Finally, let’s talk about the dough. I used to be intimidated when making pastry dough, but it’s actually quite an easy skill to master. The most important part of pastry is to use very cold butter. If the butter is cold, it melts down slower into the flour and, in turn, creates air pockets, which make for flaky pastry. To ensure your butter is perfect, cut it into cubes and store it in the fridge up until you need to use it. After combining it with the flour and forming a disc shape, wrap it in plastic wrap and return it to the fridge to firm up again. After I roll out the dough and assemble the galette, I like to pop it in the fridge yet again for ten minutes. Tip: Assemble your galette, put it in the fridge and set your oven. When your oven is ready, the galette can go right from your fridge to that 400 degree heat!
That’s it…Not too complicated, right?!
Gluten-Free Zucchini Galette
Serving size: 4
Prep time: 15 minutes
Chill time: 30 minutes
Cook time: 30 minutes
Ingredients:
For the crust:
- 1 1/2 cups gluten-free flour
- 1/2 tsp salt
- 1/4 tsp black pepper
- 1/3 cup parmesan cheese, grated, plus more for topping
- 3/4 cup cold butter, cubed
- 1 tbsp white vinegar
- 3-5 tbsp ice-cold water
For the ricotta filling:
- 1 cup ricotta cheese (I use extra creamy)
- zest of one lemon
- 1 tbsp lemon juice
- a few grinds black pepper
- pinch of salt
- 1 small zucchini, sliced into 1/8-inch rounds
- 2 tbsp olive oil
- 1/2 tsp dried basil
- 1 clove garlic, minced
- 1 egg, beaten
Instructions:
For the crust:
- To a food processor, add the flour, salt and pepper and pulse a few times to combine. Add parmesan cheese and the cold butter and pulse again until dough resembles small pea shape crumbs (see photo). Add vinegar and two tablespoons of ice cold water and pulse. Continue to add water, one tablespoon at a time, until dough begins to come together. Typically, I use around four tablespoons in total. Dump the dough onto a piece of plastic wrap, form into a disc and then wrap and place in fridge to chill for 30 minutes.
- Prepare the zucchini by laying the rounds onto paper towels and sprinkling salt on the tops to draw out any excess water. Let sit for at least 30 minutes.
For the ricotta filling:
- To a small bowl, add the ricotta, zest, lemon juice, pepper and salt and mix to combine. Place in the fridge until ready to assemble.
For the rest of the galette:
- Combine olive oil, basil and garlic in a small bowl. Set aside.
- Flour your work surface and remove the dough from the fridge. Roll out into a circle about 1/4-inch thick. Carefully transfer the dough to a parchment lined baking sheet.
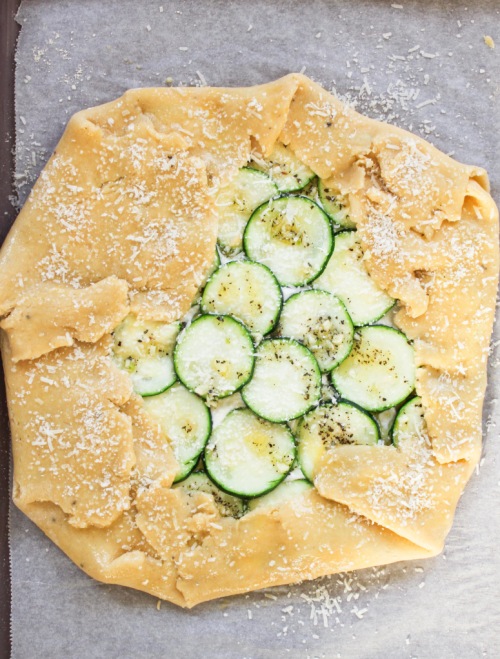
- Spread the ricotta mixture onto the dough, leaving a 2-inch border all the way around. Arrange the zucchini slices on top of the ricotta. Drizzle the olive oil mixture on top of the zucchini. Fold over the edges of the pastry. Preheat your oven to 400 degrees Fahrenheit and transfer the galette to the fridge for 10 minutes, or until the oven is ready. Right before placing the galette into the oven, brush the exposed pastry edges with the egg wash and sprinkle on some extra parmesan cheese, if desired. Bake for 25-30 minutes, or until galette is golden brown in colour.
The post Gluten-Free Zucchini Galette appeared first on Never. Not. Eating..
]]>The post Lemony Vegan Basil Pesto appeared first on Never. Not. Eating..
]]>
Pesto is a highly underused food, IMO. It is so versatile – from a sauce for pasta or pizza to a simple spread for toast, it is a complete flavour bomb!
Traditionally, pesto is made with five key ingredients: Basil, pine nuts, parmesan, olive oil and garlic (plus salt, but that doesn’t count). And, you want to know the greatest thing about pesto? The ingredients are easily adaptable. That is why turning it vegan is so easy to do.
The herbs – Basil is traditional in pestos, and I stick with it in this recipe as well. However, it can easily be swapped out for any leafy green such as parsley, cilantro, spinach or a combination of these. It depends on what you have, what you like and how adventurous you are!
The nuts – Pine nuts are typically what you find in pesto, but since one bag costs more than my monthly gym membership, I usually switch them for another type of nut. I love walnuts and I chose to use them in this recipe. Pecans would also be good for a sweeter turn-out. Toasting the nuts prior to using them in a pesto also adds another dimension of flavour.
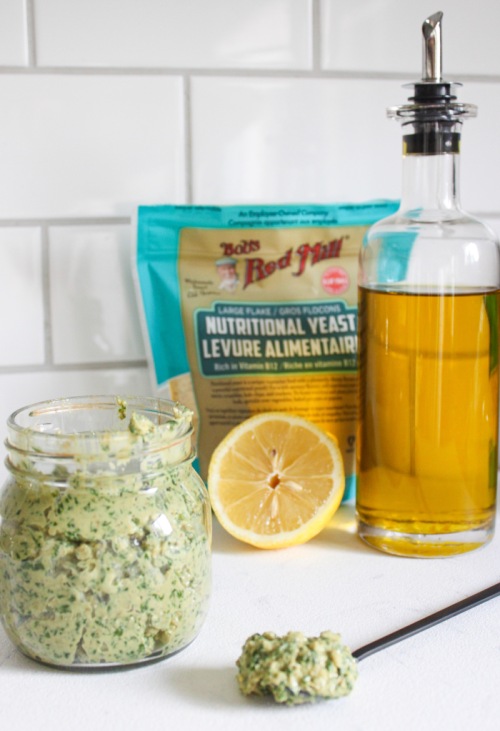
The cheese – Pesto is made with a dry-aged cheese, like parmesan. You can, however, sub it for a cheese of your choice, like romano or even an old sharp cheddar. Since this recipe is vegan, I am using the cheesiest vegan ingredient I know of – Nutritional Yeast. Nutritional Yeast is an inactive yeast that is very cheesy in flavour and is packed with a number of healthy nutrients including: Thiamine, Riboflavin, Niacin, Vitamin B6, Folate and my favourite, Vitamin B12. I am almost positive it is the only vegetarian food you can find that has B12 in it, which makes me love it even more! The one I use can be found here.
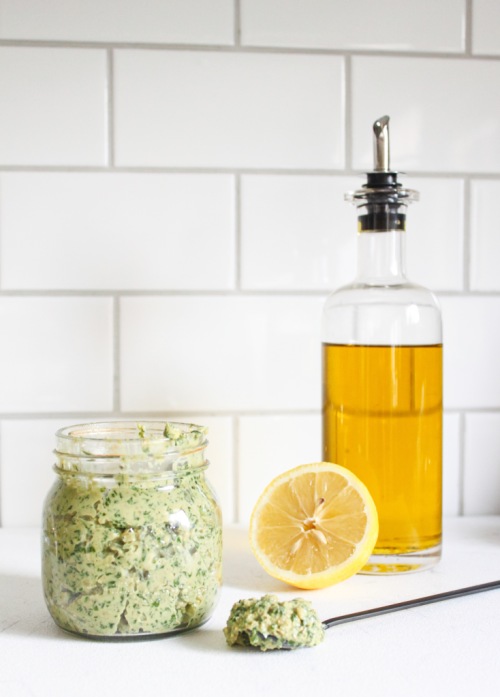
The oil – Use extra virgin olive oil. There are no exceptions for this ingredient. Make it a good olive oil, too, like this one.
Garlic – Same.
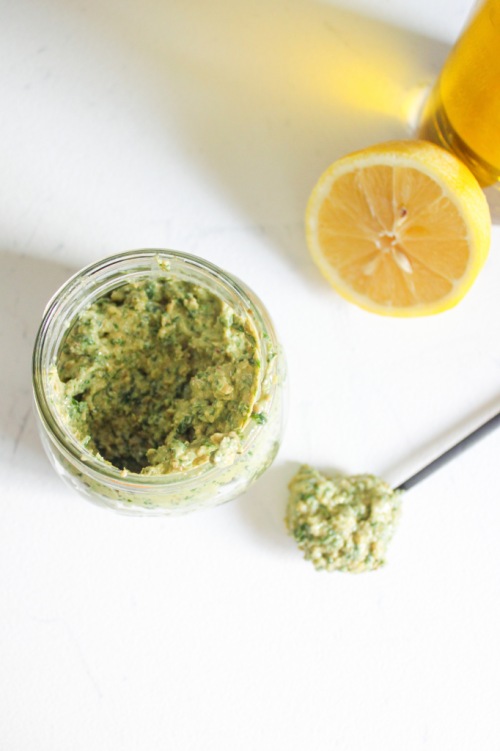
Acid – I like to put lemon juice as well as the zest into my pesto. It gives it a ‘zip’ of freshness that adds brightness and vibrancy to any dish!
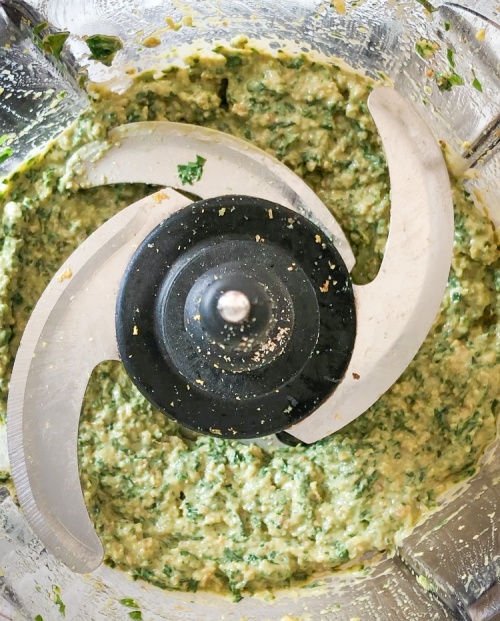
The process of making pesto can be completed in many ways. Traditionally, it is made by cutting all of the ingredients together with a sharp knife and then pouring the olive over them. It could also be made in a mortar and pestle. I like to use my food processor to save on time.
Whichever ingredients you choose to use and whichever method you bring them together in, I hope you get to enjoy pesto this summer. There is nothing better!
Lemony Vegan Basil Pesto
Serving size: Makes about 1/2 cup
Prep time: 10 minutes
Ingredients:
- 2.5 cups packed fresh basil, washed and dried
- 1/2 cup walnuts
- 1 clove garlic
- 1/4 tsp sea salt
- 2 tbsp nutritional yeast
- zest of one lemon
- 1.5 tbsp fresh lemon juice
- 1/4-1/3 cup good extra virgin olive oil
Instructions:
- To your food processor, add the basil, walnuts, garlic, salt, nutritional yeast and lemon zest. Pulse until the mixture has broken down into smaller pieces. Add the lemon juice and set your processor to blend. While blending, drizzle in the olive oil slowly. If you want a thicker pesto, add 1/4 cup of oil. If you are looking for a thinner sauce, continue to add more oil until you have reached your desired consistency. Taste and adjust seasonings (salt, lemon juice) accordingly.
This is best used immediately, but can be stored in an airtight container in the fridge for up to three days.
The post Lemony Vegan Basil Pesto appeared first on Never. Not. Eating..
]]>The post Homemade Hummus Three Ways appeared first on Never. Not. Eating..
]]>
At first, I couldn’t figure hummus out. It was always so grainy and never smooth like the store-bought ones. Why?! Someone please tell me why!? And then, after much research, I got it. I was using canned chickpeas instead of dry. Soaking dry chickpeas is a gamechanger.
The prep time on this recipe seems outrageous, but it’s really just a put-dry-chickpeas-in-bowl-and-fill-with-water-and-forget-about-overnight-kind-of-thing. The next day, they cook in a pot until soft and then a quick bim-bam-boom in the food processor and we have velvety smooth hummus. And trust me, it’s WAY better than the store bought option!
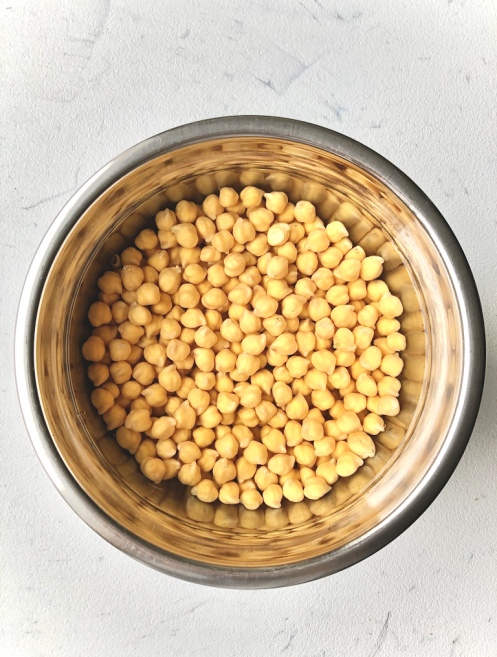
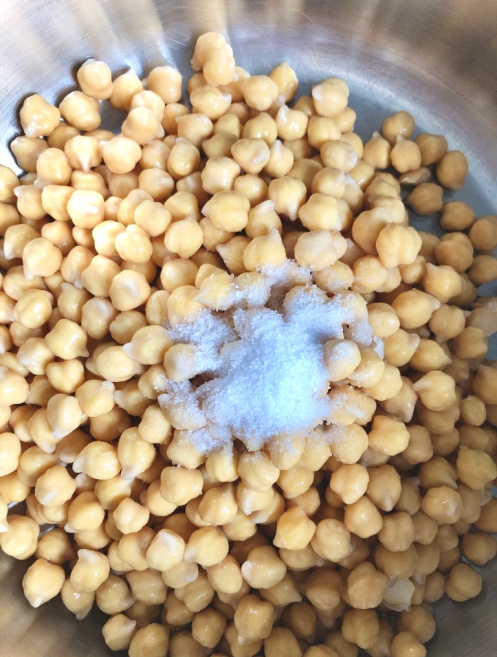
Okay, I’ll break it down a bit more. FIRST – Soak the chickpeas for at least 12 hours. I always throw them in a bowl and cover them with a few inches of water and leave overnight. They practically double in size. It’s miraculous. NEXT – Rinse them and put them in a large pot with fresh water (covering them with an extra two inches), baking soda (helps to soften) and salt (flavour bomb). Bring to a boil and then reduce heat to a simmer, cover and cook until soft – about an hour and 45 minutes.
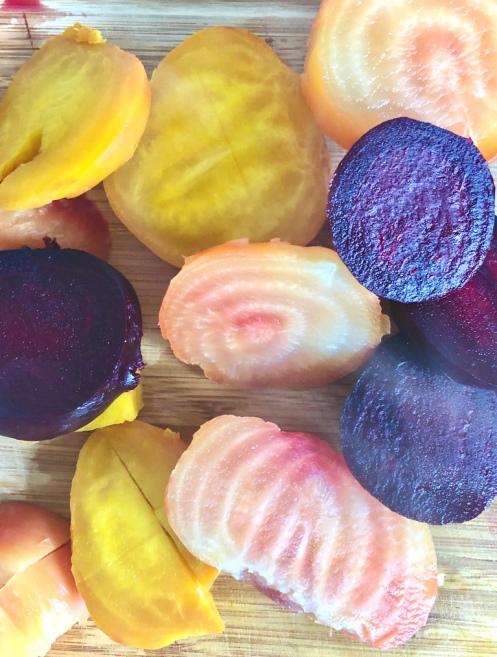
While the chickpeas are boiling, set your oven to 400 degrees F and wrap up a few golden beets in a little tin foil package. Place on a baking tray and put in the oven for about an hour and fifteen minutes. Remove and carefully open the package – when the steam escapes, it is extremely hot! Take two paper towels and hold a beet in one and use the other to peel off the skin. Rinse off your peeled beets under cold water, cut into smaller chunks and set aside.

To roast the garlic – Turn the oven down to 375 degrees F when the beets are done roasting. Slice the top quarter of the entire garlic head off. Your knife will take off the top tip of each clove and after cutting, you should be able to see the actual cloves. Drizzle with olive oil and wrap up in another cute little tin foil package. Roast in the oven for an hour, or until garlic is tender.

You have an hour to yourself now. May I recommend making coffee, turning on the Food Network and putting your feet up?!
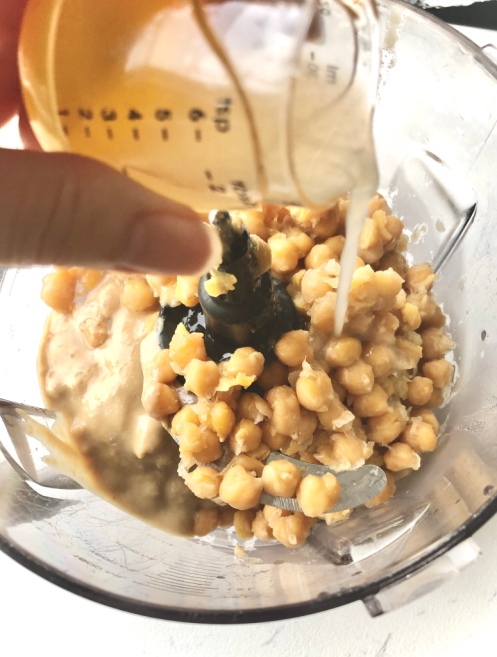
When the chickpeas are done, drain and transfer them to a food processor. I have the full Ninja Blender Set (found here) and it is amazing. Squeeze a few of the roasted garlic cloves out of their skinned casing and add to processor. Add tahini, salt and lemon juice and blend until smooth. Begin to drizzle ice cold water into the hummus in a slow stream. continue to blend for a few more seconds. Taste the hummus and add more salt if needed.

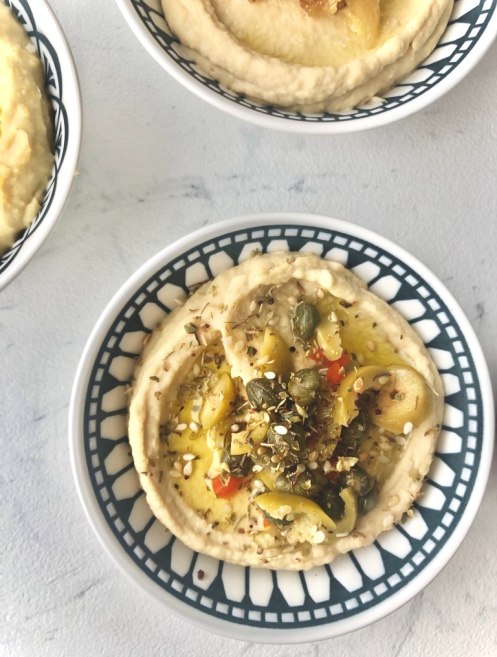
Remove two-thirds of the hummus from the food processor and split into two bowls (or containers if serving at a later time). To one bowl, add chopped up green olives and capers, a drizzle of olive oil and a generous pinch of za’atar. If you don’t have za’atar in your pantry, get to the grocery store NOW and buy it, or if you are lazy like me, order it here through Amazon. It’s worth it.
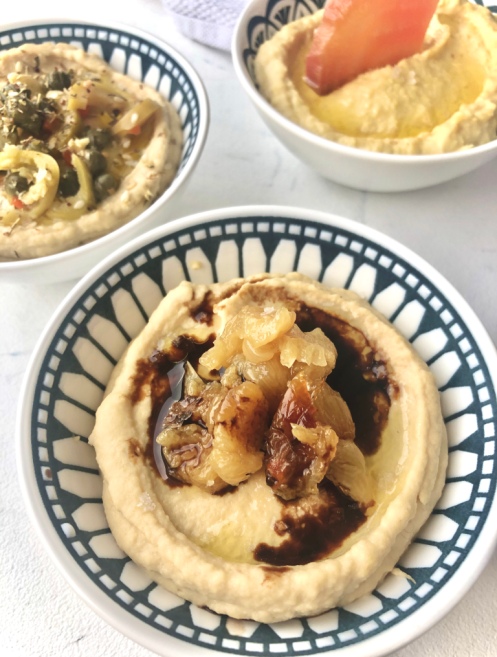
To the other bowl, squeeze the remaining garlic cloves right on top and add a drizzle of olive oil, your favourite balsamic vinegar (I use this fig balsamic) and a pinch of flaky sea salt.
To the other third of hummus still remaining in the processor, add one golden beet plus half of another, chopped, and pulse a few times.
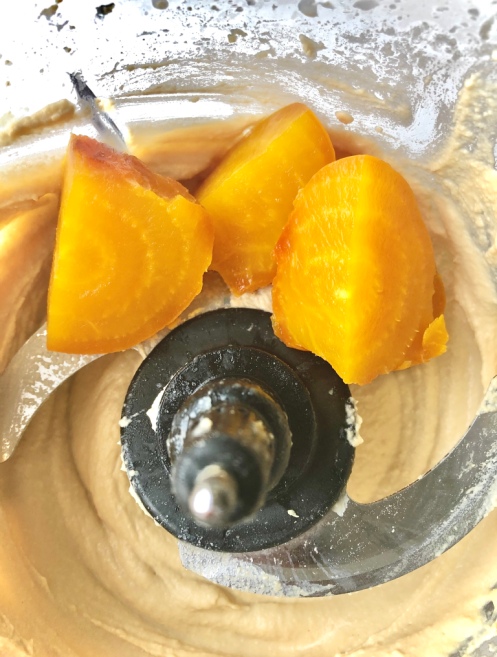
Blend until the beet pieces have incorporated. Transfer to a bowl and top with more beet slices and some flaky salt. Earthy, salty, nutty…delicious!

Three different dips. One recipe. Holiday. Ready.

Homemade Hummus Three Ways
Prep time: 12 hours
Cook time: 2 hours
Ingredients:
- 1 cup dry chickpeas
- 1/2 tsp baking soda
- 1.5 tsp salt, separated
- 2 medium-sized golden beets (or any kind)
- 1 head of garlic
- olive oil
- 1/2 cup tahini paste
- 2 tbsp freshly squeezed lemon juice (about half a lemon)
- ice cold water
- 1.5 tbsp capers
- 1.5 tbsp sliced olives
- za’atar
- balsamic vinegar (a sweet-flavoured one goes well with this recipe)
- flaky sea salt (optional)
Instructions:
- Place chickpeas in a bowl and cover with a few inches of water. Soak overnight or for 12 hours.
- Preheat oven to 400 degrees F.
- Drain and rinse chickpeas and place in a large pot with baking soda and 1 teaspoon of salt. Cover with 2 inches of water and bring to a boil. If you see foam rising to the top, skim it off with a spoon and discard. Turn the heat down and simmer, covered, for an hour and 45 minutes, or until chickpeas are soft and tender.
- In the meantime, get started on your beets. Place washed beets on a long piece of tin foil. Wrap the beets up like a present, making sure there are no holes in the package where the steam can escape. Place on a baking tray in the oven for an hour and 15 minutes, or until the beets are tender enough to slide a butter knife easily into the centre. Remove the beets and carefully open the tin foil package. Let the beets sit for one minute. Use a paper towel to hold a beet in one hand and another paper towel to peel away the skin of the beet in your other hand. The skins should remove easily when the beets are fully cooked. Rinse the beets in cold water and set aside.
- Turn the oven down to 375 degrees F and start prepping your garlic. Slice the top quarter of your garlic head off and drizzle the top of the visible cloves with a tablespoon of olive oil. Wrap in a tight tin foil package, place on a baking tray and roast in the oven for 50 minutes to an hour. The cloves will caramelize and be super tender.
- Add a few ice cubes to a small measuring cup filled with cold water and set aside. When the chickpeas are done cooking, drain and transfer to a food processor. Add the tahini, lemon juice and 1/2 teaspoon of salt. Squeeze three of the roasted garlic cloves out and add to food processor. Blend for about a minute or until smooth. Remove ice cubes from measuring cup and measure out one-quarter cup of the ice-cold water. Turn the motor on and slowly drizzle the water into the food processor. Blend for another minute. Scoop out two-thirds of the hummus into two separate bowls (or airtight containers topped with a thin layer of olive oil if not serving immediately). Top one of the bowls with the capers, sliced olives, a drizzle of olive oil and a generous sprinkling of za’atar. Top the other bowl with the remaining cloves of roasted garlic, olive oil, a trickle of sweet balsamic vinegar (I use a fig vinegar) and a pinch of flaky sea salt.
- To the remaining third still in the processor, add one of the golden beets plus half of the second (diced). Pulse a few times and then blend until the hummus is smooth. Use a spatula to transfer to another bowl and top with the last half beet (chopped), olive oil and some more flaky sea salt.
- Serve hummus dips with raw vegetables, crackers, pita or naan bread.
- To store leftover hummus, add to an airtight container with a thin layer of olive oil on top and place in fridge for up to one week.
The post Homemade Hummus Three Ways appeared first on Never. Not. Eating..
]]>The post Rainbow Buddha Bowl with Garlic Tahini Dressing appeared first on Never. Not. Eating..
]]>Sorry…got weird for a second there…but listen, here is a bowl full of pure healing. A range of super-tasty-yet-so-good-for-you vegetables paired with nutty brown rice and a garlicky-lemon tahini sauce to slather at your own will. Lunchtime game-changer.

A lot of my recipes are inspired by different places that I have visited and the foods and ingredients that I have discovered there. This dish is the opposite. I’ve been dying to get to Israel to try out what I hear to be the most amazing cuisine. A trip that most definitely will be taken in the near future, but for now, I’m going off what I know so far with this simple tahini dressing.

If you don’t know, tahini is the peanut butter of sesame seeds. It has a bitter, nutty kind of taste that pairs very well with lemon and garlic – hence this sauce. Just whisk with some cold water until you reach a drizzlable consistency and slather, slather, slather.
The foundation of this bowl is brown rice, but you can really use any grain you like. We ARE already packing this bowl full of vegetables, so we may as well continue down the path to health and choose the far superior rice. Ahem, brown rice. Cook the rice according to package directions (brown rice takes a long time, so plan ahead)!

Tip: When your rice is done cooking and it is time to remove from the heat and “let stand for five minutes,” open the lid, toss in a handful of golden raisins and quickly close the lid again. They give this dish a sweet, juicy “pop!” Trust me. I do this every time I make rice. The little golden jewels plump up by absorbing the steam that is trapped inside of the pot and there is nothing wrong with that.
Veggies – Start with your beets, as they take the longest. I like to use a mix of red, candy striped and golden beets for that “rainbow” effect. Wash the outside of them and place them on a large piece of aluminum foil. Wrap the foil up like a present, making sure that there are no openings for the steam to escape. Place on a baking sheet, throw them in the oven and forget about them for an hour or so.

Chop up your butternut squash, your brussel sprouts and your kale and drizzle with olive oil, salt and pepper. The squash goes in first – 15 minutes. Pull out and add the sprouts. 15 minutes. Pull out and add the kale. Another 10 minutes. Done.

Other rainbow prep – Other than the roasted veg, I also like to prepare the following to add: avocado, olives, green onions, pomegranate seeds and hemp hearts. Muy rainbow-esque!
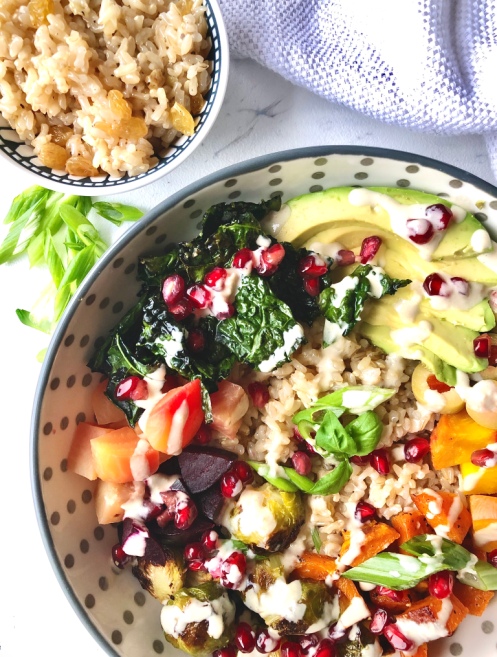
Assembly – It’s BUDDHA BOWL TIME! Scoop the rice into the bottom of your bowl. Around the outside, spoon in all of the different vegetables and toppings. Drizzle with tahini sauce and take pictures to remember this ceremonious day.
Rainbow Buddha Bowl with Garlic Tahini Dressing
Serving Size: 4
Prep time: 20 minutes
Cook time: 1 hour 15 minutes
Ingredients:
- 4-5 raw beets (I like to use a mix of red, candy stripe and golden), washed
- 1 cup dry brown rice
- one-quarter cup of golden raisins (optional)
- 2 cups butternut squash, cut into half-inch cubes
- 2 cups brussel sprouts, cored and halved (about 20 sprouts)
- 6 leaves of tuscan (black) kale, thick stem removed, roughly chopped
- 6-7 olives, sliced
- 2 scallions, sliced
- olive oil
- salt
- pepper
- 1 avocado, sliced (optional)
- half cup pomegranate seeds (optional)
- 4 tablespoons hemp hearts (optional)
For the tahini sauce:
- one-quarter cup of tahini
- 2 tbsp freshly squeezed lemon juice
- 1 clove of garlic, grated
- salt
- 3-4 tbsp ice cold water
Instructions:
- Preheat oven to 400 degrees F. Place beets in the middle of a large piece of aluminum foil and wrap up like a present so that there are no open areas where the steam could escape. Place the foil package on a baking sheet and bake for 1 hour and 10 minutes, or until a fork inserts easily.
- Rinse the rice under cold water until water runs clear. Meanwhile, add one tablespoon of olive oil to a medium-sized saucepan over medium heat. Add the rice and toast for a minute in the oil. Add a pinch of salt and two cups of water. Bring to a boil on high heat. Once boiling, cover and turn the heat to low and simmer for 45 minutes. Do NOT open the lid!
- While the rice is cooking and the beets are roasting, chop up your vegetables. Drizzle the squash, brussel sprouts and chopped kale (each in their own separate bowl) with olive oil and sprinkle with a pinch of salt and a few grinds of black pepper.
- When the beets have been roasting for about half an hour, pull the baking sheet out of the oven and add the squash, continuing to roast for 15 minutes. Pull the baking sheet out again, add brussel sprouts and quickly return to oven to roast for another 15 minutes. Remove sheet tray one more time, toss the veggies around and add the kale, roasting for 8-10 more minutes or until kale is crisp and vegetables are cooked through. Remove from oven.
- For the sauce, start by putting 2-3 ice cubes in a bowl and fill the bowl with cold water. Set aside. In a small bowl, whisk together the tahini, garlic, lemon juice and a pinch of salt until combined. Add the cold water, one tablespoon at a time, whisking until fully incorporated. It usually takes me between 3-4 tablespoons to get the consistency that I like. Set aside.
- When the rice is finished cooking, turn the burner off, lift the lid of the pot, throw in the golden raisins and quickly place the lid back on top. Remove the rice from the hot burner and let stand with lid on for 5 minutes. Fluff with a fork before assembling the bowl.
- Carefully open the foil package with the beets inside (the steam will escape and it is hot)! Use two paper towels to peel the skins off of the beets. Rinse peeled beets under cold water to remove any excess skin and diced ’em up!
- Assemble the bowl by scooping the rice and raisins into the bottom and surrounding it with the beets, squash, brussel sprouts, crispy kale, avocado, scallions, olives and pomegranate seeds. Drizzle with the tahini sauce and sprinkle on some hemp hearts for an extra protein punch.
The post Rainbow Buddha Bowl with Garlic Tahini Dressing appeared first on Never. Not. Eating..
]]>