The post White Wine Israeli Couscous with Spinach and Mushrooms appeared first on Never. Not. Eating..
]]>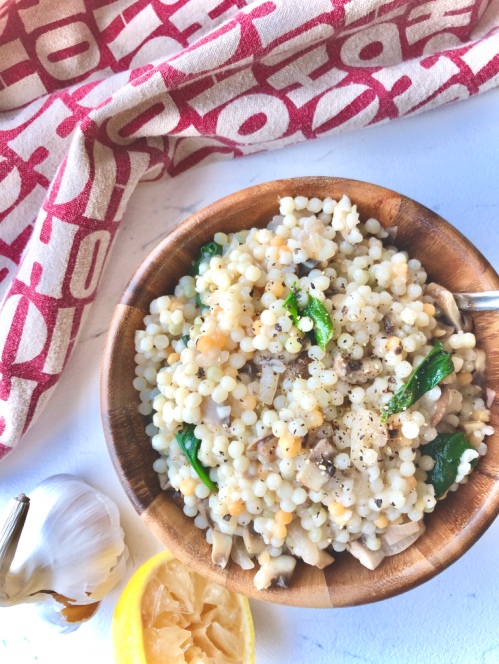
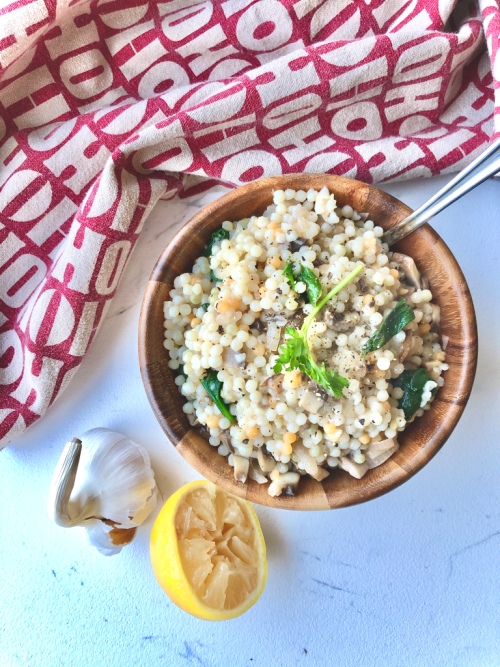
This dish is so simple…sauteed shallots, garlic, mushrooms and spinach deglazed with white wine, mixed into a heaping pile of delicious, brilliant Israeli couscous. Hellllloooo.
Israeli couscous is much larger than the typical Moroccan style cous. It is a small pasta also known as “pearl couscous.” It cooks super quickly and can be used in a variety of dishes including salads, soups and on it’s own as a side.
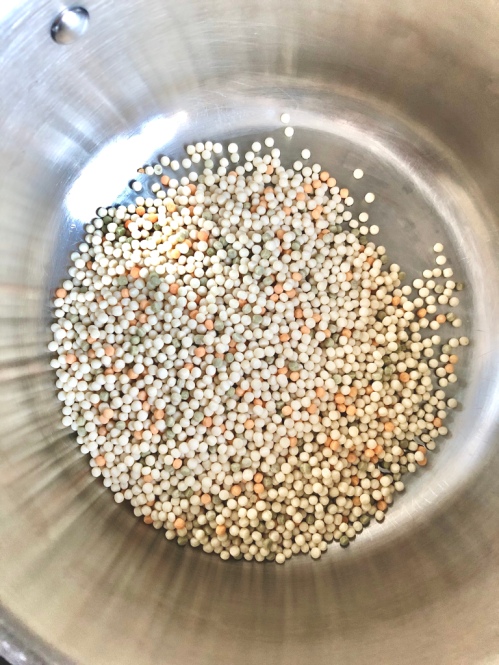
To cook the couscous, add to a pot with some olive oil and toast over medium-high heat for 1-2 minutes. Add water and salt (don’t skip!) and bring to a boil. Reduce heat and simmer for 8-10 minutes.
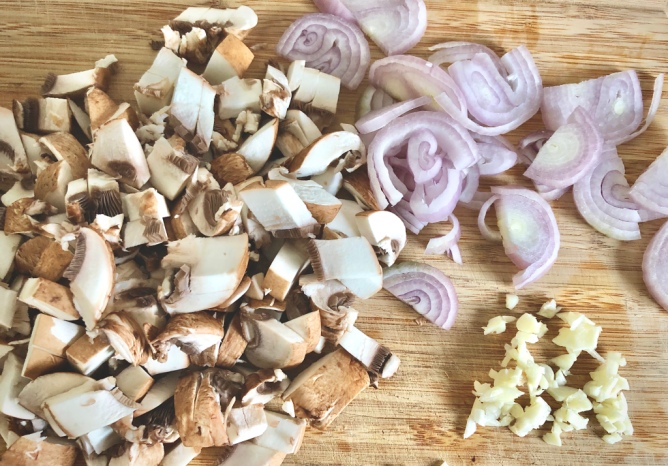
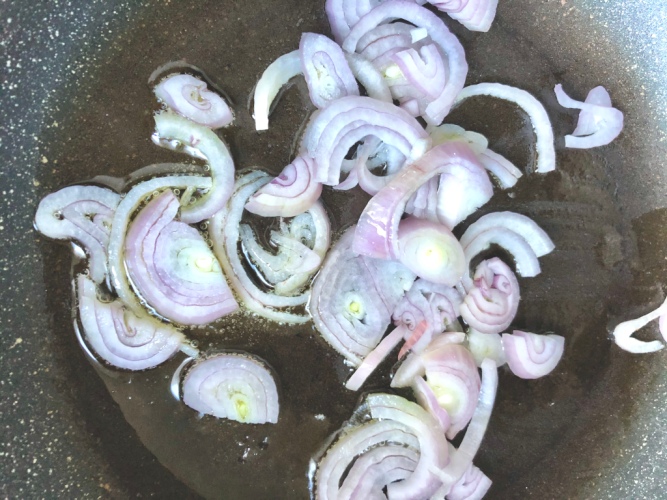
For the vegetables, add sliced shallot to a pan with olive oil over medium-low heat. Cook for a few minutes until it begins to soften and then add the garlic.
Stir for 30 seconds before adding the sliced mushrooms. Let saute for a few minutes and then pour in the white wine.
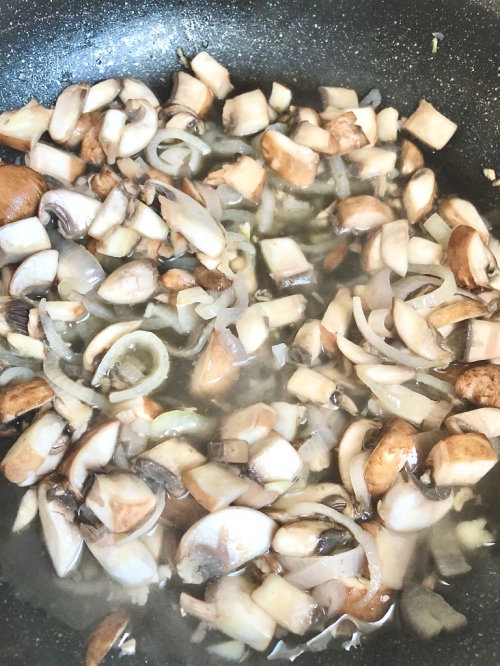
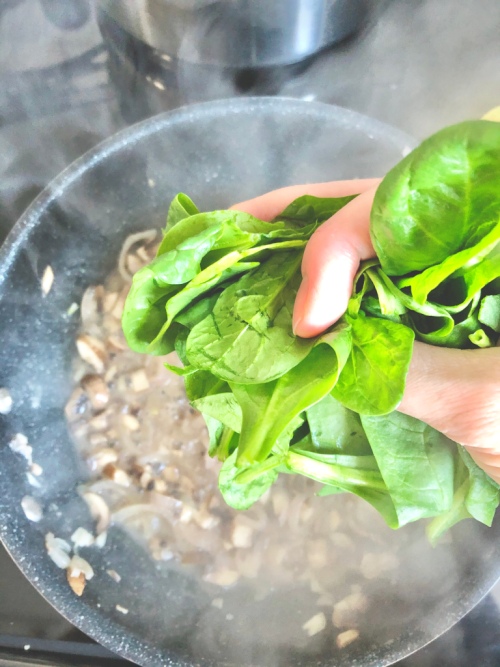
Turn the heat to medium-high and saute until the alcohol has been cooked out, about 5 minutes. Add a few handfuls of spinach and cook down until wilted.
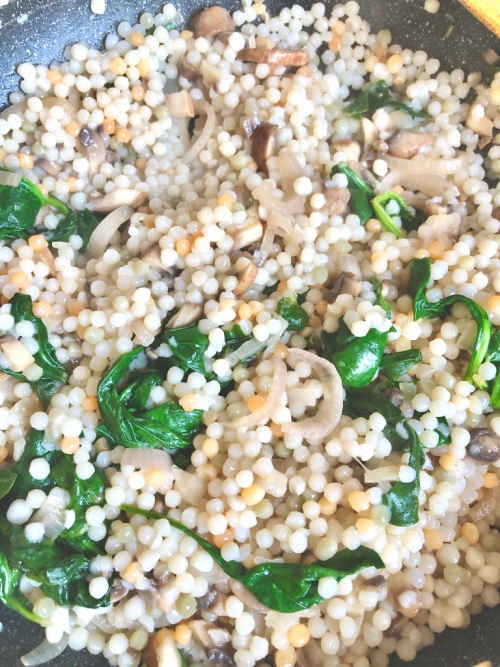
Rinse the couscous under cold water and add to the pan with the vegetables. Stir until combined, turn off heat and add a squeeze of lemon. Side dish perfection.
Serve at your holiday dinner…or bring to someone else’s! Double the recipe if you have a large party to feed.
White Wine Israeli Couscous with Spinach and Mushrooms
Serving size: 4
Prep time: 5 minutes
Cook time: 10 minutes
Ingredients:
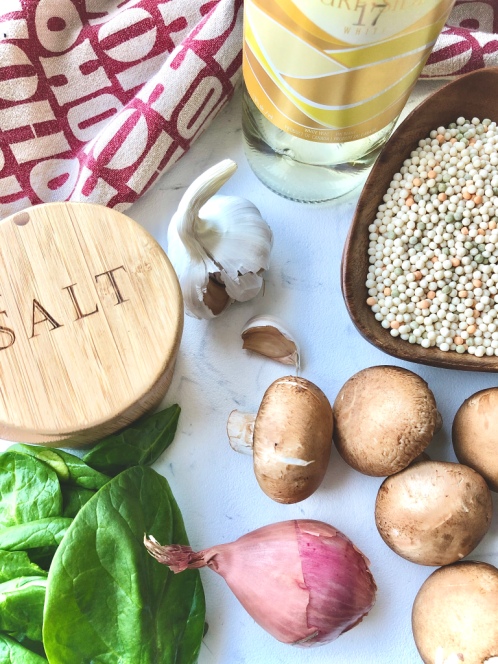
- 1 cup Israeli couscous
- olive oil
- 2 cups water
- salt
- pepper
- 1 shallot, sliced
- 2 cloves garlic, minced
- 6 cremini mushrooms, sliced
- 1/3 cup good white wine
- 2 handfuls spinach
- squeeze of lemon juice
Instructions:
- In a medium-sized pot, add 1 tablespoon of olive oil and the couscous and toast over medium-high heat for 1-2 minutes. It will become fragrant. Add 1 teaspoon of salt and the water and bring to a boil. Reduce heat and simmer for 8 minutes, or until al dente. Drain in a fine mesh sieve and rinse with cold water. Set aside.
- In a medium-sized saucepan, heat a tablespoon of olive oil over medium-low heat. Add the sliced shallot and let cook for a minute in the oil. Add the garlic and stir for 30 seconds. Add mushrooms, a few grinds of fresh black pepper and a pinch of salt. Saute for another minute and then add the white wine. Turn the heat up to medium-high and cook until the alcohol has been cooked out – about five minutes. Add the spinach and continue to cook until it is wilted down.
- Finally, add the cooked couscous to the pan, tossing with the vegetables. Turn the heat off after a minute, add a squeeze of lemon and a few more grinds of pepper and some salt to taste. Transfer to a bowl and serve immediately.
The post White Wine Israeli Couscous with Spinach and Mushrooms appeared first on Never. Not. Eating..
]]>The post Homemade Hummus Three Ways appeared first on Never. Not. Eating..
]]>
At first, I couldn’t figure hummus out. It was always so grainy and never smooth like the store-bought ones. Why?! Someone please tell me why!? And then, after much research, I got it. I was using canned chickpeas instead of dry. Soaking dry chickpeas is a gamechanger.
The prep time on this recipe seems outrageous, but it’s really just a put-dry-chickpeas-in-bowl-and-fill-with-water-and-forget-about-overnight-kind-of-thing. The next day, they cook in a pot until soft and then a quick bim-bam-boom in the food processor and we have velvety smooth hummus. And trust me, it’s WAY better than the store bought option!
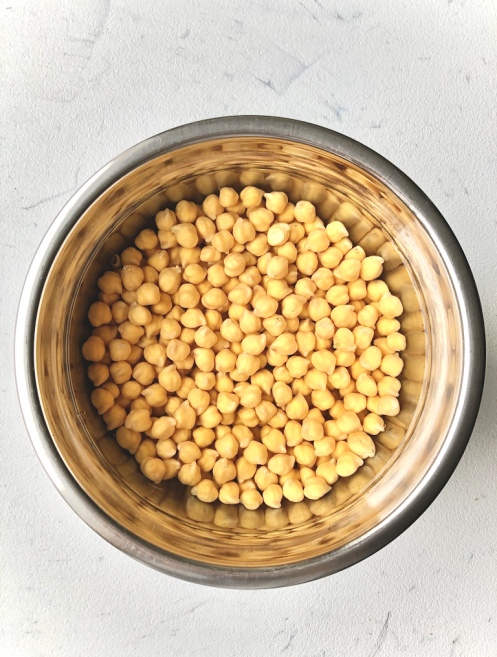
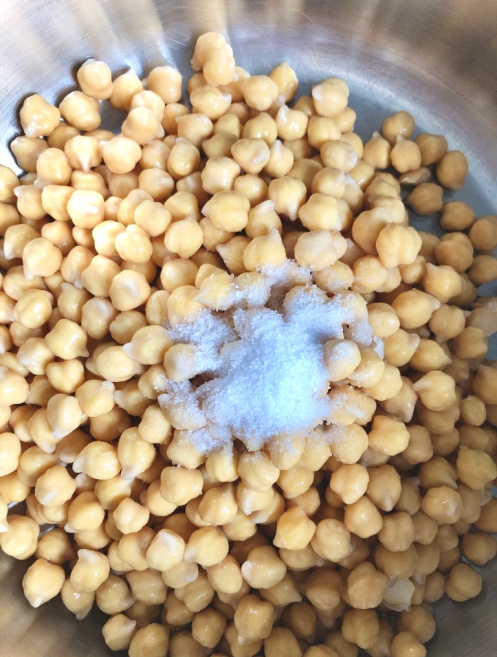
Okay, I’ll break it down a bit more. FIRST – Soak the chickpeas for at least 12 hours. I always throw them in a bowl and cover them with a few inches of water and leave overnight. They practically double in size. It’s miraculous. NEXT – Rinse them and put them in a large pot with fresh water (covering them with an extra two inches), baking soda (helps to soften) and salt (flavour bomb). Bring to a boil and then reduce heat to a simmer, cover and cook until soft – about an hour and 45 minutes.
While the chickpeas are boiling, set your oven to 400 degrees F and wrap up a few golden beets in a little tin foil package. Place on a baking tray and put in the oven for about an hour and fifteen minutes. Remove and carefully open the package – when the steam escapes, it is extremely hot! Take two paper towels and hold a beet in one and use the other to peel off the skin. Rinse off your peeled beets under cold water, cut into smaller chunks and set aside.

To roast the garlic – Turn the oven down to 375 degrees F when the beets are done roasting. Slice the top quarter of the entire garlic head off. Your knife will take off the top tip of each clove and after cutting, you should be able to see the actual cloves. Drizzle with olive oil and wrap up in another cute little tin foil package. Roast in the oven for an hour, or until garlic is tender.

You have an hour to yourself now. May I recommend making coffee, turning on the Food Network and putting your feet up?!
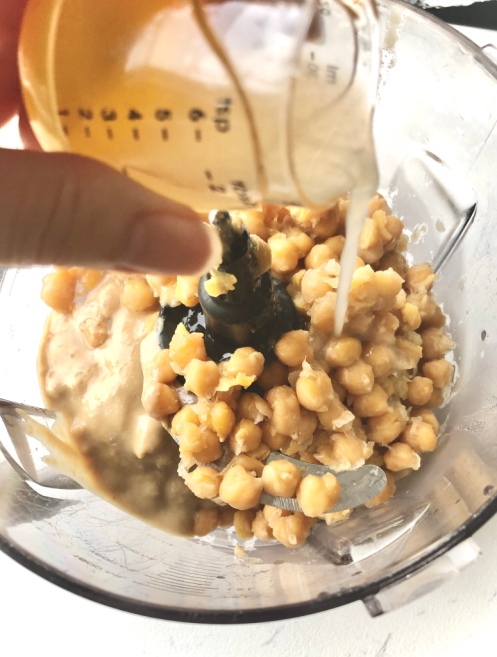
When the chickpeas are done, drain and transfer them to a food processor. I have the full Ninja Blender Set (found here) and it is amazing. Squeeze a few of the roasted garlic cloves out of their skinned casing and add to processor. Add tahini, salt and lemon juice and blend until smooth. Begin to drizzle ice cold water into the hummus in a slow stream. continue to blend for a few more seconds. Taste the hummus and add more salt if needed.

Remove two-thirds of the hummus from the food processor and split into two bowls (or containers if serving at a later time). To one bowl, add chopped up green olives and capers, a drizzle of olive oil and a generous pinch of za’atar. If you don’t have za’atar in your pantry, get to the grocery store NOW and buy it, or if you are lazy like me, order it here through Amazon. It’s worth it.
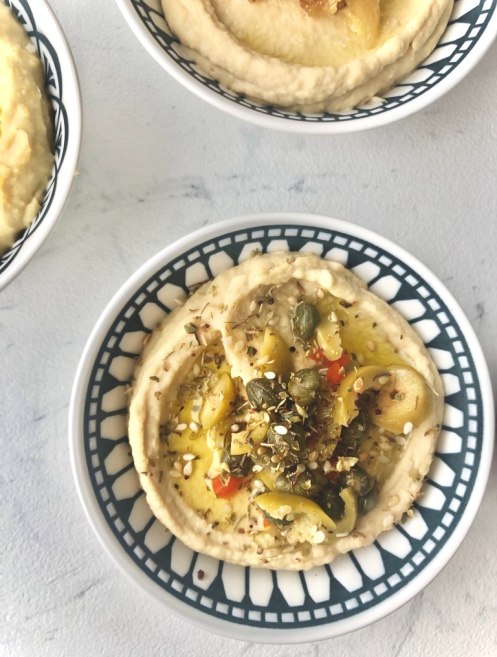
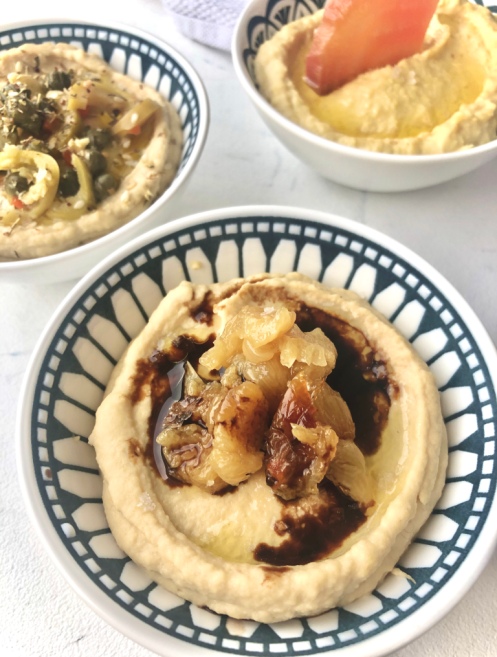
To the other bowl, squeeze the remaining garlic cloves right on top and add a drizzle of olive oil, your favourite balsamic vinegar (I use this fig balsamic) and a pinch of flaky sea salt.
To the other third of hummus still remaining in the processor, add one golden beet plus half of another, chopped, and pulse a few times.
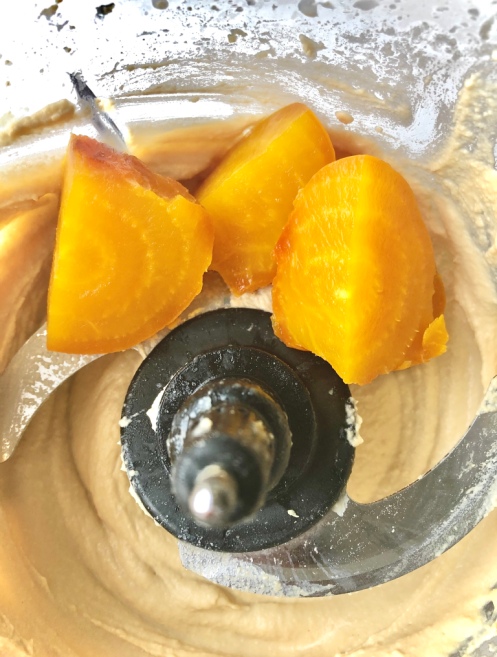
Blend until the beet pieces have incorporated. Transfer to a bowl and top with more beet slices and some flaky salt. Earthy, salty, nutty…delicious!

Three different dips. One recipe. Holiday. Ready.

Homemade Hummus Three Ways
Prep time: 12 hours
Cook time: 2 hours
Ingredients:
- 1 cup dry chickpeas
- 1/2 tsp baking soda
- 1.5 tsp salt, separated
- 2 medium-sized golden beets (or any kind)
- 1 head of garlic
- olive oil
- 1/2 cup tahini paste
- 2 tbsp freshly squeezed lemon juice (about half a lemon)
- ice cold water
- 1.5 tbsp capers
- 1.5 tbsp sliced olives
- za’atar
- balsamic vinegar (a sweet-flavoured one goes well with this recipe)
- flaky sea salt (optional)
Instructions:
- Place chickpeas in a bowl and cover with a few inches of water. Soak overnight or for 12 hours.
- Preheat oven to 400 degrees F.
- Drain and rinse chickpeas and place in a large pot with baking soda and 1 teaspoon of salt. Cover with 2 inches of water and bring to a boil. If you see foam rising to the top, skim it off with a spoon and discard. Turn the heat down and simmer, covered, for an hour and 45 minutes, or until chickpeas are soft and tender.
- In the meantime, get started on your beets. Place washed beets on a long piece of tin foil. Wrap the beets up like a present, making sure there are no holes in the package where the steam can escape. Place on a baking tray in the oven for an hour and 15 minutes, or until the beets are tender enough to slide a butter knife easily into the centre. Remove the beets and carefully open the tin foil package. Let the beets sit for one minute. Use a paper towel to hold a beet in one hand and another paper towel to peel away the skin of the beet in your other hand. The skins should remove easily when the beets are fully cooked. Rinse the beets in cold water and set aside.
- Turn the oven down to 375 degrees F and start prepping your garlic. Slice the top quarter of your garlic head off and drizzle the top of the visible cloves with a tablespoon of olive oil. Wrap in a tight tin foil package, place on a baking tray and roast in the oven for 50 minutes to an hour. The cloves will caramelize and be super tender.
- Add a few ice cubes to a small measuring cup filled with cold water and set aside. When the chickpeas are done cooking, drain and transfer to a food processor. Add the tahini, lemon juice and 1/2 teaspoon of salt. Squeeze three of the roasted garlic cloves out and add to food processor. Blend for about a minute or until smooth. Remove ice cubes from measuring cup and measure out one-quarter cup of the ice-cold water. Turn the motor on and slowly drizzle the water into the food processor. Blend for another minute. Scoop out two-thirds of the hummus into two separate bowls (or airtight containers topped with a thin layer of olive oil if not serving immediately). Top one of the bowls with the capers, sliced olives, a drizzle of olive oil and a generous sprinkling of za’atar. Top the other bowl with the remaining cloves of roasted garlic, olive oil, a trickle of sweet balsamic vinegar (I use a fig vinegar) and a pinch of flaky sea salt.
- To the remaining third still in the processor, add one of the golden beets plus half of the second (diced). Pulse a few times and then blend until the hummus is smooth. Use a spatula to transfer to another bowl and top with the last half beet (chopped), olive oil and some more flaky sea salt.
- Serve hummus dips with raw vegetables, crackers, pita or naan bread.
- To store leftover hummus, add to an airtight container with a thin layer of olive oil on top and place in fridge for up to one week.
The post Homemade Hummus Three Ways appeared first on Never. Not. Eating..
]]>The post Shakshuka appeared first on Never. Not. Eating..
]]>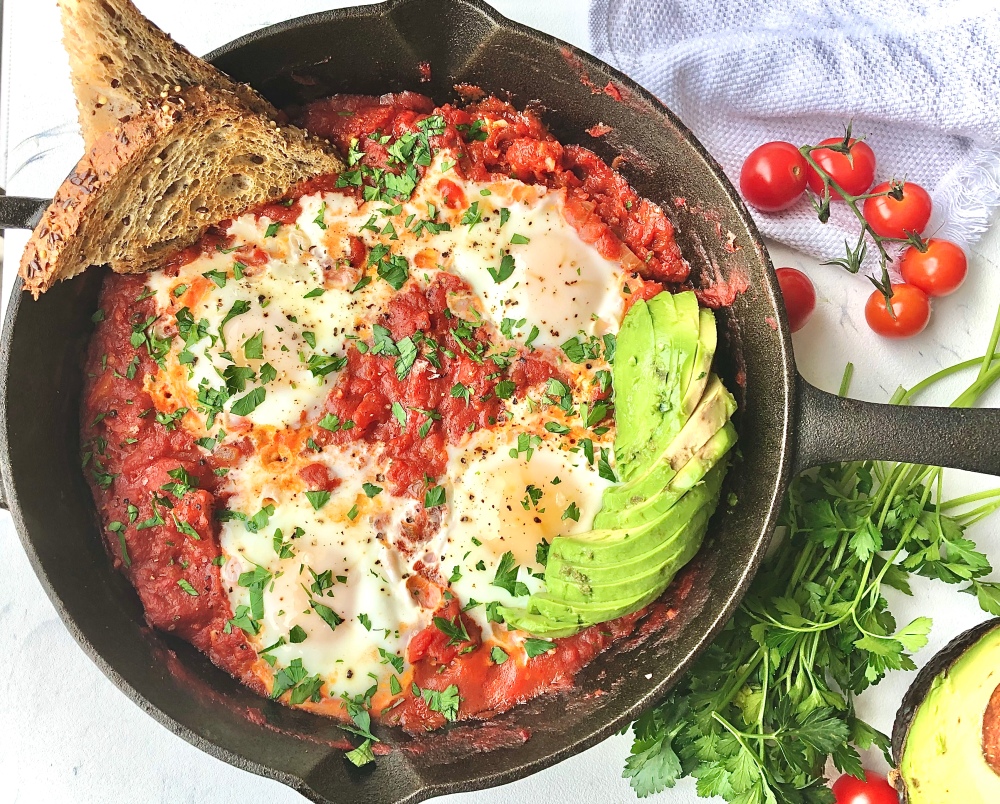
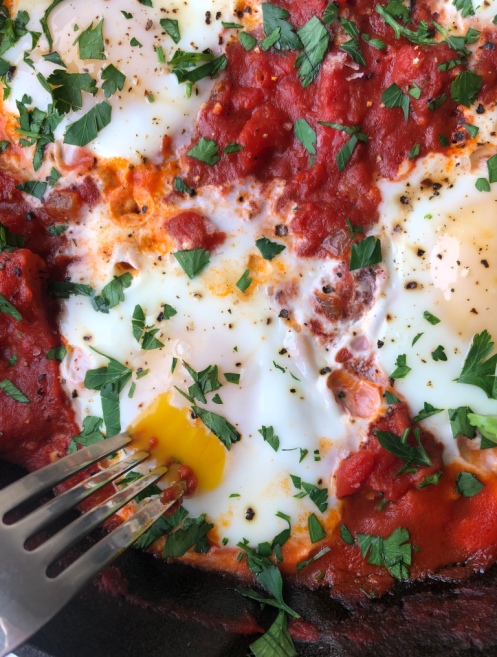
I’ve been really diggin’ Middle Eastern cuisine lately, and shakshuka is something that has been on rotation in my kitchen for a while now. It is basically eggs poached in a spicy tomato sauce served with crusty bread for dipping. And I’m not mad about anything that I can dip into.
There are many places where shakshuka can be found on every corner, and one that has been inspiring me lately is Israel. Does anyone want to go with me?? I’m patiently waiting for the school year to be over so I can hop on a plane and land in Tel Aviv where I will devour all of the deliciousness that derives from this up and coming city.
Shakshuka is so simple and easy. It’s onions and bell pepper, sauteed with garlic and traditional middle-eastern spices, like cumin, coriander, paprika and cayenne, and simmered in a tomato sauce. Make a few wells in the sauce, crack a few eggs, let them cook to your liking and you have breakfast. Or brunch. Or lunch or dinner. Good for a friendly gathering, too. You can’t limit shakshuka…Don’t even try.
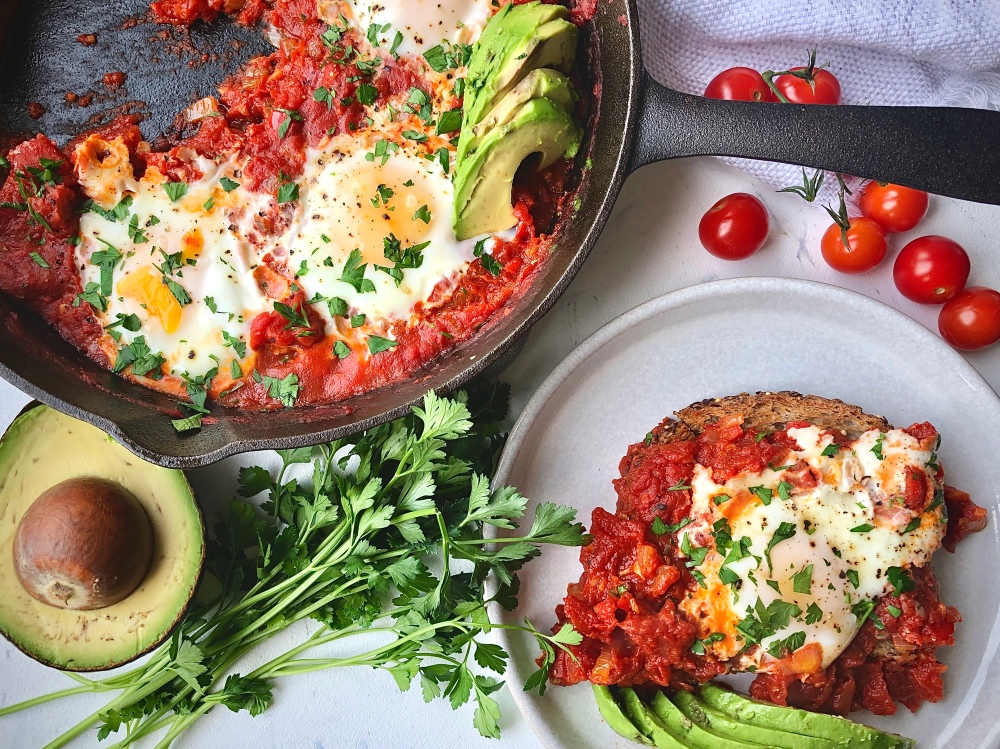
Did I mention that all of this delightfulness is made in ONE cast iron pan. Yup. I love an easy clean.
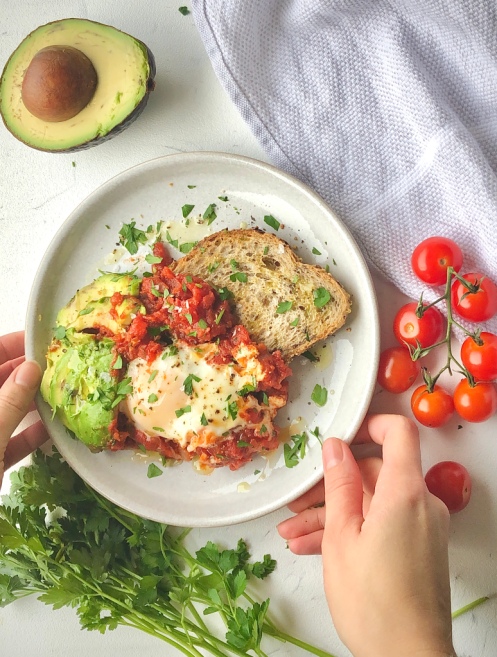
Toppings: You know I’m the topping queen. If I can find more food to put onto a dish full of food than I’m a happy girl. I like to add creamy avocado slices, a crusty sourdough bread for dipping, fresh parsley and flaky sea salt on top of my shak. Feta is also a badass addition.
Shakshuka
Servings: 3-4
Prep time: 5 minutes
Cook time: 30 minutes
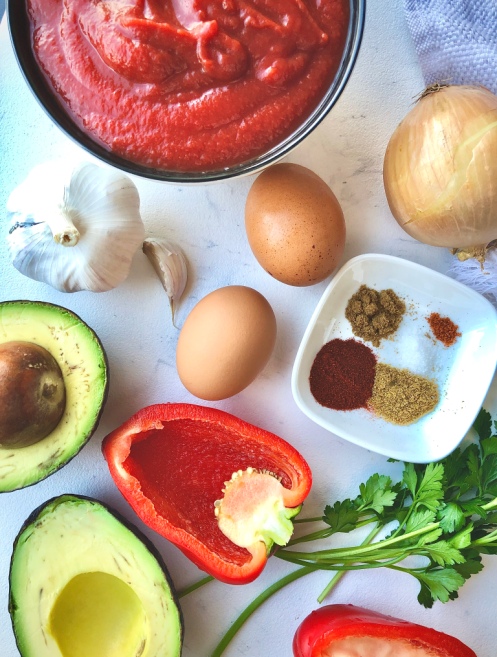
Ingredients:
- 2 tbsp olive oil, plus more for drizzling
- 1/2 of an onion, diced
- 1/2 of a red bell pepper, seeded and finely diced
- 2 cloves of garlic, finely chopped
- 1/2 tsp cumin
- 1/2 tsp paprika
- 1/4 tsp coriander
- pinch of cayenne (optional)
- 1 cup crushed tomatoes
- 1 cup canned diced tomatoes (with their liquid)
- 4 large eggs
- salt
- fresh black pepper
- parsley
- avocado (optional)
- toasted, crusty bread (I prefer sourdough), for dipping
Instructions:
- Heat olive oil over medium heat in a cast iron skillet. Add the onion and saute for a minute. Add the bell pepper and continue to cook for about 10 minutes, or until onion starts becoming translucent and just slightly browned around the edges.
- Add the garlic, cumin, paprika, coriander and cayenne. Toast until fragrant, about one minute.
- Pour in the crushed and diced tomatoes, a pinch of salt and a few grinds of fresh black pepper. Let simmer for 15-20 minutes. The sauce will lose a lot of its water content and it will thicken up.
- Make 4 wells in the sauce and crack an egg into each one. Turn the burner down to medium-low, cover the skillet and cook for 3-5 minutes, or until eggs are cooked to your liking.
- Turn heat off and sprinkle with fresh parsley, a few more grinds of pepper and flaky sea salt. Add avocado slices and eat with your favourite crusty bread.
The post Shakshuka appeared first on Never. Not. Eating..
]]>