The post Pink Hummus (Beetroot) appeared first on Never. Not. Eating..
]]>
WHAT IS PINK HUMMUS?
I’m a regular hummus lover for sure, but when you jazz it up by making it pink, it’s even better. I mean, you eat with your eyes first…am I right?!
This Pink Hummus is made with the legendary beetroot, meaning it is slightly sweet, yet earthy and aesthetically, it’s super vibrant! A definite show-stopper when brought to any party.
WHY I LOVE THIS HUMMUS
GOOD hummus is a labour of love, I’m not going to lie. However, the amount of time that hummus takes is mostly passive time. You don’t have to be in the kitchen during the entire process. And, it takes so long because this method of making hummus is going to give you the smoothest results, meaning the most delicious hummus.

Other than the smoothest, most velvety texture, I love this hummus because of the colour. It’s so fun and playful – perfect for kids or a crowd!
Also, I add roasted garlic to this recipe for maximum flavour and there’s nothing better than a head of roasted garlic, in my opinion.
THE INGREDIENTS
The ingredients to this recipe are simple, but it’s how you prepare them that really makes a difference. Here is what you will need:
- dry chickpeas
- beets
- tahini
- lemon juice
- garlic
- salt

HOW TO MAKE BEETROOT HUMMUS
The key to the smoothest hummus possible is using dry chickpeas. They take a while to prepare, so aim to make your hummus in the morning or early afternoon. First, you must soak the chickpeas overnight. By doing this, you will notice that they double in size and absorb a lot of that water.
In the morning, drain and rinse the chickpeas and add them to a large pot of water with some baking soda (to help soften them) and some salt. Bring to a boil and then reduce the heat to a low rolling boil, letting them cook for about an hour and a half, until they are nice and soft.

While the chickpeas are cooking, roast your beet in the oven by wrapping it in a piece of foil and placing it on a baking sheet. If you are adding garlic to the hummus (which I highly recommend), slice the top off the whole head of garlic to expose the top of each clove. Drizzle the cloves in olive oil, wrap the head in tin foil and roast in the oven for 45-55 minutes.
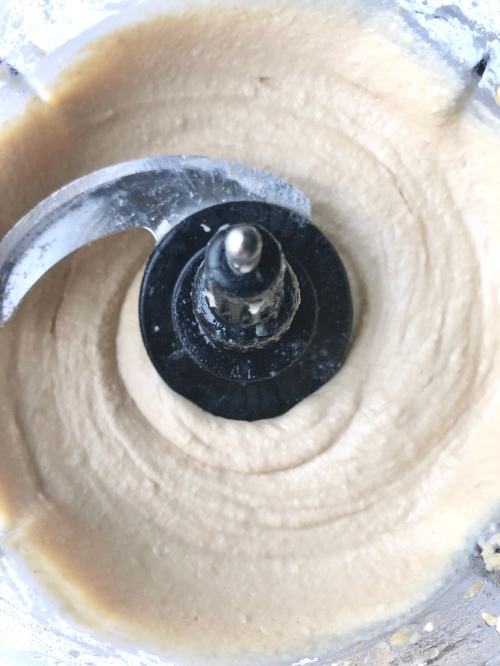
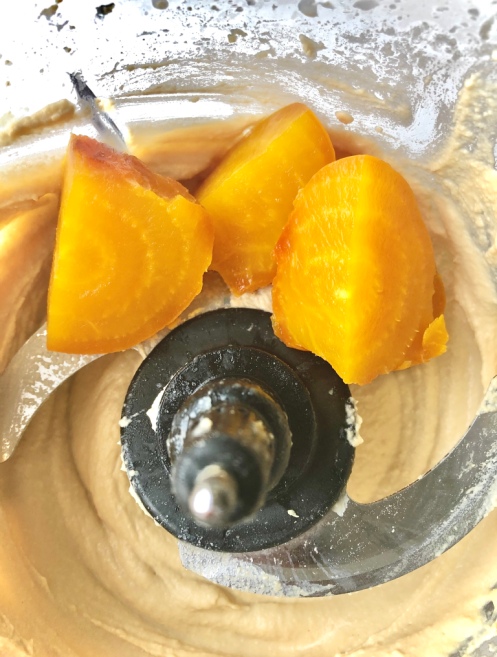
When the chickpeas are cooked, add them to a high-powered food processor, along with the tahini lemon juice, salt, garlic and the roasted beet. Blend for one minute until everything is incorporated, then scrape down the sides. Blend for another minute while drizzling in ice cold water until it is smooth and the texture is perfect.
TIPS WHEN MAKING PINK HUMMUS
- Even though this recipe only requires one cooked beet, I would roast more to top the hummus with, and to have on hand for a quick snack – I love my beets with a little bit of olive oil, feta cheese and some salt and pepper!
- Drizzle olive oil over top of the hummus before storing in the fridge to avoid discolouration or a “skin” forming on the top.
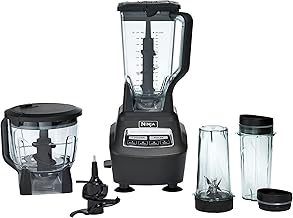
- Use a high-powered food processor to ensure your hummus whips up to the smoothest consistency. I have the Ninja food processor and I love it!

MORE VIBRANT RECIPES YOU’LL LOVE
3-Ingredient Strawberry Chia Jam (summertime in a jar)
Strawberry Honey Ginger Galette (a sweet pie with an unexpected bing-bang-boom!)
Simple Beetroot Pasta (more beets, but this time with pasta)
TOOLS I USED TO MAKE THIS PINK HUMMUS
Click on the images below to see what I used for this recipe.


This post contains affiliate links and I may earn a small commission when purchases are made after clicking the links, at no cost to you – thank you!
PINK HUMMUS (BEETROOT)
Serving size: Makes about 3 cups
Prep time: 10 minutes
Cook time: 1.5 hours
Passive time: 6-8 hours (overnight)
Ingredients
- 1 cup dry chickpeas
- 1/2 tsp baking soda
- salt
- 1 beet*
- 1 head of garlic (optional)
- juice of half a lemon (2 tbsp)
- 1/2 cup tahini
- olive oil
Instructions
- Place chickpeas in a bowl and cover with a few inches of water. Soak overnight or for 6-8 hours. When they are done soaking, proceed with the next steps.
- Preheat oven to 400 degrees F.
- Drain and rinse the chickpeas and place them in a medium-sized pot with baking soda and one teaspoon of salt. Cover with 2 inches of water and bring to a boil. If you see foam rising to the top, skim it off with a spoon and discard. Turn the heat down and simmer, covered, for an hour and a half, or until chickpeas are soft and tender – you can cook them for as long as two hours.
Preparing the beets
- In the meantime, get started on roasting your beet – place washed beet on a piece of tin foil and wrap it up like a present, making sure there are no holes in the foil where the steam can escape. Place on a baking tray in the oven for an hour and a half, or until the beet is tender enough to slide a butter knife easily into the centre.
Preparing the roasted garlic
- If you are adding garlic to the hummus – slice the top quarter of your head of garlic off and drizzle the top of the visible cloves with a tablespoon of olive oil. Wrap in a tin foil package, similar to the one you wrapped the beet in and place on baking tray with the beet and roast in the oven for 45-50 minutes. The cloves will caramelize and be super tender.
Putting it all together
- Remove and carefully open the tin foil packages. Let the beet sit for one minute and then use a paper towel to hold it in one hand and another paper towel to peel away the skin with your other hand. The skin should remove easily when the beet is fully cooked. Rinse the beet in cold water and slice into quarters.
- Add a few ice cubes to a small measuring cup filled with cold water and set aside. When the chickpeas are done cooking, drain, transfer to a food processor and add the tahini, lemon juice, half teaspoon of salt and the beet quarters. Squeeze three (or more to taste) of the roasted garlic cloves out and add to the food processor. Blend the ingredients for about one minute and then scrape down the sides of the processor. Remove ice cubes from measuring cup and measure out one-quarter cup of the ice-cold water. Turn the motor back on and slowly drizzle the water into the food processor and blend for another minute. Try the hummus and add more salt or lemon juice, if needed. Transfer to a serving bowl and top with a pinch of flaky sea salt, if desired.
Store the hummus in an airtight container in the fridge with a drizzle of olive oil that covers the surface to avoid discolouration and a “skin” developing.
NOTES:
*I recommend roasting more than one beet to have some for a meal later on.
The post Pink Hummus (Beetroot) appeared first on Never. Not. Eating..
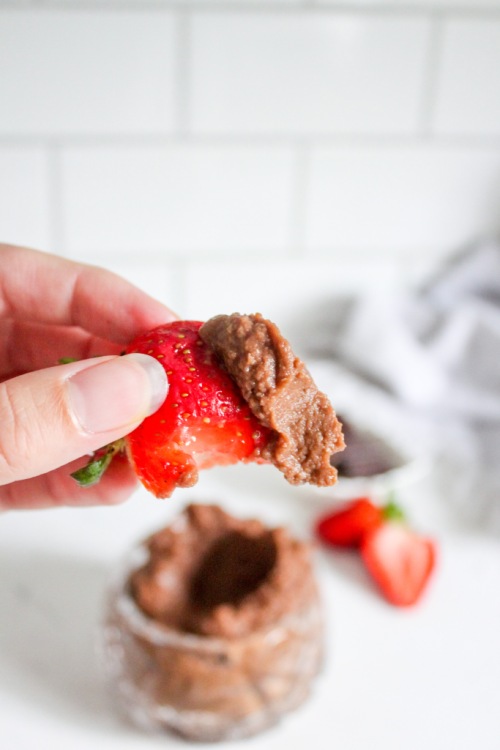
]]>The post Chocolate Hummus appeared first on Never. Not. Eating..
]]>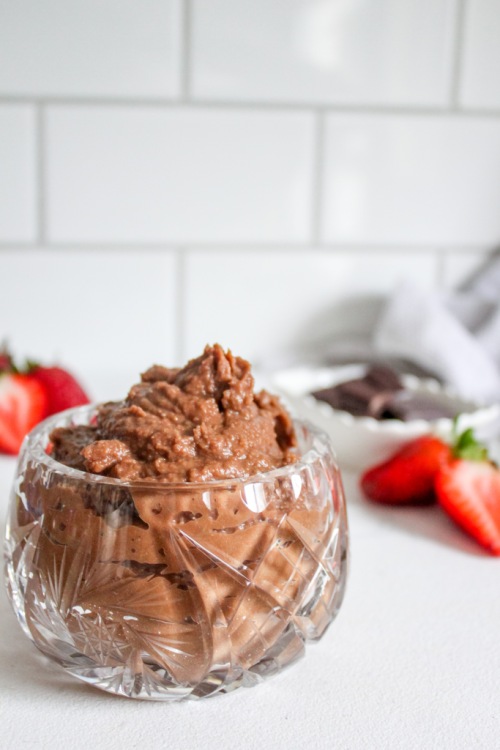
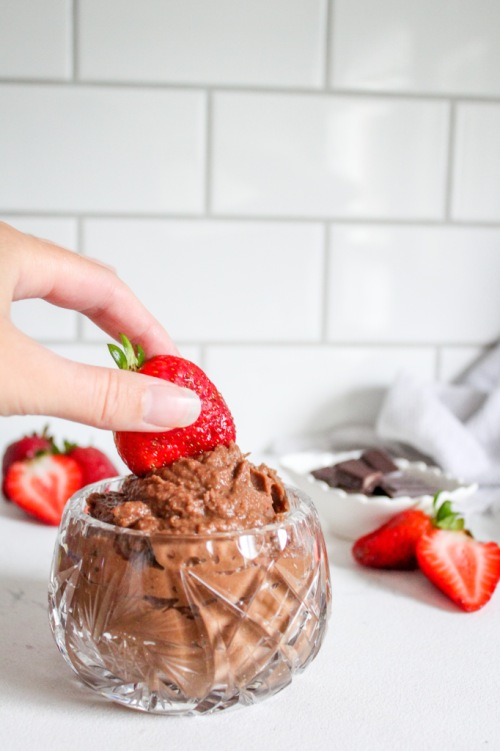
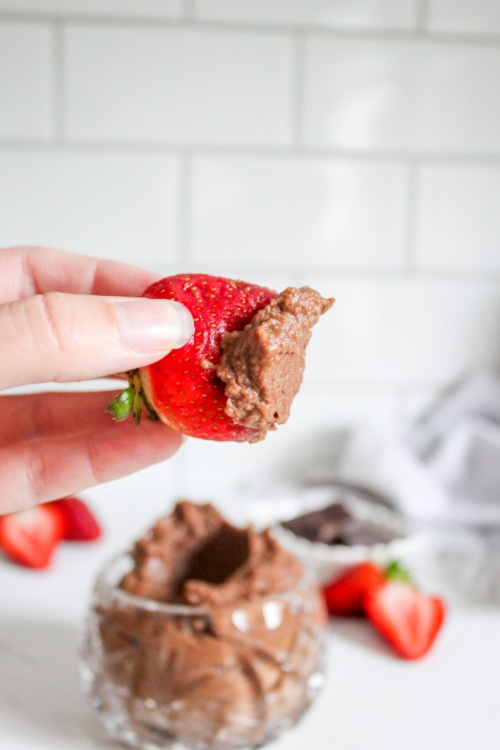
Y’all know I love a good healthy snack, and this is that. Full of protein, fibre, iron and CHOCOLATE. How do you eat chocolate hummus, you ask? Well, if not by the spoonful, then perhaps with fruits, on toast or alongside some salty pretzels. Follow your heart.
Here is what you will need for this recipe:
- Chickpeas (I always use dry chickpeas that I soak overnight and cook for an hour – they make dips much smoother than the canned stuff)
- Cocoa powder
- Maple syrup
- Vanilla
- Salt
This recipe is flexible, depending on your taste. If you love chocolate, you can choose to add more cocoa powder, or if you would like a subtler chocolate flavour, add less. Same with the sweetness level. If you enjoy really sweet desserts, add more syrup. If you are like me and prefer less sweet, add the amount you see in the recipe.
Let’s do the damn thing!
Chocolate Hummus
Serving size: Makes about 1 cup
Prep time: 5 minutes
Inactive time (for soaking): 8 hours
Cook time: 1 hour
Ingredients:
- 3/4 cup dry chickpeas (or 2 cups canned, rinsed very well)
- 3 – 4 tbsp cocoa powder
- 3 tbsp maple syrup (or more, to taste)
- 1/2 tsp pure vanilla extract (optional)
- 1/4 tsp salt
Instructions:
- If working with dry chickpeas (recommended for a smoother consistency), cover chickpeas with two inches of water and soak overnight. Drain, rinse and transfer to a medium-sized pot. Cover with two inches of water and bring to a boil. Reduce heat to a rolling simmer and cook chickpeas, lid off, for one hour or until tender. If working with canned chickpeas, skip this step.
- Add cooked chickpeas to a food processor, along with three tablespoons of cocoa powder, the syrup, salt and the vanilla, if using. Blend until smooth, scraping down the sides of your food processor every so often. Taste and add more cocoa or syrup, if desired.
- Transfer hummus to an airtight container if not serving immediately and store in the fridge for up to four days.
The post Chocolate Hummus appeared first on Never. Not. Eating..
]]>The post Roasted Vegetable Quinoa Bowl appeared first on Never. Not. Eating..
]]>
I’m not worried though, because this quinoa bowl will get me back on track. All kidding aside, I have been eating this for the last two weeks because it is so, so good. And so, so versatile. You can substitute whatever veggies you love in place of the ones that I have included in this recipe.
The base of this bowl is quinoa. It’s an ancient supergrain I love eating because it’s packed with protein, and as a vegetarian, it’s a quick go-to. When I was in Peru, I found an astounding amount of dishes incorporated quinoa. Soups, especially. And if you follow me on Instagram (@nevernoteatingca), you may have read my “Avocado Toast” post and learned about the unfortunate food struggles I had while traveling, leading me to play it safe at restaurants and regularly order the quinoa soup. The Peruvians got me hooked.
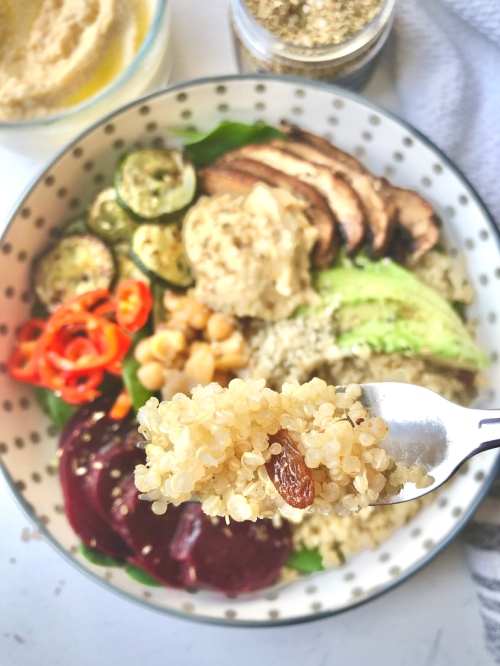
To cook the quinoa, I always toast the grains in a bit of olive oil for a minute, then add chopped garlic and saute for a quick sec before adding the salt and water. I find the garlic bumps it up to a new level that I can no longer do without.
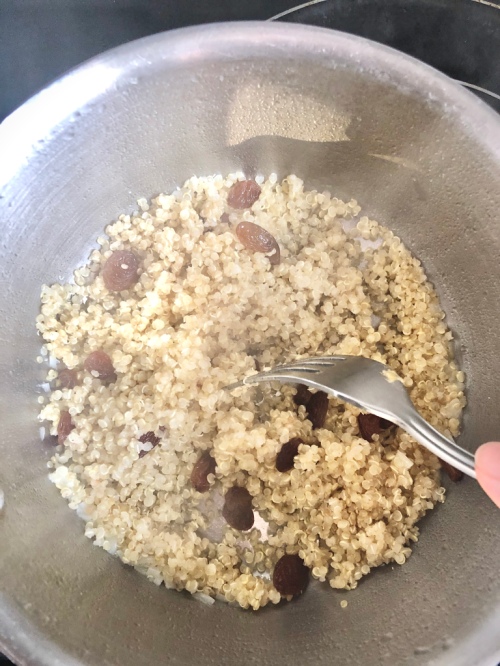
The other trick I use in this recipe that I do whenever I make any grain (because I’m OBSESSED), is to toss in a handful of raisins during the “5 minute stand time” and put the lid back on so that the raisins plump up with the steam. Use golden, sultana or even regular raisins…it don’t matter, boo. It lends a little sweet, juicy pop and why wouldn’t you want that?!
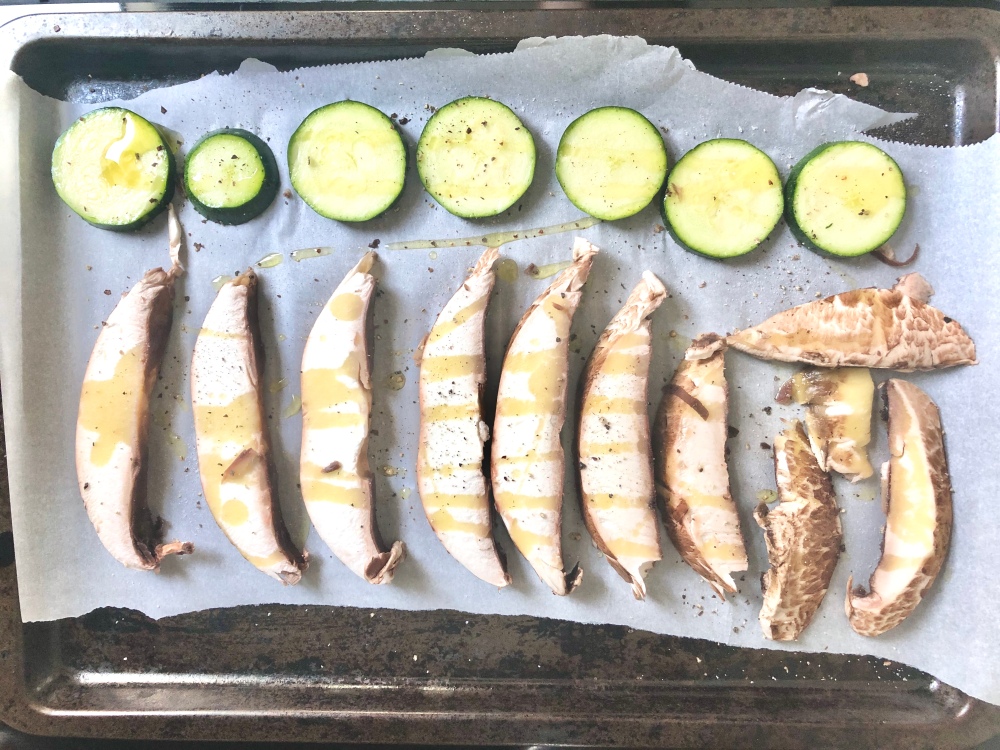
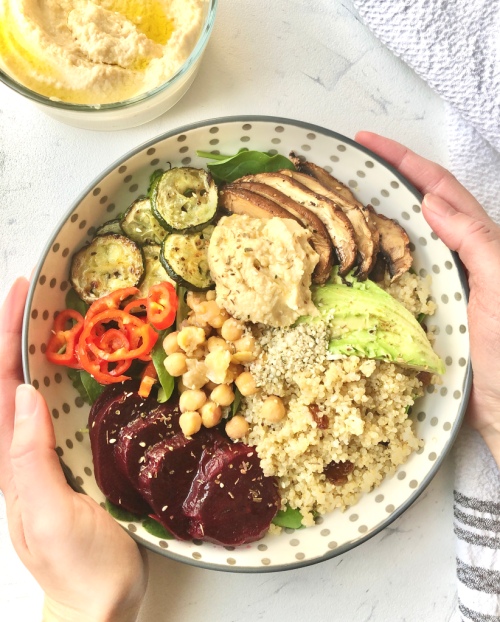
The veg – My favourite veggie in this bowl is the portobello mushrooms. After roasting in the oven, they take on a meaty texture and their earthy, umami flavour just take this dish over the top. I. Can’t. Even. I also roasted up some beets and zucchini which both lend a different textural component and are healthy AF. Use whatever vegetables you have left over in your fridge…we are adaptable here.

Toppings: Let’s start with the winning component of this dish – Hummus. You may have seen my Homemade Hummus Three Ways post, and I highly encourage you to follow it and make your own hummus, but, of course, you could go with store-bought. I pinky promise you it is NOT the same, though. The recipe is so easy, and it’s honestly velvety smooth, flavourful and the perfect topping to this bowl. I always just use the roasted garlic hummus for this bowl. Who needs a dressing?!
The other toppings I used include: Fresh avocado (duh!), hemp hearts (I use the ones found here), chickpeas, tiny sweet peppers, and baby spinach and kale (as you can see in the photo these are more ‘bottomings’). Top it with whatever you can’t live without.
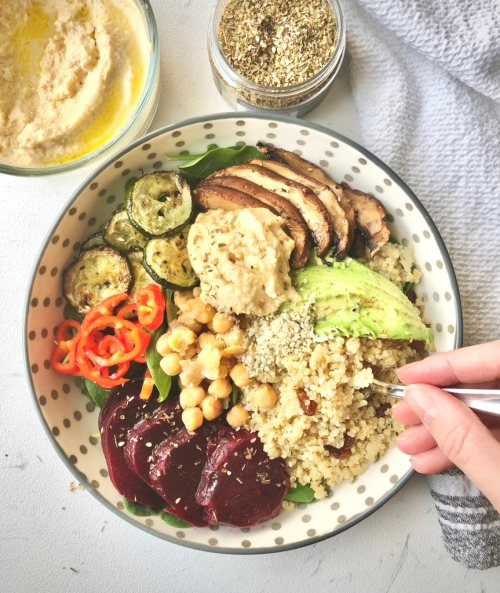
Put it all in a bowl, drizzle with a teeny bit of olive oil, sprinkle with za’atar and call it lunch (or dinner)!
Roasted Vegetable Quinoa Bowl
Serving size: 2
Prep time: 10 minutes
Cook time: 1 hour and 15 minutes (mostly for the beets to roast)
Ingredients:
- 3-4 beets
- 2 large portobello mushrooms, cleaned and sliced
- 1 zucchini , sliced into coins
- 1/2 cup quinoa
- 1 clove garlic, minced
- 1 cup water
- 1/4 cup sultana raisins (optional)
- Homemade Hummus
- salt
- pepper
- olive oil
Extra toppings (all are optional, but you should probably include them):
- 1/2 avocado, diced
- 1/2 bell pepper, diced
- 1/2 cup chickpeas
- 2 cups greens (I use baby spinach and kale)
- hemp hearts
- olive oil
- za’atar
Instructions:
- Preheat your oven to 400 degrees F.
- Start with the beets – Place washed beets on a long piece of tin foil. Wrap the beets up like a present, making sure there are no holes in the package where the steam can escape. Place on a baking tray in the oven for an hour and 15 minutes, or until the beets are tender enough to slide a butter knife easily into the centre. Remove the beets and carefully open the tin foil package. Let the beets sit for one minute. Use a paper towel to hold a beet in one hand and another paper towel to peel away the skin of the beet in your other hand. The skins should remove easily when the beets are fully cooked. Rinse the beets and set aside.
- Place mushrooms and zucchini on a parchment lined baking sheet. Drizzle with one tablespoon of olive oil, a few grinds of black pepper and a generous pinch of salt. Toss to evenly coat. Bake alongside the beets for 15 minutes, flip and bake for another 10-15 minutes, until tender and browned.
- In a medium saucepan, add 1 tbsp olive oil over medium-high heat. Add the quinoa and let toast, stirring around occasionally for 1-2 minutes. Add garlic and saute for 30 seconds or until fragrant. Add water and a big pinch of salt and bring to a boil. Turn heat down to a simmer, cover and leave for 15 minutes without lifting the lid. When it is done, turn heat off, quickly lift the lid and add the raisins, put the lid back on and let the quinoa stand off of the heat for five minutes. Fluff with a fork before serving.
- In two serving bowls, lay down your greens and top with the quinoa and raisins. Add your diced beets, zucchini and mushroom slices to each. If using, also add avocado, peppers, chickpeas and hemp hearts. Top each bowl with a large dollop (or two) of hummus. Finish with a drizzle of olive oil and a sprinkling of za’atar spice.
The post Roasted Vegetable Quinoa Bowl appeared first on Never. Not. Eating..
]]>The post Homemade Hummus Three Ways appeared first on Never. Not. Eating..
]]>
At first, I couldn’t figure hummus out. It was always so grainy and never smooth like the store-bought ones. Why?! Someone please tell me why!? And then, after much research, I got it. I was using canned chickpeas instead of dry. Soaking dry chickpeas is a gamechanger.
The prep time on this recipe seems outrageous, but it’s really just a put-dry-chickpeas-in-bowl-and-fill-with-water-and-forget-about-overnight-kind-of-thing. The next day, they cook in a pot until soft and then a quick bim-bam-boom in the food processor and we have velvety smooth hummus. And trust me, it’s WAY better than the store bought option!
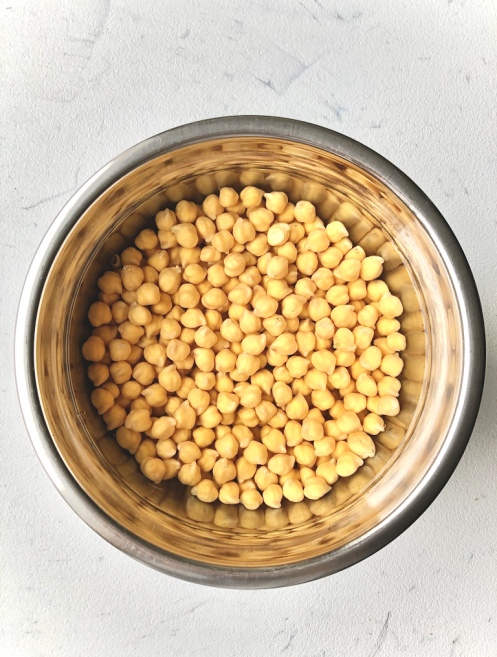
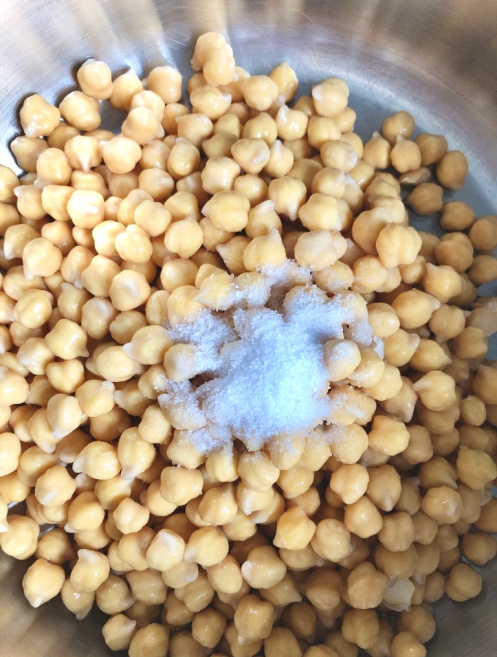
Okay, I’ll break it down a bit more. FIRST – Soak the chickpeas for at least 12 hours. I always throw them in a bowl and cover them with a few inches of water and leave overnight. They practically double in size. It’s miraculous. NEXT – Rinse them and put them in a large pot with fresh water (covering them with an extra two inches), baking soda (helps to soften) and salt (flavour bomb). Bring to a boil and then reduce heat to a simmer, cover and cook until soft – about an hour and 45 minutes.
While the chickpeas are boiling, set your oven to 400 degrees F and wrap up a few golden beets in a little tin foil package. Place on a baking tray and put in the oven for about an hour and fifteen minutes. Remove and carefully open the package – when the steam escapes, it is extremely hot! Take two paper towels and hold a beet in one and use the other to peel off the skin. Rinse off your peeled beets under cold water, cut into smaller chunks and set aside.

To roast the garlic – Turn the oven down to 375 degrees F when the beets are done roasting. Slice the top quarter of the entire garlic head off. Your knife will take off the top tip of each clove and after cutting, you should be able to see the actual cloves. Drizzle with olive oil and wrap up in another cute little tin foil package. Roast in the oven for an hour, or until garlic is tender.

You have an hour to yourself now. May I recommend making coffee, turning on the Food Network and putting your feet up?!
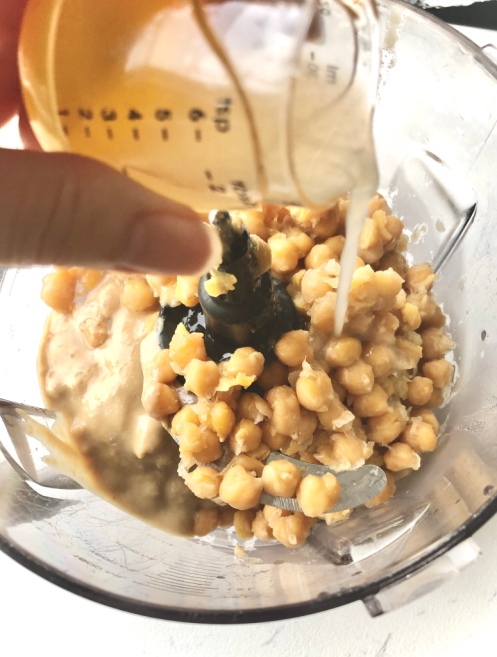
When the chickpeas are done, drain and transfer them to a food processor. I have the full Ninja Blender Set (found here) and it is amazing. Squeeze a few of the roasted garlic cloves out of their skinned casing and add to processor. Add tahini, salt and lemon juice and blend until smooth. Begin to drizzle ice cold water into the hummus in a slow stream. continue to blend for a few more seconds. Taste the hummus and add more salt if needed.

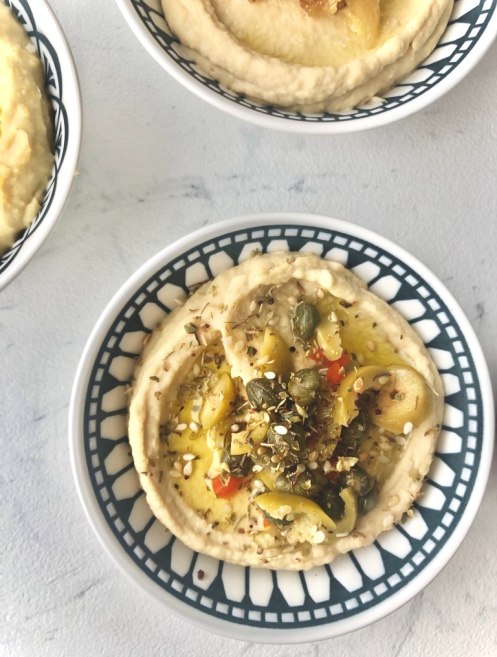
Remove two-thirds of the hummus from the food processor and split into two bowls (or containers if serving at a later time). To one bowl, add chopped up green olives and capers, a drizzle of olive oil and a generous pinch of za’atar. If you don’t have za’atar in your pantry, get to the grocery store NOW and buy it, or if you are lazy like me, order it here through Amazon. It’s worth it.
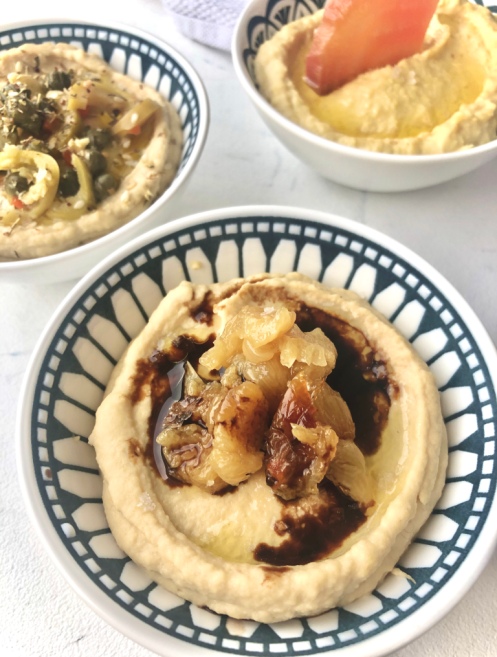
To the other bowl, squeeze the remaining garlic cloves right on top and add a drizzle of olive oil, your favourite balsamic vinegar (I use this fig balsamic) and a pinch of flaky sea salt.
To the other third of hummus still remaining in the processor, add one golden beet plus half of another, chopped, and pulse a few times.
Blend until the beet pieces have incorporated. Transfer to a bowl and top with more beet slices and some flaky salt. Earthy, salty, nutty…delicious!

Three different dips. One recipe. Holiday. Ready.

Homemade Hummus Three Ways
Prep time: 12 hours
Cook time: 2 hours
Ingredients:
- 1 cup dry chickpeas
- 1/2 tsp baking soda
- 1.5 tsp salt, separated
- 2 medium-sized golden beets (or any kind)
- 1 head of garlic
- olive oil
- 1/2 cup tahini paste
- 2 tbsp freshly squeezed lemon juice (about half a lemon)
- ice cold water
- 1.5 tbsp capers
- 1.5 tbsp sliced olives
- za’atar
- balsamic vinegar (a sweet-flavoured one goes well with this recipe)
- flaky sea salt (optional)
Instructions:
- Place chickpeas in a bowl and cover with a few inches of water. Soak overnight or for 12 hours.
- Preheat oven to 400 degrees F.
- Drain and rinse chickpeas and place in a large pot with baking soda and 1 teaspoon of salt. Cover with 2 inches of water and bring to a boil. If you see foam rising to the top, skim it off with a spoon and discard. Turn the heat down and simmer, covered, for an hour and 45 minutes, or until chickpeas are soft and tender.
- In the meantime, get started on your beets. Place washed beets on a long piece of tin foil. Wrap the beets up like a present, making sure there are no holes in the package where the steam can escape. Place on a baking tray in the oven for an hour and 15 minutes, or until the beets are tender enough to slide a butter knife easily into the centre. Remove the beets and carefully open the tin foil package. Let the beets sit for one minute. Use a paper towel to hold a beet in one hand and another paper towel to peel away the skin of the beet in your other hand. The skins should remove easily when the beets are fully cooked. Rinse the beets in cold water and set aside.
- Turn the oven down to 375 degrees F and start prepping your garlic. Slice the top quarter of your garlic head off and drizzle the top of the visible cloves with a tablespoon of olive oil. Wrap in a tight tin foil package, place on a baking tray and roast in the oven for 50 minutes to an hour. The cloves will caramelize and be super tender.
- Add a few ice cubes to a small measuring cup filled with cold water and set aside. When the chickpeas are done cooking, drain and transfer to a food processor. Add the tahini, lemon juice and 1/2 teaspoon of salt. Squeeze three of the roasted garlic cloves out and add to food processor. Blend for about a minute or until smooth. Remove ice cubes from measuring cup and measure out one-quarter cup of the ice-cold water. Turn the motor on and slowly drizzle the water into the food processor. Blend for another minute. Scoop out two-thirds of the hummus into two separate bowls (or airtight containers topped with a thin layer of olive oil if not serving immediately). Top one of the bowls with the capers, sliced olives, a drizzle of olive oil and a generous sprinkling of za’atar. Top the other bowl with the remaining cloves of roasted garlic, olive oil, a trickle of sweet balsamic vinegar (I use a fig vinegar) and a pinch of flaky sea salt.
- To the remaining third still in the processor, add one of the golden beets plus half of the second (diced). Pulse a few times and then blend until the hummus is smooth. Use a spatula to transfer to another bowl and top with the last half beet (chopped), olive oil and some more flaky sea salt.
- Serve hummus dips with raw vegetables, crackers, pita or naan bread.
- To store leftover hummus, add to an airtight container with a thin layer of olive oil on top and place in fridge for up to one week.
The post Homemade Hummus Three Ways appeared first on Never. Not. Eating..
]]>