The post Strawberry Honey Ginger Galette appeared first on Never. Not. Eating..
]]>
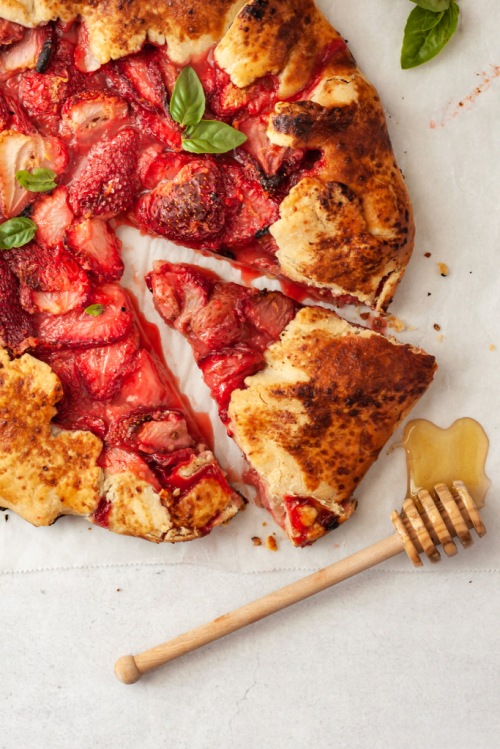
WHAT IS A STRAWBERRY HONEY GINGER GALETTE?
Sometimes I just need a WAHBAM, hit-me-in-the-face kind of dessert and I think this is it. We all know and love the humble strawberry, but sometimes she gets lonely all by herself. Therefore, I introduced her to a new friend in this recipe and they form a perfect match. Strawberry + ginger = BFFs.
I’ll be straight up with you – if you don’t like ginger, this recipe probably isn’t for you, however, I’m okay with you leaving it out. I’ll allow it, just this once. But, if you do like ginger, then why not switch up your summer dessert game? It adds a little kick that only ginger can give and I’m here for it.
THE INGREDIENTS
This recipe is not complicated. It’s actually quite simple, and requires minimal ingredients. Here is what you will need:
For the Dough:
- Flour
- Butter
- Salt & Ginger powder
For the filling:
- Strawberries
- Fresh ginger
- A lemon
- Honey
- Cornstarch
- An egg + sanding sugar (for the egg wash)
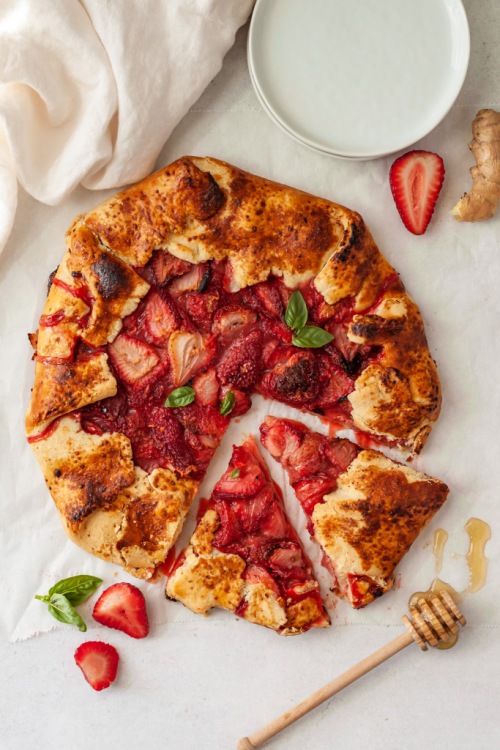
THE PASTRY DOUGH
You can definitely use store-bought pie dough for this, but why would you when making it yourself is uber easy?! All you need to do is throw all ingredients into a food processor and it comes together in a jiffy. You then roll it out, fill it up, fold it over, bake it and it becomes a gorgeously rustic little galette that will please all of your ginger-loving friends.
To ensure your pie dough is extra flaky when baked, you need to make sure your butter is super cold. I like to cube up the required amount and put the cubes in the freezer while I measure out the rest of the ingredients. This allows the butter to melt slower and create pockets of air that form those gorgeous layers in your crust.

THE FILLING
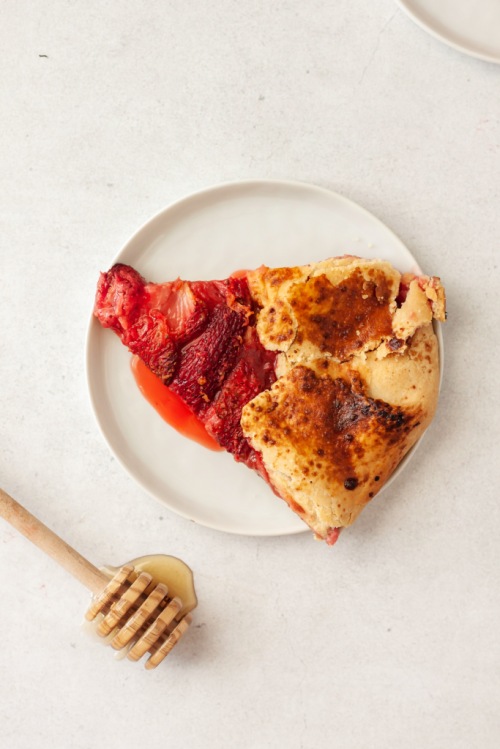
Firstly, you are going to want to prepare your strawberries. If they are smaller, halve them, and if they are larger, I like to cut them into thirds to have nice, big pieces in the galette. They will shrink down as they cook, so keep this in mind!
When your strawberries are ready, place them in a bowl with the other filling ingredients and that is *literally* it. Let it sit to thicken up while you roll out your dough – how easy is that?!
OTHER GLUTEN-FREE RECIPES
Gluten-Free Crepes with an Apple Cinnamon Compote (the perfect weekend breakfast)
Chocolate Chai Ganache (a luscious cake filling)
Gluten-Free Stone Fruit Galette (another open face pie for you to enjoy)
Gluten-Free Zucchini Galette (another galette, but a more savoury option)
TOOLS NEEDED TO MAKE THIS STRAWBERRY HONEY GINGER GALETTE
Click on the images below to see what I use for this recipe.


This post contains affiliate links and I may earn a small commission when purchases are made after clicking the links, at no cost to you – Thank you!
STRAWBERRY HONEY GINGER GALETTE
Serving size: 7-8
Prep time: 30 minutes (much of this is inactive time)
Cook time: 30 minutes
Ingredients:
- 1 1/2 cups all purpose flour
- 1/2 tsp salt
- 1/2 tsp ginger powder
- Half cup + 1 tbsp butter, cubed and very cold*
- 1.5 pounds fresh strawberries, halved
- zest of one lemon
- 1 1/2 tbsp lemon juice
- 1/2 – 1 tbsp fresh ginger, minced**
- 1 tbsp cornstarch
- 2 tbsp honey
- 1 egg, beaten
- 1 tbsp sugar (optional)
Instructions:
- Start with the dough by adding the flour, salt and ginger powder to a food processor and pulse to combine. Add the cold butter and continue to pulse until dough begins to resemble peas. Drizzle in one tablespoon of ice cold water and continue to pulse until the dough comes together. This may require an extra tablespoon or so of water, but make sure to add it slowly. Finally, form dough into a disc, cover in plastic wrap and refrigerate for 30 minutes.
- While the dough is resting, create the filling. Combine the strawberries, zest, lemon juice, ginger, honey and cornstarch in a bowl with a pinch of salt and set aside.
- Place the dough disc onto a lightly floured surface and roll it out to 1/8-inch thick. Carefully transfer to a parchment lined baking sheet. Scoop the filling into the middle of the pie dough with a slotted spoon, trying to avoid adding the excess liquid. Spread the filling out, leaving a 1.5 inch border all the way around. Work your way around the perimeter, folding the edges of the dough overtop of the filling. Place the entire baking sheet in the fridge to firm up the butter again, while the oven preheats.
- Preheat your oven to 400 degrees Fahrenheit.
- When your oven is ready, remove the galette from the fridge and brush the pastry edges with the beaten egg. Sprinkle the sugar over the egg wash and bake for 30-35 minutes, or until crust is golden brown. Remove from oven and let cool for 10 minutes before serving!
NOTES:
*I like to cube my butter ahead of time and place it in the freezer while I prep the other ingredients.
**Depending on how much of a kick you want from the ginger, I would measure it according to the people you are serving. If you just want a hint of ginger, put in 1/2 tbsp. If you want to really taste it, add up to 1 tbsp.
The post Strawberry Honey Ginger Galette appeared first on Never. Not. Eating..
]]>The post Gluten-Free Zucchini Galette appeared first on Never. Not. Eating..
]]>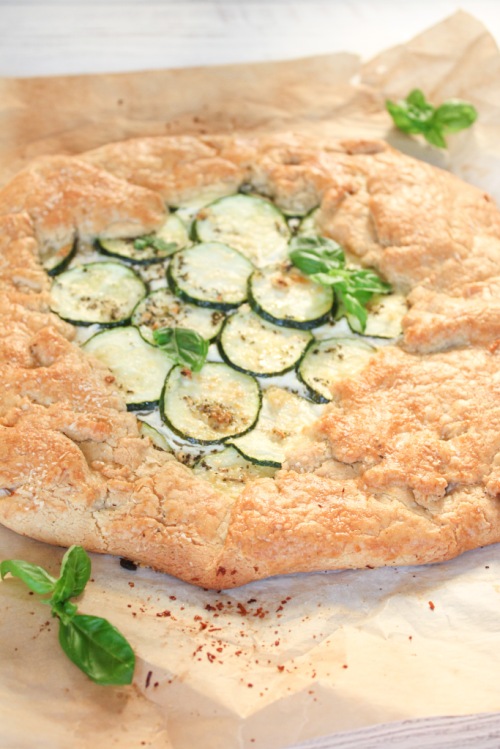
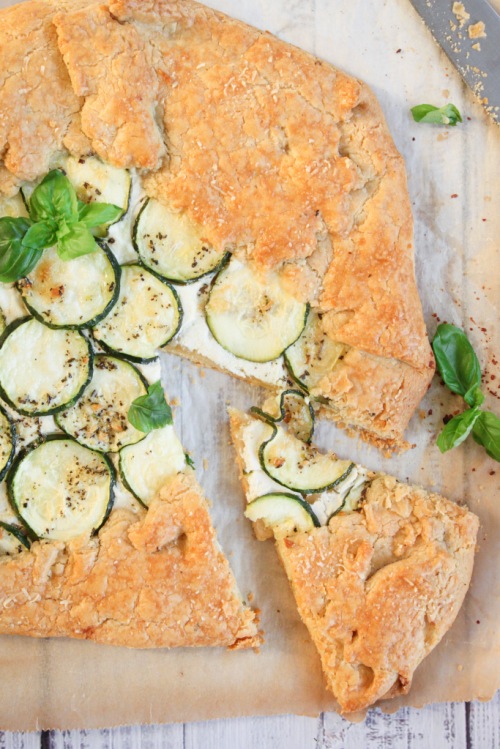
If you know me, you know I love a good galette. And I love mixing it up and creating both sweet and savoury galettes. I’ve tried everything from stone fruit to tomato to apple, and now, zucchini! You can literally wrap any produce in flaky pastry and 90% of the time it will be tasty. WORD.
I decided to make this galette gluten-free, mostly because I avoid gluten as much as I can, but also because I just bought an All-Purpose Gluten-Free Flour by Bob’s Red Mill that I was really excited to try. Of course, anything made with gluten-free flour has a different taste than that made with regular, wheat flour, but I must say, I was impressed with how this crust held together and how flaky it was. If you eat regular wheat flour, feel free to swap in some all-purpose in it’s place!
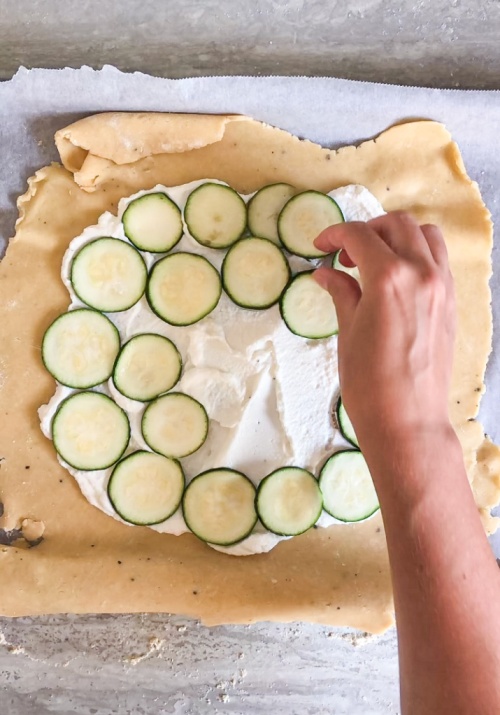
Let’s talk filling – Smooth, lemony ricotta. This is my favourite part. Extra creamy ricotta with lemon juice and zest, salt and pepper whipped together to make the dreamiest of beds for the lucky zucchini. Smear the crust with as little or as much as you want. The addition of lemon brings a brightness to the dish that makes it perfect for Spring or Summer.
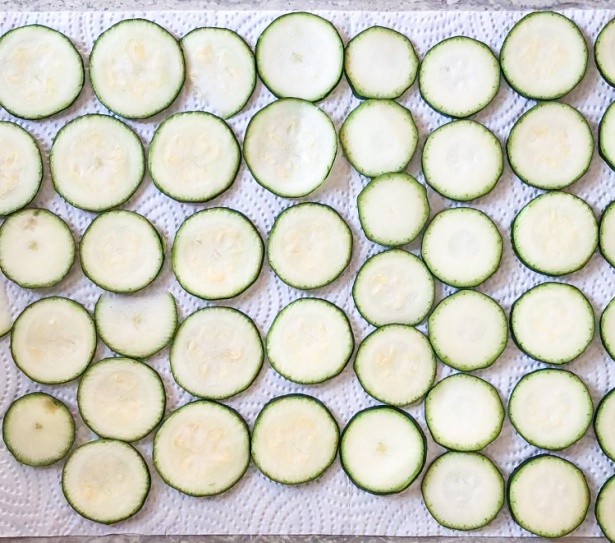
The leading actress here is the zucchini. A few important tips that will help you achieve the ideal galette would be to slice the zucchini about a quarter of an inch thick, making sure they are all the same thickness, place the slices onto paper towels for 30 minutes before assembling your tart and salt them well. This allows the (abundant) excess water to be pulled out, avoiding a soggy mess.

The dough – Finally, let’s talk about the dough. I used to be intimidated when making pastry dough, but it’s actually quite an easy skill to master. The most important part of pastry is to use very cold butter. If the butter is cold, it melts down slower into the flour and, in turn, creates air pockets, which make for flaky pastry. To ensure your butter is perfect, cut it into cubes and store it in the fridge up until you need to use it. After combining it with the flour and forming a disc shape, wrap it in plastic wrap and return it to the fridge to firm up again. After I roll out the dough and assemble the galette, I like to pop it in the fridge yet again for ten minutes. Tip: Assemble your galette, put it in the fridge and set your oven. When your oven is ready, the galette can go right from your fridge to that 400 degree heat!
That’s it…Not too complicated, right?!
Gluten-Free Zucchini Galette
Serving size: 4
Prep time: 15 minutes
Chill time: 30 minutes
Cook time: 30 minutes
Ingredients:
For the crust:
- 1 1/2 cups gluten-free flour
- 1/2 tsp salt
- 1/4 tsp black pepper
- 1/3 cup parmesan cheese, grated, plus more for topping
- 3/4 cup cold butter, cubed
- 1 tbsp white vinegar
- 3-5 tbsp ice-cold water
For the ricotta filling:
- 1 cup ricotta cheese (I use extra creamy)
- zest of one lemon
- 1 tbsp lemon juice
- a few grinds black pepper
- pinch of salt
- 1 small zucchini, sliced into 1/8-inch rounds
- 2 tbsp olive oil
- 1/2 tsp dried basil
- 1 clove garlic, minced
- 1 egg, beaten
Instructions:
For the crust:
- To a food processor, add the flour, salt and pepper and pulse a few times to combine. Add parmesan cheese and the cold butter and pulse again until dough resembles small pea shape crumbs (see photo). Add vinegar and two tablespoons of ice cold water and pulse. Continue to add water, one tablespoon at a time, until dough begins to come together. Typically, I use around four tablespoons in total. Dump the dough onto a piece of plastic wrap, form into a disc and then wrap and place in fridge to chill for 30 minutes.
- Prepare the zucchini by laying the rounds onto paper towels and sprinkling salt on the tops to draw out any excess water. Let sit for at least 30 minutes.
For the ricotta filling:
- To a small bowl, add the ricotta, zest, lemon juice, pepper and salt and mix to combine. Place in the fridge until ready to assemble.
For the rest of the galette:
- Combine olive oil, basil and garlic in a small bowl. Set aside.
- Flour your work surface and remove the dough from the fridge. Roll out into a circle about 1/4-inch thick. Carefully transfer the dough to a parchment lined baking sheet.
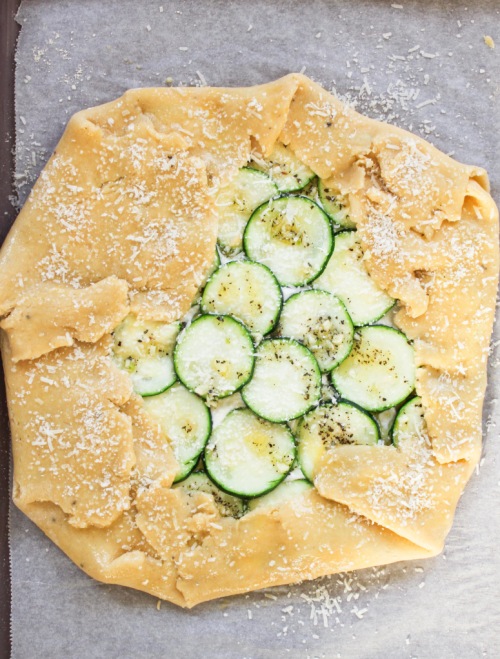
- Spread the ricotta mixture onto the dough, leaving a 2-inch border all the way around. Arrange the zucchini slices on top of the ricotta. Drizzle the olive oil mixture on top of the zucchini. Fold over the edges of the pastry. Preheat your oven to 400 degrees Fahrenheit and transfer the galette to the fridge for 10 minutes, or until the oven is ready. Right before placing the galette into the oven, brush the exposed pastry edges with the egg wash and sprinkle on some extra parmesan cheese, if desired. Bake for 25-30 minutes, or until galette is golden brown in colour.
The post Gluten-Free Zucchini Galette appeared first on Never. Not. Eating..
]]>