The post Flourless Oatmeal Blueberry Cookies appeared first on Never. Not. Eating..
]]>
WHAT ARE FLOURLESS OATMEAL BLUEBERRY COOKIES?
These healthy cookies are a guilt-free, post-dinner or pre-workout snack! They are made in one bowl, with only natural ingredients and no refined sugar. I make them every week because I refuse to allow dinner to be my final meal of the night.

WHY I LIKE THESE COOKIES
I don’t just like these cookies – I am obsessed with them! The blueberries add the juiciest “pop” and a perfect sweetness that is unmatched, in my opinion. I also feel good about eating them (every day), as they only contain natural ingredients, all of which are pantry staples.

THE INGREDIENTS
You only need a few pantry ingredients to make this recipe:
- banana
- peanut butter
- egg
- vanilla
- maple syrup
- cinnamon
- salt
- oats
- blueberries
MAKING FLOURLESS OATMEAL BLUEBERRY COOKIES
You will honestly be amazed with how easy these are to make. Grab a big mixing bowl and add all of the wet ingredients – a mashed banana, peanut butter, egg, vanilla and syrup. Whisk together – that’s right, you don’t even need an electric mixer!
Add in the dry ingredients – the salt, cinnamon and oats. Switch over to a spatula to make sure everything has been mixed fully. Finally, fold in the blueberries and save a few to put on top of the cookies before baking. Scoop the dough onto a parchment lined cookie sheet, using a large cookie scoop and flatten them with the palm of your hand (they will not rise in the oven, so no need to space them too far apart). Bake for 12-14 minutes and enjoy!

TIPS
- Choose an all-natural nut butter to maintain the healthiness of this recipe (look at the ingredient list on the jar – it should only have one ingredient)!
- You can use fresh or frozen blueberries for this recipes, either one works beautifully!
- The cookie dough will be on the wetter side – don’t worry, they will bake up nicely and easily release from the baking sheet when they are fully cooked.
OTHER HEALTHY TREATS YOU NEED TO TRY
Vegan Rice Crispy Chocolate Treats (a fun, bite-sized snack)
No-Measure Oatmeal Almond Butter Cookies (skip the measuring with these perfect failproof cookies)
Healthy Pumpkin Oatmeal Chocolate Chip Cookies (the perfect Fall version of these Flourless Oatmeal Blueberry Cookies)
TOOLS I USED TO MAKE THESE FLOURLESS OATMEAL BLUEBERRY COOKIES
Click on the images below to see what I used for this recipe.


FLOURLESS OATMEAL BLUEBERRY COOKIES
Servings: Makes 8 large cookies
Prep time: 10 minutes
Cook time: 13 minutes
Ingredients
- 1 very ripe banana, mashed
- 1/4 cup peanut butter (or any nut butter)
- 1 tbsp pure vanilla extract
- 2 tbsp pure maple syrup
- 1 large egg
- 1/2 tsp cinnamon
- 1/2 tsp salt
- 2 1/4 – 2 1/2 cups rolled oats
- 1 cup fresh or frozen blueberries
Instructions
- Preheat your oven to 350 degrees Fahrenheit.
- In a large bowl, whisk together the mashed banana, peanut butter, vanilla and maple syrup. Next, add in the egg and whisk until fully combined.
- Add the cinnamon, salt and 2 1/4 cups of oats to the bowl. Mix with a spatula. If the dough is very wet, add in the extra 1/4 cup of oats. The mixture should be slightly on the wetter side.
- Fold in the blueberries and then use a 1.5 tablespoon cookie scoop to form 12 cookies (alternatively, roll into balls using wet hands). Place on a parchment lined baking sheet and use your palm to flatten each cookie. As these will not spread, you don’t need to leave too much space between them.
- Bake for 13 minutes, remove from oven and let cool for a minute on the baking sheet before transferring to a wire rack to cool completely.
- Once they have fully cooled, store in an airtight container for up to four days.

The post Flourless Oatmeal Blueberry Cookies appeared first on Never. Not. Eating..
]]>The post Healthy Pumpkin Oatmeal Chocolate Chip Cookies appeared first on Never. Not. Eating..
]]>
WHAT ARE PUMPKIN OATMEAL CHOCOLATE CHIP COOKIES?
These cookies are a one-bowl miracle – they are simple to make, healthy and perfect for autumn. Refined-sugar free, these little treats can be eaten without guilt, for breakfast or as a snack in-between meals.

WHY I LIKE THESE PUMPKIN OATMEAL CHOCOLATE CHIP COOKIES
Other than for obvious reasons, I love these cookies because they are a fun and healthy way to incorporate pumpkin into a recipe. It has proven to be challenging to find recipes made with pumpkin puree that aren’t packed with processed sugars and unhealthy fats. I also love making my own pumpkin puree (recipe found here) to ensure I know exactly what is going into my baking!

THE INGREDIENTS
A few simple pantry ingredients are all you will need to make these cookies:
- Banana
- Pumpkin puree (NOT pie filling)
- Cashew butter (or any nut butter)
- Vanilla
- Maple syrup
- An egg
- Spices (pumpkin pie and cinnamon)
- Oats
- Dark chocolate chips
MAKING HEALTHY PUMPKIN OATMEAL CHOCOLATE CHIP COOKIES
The first thing you will want to do is whisk together all of your wet ingredients – mash up the banana and add in the puree, nut butter, vanilla, maple syrup and egg.
Add your spices, some salt, the oats and chocolate chips right into the wet ingredients and mix with a spatula. Once combined, use a large cookie scoop to portion your cookies, placing them on a parchment lined baking sheet. These will not spread out, so you don’t need to worry about spacing them out too much. Flatten them with the palm of your hand and bake for 11-14 minutes.

TIPS
- Choose an all-natural nut butter to maintain the healthiness of this recipe (look at the ingredient list on the jar – it should only have one ingredient)!
- Don’t use pumpkin pie filling. Make sure you have pure pumpkin puree – click here for a recipe, or find it canned at any grocery store.
- The cookie dough will be on the wetter side – don’t worry, they will bake up nicely and easily release from the baking sheet when they are fully cooked.
OTHER HEALTHY TREATS YOU NEED TO TRY
No-Measure Oatmeal Almond Butter Cookies (skip the measuring with these failproof cookies)
Vegan Rice Crispy Chocolate Treats (a fun, bite-size snack)
Vegan Ice Cream Bars (like a Magnum, but vegan)

TOOLS I USED TO MAKE THESE PUMPKIN OATMEAL CHOCOLATE CHIP COOKIES
Click on the images below to see what I used for this recipe.
Healthy Pumpkin Oatmeal Chocolate Chip Cookies
Servings: Makes a dozen cookies
Prep time: 10 minutes
Cook time: 13 minutes
Ingredients
- 1 very ripe banana, mashed
- 1/4 cup pure pumpkin puree
- 1/4 cup cashew butter (or any nut butter)
- 1 tsp pure vanilla extract
- 2 tbsp pure maple syrup
- 1 large egg
- 1/2 tsp pumpkin pie spice
- 1/4 tsp cinnamon
- 1/2 tsp salt
- 2 1/4 – 2 1/2 cups rolled oats
- 3/4 cup sugar-free dark chocolate chips
Instructions
- Preheat your oven to 350 degrees Fahrenheit.
- In a large bowl, whisk together the mashed banana, pumpkin puree, cashew butter, vanilla and maple syrup. Add in the egg and whisk until fully combined.
- Add the pumpkin pie spice, cinnamon, salt and 2 1/4 cups of oats to the bowl. Mix with a spatula. If the dough is very wet, add in the extra 1/4 cup of oats. The mixture should be slightly on the wetter side.
- Fold in the chocolate chips and then use a 1.5 tablespoon cookie scoop to form 12 cookies (alternatively, roll into balls using wet hands). Place on a parchment lined baking sheet and use your palm to flatten each cookie. As these will not spread, you don’t need to leave too much space between them.
- Bake for 13 minutes, remove from oven and let cool for 2 minutes on the baking sheet before transferring to a wire rack to cool completely.
- Once they have fully cooled, store in an airtight container for up to four days.

The post Healthy Pumpkin Oatmeal Chocolate Chip Cookies appeared first on Never. Not. Eating..
]]>The post Vegan Rice Crispy Chocolate Treats appeared first on Never. Not. Eating..
]]>
WHAT ARE VEGAN RICE CRISPY CHOCOLATE TREATS?
I’m telling you, these are such a fun snack – they are basically a peanut butter and rice crispy cereal ball coated in chocolate, and they are so delicious. Not to mention, they are much healthier than the well-known Rice Crispy Treat because they don’t have marshmallows, but stick together with peanut butter and maple syrup instead. They are crispy, light and make for a perfect snack at any time of day!

WHY I LIKE THESE VEGAN RICE CRISPY CHOCOLATE TREATS
I am always trying to reinvent traditional desserts and snacks into healthier versions that I feel good about eating, and this recipe does exactly that. That is why these would be an amazing snack for kids as they are refined sugar-free and have protein and healthy fats from the all-natural peanut butter! I chose to use Lily’s brand sugar-free chocolate to keep these completely refined-sugar free, but you can use any chocolate you would like.

THE INGREDIENTS
To make these snacks, you only need a few simple ingredients that you likely already have in your pantry, including:
- Gluten-free, sugar-free Rice Crispy Cereal
- Natural peanut butter
- Maple syrup
- Vanilla
- Chocolate
- Flaky sea salt (optional)
MAKING VEGAN RICE CRISPY CHOCOLATE TREATS
The first thing you will need to do is create the rice crispy balls. To do this, you will add peanut butter, maple syrup and vanilla in a big bowl and mix to combine. Pour in the Rice Crispy Cereal and use a spatula to incorporate the cereal into the peanut butter mixture. When it’s fully combined, roll small portions of the cereal into small spherical balls. Place them on a parchment lined plate and freeze while making the chocolate coating.
Melt the chocolate over a double boiler and then remove the treats from the freezer and dip into the chocolate until fully coated. Return the chocolate covered treat balls to the parchment lined plate and place in the fridge in order for them to set up.

TIPS
- I like to use a new jar of peanut butter as it has a runnier consistency when first opened, before begin refrigerated – this really helps to easily mix the treat ingredients without making crumbs out of the Rice Crispy Cereal.
- To portion the balls, I use a small cookie scoop so that they are all the same size.
- Use a fork to lift the chocolate-coated treats out of the melted chocolate and tap on the side of your bowl to let any excess chocolate drip back into the bowl.
- Add a tablespoon of coconut oil to the chocolate chips while melting to get a glossier chocolate coating.

OTHER HEALTHY SNACKS YOU NEED TO TRY
No-Measure Oatmeal Almond Butter Cookies (my absolute favourite anytime snack)
Vegan Protein Energy Balls (a great pre-gym snack)
Vegan Ice Cream Bars (the perfect summer treat)
TOOLS I USED TO MAKE THESE VEGAN RICE CRISPY CHOCOLATE TREATS
Click on the images below to see what I use for this recipe.


This post contains affiliate links and I may earn a small commission when purchases are made after clicking the links, at no cost to you – thank you!
Vegan Rice Crispy Chocolate Treats
Servings: Makes 15 small treats
Prep time: 15 minutes
Chill time: 20 minutes
Ingredients
- 1 cup smooth natural peanut butter (see tips above)
- 1/4 cup 100% pure maple syrup
- 1 tsp pure vanilla extract
- 2 cups gluten-free Rice Crispies cereal
- 150 grams dark chocolate
- 1 tablespoon coconut oil (optional)
- flaky sea salt (optional)
Instructions
- In a large bowl, mix together the peanut butter, maple syrup and vanilla until combined. Pour in the cereal and stir with a spatula until fully incorporated into the peanut butter mixture.
- When the mixture is incorporated, use a small cookie scoop to portion the mixture into your hands and roll into spherical shapes – it should make around 15 treat balls. Place them on a parchment lined plate or tray and into the freezer while melting your chocolate.
- Set up a double boiler: Add about an inch of water to a small pot and place it over medium heat. Pour the chocolate into a heat-proof glass bowl and add the coconut oil, if using. Place the bowl on top of the pot to melt the chocolate, stirring regularly, and once the chocolate has melted, remove the bowl from the pot.
- Finally, remove the Rice Crispy treats from the freezer and dip into the melted chocolate, coating fully. Place them back on the parchment lined plate and repeat for all of the treats. Sprinkle with a little bit of flaky sea salt, if desired, and then refrigerate for about 20 minutes or until set.
Store in the fridge for up to 5 days.

The post Vegan Rice Crispy Chocolate Treats appeared first on Never. Not. Eating..
]]>The post Healthy 5-Ingredient Peanut Butter Cups appeared first on Never. Not. Eating..
]]>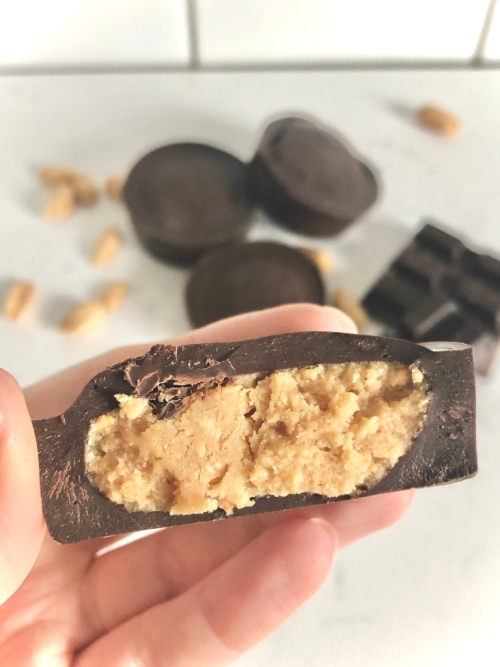
I can’t think of a better duo than chocolate and peanut butter, and I’m sticking close to home with this recipe. No fancy upgrades or add-ins. Just the classic – healthified. Dark chocolate and peanuts are both anti-inflammatory foods and coconut oil is said to enhance brain function. All-in-all, you can never go wrong with knowing exactly what is going into your food.
This simple and quick recipe requires five ingredients that you will likely already have in your pantry:
- Dark chocolate (At least 85%)
- Natural peanut butter (I use my Homemade Peanut Butter)
- Coconut oil
- Vanilla
- Maple syrup
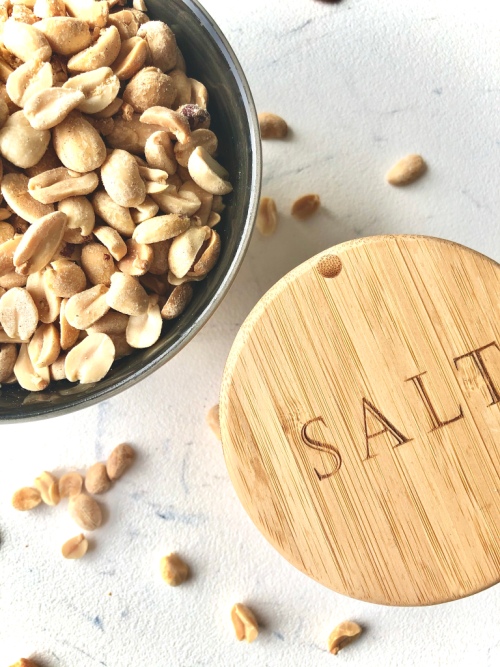
The first step is finding the best peanut butter for the filling. Look at the ingredient list on the peanut butter that you buy. The only ingredient listed should be “dry roasted peanuts.” And maybe “salt.” Otherwise, steer clear. Most peanut butters have a lot of sugar added and stabilizers to prevent oil separation. If you are trying to incorporate more healthy, whole foods into your diet, natural nut butters are best. If you are unimpressed with the price of these at your grocery store, click here to learn how to make your own in less than 10 minutes!
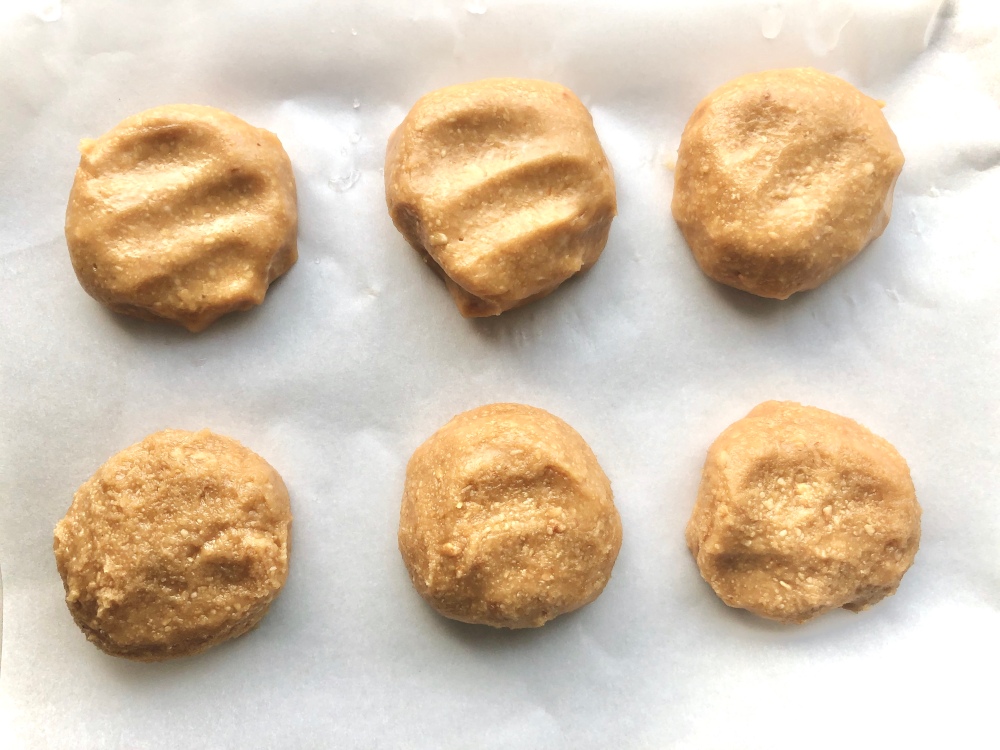
To make the filling, combine the peanut butter with the vanilla and maple syrup. Form into 1-inch balls and flatten on a large plate covered with a piece of parchment paper. Put in the freezer while you prepare the chocolate.
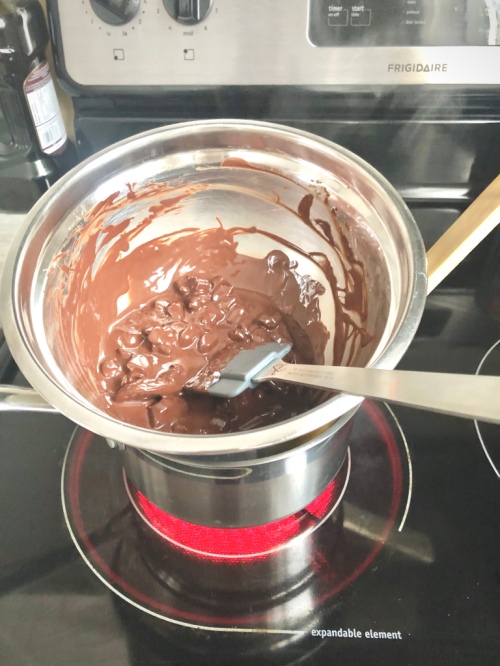
For the chocolate shell, set up a double boiler. Cut up your dark chocolate into small-ish pieces and place in a large, heat-proof bowl with coconut oil, reserving 2 ounces of the chocolate for later. Fill a small pot with about one inch of water and place over burner with the bowl of chocolate on top. Tip: Placing a wooden spoon in the pot before you put the bowl on top allows the steam to escape. Stir constantly with a rubber spatula until chocolate pieces have melted. Remove from heat and gradually add in the remaining 2 ounces of chocolate, stirring after each addition, until melted. This helps to temper the chocolate, giving it more of a glossy look when set and achieving a wanted “snap” when bitten into.
To mold the chocolates, I use this silicone muffin tray, which is beyond amazing. The pb cups come out perfectly. You can also use paper muffin liners if you don’t have a silicone tray.
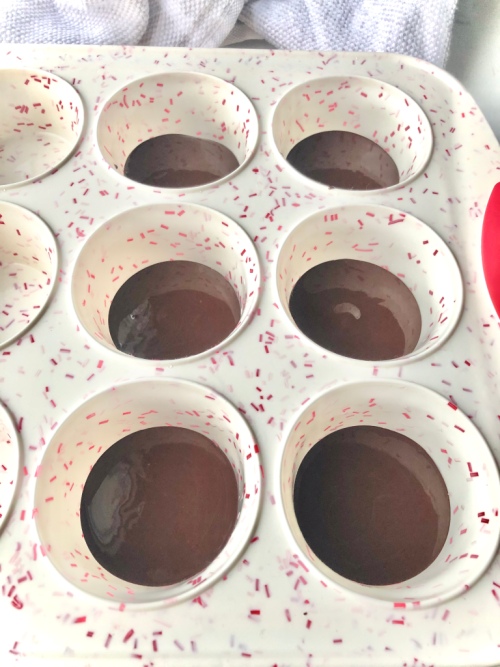
Pour enough of the melted chocolate into each cup (or liner) to coat the bottom. Remove the peanut butter discs from the freezer and place one in each cup, on top of the melted chocolate. Cover with more melted chocolate until the peanut butter is no longer visible. You may also add some flaky sea salt on top, if that’s your style. Place the pb cups in the fridge for about 15 minutes to set.

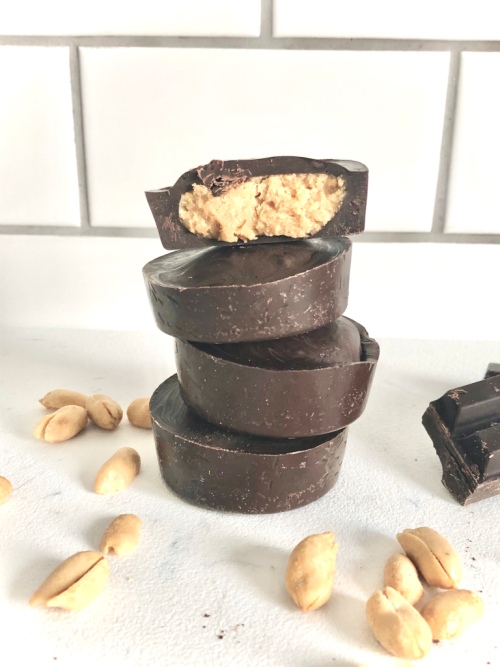
This recipe makes 6 large peanut butter cups. Store them in the fridge and remove them a few minutes before you want to chow down.
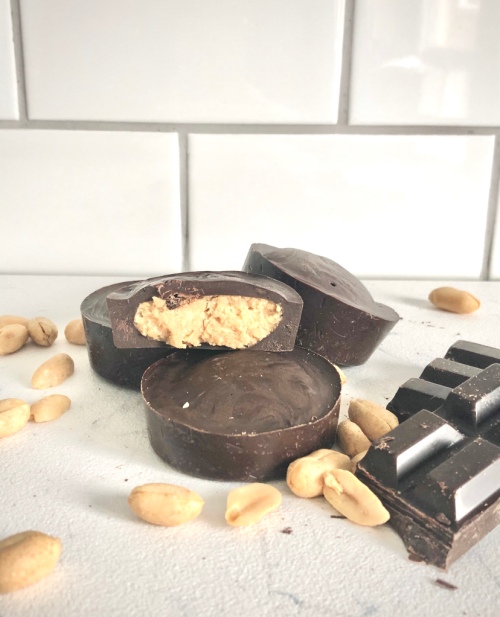
The perfect guilt-free post-dinner snack.
Healthy 5-Ingredient Peanut Butter Cups
Serving size: Makes 6 large peanut butter cups
Prep time: 25 minutes
Cook time: 5 minutes
Ingredients:
- 1/2 cup natural peanut butter
- 1 tbsp pure maple syrup
- 1/2 tsp pure vanilla extract
- 10 oz dark chocolate, separated and chopped into small pieces
- 1 tbsp coconut oil
Instructions:
- In a medium-sized bowl, mix together peanut butter, maple syrup and vanilla until combined. Form into six, 1-inch balls and flatten onto a plate lined with parchment paper. Place in freezer while you prepare the chocolate.
- Fill a small pot with one inch of water and place over a burner on medium-high heat. Bring water to a simmer. In a heatproof bowl, add 8 oz of the chocolate and the coconut oil. Place a wooden spoon in the pot with simmering water and the bowl on top of the pot. The spoon allows the steam to escape. Use a rubber spatula to constantly stir the chocolate until melted. Remove from heat.
- To temper the chocolate, slowly add in the remaining 2 oz of chocolate, one small chunk at a time, stirring until melted after each addition. This process takes a bit of time, but helps to set the chocolate properly.
- To a silicone muffin tray (or into muffin liners), pour in enough melted chocolate to just coat the bottom of six of the cups. Remove the peanut butter discs from the freezer and place one in each of the cups with chocolate. Top them off with the remainder of the melted chocolate, making sure to completely cover the peanut butter. Refrigerate for 15 minutes to set.
Store these in the fridge and remove a few minutes before serving.
The post Healthy 5-Ingredient Peanut Butter Cups appeared first on Never. Not. Eating..
]]>