The post Healthy Pumpkin Oatmeal Chocolate Chip Cookies appeared first on Never. Not. Eating..
]]>
WHAT ARE PUMPKIN OATMEAL CHOCOLATE CHIP COOKIES?
These cookies are a one-bowl miracle – they are simple to make, healthy and perfect for autumn. Refined-sugar free, these little treats can be eaten without guilt, for breakfast or as a snack in-between meals.

WHY I LIKE THESE PUMPKIN OATMEAL CHOCOLATE CHIP COOKIES
Other than for obvious reasons, I love these cookies because they are a fun and healthy way to incorporate pumpkin into a recipe. It has proven to be challenging to find recipes made with pumpkin puree that aren’t packed with processed sugars and unhealthy fats. I also love making my own pumpkin puree (recipe found here) to ensure I know exactly what is going into my baking!

THE INGREDIENTS
A few simple pantry ingredients are all you will need to make these cookies:
- Banana
- Pumpkin puree (NOT pie filling)
- Cashew butter (or any nut butter)
- Vanilla
- Maple syrup
- An egg
- Spices (pumpkin pie and cinnamon)
- Oats
- Dark chocolate chips
MAKING HEALTHY PUMPKIN OATMEAL CHOCOLATE CHIP COOKIES
The first thing you will want to do is whisk together all of your wet ingredients – mash up the banana and add in the puree, nut butter, vanilla, maple syrup and egg.
Add your spices, some salt, the oats and chocolate chips right into the wet ingredients and mix with a spatula. Once combined, use a large cookie scoop to portion your cookies, placing them on a parchment lined baking sheet. These will not spread out, so you don’t need to worry about spacing them out too much. Flatten them with the palm of your hand and bake for 11-14 minutes.

TIPS
- Choose an all-natural nut butter to maintain the healthiness of this recipe (look at the ingredient list on the jar – it should only have one ingredient)!
- Don’t use pumpkin pie filling. Make sure you have pure pumpkin puree – click here for a recipe, or find it canned at any grocery store.
- The cookie dough will be on the wetter side – don’t worry, they will bake up nicely and easily release from the baking sheet when they are fully cooked.
OTHER HEALTHY TREATS YOU NEED TO TRY
No-Measure Oatmeal Almond Butter Cookies (skip the measuring with these failproof cookies)
Vegan Rice Crispy Chocolate Treats (a fun, bite-size snack)
Vegan Ice Cream Bars (like a Magnum, but vegan)

TOOLS I USED TO MAKE THESE PUMPKIN OATMEAL CHOCOLATE CHIP COOKIES
Click on the images below to see what I used for this recipe.


Healthy Pumpkin Oatmeal Chocolate Chip Cookies
Servings: Makes a dozen cookies
Prep time: 10 minutes
Cook time: 13 minutes
Ingredients
- 1 very ripe banana, mashed
- 1/4 cup pure pumpkin puree
- 1/4 cup cashew butter (or any nut butter)
- 1 tsp pure vanilla extract
- 2 tbsp pure maple syrup
- 1 large egg
- 1/2 tsp pumpkin pie spice
- 1/4 tsp cinnamon
- 1/2 tsp salt
- 2 1/4 – 2 1/2 cups rolled oats
- 3/4 cup sugar-free dark chocolate chips
Instructions
- Preheat your oven to 350 degrees Fahrenheit.
- In a large bowl, whisk together the mashed banana, pumpkin puree, cashew butter, vanilla and maple syrup. Add in the egg and whisk until fully combined.
- Add the pumpkin pie spice, cinnamon, salt and 2 1/4 cups of oats to the bowl. Mix with a spatula. If the dough is very wet, add in the extra 1/4 cup of oats. The mixture should be slightly on the wetter side.
- Fold in the chocolate chips and then use a 1.5 tablespoon cookie scoop to form 12 cookies (alternatively, roll into balls using wet hands). Place on a parchment lined baking sheet and use your palm to flatten each cookie. As these will not spread, you don’t need to leave too much space between them.
- Bake for 13 minutes, remove from oven and let cool for 2 minutes on the baking sheet before transferring to a wire rack to cool completely.
- Once they have fully cooled, store in an airtight container for up to four days.

The post Healthy Pumpkin Oatmeal Chocolate Chip Cookies appeared first on Never. Not. Eating..
]]>The post No-Measure Oatmeal Almond Butter Cookies appeared first on Never. Not. Eating..
]]>
What are No-Measure Oatmeal Almond Butter Cookies?
I am always finding ways to “healthify” traditional treats, and I was in the mood for some cookies this time around. I had a few ingredients that I needed to get rid of, so I decided to try my hand at some no-measure Oatmeal Almond Butter Cookies, and it turned out to be a success! So much so, I make them all the time with the ingredients that need to get used up in my home.
I just eyeball all of my ingredients into a bowl, mix them up and form them into cookies! They are refined sugar-free, dairy-free and gluten-free.

The Ingredients for No-Measure Oatmeal Almond Butter Cookies
This is where it gets fun! You can change the ingredients in any way that suits you and what you have in your kitchen! Generally, I like to use the following staple ingredients in my cookies:
Overripe bananas
I like using bananas as a sugar substitute in my baking. They also bring more moisture into the cookies and help to bind the ingredients together. It is important to use overripe bananas for a sweeter result. I typically only use one banana, unless I am hoping to yield a larger batch of cookies…in that case, I will add another!
Almond butter (or any preferred nut butter)
Nut butters have high fat, fibre and protein and, therefore, can serve a number of purposes when added to baked goods. Firstly, nut butters are a good replacement for oils or butters, due to their fat content. The fibre in nut butters help to balance out the sugars in a recipe. Protein gives these cookies a bit more structure and allows them to hold up well! I like to add a healthy pour of almond butter…say a 1/2 cup or so!
Egg
As in any baking recipe, the job of the egg is to bind everything together and create structure. Think of it as the “glue” that holds everything together. If I’m hoping for eight cookies, I use one egg.

Gluten-free rolled oats
The oats are the main dry ingredient in this recipe and they replace the flour in a normal cookie recipe. Without the oats, your cookies would lack form and be very “goopy.” They are also much healthier than all-purpose flour! This is the ingredient that I truly have no measurements for – just pour in a bit at a time until the batter is not too wet, but not too dry. Eyeball it!
Vanilla
You should not skip this flavour bomb! Always use pure vanilla extract in any baking you do. If you would like to see how you can make your own at home, check out my Instagram reel (@nevernoteatingca). It takes two minutes to make!
Cinnamon
I like adding cinnamon to these cookies to add a little bit of warmth. Plus, I just love cinnamon!
Maple syrup
Along with the bananas, the maple syrup offers sweetness to these cookies. Depending on how much of a sweet tooth you have, pour in a small amount, or add a bit more to amplify that maple flavour!
Sugar-free chocolate
Because I wanted to make these cookies healthy, I decided to use sugar-free chocolate, but you can use whatever chocolate you want! I like a lot of little chocolate pools in my cookies, so I add a LOT of chocolate!

How to bring the ingredients together
Begin by using a hand mixer or a whisk to mix all of the wet ingredients together, just as you would in any normal baking recipe. Mash the banana(s) and pour in some almond butter, add an egg, some vanilla and maple syrup, according to how sweet you would like it.
Next, sprinkle in some cinnamon and pour in a small amount of oats, mixing until everything is combined. Continue to add more oats until the batter comes together and is not too wet, but not too dry. Fold in some chocolate and scoop onto a parchment-lined baking sheet. Flatten the cookies with your palm and bake in a 350 degree oven for around 10 minutes, or until cookies are set and release easily from the tray. You will notice the bottoms beginning to brown when they are ready.

Other healthy recipes you NEED to check out:
Vegan Protein Energy Balls (the perfect post-work, pre-workout snack)
Dark Chocolate Protein Nuggets [high protein, high (good) fat…these get you through the day]
Vegan Power Muffins (a morning pick-me-up)
This post contains affiliate links and I may earn a small commission when purchases are made after clicking the links, at no cost to you. Thank you!
No-Measure Oatmeal Almond Butter Cookies
*This recipe is NO-MEASURE. Please read above to get an idea of the purpose and amount of each ingredient.
Prep time: 10 minutes
Bake time: 10-13 minutes
Ingredients:
- banana(s), mashed
- nut butter
- egg(s)
- maple syrup
- vanilla
- salt
- cinnamon
- rolled oats (aim for gluten-free)
- sugar-free chocolate
Instructions:
- Preheat oven to 350 degrees Fahrenheit.
- Use a hand mixer or a whisk to combine the mashed banana(s), nut butter, egg(s), maple syrup and vanilla.
- Add in a big pinch of salt, a sprinkle of cinnamon and some rolled oats. Stir with a wooden spoon to combine. Continue to add more oats until the batter is not too wet, but not too dry. It should be slightly sticky. Fold in the chocolate.
- Using a large cookie scoop, scoop the batter onto a parchment-lined cookie sheet. Flatten each cookie using the palm of your hand and bake for 10-13 minutes or until the cookies have set up and release easily from the cookie sheet. Let cool on a wire rack and store in an airtight container.
*Check out my Instagram reel to see a video on how these cookies come together!

The post No-Measure Oatmeal Almond Butter Cookies appeared first on Never. Not. Eating..
]]>The post Vegan Coconut Panna Cotta with a Mango Compote appeared first on Never. Not. Eating..
]]>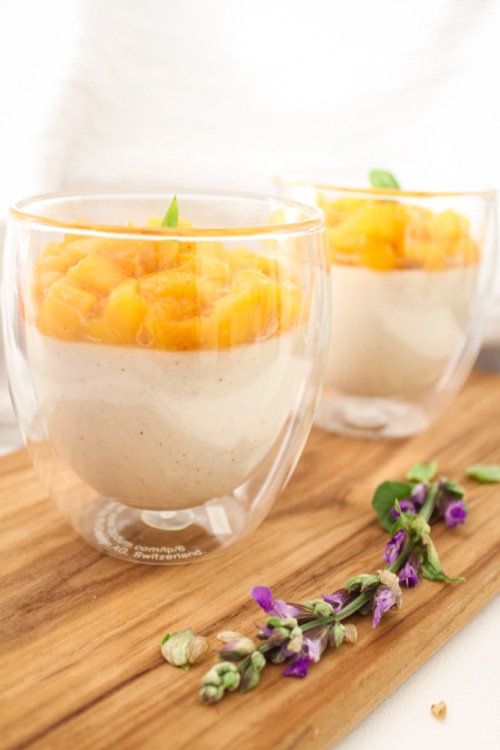
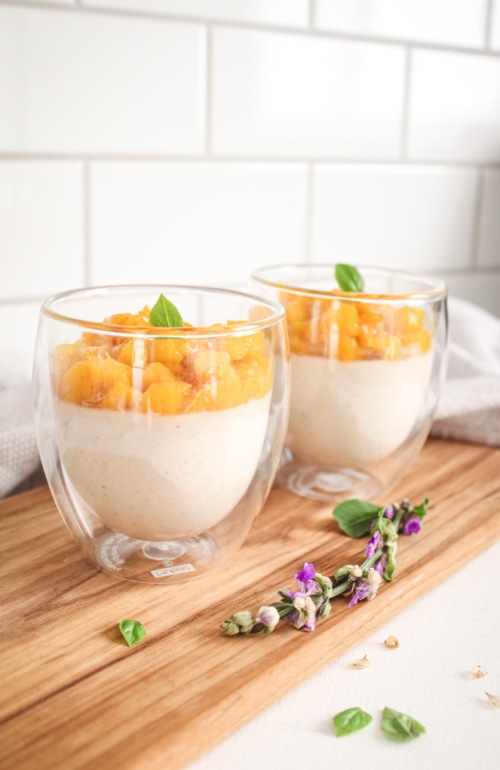
This vegan dessert mimics the OG Italian dessert. “Panna Cotta” means “Cooked Cream” in Italian, and I give you just that! Minus the cream, sub the coconut milk – My fav! It’s smooth, creamy, sweet and fruity. The perfect make-ahead dessert!

This dessert consists of two parts – the panna cotta and the fruit compote on top. For the panna cotta, you are going to need:
- Full-fat coconut milk
- maple syrup (or your choice of sugar)
- agar agar (a vegan gelatin)
- cinnamon
- nutmeg
- salt
For the compote, you will need:
- One mango
- cinnamon
- nutmeg
- salt
- citrus juice (lime or lemon)
- maple syrup
It may seem like a daunting task, but trust me…It’s the simplist dessert imaginable! It takes about 10 minutes to make each part and then all you have to do is wait until it sets up in the fridge! So easy. More delicious. Panna cotta pefection.
Here is the recipe.
Vegan Coconut Panna Cotta with a Mango Compote
Serving size: Makes 3 desserts
Prep time: 10 minutes
Cook time: 20 minutes
Set time: 1 hour
Ingredients:
For the Panna Cotta:
- 1 14-oz can of full-fat coconut milk
- 1/4 tsp cinnamon
- pinch of fresh nutmeg
- 3/4 tsp agar agar
- 1/4 cup maple syrup (or sugar of choice)
- pinch of salt
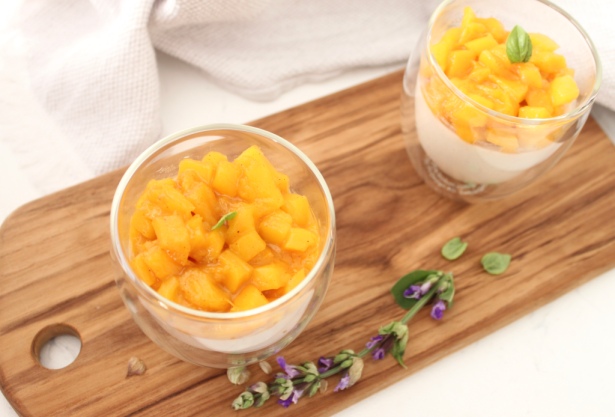
For the Mango Compote:
- 1 mango, small dice
- 1 tbsp maple syrup
- 2 tbsp freshly squeezed citrus juice (I use half lemon, half lime)
- pinch of cinnamon
- pinch of fresh nutmeg
- pinch of salt
Instructions:
- Bring the coconut milk to a boil in a small saucepan with cinnamon and nutmeg, watching carefully to avoid boiling over. Once boiling, add agar agar and reduce heat. Whisk for one minute and then add the maple syrup and salt. Simmer on low for another two minutes, whisking occasionally. Strain through a fine mesh sieve into a measuring cup with a spout. Divide into three dessert cups or stemless wine glasses and place in the fridge for at least an hour to set up.
- In a small saucepan, add the mango, maple syrup, citrus juice, cinnamon, nutmeg and salt. Let simmer until it takes on a jam-like consistency, about 10 minutes. Let cool about 10 minutes before spooning on top of the set panna cotta. Eat warm, or place back in the fridge and enjoy cold (my favourite).
The post Vegan Coconut Panna Cotta with a Mango Compote appeared first on Never. Not. Eating..
]]>The post Vegan Blueberry Pomegranate Tart appeared first on Never. Not. Eating..
]]>
I’m the type of cook who discovers an ingredient and becomes obsessed with it for weeks at a time. Right now, it’s agar agar. The vegan version of gelatin. It’s literal happiness in powder-form. Have a favourite juice? Add agar agar and it turns that juice into a jiggly, wiggly treat. If you loved Jell-o as a kid, like me, you’ll love agar agar.
Whereas gelatin is made from animal collagen, agar agar is derived from seaweed. It is completely vegan and therefore a perfect ingredient to make jellies, gummies, tarts, preserves and much more.
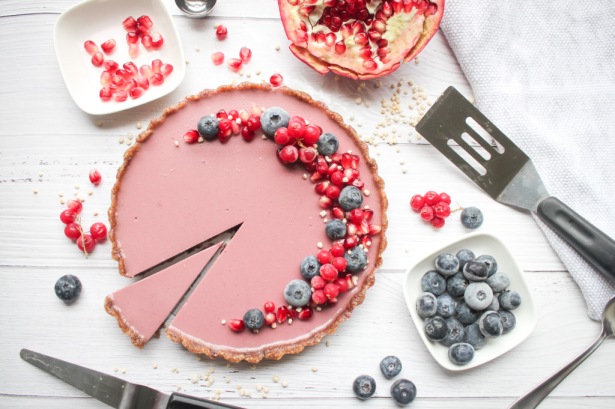
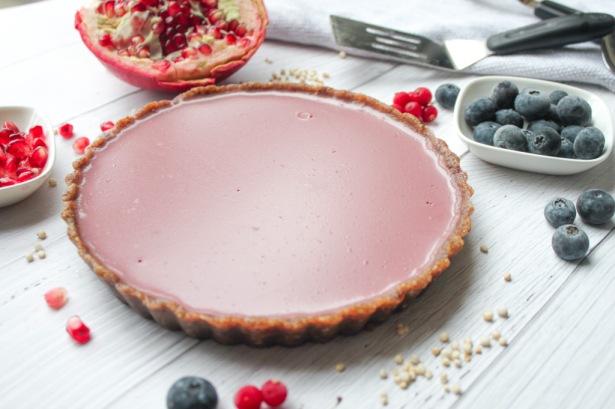
The crust of this tart was made by combining walnuts, pecans, dates, maple syrup, salt and vanilla in my food processor until the ingredients begin to stick together. This is then pressed into an 8-inch tart pan and thrown into the freezer while the filling is made.
For the jelly filling, add the pomegranate-blueberry juice (I love the “Pom Wonderful” brand) to a saucepan with the full-fat canned coconut milk. Bring the liquids up to a boil, add the agar agar and then whisk the mixture until it’s fully dissolved. Lower the heat and add the salt and maple syrup and cook for a few more minutes. Strain the liquid over a measuring cup to make transferring to your tart shell easier and less messy. No one likes a mess.
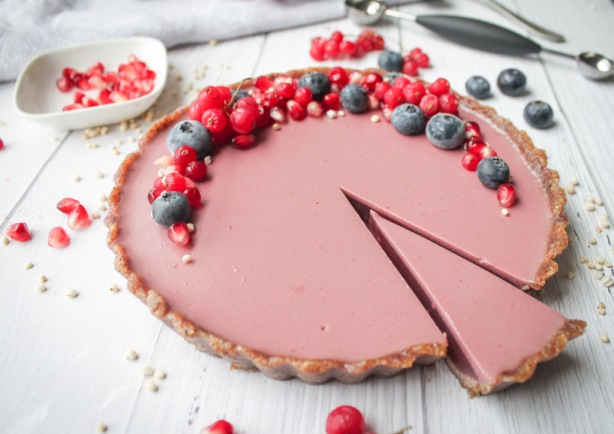
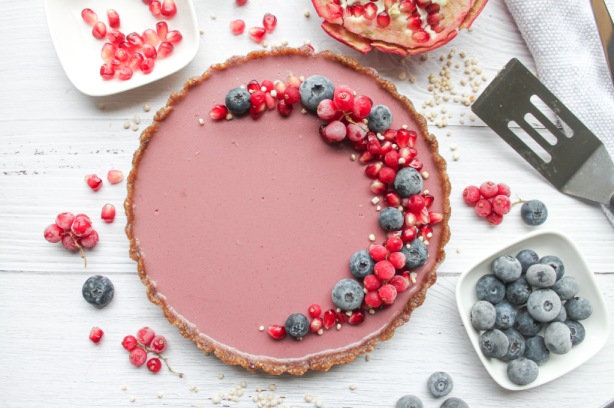
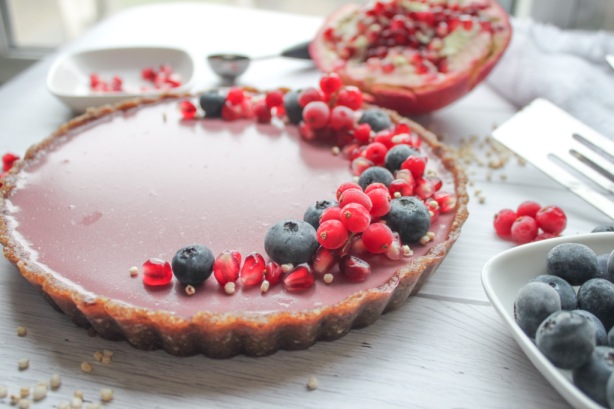
When the filling has cooled down for about 10-15 minutes, give it a quick whisk and then carefully pour it into the tart pan, over the crust. Transfer it to your fridge and let it set up for at least 3 hours. Waiting is the hardest part, but it gives you time to think about how you will decorate your tart! I like to show what is in my food when I plate it, so naturally, I topped this tart with pomegranate seeds and fresh blueberries. I also added some puffed quinoa for a slight colour contrast and a fun pop!
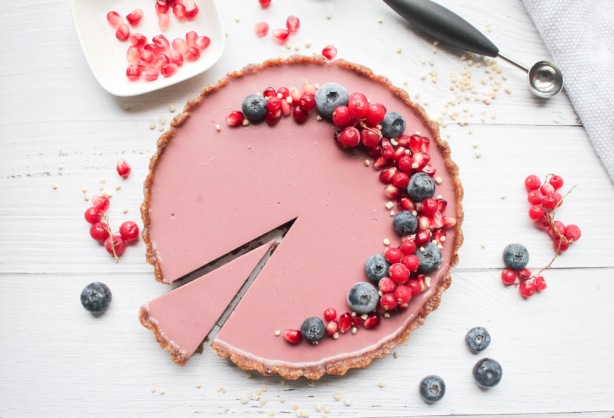
This tart is best if consumed within 24 hours.
Vegan Blueberry Pomegranate Tart
Yield: Makes an 8-inch tart
Prep time: 5 minutes
Cook time: 5 minutes
Chill time: 3 hours
Ingredients:
For the crust:
- 1/2 cup walnuts
- 1/2 cup pecans
- 1/4 tsp salt
- 6 dates, pitted
- 1/2 tsp vanilla
- 1 tbsp maple syrup
For the filling:
- 3/4 cup pomegranate-blueberry juice (or just straight pomegranate juice)
- 1 cup full-fat canned coconut milk
- 3/4 tsp agar agar
- 1/4 tsp salt
- 2 tbsp maple syrup
Instructions:
- To make the crust – Add all ingredients into a food processor and pulse until it begins to come together, about one minute. Press into an 8-inch tart pan and put in the freezer while you make the filling.
- For the filling – Add juice and coconut milk to a small saucepan and bring up to a boil. Once boiling, add the agar agar and whisk for one minute, or until the powder is completely dissolved. Reduce heat to a simmer and add the salt and maple syrup. Let simmer for 2 more minutes, whisking occasionally. Remove the liquid from the heat and strain through a fine-mesh sieve over a measuring cup with a spout. Let cool for at least ten minutes before carefully pouring over your tart crust. Let it set in the fridge for at least 3 hours before serving.
*This tart is best consumed within 24 hours.
The post Vegan Blueberry Pomegranate Tart appeared first on Never. Not. Eating..
]]>The post Healthy 5-Ingredient Peanut Butter Cups appeared first on Never. Not. Eating..
]]>
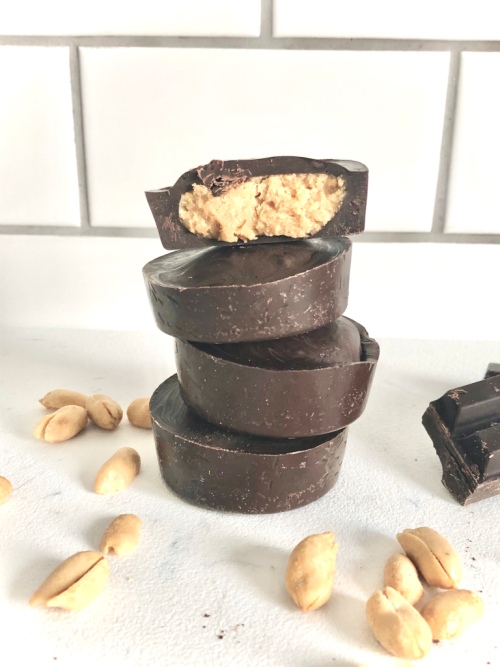
I can’t think of a better duo than chocolate and peanut butter, and I’m sticking close to home with this recipe. No fancy upgrades or add-ins. Just the classic – healthified. Dark chocolate and peanuts are both anti-inflammatory foods and coconut oil is said to enhance brain function. All-in-all, you can never go wrong with knowing exactly what is going into your food.
This simple and quick recipe requires five ingredients that you will likely already have in your pantry:
- Dark chocolate (At least 85%)
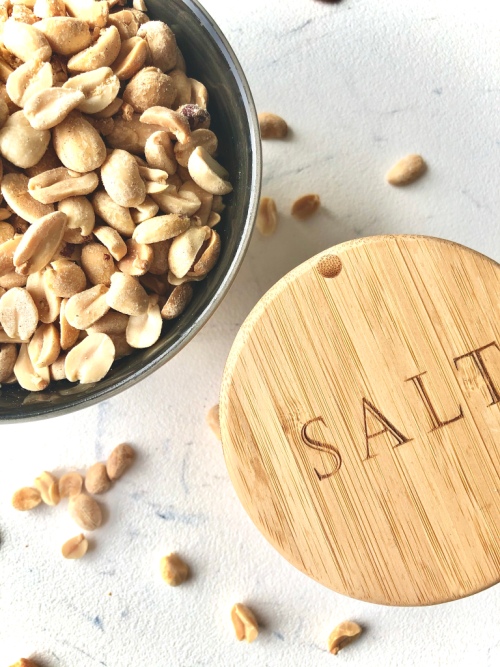
- Natural peanut butter (I use my Homemade Peanut Butter)
- Coconut oil
- Vanilla
- Maple syrup
The first step is finding the best peanut butter for the filling. Look at the ingredient list on the peanut butter that you buy. The only ingredient listed should be “dry roasted peanuts.” And maybe “salt.” Otherwise, steer clear. Most peanut butters have a lot of sugar added and stabilizers to prevent oil separation. If you are trying to incorporate more healthy, whole foods into your diet, natural nut butters are best. If you are unimpressed with the price of these at your grocery store, click here to learn how to make your own in less than 10 minutes!
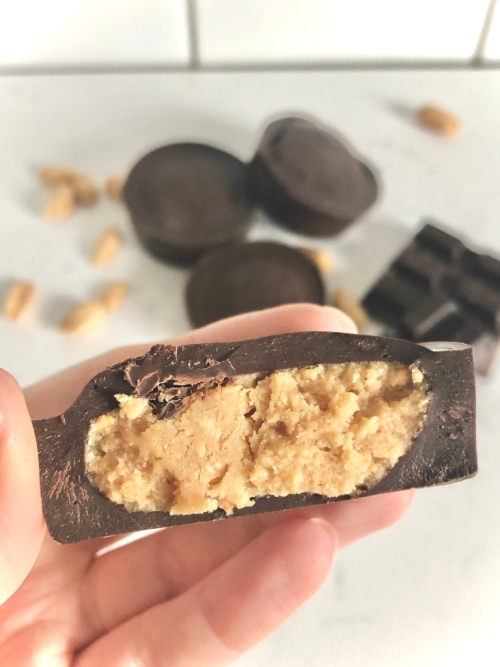
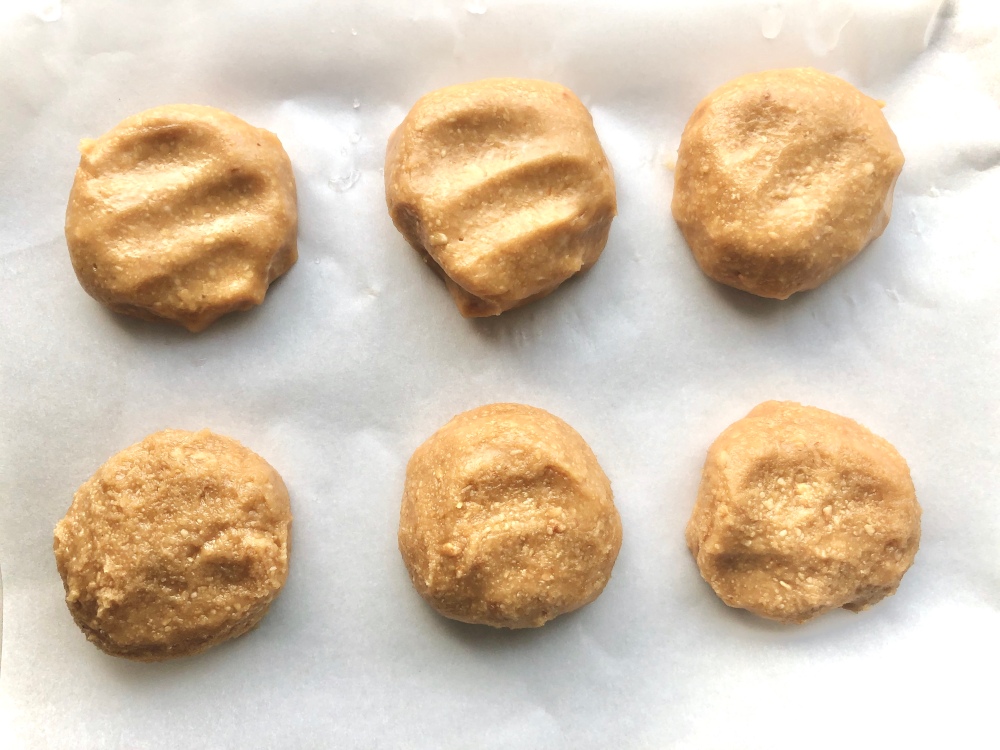
To make the filling, combine the peanut butter with the vanilla and maple syrup. Form into 1-inch balls and flatten on a large plate covered with a piece of parchment paper. Put in the freezer while you prepare the chocolate.
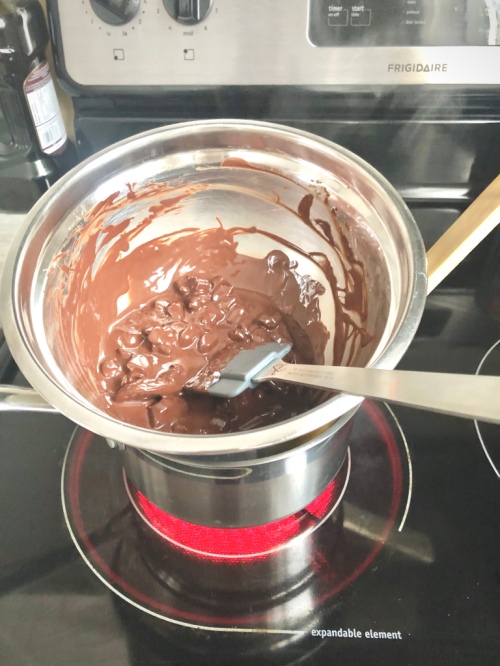
For the chocolate shell, set up a double boiler. Cut up your dark chocolate into small-ish pieces and place in a large, heat-proof bowl with coconut oil, reserving 2 ounces of the chocolate for later. Fill a small pot with about one inch of water and place over burner with the bowl of chocolate on top. Tip: Placing a wooden spoon in the pot before you put the bowl on top allows the steam to escape. Stir constantly with a rubber spatula until chocolate pieces have melted. Remove from heat and gradually add in the remaining 2 ounces of chocolate, stirring after each addition, until melted. This helps to temper the chocolate, giving it more of a glossy look when set and achieving a wanted “snap” when bitten into.
To mold the chocolates, I use this silicone muffin tray, which is beyond amazing. The pb cups come out perfectly. You can also use paper muffin liners if you don’t have a silicone tray.
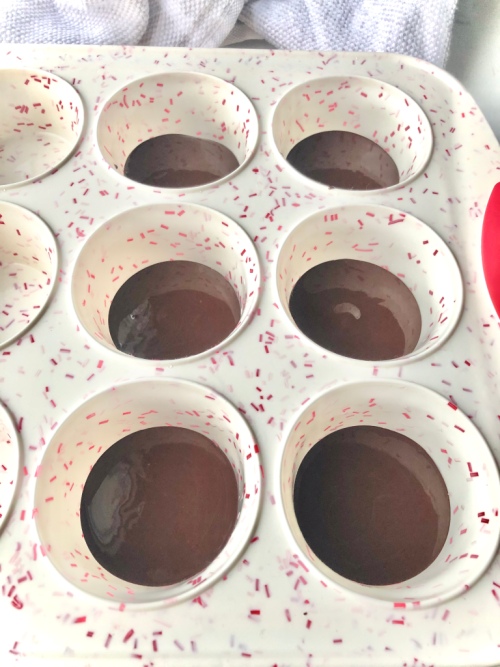
Pour enough of the melted chocolate into each cup (or liner) to coat the bottom. Remove the peanut butter discs from the freezer and place one in each cup, on top of the melted chocolate. Cover with more melted chocolate until the peanut butter is no longer visible. You may also add some flaky sea salt on top, if that’s your style. Place the pb cups in the fridge for about 15 minutes to set.

This recipe makes 6 large peanut butter cups. Store them in the fridge and remove them a few minutes before you want to chow down.
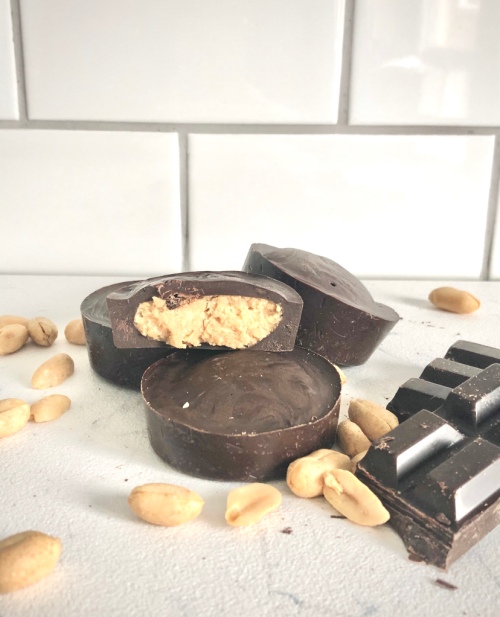
The perfect guilt-free post-dinner snack.
Healthy 5-Ingredient Peanut Butter Cups
Serving size: Makes 6 large peanut butter cups
Prep time: 25 minutes
Cook time: 5 minutes
Ingredients:
- 1/2 cup natural peanut butter
- 1 tbsp pure maple syrup
- 1/2 tsp pure vanilla extract
- 10 oz dark chocolate, separated and chopped into small pieces
- 1 tbsp coconut oil
Instructions:
- In a medium-sized bowl, mix together peanut butter, maple syrup and vanilla until combined. Form into six, 1-inch balls and flatten onto a plate lined with parchment paper. Place in freezer while you prepare the chocolate.
- Fill a small pot with one inch of water and place over a burner on medium-high heat. Bring water to a simmer. In a heatproof bowl, add 8 oz of the chocolate and the coconut oil. Place a wooden spoon in the pot with simmering water and the bowl on top of the pot. The spoon allows the steam to escape. Use a rubber spatula to constantly stir the chocolate until melted. Remove from heat.
- To temper the chocolate, slowly add in the remaining 2 oz of chocolate, one small chunk at a time, stirring until melted after each addition. This process takes a bit of time, but helps to set the chocolate properly.
- To a silicone muffin tray (or into muffin liners), pour in enough melted chocolate to just coat the bottom of six of the cups. Remove the peanut butter discs from the freezer and place one in each of the cups with chocolate. Top them off with the remainder of the melted chocolate, making sure to completely cover the peanut butter. Refrigerate for 15 minutes to set.
Store these in the fridge and remove a few minutes before serving.
The post Healthy 5-Ingredient Peanut Butter Cups appeared first on Never. Not. Eating..
]]>