The post Mediterranean Rice Bowl (GF) appeared first on Never. Not. Eating..
]]>
WHAT IS A MEDITERRANEAN RICE BOWL?
This recipe is a mix between a buddha bowl and a salad. It’s all of your favourites from a Greek salad thrown together with some rice and, my favourite – homemade hummus!

THE INGREDIENTS
I love this Mediterranean Rice Bowl because the ingredients are so fresh and vibrant. They are easy to prepare and can be swapped out or omitted based on your preferences. You will need:
- your favourite rice
- spinach (or your favourite lettuce)
- cherry tomatoes
- cucumber
- feta cheese
- olives
- homemade hummus
- olive oil
- red wine vinegar
- a lemon
- dijon mustard
- garlic
- dried herbs (oregano & basil)
HOW TO MAKE THIS MEDITERRANEAN RICE BOWL
There are two cooked components to this bowl – the rice and the hummus. You may choose to use store-bought hummus, but if you haven’t made your own before, I highly suggest you try it. Check out my recipe here. It’s seriously a game-changer!

The rest of the ingredients are “toppers” which will be added to the bowl with the rice. Dice up your cucumber, halve the tomatoes and olives, and crumble up the feta.
To prepare the dressing, stir together the vinegar, juice of half a lemon, mustard, minced garlic and herbs and then drizzle in the olive oil while whisking to combine.
BUILDING THE BOWL
Firstly, lay your spinach in the bottom of your favourite bowl. Top it with the rice, tomatoes, olives, cucumber, feta and a big dollop of the hummus. Next, drizzle your dressing over top of the ingredients and toss with two spoons to combine. Add salt and pepper according to taste, dig in and enjoy!
MORE RECIPES IN A BOWL
Rainbow Buddha Bowl with Garlic Tahini Dressing (taste the rainbow and get all your nutrients)
Roasted Vegetable Quinoa Bowl (protein-packed and super easy)
TOOLS NEEDED FOR THIS RECIPE
Click below to check out what I use to make this Mediterranean Rice Bowl.


This post contains affiliate links and I may earn a small commission when purchases are made after clicking the links, at no cost to you – thank you!
MEDITERRANEAN RICE BOWL (GF)
Serving size: 4
Prep time: 10 minutes
Cook time: 25 minutes
INGREDIENTS
- 1 cup rice
- 4 handfuls baby spinach
- 1 cup cherry tomatoes, halved
- 1/2 cup olives, pitted and sliced
- 1 cup cucumbers, chopped
- 1/2 cup feta cheese, crumbled
- 1/2 cup homemade or store-bought hummus
For the dressing:
- 2 tbsp red wine vinegar
- 1/4 tsp dried oregano
- 1/4 tsp dried basil
- 2 garlic cloves, minced
- juice of 1/2 a lemon (about 2 tbsp)
- 1 tsp dijon mustard
- 1/2 cup olive oil
- salt
- pepper
INSTRUCTIONS
- Cook the rice according to package directions.
- Place one handful of spinach into each of the four serving bowls and top with the cooked rice. Divide the tomatoes, cucumbers, olives, feta cheese and hummus amongst the four bowls, on top of the rice and spinach.
- In a separate small bowl or measuring cup, mix together the vinegar, oregano, basil, garlic, lemon juice and mustard. Slowly drizzle in the olive oil while whisking to combine and season with a pinch of salt and pepper. Drizzle the dressing overtop of the assembled bowls. Toss, serve and enjoy!
The post Mediterranean Rice Bowl (GF) appeared first on Never. Not. Eating..
]]>The post Chocolate Chai Ganache (Vegan, Gluten-Free) appeared first on Never. Not. Eating..
]]>
WHAT IS CHOCOLATE CHAI GANACHE?
A ganache is traditionally a mixture of chocolate and warmed cream. It is often used as a filling or icing for cakes, to serve with fruit or something to stuff pastries with! It is also really addicting on it’s own…by the spoonful. Just sayin’.
THE INGREDIENTS
This Chocolate Chai Ganache is fully vegan, meaning no dairy whatsoever! Whoop, whoop! Instead, I use full-fat coconut milk. You can also use a lower-fat coconut milk, if you prefer. To make this recipe, you will need three ingredients – vegan chocolate, chai tea bags and one can of coconut milk.

THE PROCESS
The first step is to infuse that beautiful chai flavour into the coconut milk. Pour the coconut milk into a small saucepan and add two chai tea bags. Bring to a gentle simmer for 15 minutes. You don’t want to simmer for much longer, or else you will lose more of the liquid. 15 minutes is the perfect length of time to retain enough liquid and still get a rich chai flavour!
When the milk is ready, simply pour it over the vegan chocolate, wait one minute, and then stir until all of the chocolate is melted. See below for different ways you can use this ganache and how the recipe may change slightly, depending on it’s purpose.

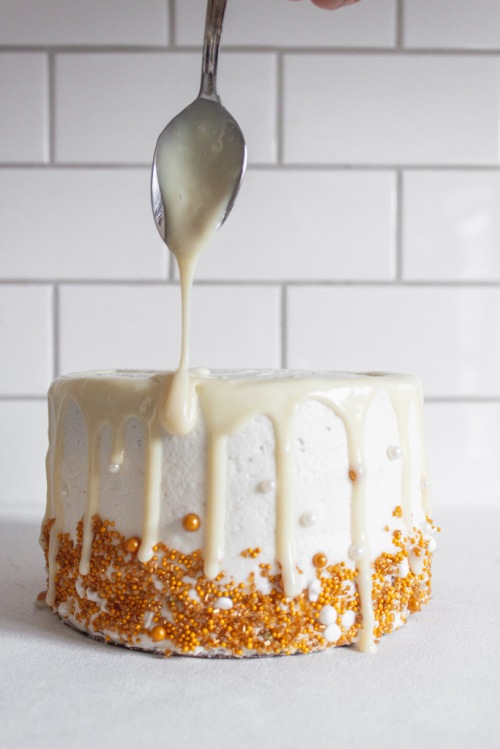
CHOCOLATE CHAI GANACHE AS A GLAZE
If you are tired of the overly sweet American buttercream usually used on the outside of cakes, try making this ganache and pouring it over your cake instead. To make this the perfect glaze consistency, use 1 can of coconut milk to 1 cup of chocolate. Once it has cooled, pour it over a cold cake and watch it drip over the sides and coat your cake in a luscious layer of pure YUM.
CHOCOLATE CHAI GANACHE AS A FILLING
Okay, this may be my favourite way to use ganache – INSIDE cakes. Cake layer one goes down, a thick layer of ganache goes on top, cake layer two goes down – perfection! It is important that, if you are making a filling, the texture is thicker so it doesn’t ooze out of the sides of your cake. Therefore, use 1 can of coconut milk to one and a quarter cup of chopped chocolate. After the coconut milk has been poured over the chocolate and stirred completely, the chocolate will begin to firm up. You can even put it in the fridge to speed up the process, but you still want to be able to spread it easily, so keep an eye on it!

DON’T MISS THESE OTHER VEGAN DESSERTS
Vegan Ice Cream Bars (similar to Magnums)
Vegan Mocha Buttercream (fill your cakes with ganache and top them with this perfect buttercream)
Sweet Potato Creme Brulee (perfect for a dinner party)
This post contains affiliate links and I may earn a small commission when purchases are made after clicking the links, at no cost to you. Thank you!
Chocolate Chai Ganache (Vegan, Gluten-Free)
Prep time: 2 minutes
Cook time: 15 minutes
INGREDIENTS
| Purpose | Vegan Chocolate | Coconut Milk | Chai |
|---|---|---|---|
| Glazing cakes | 1 cup, chopped (or chunks) | 1 can (400 ml) | 2 tea bags |
| Filling cakes | 1 1/4 cup, chopped (or chunks) | 1 can (400 ml) | 2 tea bags |
INSTRUCTIONS
- Add coconut milk and tea bags to a small pot and bring to a gentle simmer for 15 minutes, uncovered.
- Place vegan chocolate into a heat-proof bowl, remove the tea bags from the pot, and strain the coconut milk over the chocolate. Let sit for one minute and then whisk until the chocolate is fully melted. Let cool before using.
TIPS:
- If GLAZING – when the ganache has cooled, pour it over an assembled cake that has been elevated and has a baking tray underneath to catch the drips.
- If FILLING – you can place the ganache in the fridge to help cool and firm up, but you want it to be spreadable, so make sure it doesn’t get too firm.
The post Chocolate Chai Ganache (Vegan, Gluten-Free) appeared first on Never. Not. Eating..
]]>The post Easy Za’atar Socca appeared first on Never. Not. Eating..
]]>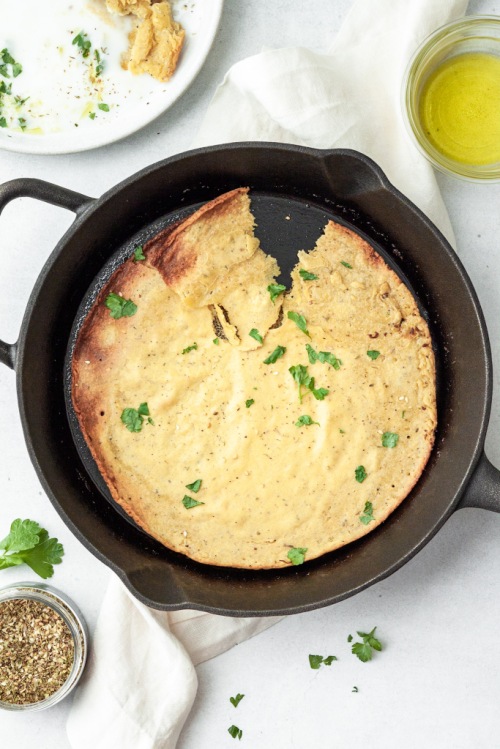
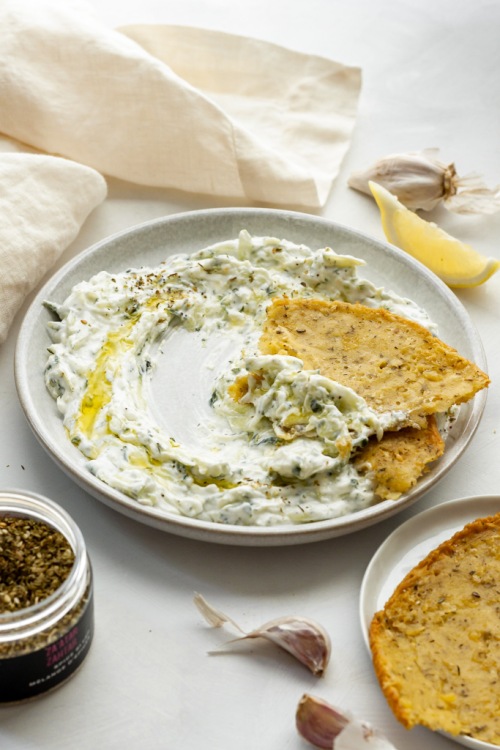
WHAT IS EASY ZA’ATAR SOCCA?
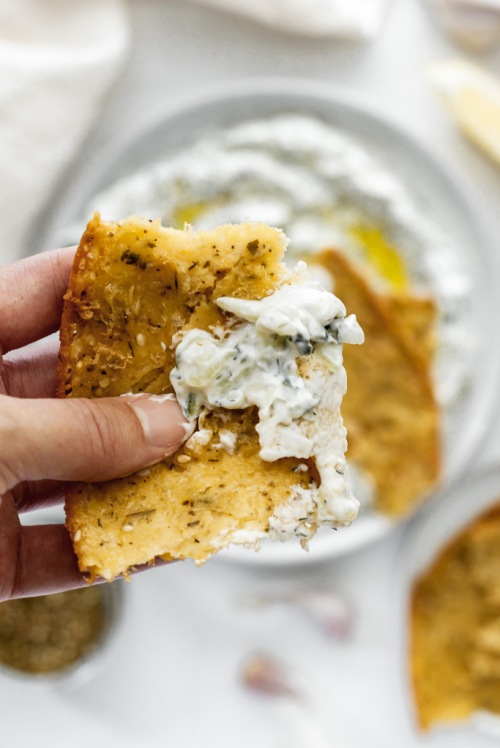
Crispy, gluten-free and the perfect vessel for dipping. I could ask for nothing more in my life. Socca is an Italian-French, crepe-like flatbread that is just so delicious. Try it with my Homemade Tzatziki recipe!
TIPS FOR MAKING SOCCA
The most important tool for perfecting this recipe, in my opinion, is a cast iron pan. It’s crucial to get the pan and oil scorching hot before pouring in the batter the ensure you achieve even heat distribution and crispy socca. Check out this one from Amazon.
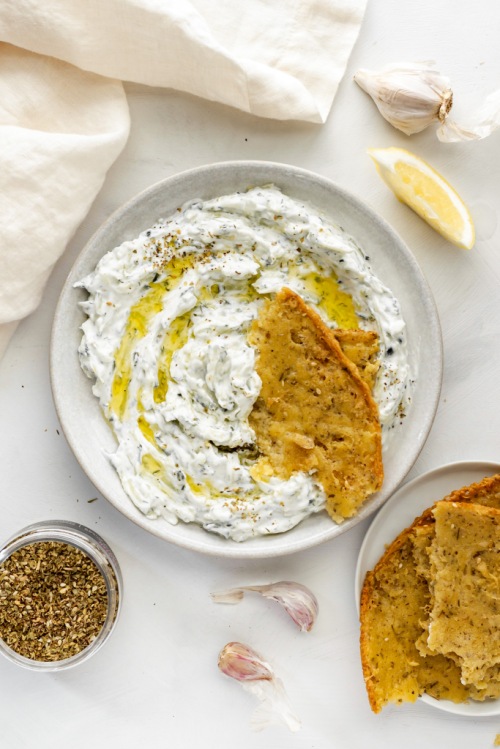
What do you eat Socca with? If not just as is, then try it with your favourite dips, stews or curries. It is great for picking up sauce or just adding that missing piece to a meal!
This recipe only requires these three ingredients (salt and water don’t really count as an ingredient…right?!):
- chickpea flour
- za’atar
- olive oil
The easiest, most delicious gluten-free bread you will ever make!
This post contains affiliate links and I may earn a small commission when purchases are made after clicking the links, at no cost to you. Thank you for supporting me!
Easy Za’atar Socca
Serving size: Makes 2 large flatbreads
Prep time: 5 minutes
Cook time: 10-12 minutes
Ingredients:
- 1 cup chickpea flour
- 1/2 tsp salt
- 1 tsp za’atar
- 1 tbsp olive oil + more for the pan
- 1 cup water
Instructions:
- In a medium bowl, whisk together the flour, salt, za’atar, 1 tablespoon of olive oil and water until smooth. Set aside.
- Preheat oven to 450 degrees Fahrenheit. Coat the bottom of a cast iron pan with olive oil (about 2 tbsp) and place in the oven for 5 minutes to heat the oil. Remove carefully and pour in half of the batter, swirling the pan around to help spread it out. Cook in the oven for 10-12 minutes, or until edges turn brown and bread is cooked through. Remove from oven and repeat this process for the remaining half of the batter.
NOTES:
Socca is best when served immediately after cooking, but you can store in an airtight container in the fridge for a few days, if necessary.
The post Easy Za’atar Socca appeared first on Never. Not. Eating..
]]>The post Sweet Potato Creme Brulee (Vegan, GF) appeared first on Never. Not. Eating..
]]>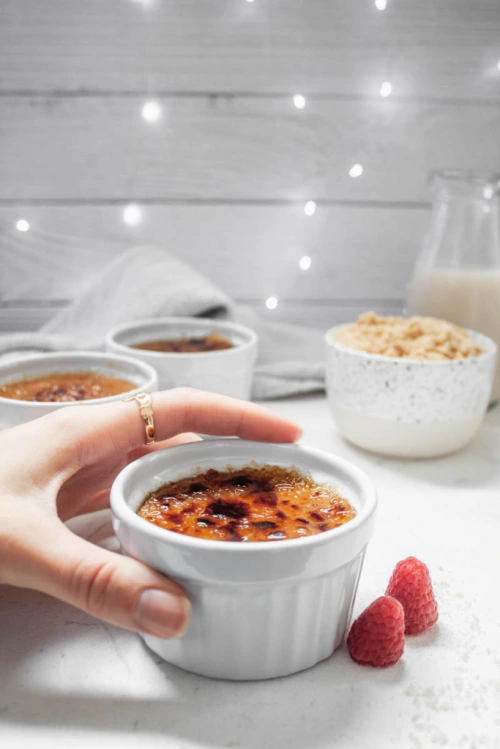
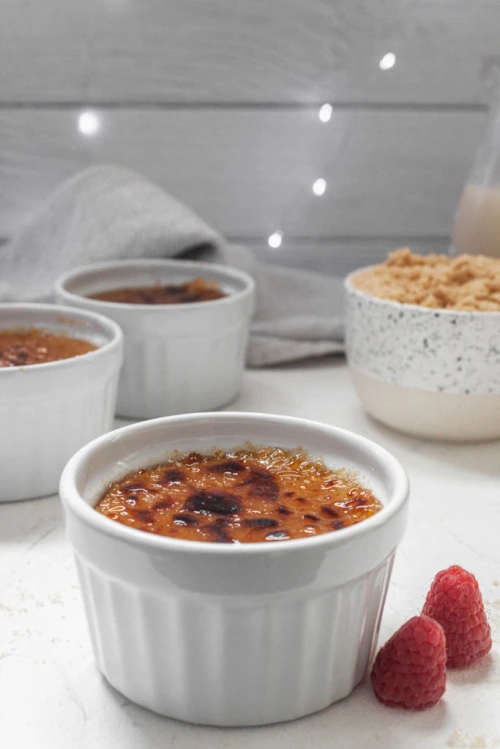
WHAT IS SWEET POTATO CREME BRULEE?
I really love sweet potatoes and I always have them at this time of year. I prefer them to white potatoes and always experiment with different ways of using them. This week, I turned them into the cutest little desserts, that are also dairy-free and gluten-free! ‘Cause who doesn’t love to be free?!

INGREDIENTS
So, real talk: My appreciation for coconut milk grows by the day. Nature seriously did us a solid by serving us coconuts, and I am down for it. You can very likely turn any animal-based recipe into a plant-based one with a simple can of coconut milk, just in case you were wondering!
Coconut milk and sweet potatoes are the two main ingredients in this recipe. You will also need a sweetener, and since sweet potatoes and maple go really well together, I use syrup (that pure Canadian kind)! Some cinnamon and fresh nutmeg bring in the warm, cozy feelings of winter. Finally, the glue that holds it all together is the agar agar. Agar agar is basically a vegan gelatin. You can buy it on Amazon, or if you have any specialty grocery stores in your ‘hood, try that!
HOW TO MAKE SWEET POTATO CREME BRULEE
The first step is to roast the sweet potato. I really hate a mess (and I’m lazy), so I just pierce my potato with a fork a few times and stick it directly on the rack of my oven, place a piece of tin foil on the rack below it (to catch any drippings), set my oven to 400 degrees and walk away for an hour. You will see the potato begin to ooze out (yes, it’s normal) and that’s usually how you know it is ready. Stick a fork in it, just in case.
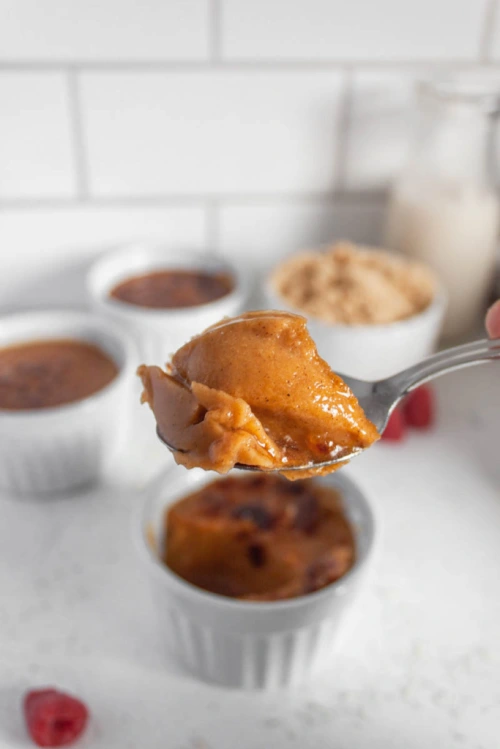
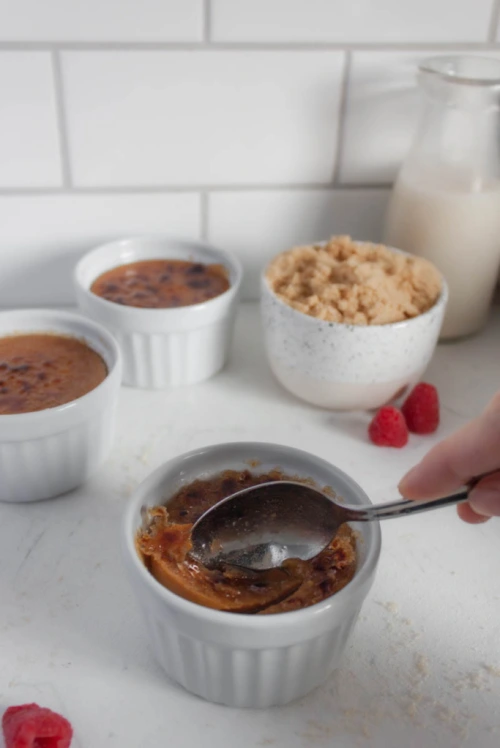
Next, you place the potato, milk and syrup in a blender and blend until smooth. Transfer to a pot with some salt and the spices and bring to a boil. Add the agar agar and reduce heat, whisking for about a minute to ensure the agar is completely combined. Strain the mixture and pour into small ramekins and when ready to serve, top with some sugar (I do a mix of white and brown) and torch!
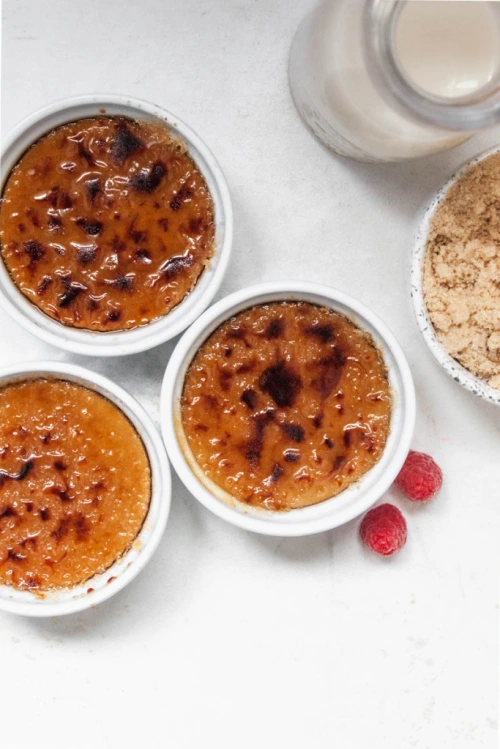
Your holiday guests will love cracking the hardened sugar on top and diving in to this semi-healthy treat!
OTHER VEGAN DESSERTS
Vegan Whipped Cream (the perfect dessert topping)
Vegan Rice Crispy Chocolate Treats (a perfect bite-sized snack)
Chocolate Chai Ganache (amazing for cake decorating)
TOOLS I USED TO MAKE THIS RECIPE


Sweet Potato Creme Brulee (Vegan, GF)
Servings: 4
Prep time: 5 minutes
Cook time: 1 hour 10 minutes
Ingredients:
- 1 medium sweet potato
- 1 can full-fat coconut milk
- 1/2 cup coconut milk (I use Silk brand)
- 2 tbsp maple syrup
- 1 tsp cinnamon
- pinch of fresh nutmeg
- A pinch salt
- 1/2 tsp agar agar
- 1 tsp pure vanilla extract
- 4 tbsp sugar (I mix equal parts white and brown)
Instructions:
- Preheat oven to 400 degrees Fahrenheit. Pierce the sweet potato with a fork a few times. When oven is ready, place potato directly on the middle rack, and put a piece of tin foil on the rack below it, to catch any drippings. Bake for 1 hour, or until fork inserts easily into the centre. Carefully remove skin.
- To your blender, add the sweet potato, both coconut milks and the syrup. Blend until smooth and then transfer to a pot.
- Place the pot on the stove over medium-high heat. Add the salt, cinnamon and nutmeg and bring to a boil, stirring often. Once boiling, add the agar agar, lower the heat to a simmer and whisk continuously for one minute, or until the agar agar is completely dissolved. Remove from heat and whisk in the vanilla.
- Strain the mixture through a fine mesh sieve directly into four small ramekins. Place in the fridge to firm up for at least one hour.
- Right before serving, sprinkle the tops of each ramekin with one tablespoon of the sugar and use a kitchen torch to melt the sugar until it is a deep brown colour. Let it sit for a minute before serving.
- Crack the top with a spoon and enjoy!
The post Sweet Potato Creme Brulee (Vegan, GF) appeared first on Never. Not. Eating..
]]>The post Winter Pear Spice Cake with a Vanilla “Buttercream” (Vegan, GF) appeared first on Never. Not. Eating..
]]>
Feeling sad about the virus during the holidays? Do what I do – spend ample amounts of money on yourself, eat endless desserts and relish in all of your glorious decorations! It will 100% make you feel better.
Firstly, let’s talk about self-love. Haven’t you ever heard, “You gotta look out for #1?!” That’s you, babe! You’re #1! This holiday, why not buy that nice blender you wanted? Or, that new piece of art for your wall? I’m not seeing the people I normally see on Christmas, meaning, I don’t need to buy them gifts, so that money has to go somewhere…right?! Right!
I actually just bought myself a nice, new mattress, and you know what?! I deserve it. If not because I work hard, than because I survived this year. If you are looking for a well-priced, well-made mattress, check out Endy. They are a Canadian company, and have endless 5-star reviews. You get $55 off your purchase by clicking here…Treat yo’self!
The holidays are also for munchin’. It’s stretchy-pant season and I’m all for it. I had every intention of delivering this cake to some family members, but NOPE. Changed my mind. I ate it instead.

I have a passion for cake decorating – it makes me happy to bring together two of my loves – art and food. For this cake, I wanted to create a clean, and fresh winter scene. The mood is meant to be bright, airy and uplifting. I love how clean and profesh (that’s short for professional…did I just make up the next trending word?!) white looks on cake. I also wanted to add a little sparkle, because it’s Christmas, so I decorated with some gold and white sprinkles to pull it all together!
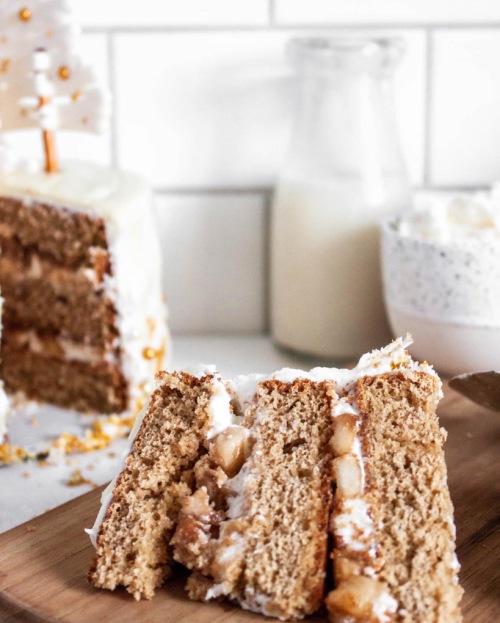
In terms of the cake itself, I wanted to stay true to holiday flavours – warm and aromatic spices with subtle notes of vanilla. I chose a pear filling that screams winter. Did I mention this cake is vegan and gluten-free as well? Yaass.
Winter Pear Spice Cake with a Vanilla “Buttercream” (Vegan, GF)
Yield: A two-layer 6-inch cake
Prep time: 60 minutes
Cook time: 20 minutes
Ingredients:
For the cake:
- 1 cup canned coconut milk
- 1 tbsp apple cider vinegar
- 3/4 cup + 2 tbsp brown sugar, packed
- 1 banana, mashed
- 2 tsp vanilla
- 2 cups gluten-free flour, I use Bob’s Red Mill
- 1 1/4 tsp cinnamon, separated
- 1/2 tsp dried ginger
- 1/4 tsp nutmeg
- 1 tsp salt
- 3/4 tsp baking powder
- 1/2 tsp baking soda
- 1 large pear, peeled and finely diced
For the icing:
- 1/2 cup vegan butter, softened
- 1/2 cup vegetable shortening
- 1 tsp pure vanilla extract
- pinch of salt
- 4 cups powdered sugar
- 3-4 tbsp canned coconut milk
Instructions:
For the cake:
- Grease two, 6-inch baking pans,* line with parchment paper and dust with flour. Preheat oven to 350 degrees Fahrenheit.
- Stir coconut milk and apple cider vinegar together and set aside.
- Wet ingredients: In a large bowl, beat 3/4 cup brown sugar with the banana and vanilla until combined.
- Dry ingredients: In a medium bowl, sift together the flour, cinnamon, ginger, nutmeg, salt, baking powder and baking soda.
- In a few additions, alternate between adding the flour mixture and the coconut milk to the wet ingredients. Beat on medium speed until combined.
- Pour batter into prepared pans and bake 30 minutes, or until inserted toothpick comes out clean. Let sit in pans for five minutes before transferring to a wire rack to finish cooling.
- While your cakes bake, combine the diced pear together with the remaining two tablespoons of brown sugar and 1/4 teaspoon of cinnamon. Let sit for at least 15 minutes.
For the icing:
- Beat butter, shortening, vanilla and salt on medium-high speed until light and fluffy. Add one cup of powdered sugar and beat on low. Continue adding sugar by the cup, along with the coconut milk, one tablespoon at a time, until you have used all of the powdered sugar. If frosting is too thick, slowly add more coconut milk. If it is too thin, add more powdered sugar.
To assemble:
- Use a serrated knife to trim the top (dome-like) part of the cakes off. Place one layer on your turntable, serving plate or cake stand, and dollop a large amount of frosting on top of it. Spread with a spatula to the edges to create an even layer of frosting, and then apply pressure in the middle with a small, offset spatula to create a “well.” You should have a “dam” around the circumference of the cake to contain the filling. Fill the well with the pear mixture. Place the second layer on top, upside down. Place another dollop of frosting on that layer and spread to the edges again. Add more icing to your spatula to cover the sides of the cake. Use a cake scraper to smooth out the icing. Serve and enjoy!
NOTES:
*Sometimes I like to create thinner layers and I use three 6-inch pans instead. If you do this, the cook time will reduce by about 10 minutes…Keep a close eye!
The post Winter Pear Spice Cake with a Vanilla “Buttercream” (Vegan, GF) appeared first on Never. Not. Eating..
]]>The post Oatmeal Earl Grey and Lavender Sandwich Cookies appeared first on Never. Not. Eating..
]]>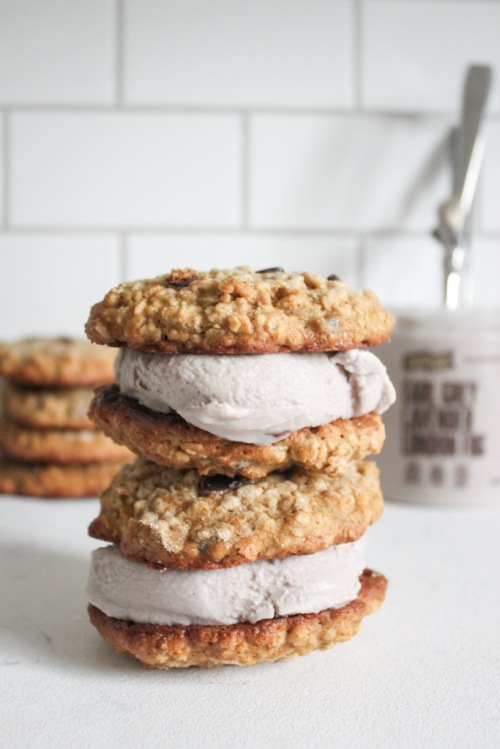
I’ve always loved baking, but as we all know, it’s a science. I tend to stick to cooking, because I like to just throw stuff into a pot and not have to worry about whether the ratios are going to work out or not. But, now that it is stretchy-pant season, I wanted to indulge in some sweet treats, so I thought I would try my hand at developing a cookie recipe. I won’t lie – it took me a few tries, but I am happy at where we landed.
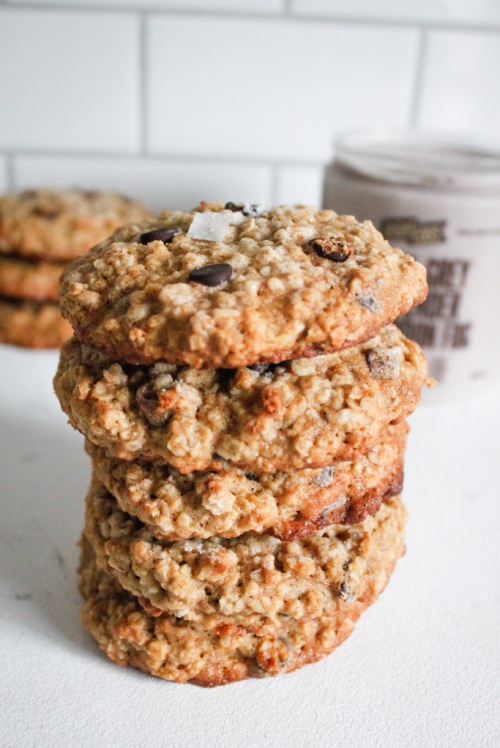
I was aiming for a soft and chewy cookie that stayed soft and chewy. I always find that the cookies I made that claimed to be “chewy,” always hardened up super fast. These ones don’t. Days later, they still have that perfect texture.
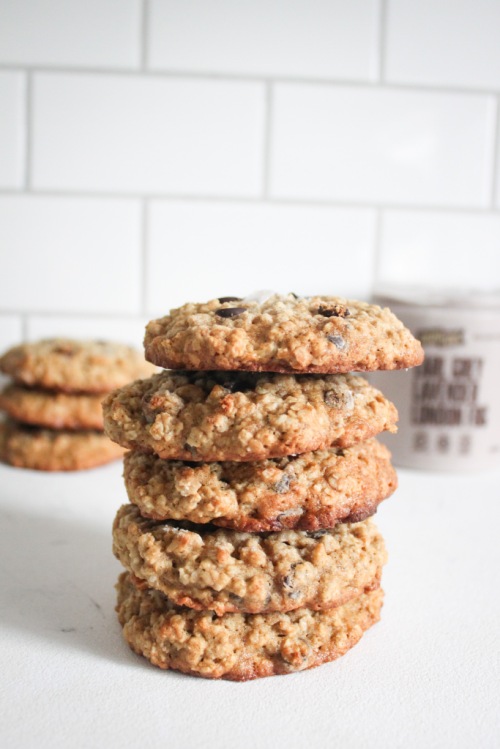
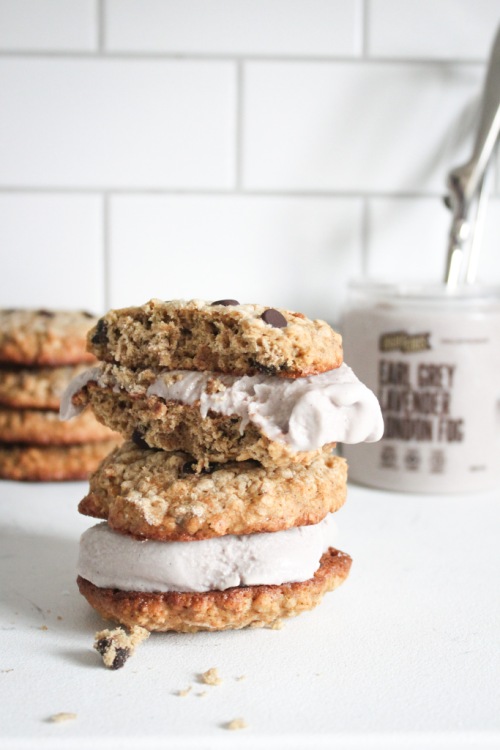
They are simple to make and when you scoop in that yummy gelato, they make for the perfect post-dinner, winter weather treat.
Peace, love and sandwich cookies.
Oatmeal Earl Grey and Lavender Sandwich Cookies
Servings: Makes 18 cookies (9 sandwiches)
Prep time: 15 minutes
Cook time: 12 minutes
Ingredients:
- 3/4 cup unsalted butter, softened
- 1 cup packed brown sugar
- 2 eggs, at room temperature
- 1 banana, mashed
- 1 tsp pure vanilla extract
- 1.5 cups gluten free flour
- 1 tsp baking soda
- 1 tsp salt
- 1 tsp cinnamon
- 1/4 tsp nutmeg
- 3 cups quick oats
- 1 cup dark chocolate chips
- flaky sea salt, for topping (optional)
- 1 tub Earl Grey Lavender London Fog Gelato (or your favourite flavour)
Instructions:
- Add butter and brown sugar to a large stand mixer bowl. Beat on medium speed until light and fluffy. Add the eggs, one at a time, mixing until incorporated. Next, add the banana and vanilla and beat until combined.
- In a separate, medium bowl, whisk together the flour, baking soda, salt, cinnamon and nutmeg. Add to the wet ingredients and beat until incorporated. Remove bowl from stand mixer and use a spatula to fold in the oats and chocolate chips.
- Using a large, three tablespoon cookie scoop, scoop the dough and place on parchment lined baking sheet, two inches apart (you will need more than one baking sheet). Dip the bottom of a wide glass in sugar to press down and flatten the cookies. Place baking sheets in the fridge and set oven to 375 degrees Fahrenheit. When oven is ready, remove the cookies from the fridge and bake for 10-12 minutes, or until the bottoms just begin to brown and the centres are still pale. Sprinkle with some flaky sea salt, if desired. Let cool on the pan for five minutes before transferring to a wire rack to finish cooling.
- Add one large scoop of gelato between two cookies and gently press together to create a sandwich. Repeat for the number of sandwiches you are serving.
- Store extra cookies in an airtight container for up to three days.
The post Oatmeal Earl Grey and Lavender Sandwich Cookies appeared first on Never. Not. Eating..
]]>The post Vegan Pumpkin Coconut Cake appeared first on Never. Not. Eating..
]]>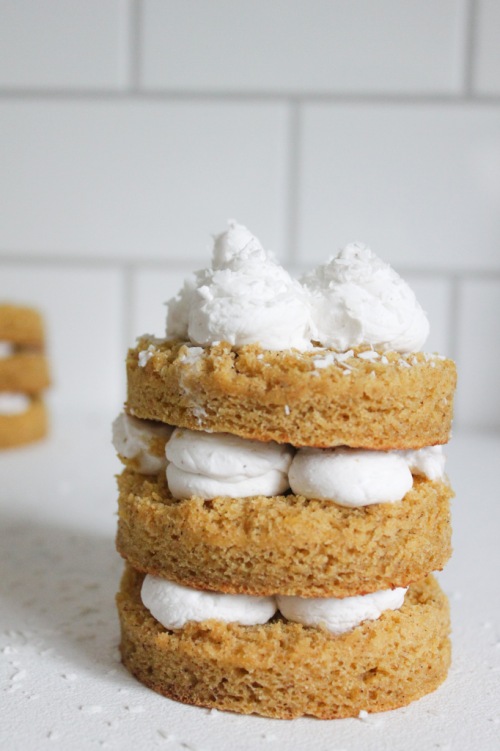
That’s right…Eggless, milkless, and as a bonus – glutenless! No bad foods allowed. A perfect Thanksgiving dessert for the upcoming long weekend!
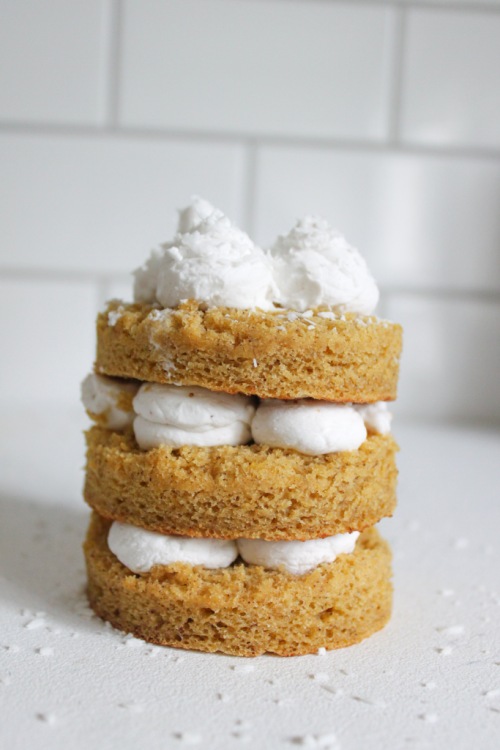
This cake takes minutes to put together, minutes to bake, and seconds to eat. It is moist and fluffy and perfect. You can make individually stacked cakes (as seen in the photos), or you can make one, two-layered cake.
Here is what you will need for the cake:
- My homemade pumpkin puree (or store bought, but it’s just not as fresh)
- Gluten-free flour
- Apple cider vinegar
- Oat milk
- Pumpkin pie spice
- Salt
- Banana
- Brown sugar
- Vanilla
- Baking soda
- Baking powder
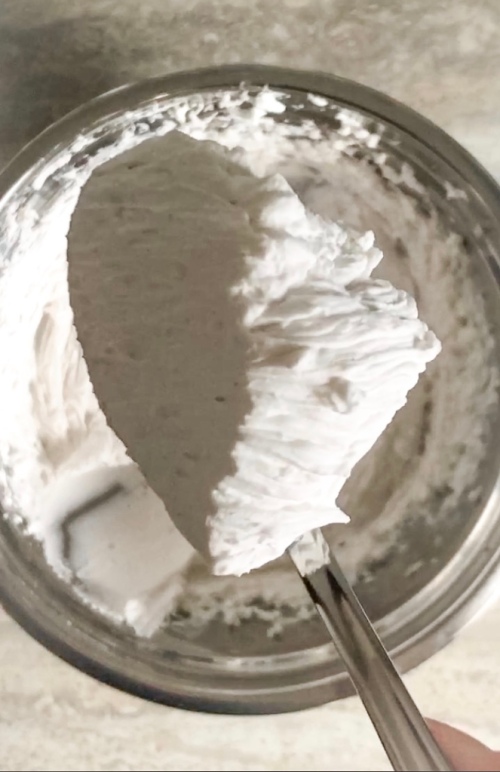
For the whipped coconut cream:
- Canned coconut milk
- Vanilla
- Cinnamon
- Salt
- Powdered sugar
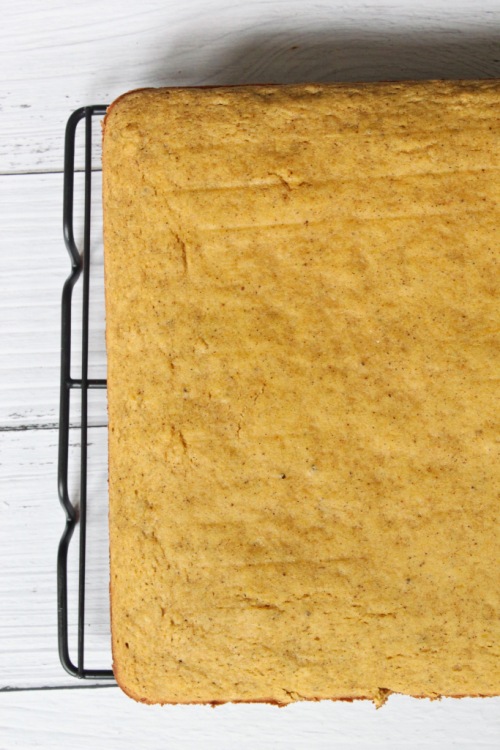
To make the cake, prepare a baking pan by greasing it, lining the bottom with parchment paper and then sprinkling with flour. Combine the apple cider vinegar and oat milk and let sit for 5 minutes. This is a buttermilk substitute, which helps makes the cake fluffy and gives it a bit of a tang. Next, blend all of the ‘wet’ ingredients together – the pumpkin, banana, vanilla and brown sugar. In a separate bowl, sift together the flour, baking soda, baking powder, salt and pumpkin pie spice. Add the dry ingredients and milk mixture to the wet ingredients in four additions, starting with the flour. Pour into prepared baking pan. This will bake for around 12-15 minutes.
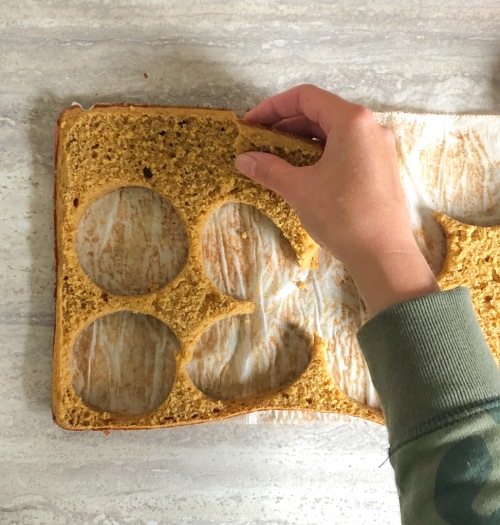
Once cooled, you can assemble you mini cakes (or one large cake) by using a round cookie cutter and cutting out circles to stack on top of one another. Alternatively, you can slice the cake down the middle and create a two-layered cake. This is a good option if you want to feed a larger party.
Baking this cake fills your house with all the smells of Fall and that, my friends, is never a bad thing! Happy baking!
Vegan Pumpkin Coconut Cake
Serving size: Makes three individual cakes or one, two-layer cake
Prep time: 10 minutes
Cook time: 12 minutes
Ingredients:
- 1/2 tbsp apple cider vinegar
- 1/2 cup oat milk (or any plant-based milk)
- 1 cup pure pumpkin (not pumpkin pie filling)
- 1 banana, mashed
- 1/2 cup brown sugar, tightly packed
- 1 tsp pure vanilla extract, separated
- 1.5 cups gluten-free flour
- 1 tsp baking soda
- 1 tsp baking powder
- 1 tsp pumpkin pie spice
- 1/2 tsp salt
- 1 14 oz can full-fat coconut milk (placed in the fridge for at least 24 hours)
- 2 tbsp powdered sugar
- 1/4 tsp cinnamon
- 2 tbsp dried coconut flakes, for topping (optional)
Instructions:
- Preheat the oven to 350 degrees Fahrenheit. Grease a 13 x 9 inch rectangular pan, line with parchment paper and dust with flour. Place a mixing bowl and electric mixer attachment into the freezer (to prepare for the whipped cream).
- Combine apple cider vinegar and oat milk together in a small bowl. Set aside.
- Beat pumpkin, banana, brown sugar and 1/2 tsp vanilla together in a large bowl until smooth.
- In a separate bowl, sift the flour, baking soda, baking powder, pumpkin pie spice and salt together.
- In four additions, add the flour mixture and oat milk to the wet ingredients, starting with the flour, and beating until combined.
- Pour batter into prepared pan and bang the pan on the counter a few times to release any air bubbles. Bake for 12-15 minutes, or until an inserted toothpick comes out clean. Remove from oven and let cool in the pan for five minutes before flipping onto a wire rack to finish cooling completely.
- While the cake cools, make the whipped cream. Remove the bowl and mixers from the freezer and carefully open the can of coconut milk from the fridge. Scoop the solid white part at the top of the can into a bowl (refrigerate the water at the bottom of the can and save for smoothies). Beat the coconut solids on medium speed for 30 seconds. Add the powdered sugar, the cinnamon, the rest of the vanilla and a pinch of salt. Beat for another minute until it is thick and creamy.
- When the cake is cool, use a round cookie cutter to cut out nine circles (or cut the cake in half to make two layers). Spread some of the whipped cream onto the first cut out circle. Top with the second and repeat. Add some whipped cream on top of the third circle and sprinkle with some of the dried coconut, if desired. Alternatively, if making one large cake, spread some of the whipped cream on the first layer of cake, top with the second layer and then dollop the rest of the whipped cream on top. Sprinkle with coconut flakes.
- Serve immediately or store in the fridge for up to 48 hours.
The post Vegan Pumpkin Coconut Cake appeared first on Never. Not. Eating..
]]>The post Gluten Free Crepes with an Apple Cinnamon Compote appeared first on Never. Not. Eating..
]]>
I’ve used my soup maker to make an abundance of different recipes, such as: soup (duh!), smoothies, juices, pancakes and my favourite, alcoholic beverages. It’s truly simple to use and does all of the cooking and blending for you, allowing time to clean up your kitchen, or do something more fun, like snack while you wait for your food. If you have a soup maker, or are thinking of purchasing one, check out my Instagram account for some more fun recipes to make in it – @nevernoteatingca
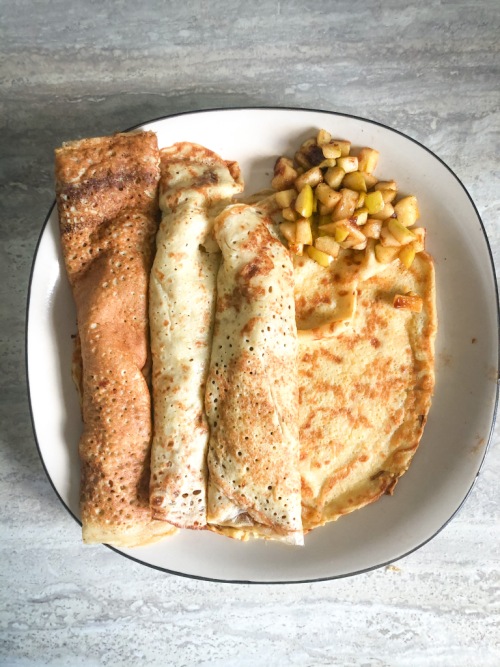
So let’s talk about these crepes. Firstly, I struggle to call them “crepes,” because as a kid, my family and I only ever ate “Finnish pancakes,” which were more crepe-like in appearance, but were never referred to as crepes. Those were our style of pancakes. We never ate traditional American pancakes. But you know what?! I’m all about pleasing the people. People see flat pancakes, they say “crepes.” So, this is for you.
Secondly, if you follow my IG account, or have read some of my posts, or even tried some of my recipes (thank you), you know that I like to put a healthier spin on foods that aren’t so healthy. Therefore, I have made these “crepes” with gluten-free flour, plant-based milk and no refined sugar. If you want to indulge a bit more, feel free to sub in the healthy ingredients for the not-so-healthy ones.
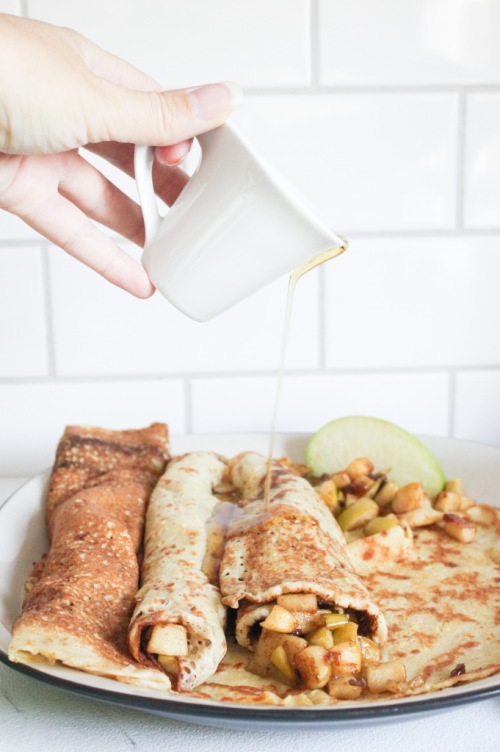
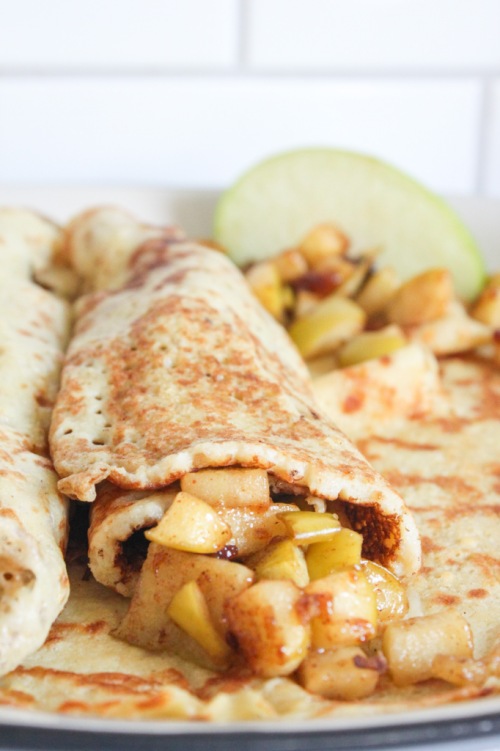
I can’t decided whether my favourite part of this dish is the pancake…I mean crepe…or the filling. It’s apple season right now, and nothing goes better together than apples and cinnamon. And nutmeg. Nutmeg is bomb. The filling is tart and sweet and ooey and gooey. It’s a great addition to these less-sweet crepes. I prefer to use honeycrisp or granny smith apples for this, but you can definitely use whatever you have on hand. I also like to keep the skins on, mostly because I’m lazy, but feel free to peel your apples if that’s your jam.
Below you will find two ways to make this recipe. The first is the easiest way, but you need a soup maker for that! The second is more traditional, but totally yummy just the same.
May your day be enhanced with pancake-crepes and fall fillings!
Gluten Free Crepes with an Apple Cinnamon Compote
Serving Size: Makes 10 large crepes
Prep time: 5 minutes
Cook time: 20 minutes
Ingredients
- 2.5 cups dairy-free milk
- 2 eggs, beaten
- 2 tbsp maple syrup, plus more for serving
- 1 tsp vanilla extract
- 1.5 cups gluten free flour
- 1/2 tsp salt
- 2 medium apples, finely diced (I use honeycrisp or granny smith)
- 1/2 tsp lemon zest
- 1 tbsp lemon juice
- 1/2 tsp cinnamon
- pinch of fresh nutmeg
- 1/2 tbsp of cornstarch
- 1 tbsp maple syrup or brown sugar
- coconut oil or butter (for the pan)
Instructions
With a soup maker:
- Add the milk, eggs, syrup, vanilla, flour and salt to your soup maker. Set to “juice.” When finished mixing, skip to step 3 below.
Without a soup maker:
- Whisk together milk, eggs, syrup and vanilla and set aside.
- In a medium bowl, whisk flour and salt together. Add the wet ingredients and whisk until combined.
- Place a large pan over medium-high heat and add half a tablespoon of coconut oil (or butter). When the pan is very hot, add about 1/3-1/2 cup of the crepe batter (depending on the size of your pan). Swirl the pan around until the batter coats the entire bottom. There shouldn’t be a lot of batter sitting on top.
- Let the crepe cook until the edges begin to come up from the pan and the bottom is browned. Flip and cook on the other side for about 2 minutes or until darker spots begin to develop on the underside. Remove from pan, place on a plate and store in the oven or microwave to keep warm. Continue with the remainder of the batter.
For the filling:
- While the crepes cook, add the apples, zest, lemon juice, cinnamon, nutmeg, cornstarch and sugar to a bowl and stir to combine. Let sit for at least 5 minutes.
- Preheat a large pan over medium-low heat. Add a half tablespoon of coconut oil or butter to the pan. When melted, add the apples. Let cook until apples are fork tender, about 8-10 minutes, stirring occasionally.
Assembly:
- Top each crepe with a few spoonfuls of the filling and a drizzle of maple syrup. Roll and enjoy!
The post Gluten Free Crepes with an Apple Cinnamon Compote appeared first on Never. Not. Eating..
]]>The post Roasted Garlic Mashed Cauliflower (Low-Carb) appeared first on Never. Not. Eating..
]]>We are officially entering Fall and that means, Thanksgiving. I’m a lover of enjoying seventy-four side dishes and can always forego the main one. I am always on the hunt for new and fun sides to add to any meal…especially those around the holidays!

This Roasted Garlic Mashed Cauliflower is the perfect side for Thanksgiving, Christmas, Easter…you name it! It’s low-carb and will please your keto and vegan family members. Bonus: It tastes just as good as mashed potatoes!
How to Make Vegan Roasted Garlic Mashed Cauliflower
I highly recommend a good food processor or blender. The Ninja Kitchen line is a great product and I use their food processor every single day. I make EVERYTHING in it – smoothie bowls, pestos, pastry doughs and this mashed cauliflower. It is an affordable alternative to the well-known Vitamix.

For this recipe, everything gets precooked, placed in your food processor and then blended until smooth – it’s THAT easy! Here is what you will need:
- One medium-sized head of cauliflower
- A head of garlic
- Vegetable broth
The Roasted Garlic
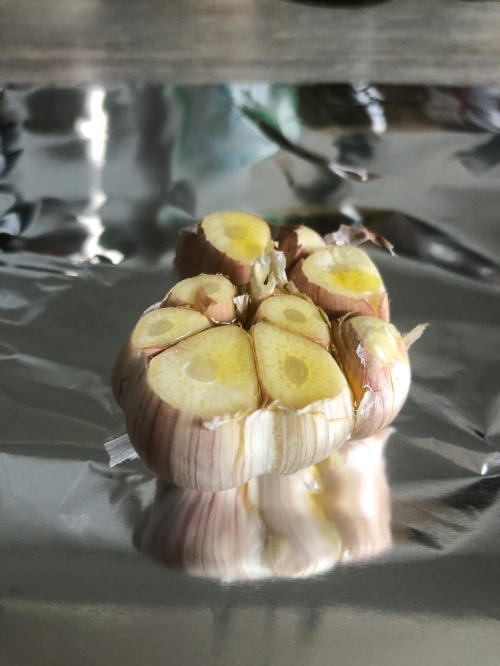
Let’s talk about the garlic – is there anything better?! For this recipe I love using roasted garlic, and although it may take longer, it’s so worth it. In addition, you will also have leftover cloves that you can use in other dishes that you will be serving (or just save them for another day). Roasting a head of garlic is a great move for large dinner parties or holiday gatherings.
To roast, all you have to do is cut off the top of the entire head of garlic, leaving the top of the cloves exposed. Drizzle the head with olive oil, wrap in tin foil and place on a baking sheet and into the oven for 45 minutes. If you want to save on time, you can mince your raw garlic, add to a pan over low heat with some olive oil for about 30 seconds to one minute, and use this in place of the roasted stuff in the recipe. Above all, don’t skimp on the garlic!
Cooking the Cauliflower
To cook the cauliflower, place the florets into a large pot with about a cup and a half of veggie stock. Cover and set your burner to high, and when the liquid starts boiling, turn the burner down slightly and let steam for about 5-10 minutes (depending on how small your florets are). They will be ready when they are fork-tender. Don’t overcook them because you will end up with mushy cauliflower instead of mashed cauliflower!
After you cook the garlic and cauliflower, all that’s left to do is throw it all into your food processor and watch it come together – Pillowy, low-carb clouds of heaven!

More Amazing Cauliflower Sides
Sumac Roasted Cauliflower (a showstopper)
Hot and Sweet Cauliflower Wings (perfect for game day)
East Creamy Cauliflower Soup (a winter hit)
This post contains affiliate links and I may earn a small commission when purchases are made after clicking the links, at no cost to you. Thank you!
Vegan Roasted Garlic Mashed Cauliflower
Servings: 4
Prep time: 10 minutes
Cook time: 45 minutes
Ingredients:
- 1 whole head of garlic
- medium head of cauliflower, broken into florets
- 1 1/2 cups vegetable stock
- salt
- pepper
- olive oil
- fresh thyme, for topping (optional)
Instructions
For the garlic:
- Preheat oven to 375 degrees Fahrenheit.
- Peel the outer layer of skin off of the garlic and slice the top of the head off (see photo above). Place on a piece of tin foil and drizzle the top with about one tablespoon of olive oil. Wrap the garlic up so that there are no holes for the steam to escape and place on a baking sheet and then in the oven for 45-55 minutes.
For the cauliflower:
- When the garlic has been roasting for about half hour, start your cauliflower. Place the florets into a large pot with the vegetable stock, cover and bring to a boil. Once boiling, reduce slightly to a rolling boil and allow the cauliflower to steam for 5-10 minutes, or until just fork tender – do not drain.
- Use a slotted spoon to transfer the cauliflower to a food processor or blender and add one tablespoon of the veggie stock that the cauliflower was cooking in.
- Remove the garlic from the oven and carefully unwrap. Use your fingers to squeeze out two of the cloves (or as many as you want!) and place in the food processor with the cauliflower and stock. Add in 1/4 teaspoon of salt and a few grinds of fresh black pepper and pulse everything to combine and then blend until smooth. Be patient and scrape down the sides often. You can add more of the veggie stock to help loosen it, but don’t add too much or else it will become mushy. Eventually, if you continue to blend and scrape, the mixture will become smooth without the added veggie stock.
- Taste and add more salt and pepper or another clove of garlic, if desired. I like to put more than 1/4 teaspoon of salt, but it is always better to start with less and add more, than to add too much for your taste.
- Transfer the cauliflower to a serving bowl, drizzle with some olive oil and top with fresh thyme, if desired.
The post Roasted Garlic Mashed Cauliflower (Low-Carb) appeared first on Never. Not. Eating..
]]>The post Gluten Free Stone Fruit Galette appeared first on Never. Not. Eating..
]]>
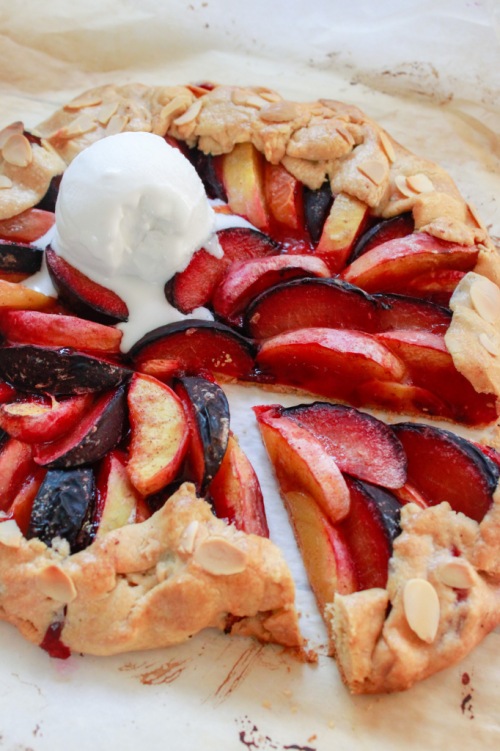
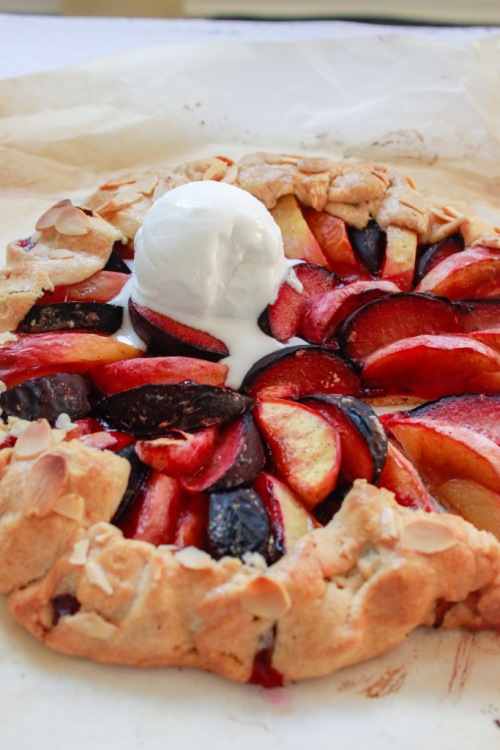
I’m sadly shedding a tear over here as stone fruit season is slipping away. It feels like peaches have only been around for a few weeks, so I’m not sorry that I am bombarding you with a million recipes. And, you need to make this one NOW, before the peaches are gone and it’s too late – get on it!
WHAT IS A GLUTEN FREE STONE FRUIT GALETTE?
If you’ve been following my blog for a while, first of all thank you, I love you, secondly, you know I do a lot of gluten-free stuff and this galette is no exception. Sometimes people think things that are gluten-free don’t taste as good as the glutinous stuff, but I’m here to tell them they’re wrong – WRONG! This crust is still flaky and delicious. So, if taste isn’t compromised, and you had to choose between a gluten-free dessert or a wheat flour dessert…Which one are you going for? I thought so.
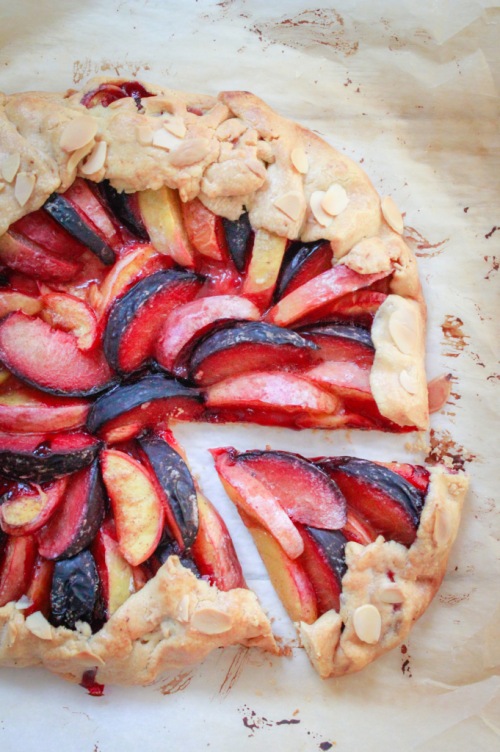
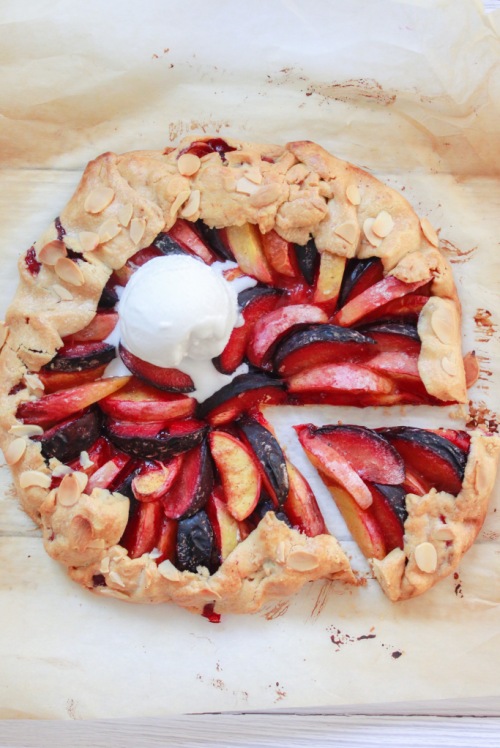
Let’s start by talking about stone fruit. If you are unsure, stone fruit is any fruit with a stone in it. We’re talkin’ peaches, nectarines, plums, cherries, apricots, etc. – you can literally use any of those for this galette. My only recommendation is, if you choose to use apricots, you should add a tablespoon or two of sugar to the fruit as fresh apricots can be very tart. I chose to use peaches, nectarines and plums as those fruits are currently at their peak where I live.
THE PASTRY DOUGH
I think making pastry intimidates people. It intimidates me sometimes, which is why I am always stunned when it turns out so well. Despite being gluten-free, this crust is still everything a great crust should be – flaky, buttery, light, golden. It also rolls out so easily. It’s worth a shot, gluten-free or not – did you catch the rhyme?
WHY SHOULD YOU MAKE THIS GLUTEN FREE STONE FRUIT GALETTE?
If you aren’t convinced to make this yet, I have one further piece of information that may help – TIME. It takes hardly any of it. Seriously, I can understand looking at something like a galette and thinking, “that looks too intense for me,” but this isn’t like that – I promise. The dough takes about 5 minutes to put together, and then it chills in the fridge for 30 minutes. The fruit just needs to be chopped and mixed with a few simple ingredients and also needs to sit for a bit. After that, all you need to do is roll out the dough, place the fruit on top and bake – easy peasy.
THE INGREDIENTS
Like I said, this galette is so easy to make. Moreover, it requires minimal ingredients that come together quickly. Here’s what you need to pick up from your grocery store (like, today!):
For the crust:
- Gluten-Free All Purpose Flour (I prefer Bob’s Red Mill)
- Salt
- Butter
For the Filling:
- Stone fruit of your choice (peaches, plums, nectarines, etc.)
- Cornstarch
- A lemon
- Cinnamon
- Nutmeg
- Salt
- An egg (for the egg wash)
- Sliced almonds (to top, optional)
OTHER MUST-TRY GALETTE RECIPES
Strawberry Honey Ginger Galette (for a unique dessert when you’re feeling sassy)
Gluten Free Zucchini Galette (another fun option, but this time – savoury)
TOOLS NEEDED TO MAKE THIS GLUTEN FREE STONE FRUIT GALETTE
Click on the images below to see what I use for this recipe.


This post contains affiliate links and I may earn a small commission when purchases are made after clicking the links, at no cost to you – Thank you!
GLUTEN FREE STONE FRUIT GALETTE
Serving size: 8-10
Prep time: 15 minutes
Chill time: 30 minutes
Cook time: 30 minutes
Ingredients
For the crust:
- 1 1/4 cup gluten-free flour
- 1/2 tsp salt
- 3/4 cup cold unsalted butter, cubed
- 1 tbsp vinegar
- ice-cold water
For the filling:
- 4 cups of stone fruit (approximately 5-6 medium-sized fruits, I used 2 peaches, 1 nectarine and 2 plums)
- 1 tbsp cornstarch
- 1 tbsp lemon juice
- 1/2 tsp cinnamon
- pinch of nutmeg
- pinch of salt
- 1 egg, beaten
- 2 tbsp slivered almonds (optional)
Instructions
For the crust:
- Add the flour and salt to a food processor and pulse a few times to combine. Toss in the cold cubed butter and pulse again until dough resembles small peas. Add the vinegar and one tablespoon of ice-cold water and pulse. If needed, add more water, half tablespoon at a time until larger pieces of dough come together – this usually takes me 1.5 to 2 tablespoons of water to achieve. Be careful not to add too much water or dough will be too sticky.
- Turn dough out onto a piece of plastic wrap and use your hands to form dough into a disc. Wrap and place in fridge to chill for 30 minutes.
For the filling:
- Add all of the filling ingredients to a bowl and stir to combine. Set aside while the dough finishes chilling.
Assembling:
- Firstly, make sure you flour your work surface well. Place the dough on floured surface and sprinkle more flour on top of the dough, as well as on your rolling pin. Roll out dough to about 1/4-inch thick. Carefully transfer it to a parchment lined baking sheet and arrange the stone fruit slices on top, in a circular formation, leaving a one-inch border all the way around. Fold the edges over the fruit and place the baking sheet back into the fridge, setting the oven to 400 degrees Fahrenheit to preheat.
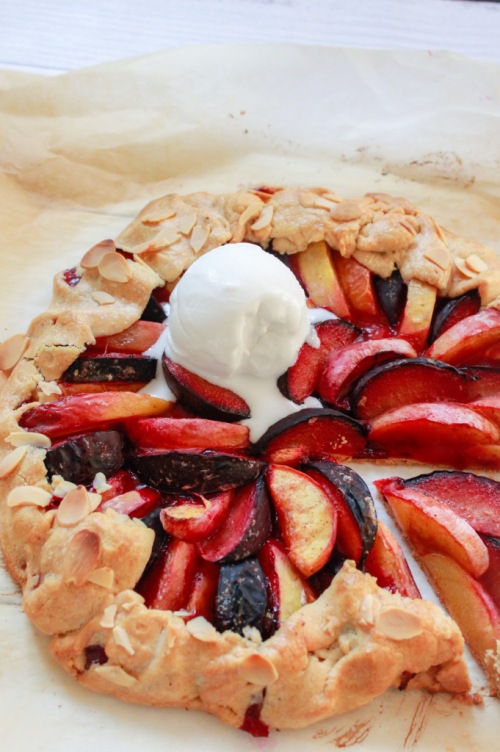
- When the oven is ready, remove the galette from the fridge and brush the beaten egg over the exposed pastry edges and top with a few sliced almonds, if desired. Bake the galette for 25-35 minutes, or until crust is golden brown. Be sure to let it cool for 5 minutes before serving, as the fruit can be very hot.
NOTES
This galette is best when eaten immediately, but can be stored in an airtight container in the fridge for up to 3 days.
This recipe is less-sweet, so add a tablespoon or two of sugar to the fruit when combining with the other ingredients if you would like a sweeter dessert.
Try with a scoop of vanilla bean ice cream!
The post Gluten Free Stone Fruit Galette appeared first on Never. Not. Eating..
]]>