The post Vegan Rice Crispy Chocolate Treats appeared first on Never. Not. Eating..
]]>
WHAT ARE VEGAN RICE CRISPY CHOCOLATE TREATS?
I’m telling you, these are such a fun snack – they are basically a peanut butter and rice crispy cereal ball coated in chocolate, and they are so delicious. Not to mention, they are much healthier than the well-known Rice Crispy Treat because they don’t have marshmallows, but stick together with peanut butter and maple syrup instead. They are crispy, light and make for a perfect snack at any time of day!

WHY I LIKE THESE VEGAN RICE CRISPY CHOCOLATE TREATS
I am always trying to reinvent traditional desserts and snacks into healthier versions that I feel good about eating, and this recipe does exactly that. That is why these would be an amazing snack for kids as they are refined sugar-free and have protein and healthy fats from the all-natural peanut butter! I chose to use Lily’s brand sugar-free chocolate to keep these completely refined-sugar free, but you can use any chocolate you would like.

THE INGREDIENTS
To make these snacks, you only need a few simple ingredients that you likely already have in your pantry, including:
- Gluten-free, sugar-free Rice Crispy Cereal
- Natural peanut butter
- Maple syrup
- Vanilla
- Chocolate
- Flaky sea salt (optional)
MAKING VEGAN RICE CRISPY CHOCOLATE TREATS
The first thing you will need to do is create the rice crispy balls. To do this, you will add peanut butter, maple syrup and vanilla in a big bowl and mix to combine. Pour in the Rice Crispy Cereal and use a spatula to incorporate the cereal into the peanut butter mixture. When it’s fully combined, roll small portions of the cereal into small spherical balls. Place them on a parchment lined plate and freeze while making the chocolate coating.
Melt the chocolate over a double boiler and then remove the treats from the freezer and dip into the chocolate until fully coated. Return the chocolate covered treat balls to the parchment lined plate and place in the fridge in order for them to set up.

TIPS
- I like to use a new jar of peanut butter as it has a runnier consistency when first opened, before begin refrigerated – this really helps to easily mix the treat ingredients without making crumbs out of the Rice Crispy Cereal.
- To portion the balls, I use a small cookie scoop so that they are all the same size.
- Use a fork to lift the chocolate-coated treats out of the melted chocolate and tap on the side of your bowl to let any excess chocolate drip back into the bowl.
- Add a tablespoon of coconut oil to the chocolate chips while melting to get a glossier chocolate coating.

OTHER HEALTHY SNACKS YOU NEED TO TRY
No-Measure Oatmeal Almond Butter Cookies (my absolute favourite anytime snack)
Vegan Protein Energy Balls (a great pre-gym snack)
Vegan Ice Cream Bars (the perfect summer treat)
TOOLS I USED TO MAKE THESE VEGAN RICE CRISPY CHOCOLATE TREATS
Click on the images below to see what I use for this recipe.


This post contains affiliate links and I may earn a small commission when purchases are made after clicking the links, at no cost to you – thank you!
Vegan Rice Crispy Chocolate Treats
Servings: Makes 15 small treats
Prep time: 15 minutes
Chill time: 20 minutes
Ingredients
- 1 cup smooth natural peanut butter (see tips above)
- 1/4 cup 100% pure maple syrup
- 1 tsp pure vanilla extract
- 2 cups gluten-free Rice Crispies cereal
- 150 grams dark chocolate
- 1 tablespoon coconut oil (optional)
- flaky sea salt (optional)
Instructions
- In a large bowl, mix together the peanut butter, maple syrup and vanilla until combined. Pour in the cereal and stir with a spatula until fully incorporated into the peanut butter mixture.
- When the mixture is incorporated, use a small cookie scoop to portion the mixture into your hands and roll into spherical shapes – it should make around 15 treat balls. Place them on a parchment lined plate or tray and into the freezer while melting your chocolate.
- Set up a double boiler: Add about an inch of water to a small pot and place it over medium heat. Pour the chocolate into a heat-proof glass bowl and add the coconut oil, if using. Place the bowl on top of the pot to melt the chocolate, stirring regularly, and once the chocolate has melted, remove the bowl from the pot.
- Finally, remove the Rice Crispy treats from the freezer and dip into the melted chocolate, coating fully. Place them back on the parchment lined plate and repeat for all of the treats. Sprinkle with a little bit of flaky sea salt, if desired, and then refrigerate for about 20 minutes or until set.
Store in the fridge for up to 5 days.

The post Vegan Rice Crispy Chocolate Treats appeared first on Never. Not. Eating..
]]>The post Dark Chocolate Protein Nuggets appeared first on Never. Not. Eating..
]]>
I was in Costco the other day and I found these Keto Nuggets and decided to give them a shot. I’ve been looking for something that I can eat post-dinner that isn’t too terrible for you. I really just can’t get behind the idea that dinner is the last meal that I will eat in a day. I don’t vibe with that. Anyway, back to my story: I purchased them and they were pretty darn good! But, since it’s me and I need to make mostly everything from scratch, I decided that instead of buying them again, I was going to make them. And here we are!

So these “nuggets” are super quick and easy. The nuts and seeds in the recipe can easily be swapped out for your favourite nuts and seeds, as long as you abide by the number of grams listed!
I like to toast the almonds and pecans to get that roasty toasty flavah before dousing them in the melted chocolate. So good!

Note: There isn’t any extra sugar added to these…Just what is in the chocolate. I like things less-sweet, but also because I always use maple syrup, honey or agave to sweeten my food, and their properties could potentially seize the chocolate. Chocolate is super temperamental, and even the tiniest drop of water could ruin an entire bowl. Because all of my preferred sweeteners are in liquid form, I didn’t want to add any and compromise the chocolate.

You can definitely find a lot of the ingredients at Costco or your local bulk food store, but here are some links to the required products if you prefer to shop online:
- Pecans
- Almonds
- Hemp hearts
- Pumpkin seeds
- Chia seeds
- Shredded coconut
- Flaky sea salt
- Dark chocolate
- Coconut oil
Another very helpful item is a kitchen scale. This is so great to have on hand, especially if you do a lot of baking. I used my scale for this recipe as it is the most accurate, especially when you are measuring nuts – their awkward shape always fits differently into measuring cups.
Let’s make some nuggets!

This post contains affiliate links and I may earn a small commission when purchases are made after clicking the links, at no cost to you. Thank you for supporting me!
Dark Chocolate Protein Nuggets
Prep time: 10 minutes
Cook time: 10 minutes
Cool time (inactive): 1 hour
Ingredients:
- 1/2 tsp Flaky sea salt
Instructions:
- Preheat oven to 350 degrees Fahrenheit and line a large baking sheet with parchment paper.
- Spread the pecans out on the parchment paper and bake in oven for 3 minutes.
- Pull out the baking sheet and add the almonds. Bake for another 3-6 minutes, or until just starting to become brown. Watch carefully! They will burn easily.
- To a large bowl, mix together the toasted nuts, hemp hearts, pumpkin seeds, chia seeds, coconut and salt and set aside.
- Add the chocolate and coconut oil to a double boiler*, over low heat. Stir frequently with a spatula until almost completely melted. Remove and continue stirring until the remaining solid pieces melt.
- Pour the chocolate over the nut and seed mixture and use a wooden spoon to mix until all of the nuts and seeds are coated. Spread the mixture out onto a parchment lined baking sheet (you can use the same parchment you used for roasting the nuts). Place in the fridge for at least one hour to set.
- When fully set, remove from fridge and break into bite-size “nuggets.” Store in an airtight container in the fridge for up to 2 weeks!
NOTES:
*For the double boiler, fill a small pot with one – to two-inches of water and place over medium low heat. Add a larger glass, or heatproof bowl on top of the pot with a wooden spoon in between to let the steam escape. Place the chocolate and coconut oil into the glass bowl to melt.
The post Dark Chocolate Protein Nuggets appeared first on Never. Not. Eating..
]]>The post Brown Butter Nutty Granola appeared first on Never. Not. Eating..
]]>- Christmas is coming
- You need a hostess gift
- You like nuts
Truly – this is the best, most perfect, thoughtful, fast, easy, cheap and delicious gift that you could give to someone for hosting you over the holidays. I wouldn’t lie to you. Scout’s honour.
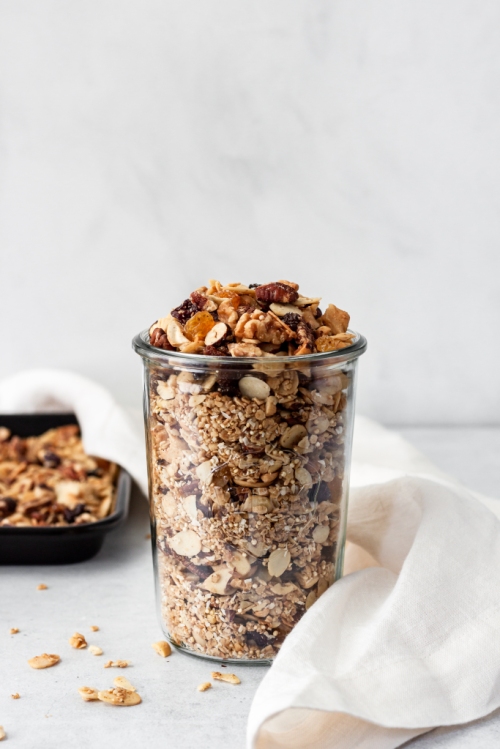
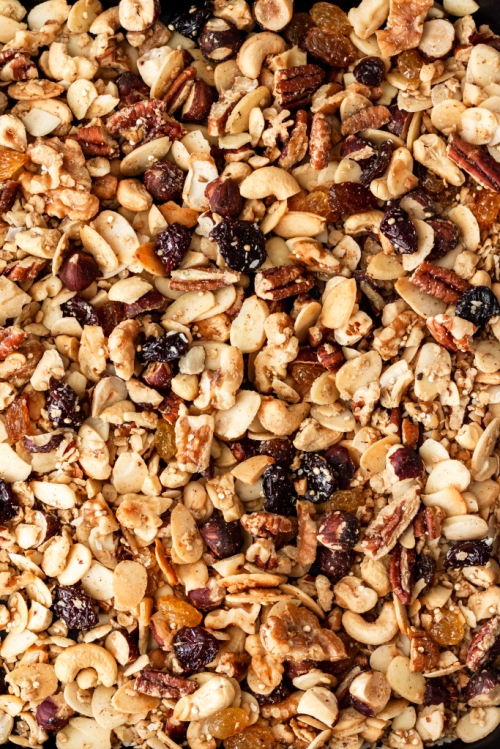
This granola recipe boasts all things Christmas – warm spices, toasted nuts, jeweled cranberries…and brown butter – the best part. Grab a few small mason jars and fill ’em up, tie some bows and get ready to have a handful of new best friends.
Alright, less talk, more granola.

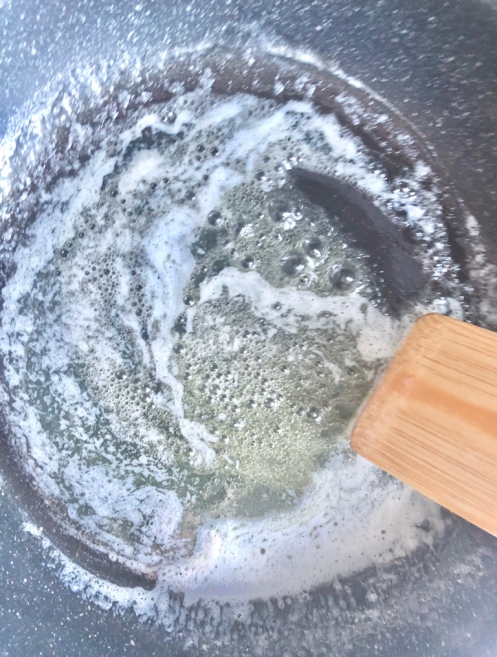
First step: Make the brown butter. Add a quarter cup of cold butter to a pan over medium-low heat. Let the butter foam up and become fragrant, stirring often.
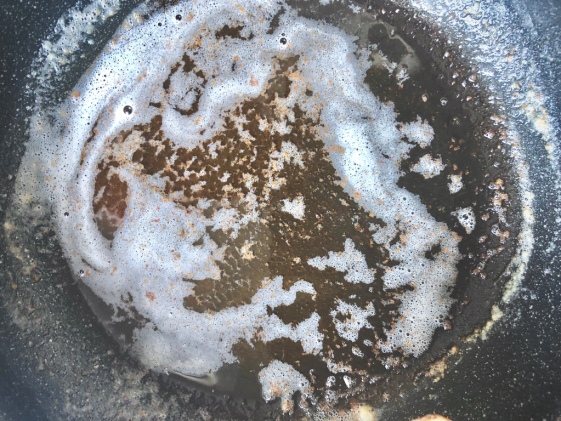
It will begin to develop brown bits on the bottom of the pan (5 minutes or so) – remove from heat and let cool (put it in the fridge or freezer to speed up this process).
Secondly: Grab the biggest bowl you own. We’re not messin’ around.
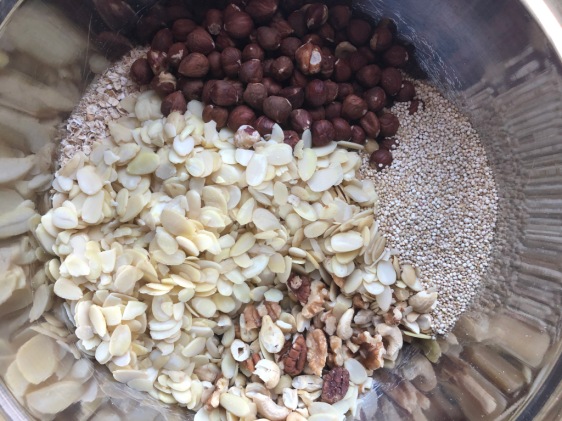
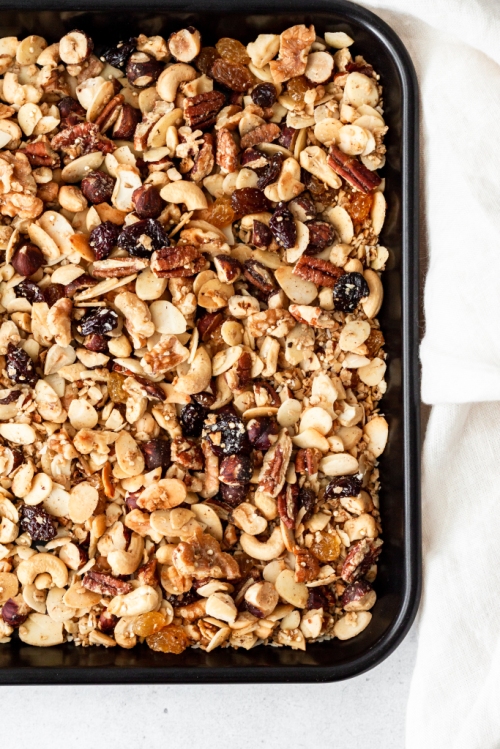
Dump in 2 cups of rolled oats, 6 cups of your favourite types of nuts (I do one cup pecans, one cup walnuts, one cup cashews, two cups slivered almonds and one cup hazelnuts) and half of a cup of quinoa. Set aside.
Next: In a small measuring cup, whisk together three-quarters of a cup of maple syrup, the cooled brown butter, half a teaspoon vanilla, half a teaspoon cinnamon and a quarter of a teaspoon of nutmeg.
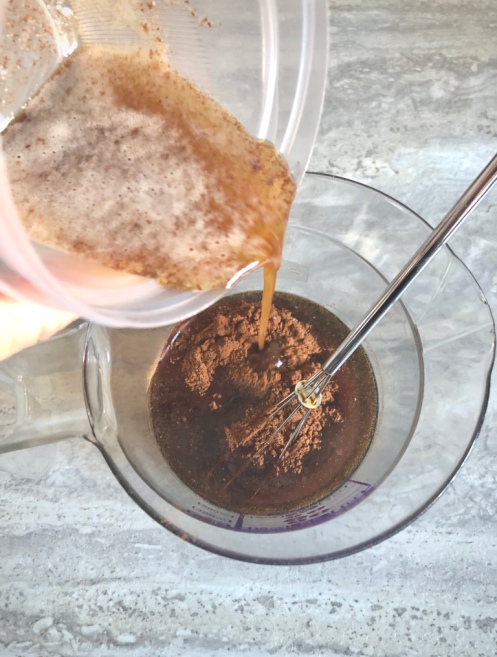
Pour over the nut mixture and stir, making sure everything is coated nicely.
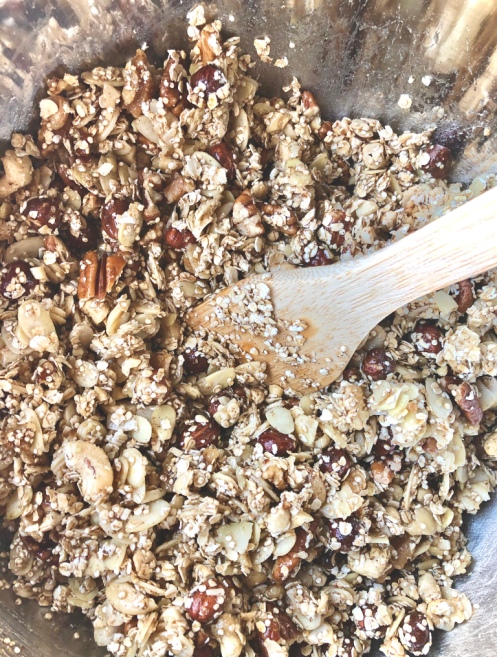
Transfer to a baking sheet that is lined with aluminum foil and bake in a 375 degree oven for 30-35 minutes, stirring often to prevent burning. Add large coconut flakes for the last two minutes of baking. Remove from oven and add some golden and sultana raisins as well as a handful of dried cranberries and a bunch of flaky sea salt. Cool for twenty minutes before putting into jars or storing in airtight containers.
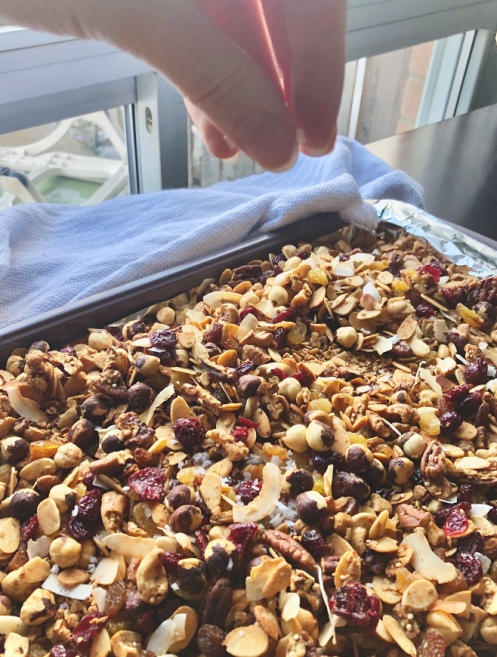
*I highly recommend using heavy duty aluminum foil for this as thinner foil can rip easily when you are stirring the granola. No one likes tin flakes in their food!
Brown Butter Nutty Granola
Yield: 8 cups
Prep time: 10 minutes
Cook time: 35 minutes
Ingredients:
- 1/4 cup cold butter
- 2 cups quick (or rolled) oats
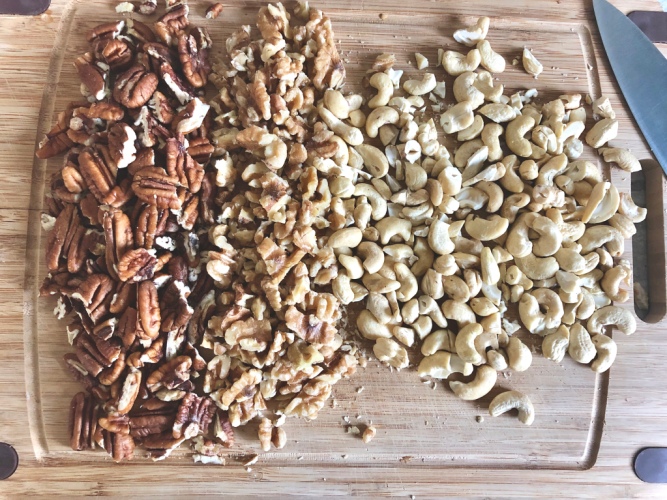
- 1 cup pecans, rough chop
- 1 cup walnuts, rough chop
- 1 cup cashews, rough chop
- 2 cups slivered almonds
- 1 cup hazelnuts, rough chop
- 1/2 cup raw quinoa
- 3/4 cup pure maple syrup
- 1/2 teaspoon vanilla
- 1/2 teaspoon cinnamon
- 1/4 teaspoon nutmeg
- 1/2 cup large flake coconut
- 1/3 cup sultana raisins
- 1/3 cup golden raisins
- 1/3 cup dried cranberries
- 1/2 tbsp – 1 tbsp flaky sea salt
Instructions:
- Add butter to a medium-sized pan over medium-low heat. Cook, stirring often, until you see brown bits begin to form on the bottom of the pan (about 5 minutes). Remove from heat immediately and cool completely (speed up cooling process in fridge or freezer). Do not burn the butter!
- Preheat oven to 375 degrees Fahrenheit and line a large baking sheet with heavy duty aluminum foil.
- In a very large mixing bowl, add the oats, nuts and quinoa.
- In a small measuring cup, measure out the maple syrup. Add the cooled brown butter, vanilla, cinnamon and nutmeg and whisk until combined. Drizzle over the nut mixture and toss until everything is coated. Spread evenly on the foil-lined baking sheet. Bake granola in oven for 35 minutes, stirring frequently to avoid burning. During the last five minutes, add the flaked coconut. The granola is ready when everything is a golden brown colour.
- Remove from oven and add the raisins, cranberries and sea salt to taste (don’t skip the salt!!!).
- Let cool completely before storing in an airtight container.
The post Brown Butter Nutty Granola appeared first on Never. Not. Eating..
]]>