The post Creamy Vegan Mushroom Rigatoni appeared first on Never. Not. Eating..
]]>
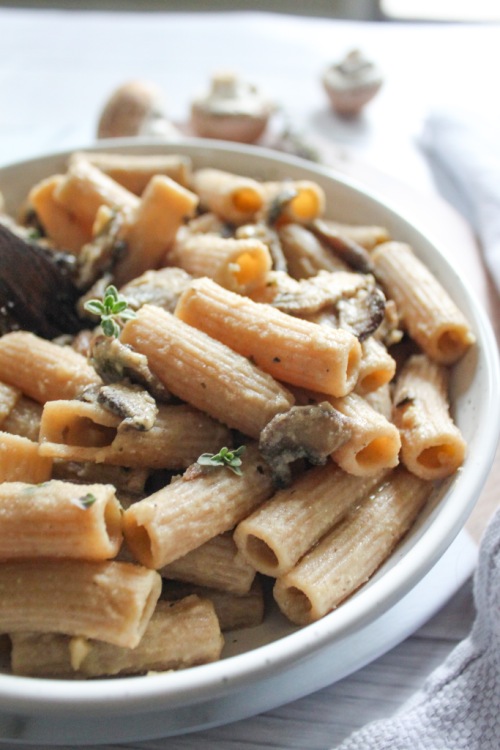
Now I love those little fungi so much. That’s why I had to dedicate this pasta to them – to say I’m sorry for a lifetime of neglect, and it won’t happen again.
One thing I never neglected – Rigatoni. Isn’t it such a great pasta choice? Those sweet little grooves that hold all the sauce? Yes, please! I love using spelt pasta, but any pasta works for this recipe. Make sure you cook it to al dente, as it will continue to cook once added to that creamy mushroom sauce!
The sauce – Simple, yet delicious. Creamy, but vegan. This easy-to-make sauce requires only a few ingredients:
- garlic
- mushrooms
- thyme
- white wine
- stock
- coconut milk
- vegan butter
Start by adding the mushrooms to some olive oil and salt in a pan. Cook them down and caramelize them up! Next, add in the garlic, thyme and white wine. Cook until you cannot smell the alcohol anymore and then add the stock and milk. Let simmer until it thickens up, and transfer the pasta into the sauce to finish cooking. Finally, add in some of the pasta water to bring everything together and you got yourself some mushroom pasta!
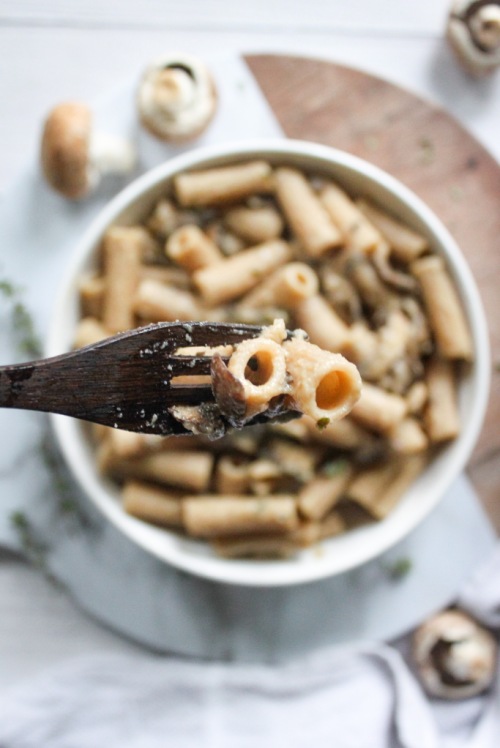
Let’s all show our love to mushrooms!
Creamy Vegan Mushroom Rigatoni
Servings: 2
Prep time: 5 minutes
Cook time: 20 minutes
Ingredients:
- 200 g rigatoni
- 3 cups sliced mushrooms
- olive oil
- salt
- pepper
- 2 cloves garlic, minced
- 2 sprigs thyme, stems removed
- 1/4 cup white wine
- 3/4 cup vegetable stock
- 3/4 cup full-fat canned coconut milk
- 1 tbsp vegan butter
Instructions:
- Cook the pasta according to package instructions, in heavily salted boiling water. Reserve 1/4 cup of the pasta water before draining.
- Add two tablespoons of olive oil to a large saucepan over medium-low heat. When the oil begins to move easily in the pan, add the mushrooms and a pinch of salt. Cook for 6-8 minutes, stirring occasionally. Add the garlic and thyme to the pan and cook until fragrant, about 30 seconds. Add the wine and let simmer for about 5 minutes, or until the alcohol smell is gone. Pour in the vegetable stock, stir, and follow with the coconut milk. Let the sauce simmer until thickened, about 10 minutes. Finish with the butter and some cracks of fresh black pepper.
- Transfer the pasta into the pan, pour in the reserved pasta water, and mix to coat with the sauce. Taste and adjust seasoning as necessary. Enjoy!
The post Creamy Vegan Mushroom Rigatoni appeared first on Never. Not. Eating..
]]>The post The Triple P’s – Pink Pitaya Pancakes (Vegan & GF) appeared first on Never. Not. Eating..
]]>
Not only is pink a pretty hue, but it has also made its mark on our planet. Pink ribbons are used to raise awareness for breast cancer, a pink shirt is a symbol for anti-bullying, and pink flowers and hearts are given to express one’s love for another.
Pink food is more enjoyable as well, and that’s a fact. Okay, fine…it’s not a fact, but it’s my very strong opinion and I dare you to challenge me!
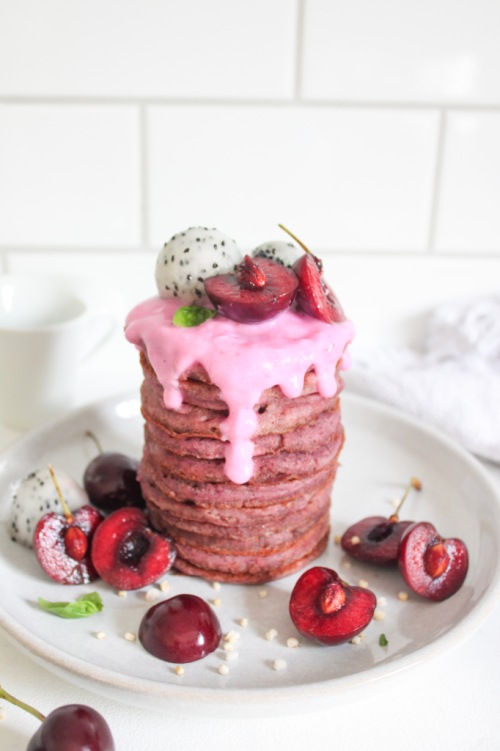
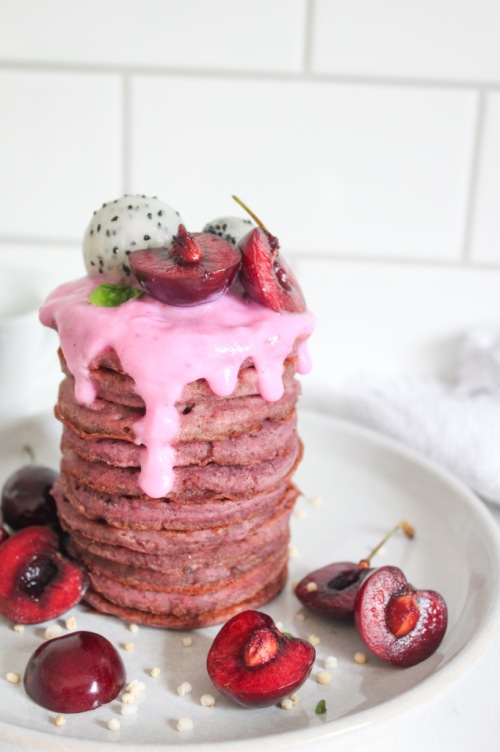
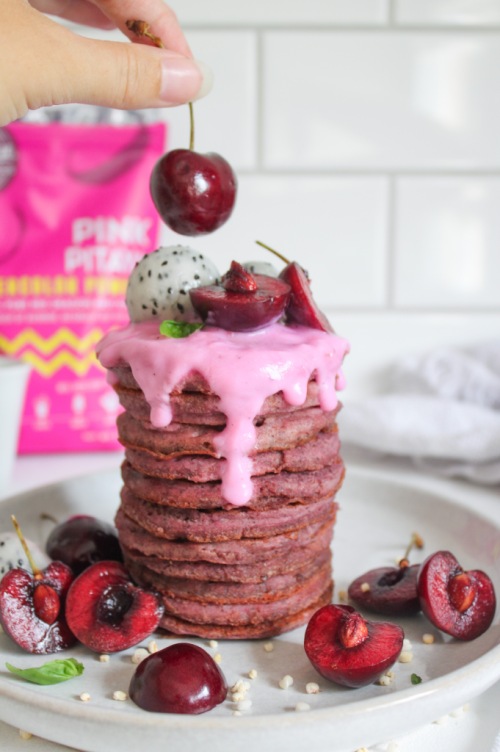
Anywho, since we now agree that pink food is better than non-pink food, I have a pretty sweet recipe for you – The Triple P’s! PINK PITAYA PANCAKES.
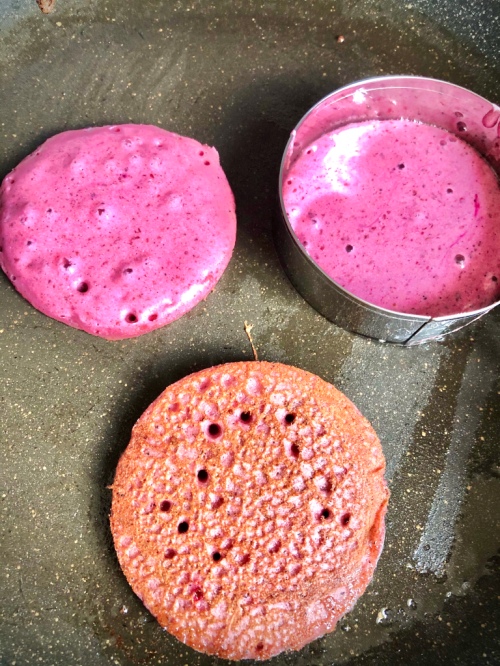
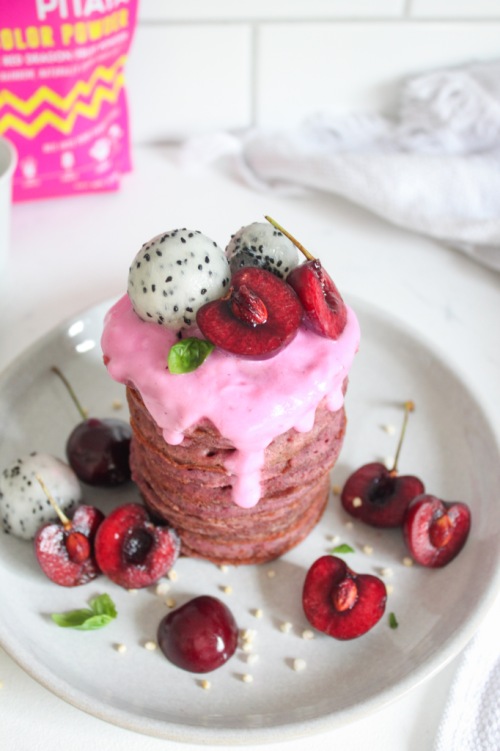
Since we’ve already discussed the importance of the colour pink, let’s talk about pitayas. If you don’t know, a pitaya is a fruit, commonly known as “dragonfruit” in North America. It has a pink skin with scale-like spikes shooting out of the exterior. It’s quite unique in appearance, and also quite beautiful. The inside of a pitaya can be white or a bright pink, with little black seeds, similar to that of a kiwi. It has a very mild taste and soft, fleshy texture. The pitaya I am using in this recipe is actually in powder form. The fruit is dried out and then finely ground so it can be used in smoothies, baking, and today – PANCAKES! You can find pink pitaya powder here.
And, these aren’t just any pancakes, peeps. These are gluten-free, vegan, and refined sugar-free! You. Are. Welcome. So, what replaces all of the glutenous, sugary, dairy-forward ingredients, you ask? Well, let’s start with the dry:
Buckwheat flour – I love, love, love using buckwheat flour as a substitute for all-purpose. It is NOT made out of wheat, and therefore is gluten-free. Buckwheat is actually a seed and it is ground up and sold in ‘flour’ form. I consider it to be the best GF flour for pancakes because it holds up and acts the most similar to regular flour. I also really like the nuttier taste.
Flax – Eggs are a typical pancake ingredient, but if I added them to this recipe then the pancakes wouldn’t be vegan. So instead, I use a flax ‘egg,’ which is literally just flax meal and water mixed together and left to sit for a few minutes to thicken up. It’s the perfect vegan binder.
Oat Milk – In any standard flapjack recipe, you will either find milk or buttermilk. And, again, since I’m going for vegan pancakes today, dairy products just don’t cut it. That’s why I have created my vegan ‘buttermilk’ by mixing some organic apple cider vinegar with oat milk instead of the baby cow elixir. You can also use white vinegar for this, if you don’t have ACV. Make sure you are using a certified gluten-free oat milk, as oats themselves do not have gluten in them, but often can be cross-contaminated with other glutenous products. If you can’t find a gluten-free oat milk, you can definitely use almond, cashew or soy milk instead!
Maple Syrup – Finally, the sweet stuff. Obviously white refined sugar is standard, but that shiz is so bad for you, man. I typically could eat these pancakes without any sugar, just because I’m sweet enough, but sometimes I like to add a little maple syrup to bring out the Canadian in me. It’s completely optional, but you do you. You can add more than what is called for if you like a sweeter pancake.
Alright, I think I’ve covered all of the important bases here. Let’s make some flippy flappies!
The Triple P’s – Pink Pitaya Pancakes (Vegan, GF)
Serving size: Makes about 15 small pancakes
Prep time: 10 minutes
Cook time: 15 minutes
Ingredients:
- 1 tbsp flax meal
- 1/2 tsp apple cider vinegar or white vinegar
- 3/4 cup gluten-free oat milk (or your preferred dairy-free milk)
- 1/2 cup buckwheat flour
- 1/2 tsp baking powder
- 1/4 tsp baking soda
- 1/4 tsp salt
- 1 tsp maca powder (optional)
- 1.5 tbsp pink pitaya powder (optional)
- 1-3 tbsp pure maple syrup (according to how sweet you want them, I do 1 tbsp)
- 1/2 tsp pure vanilla extract
- coconut oil
Instructions:
- To a small bowl, add flax meal and 2.5 tablespoons of water. Mix well and place in the fridge for at least 5 minutes.
- Add vinegar and plant-based milk to a measuring cup and stir. Set aside.
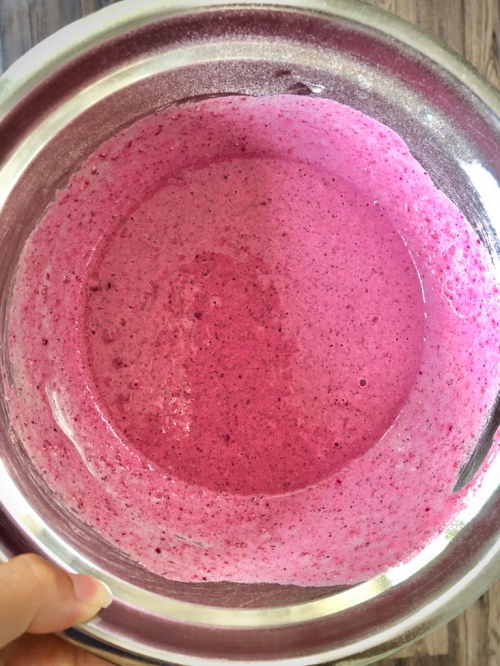
- To a medium bowl, add buckwheat flour, baking powder, baking soda, salt, maca powder and pitaya powder, if using. Whisk to combine and set aside.
- Add the maple syrup and vanilla to the measuring cup with the vinegar and milk. Remove flax mixture from the fridge and add to the milk mixture as well. Stir and then pour into the dry ingredients. Whisk until combined.
- Add about 1/2 tablespoon of coconut oil to a pan set over medium heat. When the oil is hot, use a ladle to pour some of the pancake batter into the pan. When bubbles begin to appear around the edges (about 1-2 minutes), flip the pancake and cook for 30 seconds to one minute more. Remove from heat and continue with rest of batter, adding more coconut oil as needed.
- Serve immediately or store in an airtight container in the fridge for up to three days.
NOTES:
I love serving these with fresh fruit, yogurt and pure maple syrup.
This recipe feeds approximately two people. You can double the recipe if feeding a larger family.
The post The Triple P’s – Pink Pitaya Pancakes (Vegan & GF) appeared first on Never. Not. Eating..
]]>The post Easy Creamy Cauliflower Soup appeared first on Never. Not. Eating..
]]>
I used my Simple Living Soup Maker to make this soup. If you haven’t heard of Simple Living and their products, you need to check them out! I love my soup maker – It makes dinners easy – heating, blending and cooking soups in 30 minutes! Their soup maker can also be used to make smoothies and alcoholic beverages…My fav! Not to mention it is so quick to clean and easy to store. The BEST.
If you don’t have a Soup Maker, you can use a large pot and then an immersion blender to puree the soup after it is done cooking.
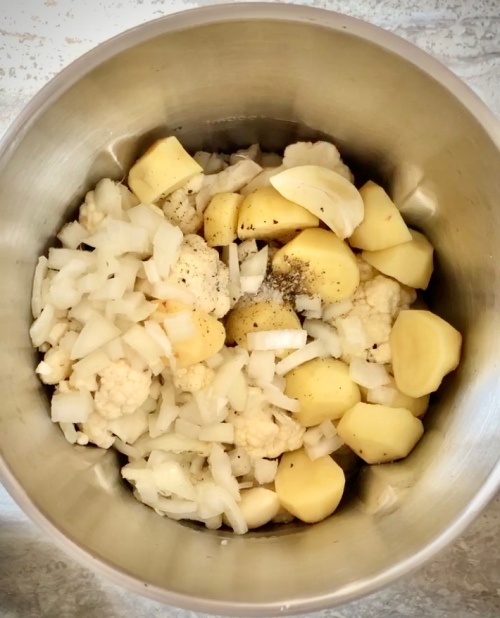
Let’s talk ingredients. Here is what you will need to make this flavourful soup:
- cauliflower
- a yellow or white potato
- yellow onion
- garlic
- dried/fresh sage
- vegetable broth
Everything goes into your Soup Maker and it gets set to “Smooth,” and then turned on. Half an hour later, the soup is hot, creamy and ready to serve.
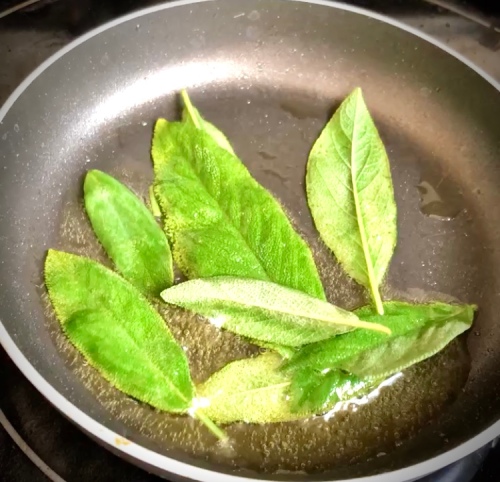
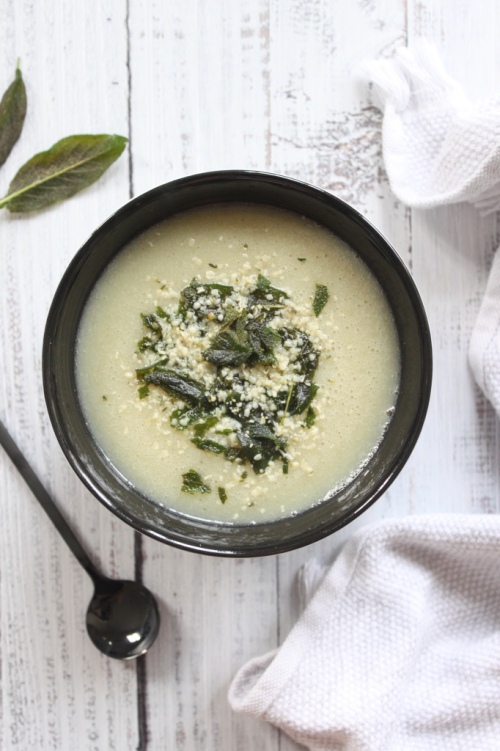
While the soup is cooking, I like to fry some fresh sage leaves to put on top. These are GOLD. All you have to do is add them to a hot pan with a thin layer of oil and fry until crispy! This only takes a minute or two. Drain them on some paper towels and when the soup is done, sprinkle them on top. So good!
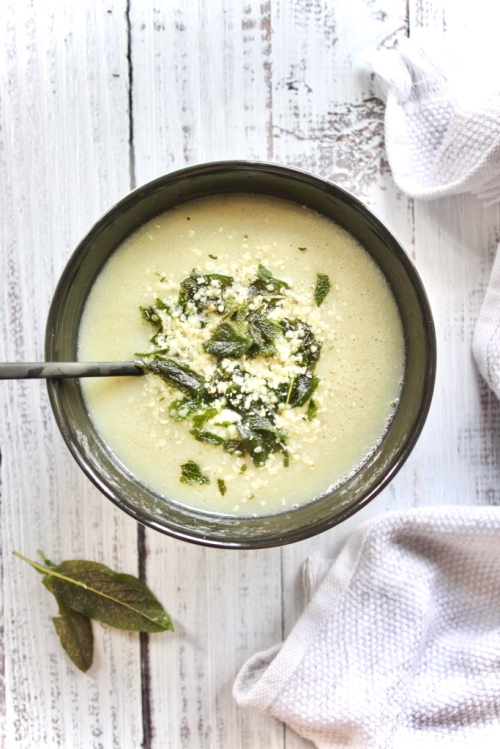
This recipe is the perfect, healthy, post-work meal that will feed a family of four. It’s great for those long days at work, when you come home and need something quick to whip up. The Soup Maker makes it even more practical – I will never make soup in anything else again!
Easy Creamy Cauliflower Soup
Servings: 4
Prep time: 15 minutes
Cook time: 30 minutes
Ingredients:
- one small head of cauliflower, cleaned and broken into florets
- one medium yellow or white potato, cut into 1/2 inch chunks
- 1/2 yellow onion, diced
- 2 cloves garlic (minced, if cooking stovetop)
- 1/2 tsp dried sage
- 1/4 tsp salt
- a few grinds of fresh black pepper
- 3 cups of vegetable broth (plus 1/2 cup if cooking stovetop)
- olive oil
Instructions:
Soup Maker steps:
- Put all ingredients into your soup maker. Feel free to add more broth right up to the MAX line. Secure the lid and set to “Smooth.” Press “ON.” Once the soup is done, check the seasoning and add more salt/pepper if desired. Pour into bowls and drizzle with a splash of olive oil.
Stovetop steps:
- Add 1 tablespoon olive oil to a large pot over medium heat. Once the oil has warmed, add your onion and let cook, stirring occasionally, until soft – about 5 minutes. Add the garlic and stir frequently, cooking until fragrant – about 30 seconds to 1 minute. Add the cauliflower, potatoes, sage, salt and pepper to the pot. Pour in the vegetable broth and stir to combine. Bring up to a boil and then reduce the heat to a simmer. Cover and cook for 30 minutes.
- Once the soup is done and all vegetables are tender, blend the soup with an immersion blender until smooth. Alternatively, you can very carefully pour the soup into a blender, blend until smooth and then return to the pot. At this point, taste the soup and adjust salt and pepper accordingly. Serve immediately or store in airtight containers in the fridge for up to 3 days.
NOTES:
I like to top this soup with crispy sage leaves and hemp hearts. To fry fresh sage leaves, coat the bottom of a small pan with a thin layer of oil. Place the pan over medium-high heat, and when the oil is hot, drop the sage leaves in. They should sizzle immediately. Cook for 1-2 minutes or until crispy. Drain on paper towels before serving on top of the soup.
The post Easy Creamy Cauliflower Soup appeared first on Never. Not. Eating..
]]>The post Lemony Vegan Basil Pesto appeared first on Never. Not. Eating..
]]>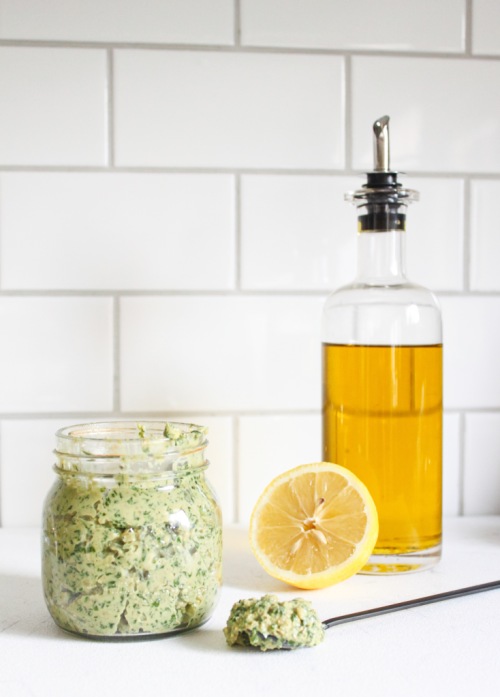
Pesto is a highly underused food, IMO. It is so versatile – from a sauce for pasta or pizza to a simple spread for toast, it is a complete flavour bomb!
Traditionally, pesto is made with five key ingredients: Basil, pine nuts, parmesan, olive oil and garlic (plus salt, but that doesn’t count). And, you want to know the greatest thing about pesto? The ingredients are easily adaptable. That is why turning it vegan is so easy to do.
The herbs – Basil is traditional in pestos, and I stick with it in this recipe as well. However, it can easily be swapped out for any leafy green such as parsley, cilantro, spinach or a combination of these. It depends on what you have, what you like and how adventurous you are!
The nuts – Pine nuts are typically what you find in pesto, but since one bag costs more than my monthly gym membership, I usually switch them for another type of nut. I love walnuts and I chose to use them in this recipe. Pecans would also be good for a sweeter turn-out. Toasting the nuts prior to using them in a pesto also adds another dimension of flavour.
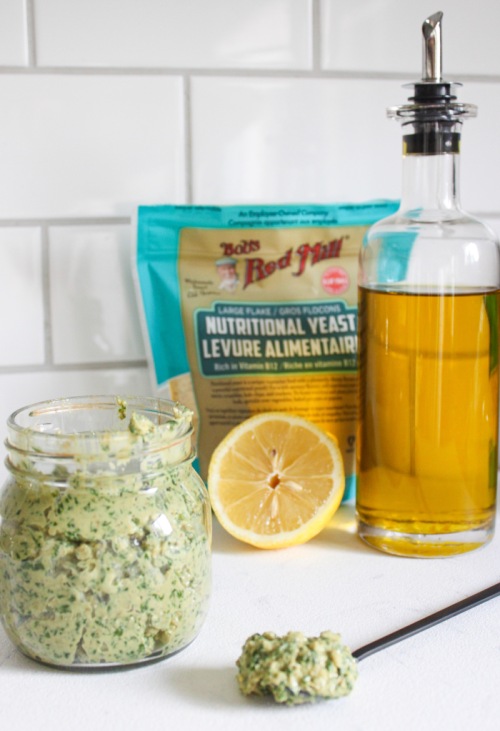
The cheese – Pesto is made with a dry-aged cheese, like parmesan. You can, however, sub it for a cheese of your choice, like romano or even an old sharp cheddar. Since this recipe is vegan, I am using the cheesiest vegan ingredient I know of – Nutritional Yeast. Nutritional Yeast is an inactive yeast that is very cheesy in flavour and is packed with a number of healthy nutrients including: Thiamine, Riboflavin, Niacin, Vitamin B6, Folate and my favourite, Vitamin B12. I am almost positive it is the only vegetarian food you can find that has B12 in it, which makes me love it even more! The one I use can be found here.
The oil – Use extra virgin olive oil. There are no exceptions for this ingredient. Make it a good olive oil, too, like this one.
Garlic – Same.
Acid – I like to put lemon juice as well as the zest into my pesto. It gives it a ‘zip’ of freshness that adds brightness and vibrancy to any dish!
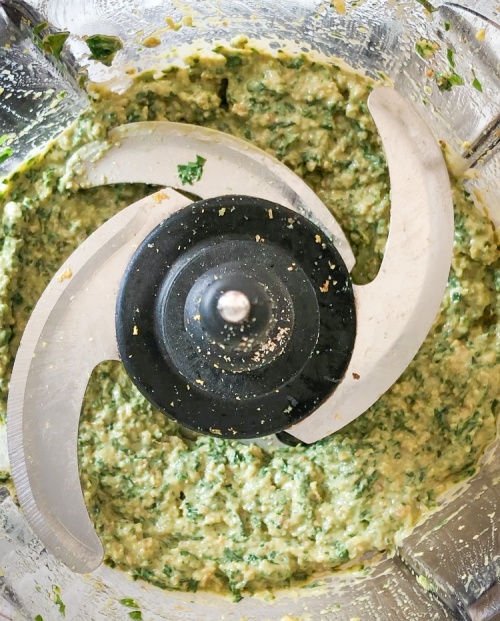
The process of making pesto can be completed in many ways. Traditionally, it is made by cutting all of the ingredients together with a sharp knife and then pouring the olive over them. It could also be made in a mortar and pestle. I like to use my food processor to save on time.
Whichever ingredients you choose to use and whichever method you bring them together in, I hope you get to enjoy pesto this summer. There is nothing better!
Lemony Vegan Basil Pesto
Serving size: Makes about 1/2 cup
Prep time: 10 minutes
Ingredients:
- 2.5 cups packed fresh basil, washed and dried
- 1/2 cup walnuts
- 1 clove garlic
- 1/4 tsp sea salt
- 2 tbsp nutritional yeast
- zest of one lemon
- 1.5 tbsp fresh lemon juice
- 1/4-1/3 cup good extra virgin olive oil
Instructions:
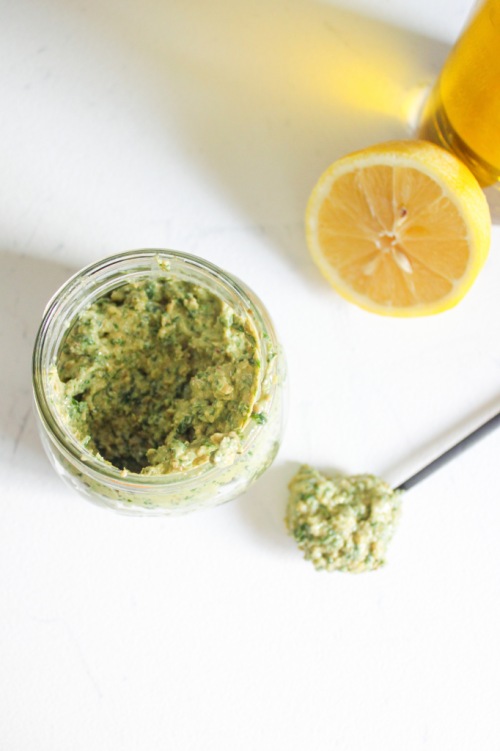
- To your food processor, add the basil, walnuts, garlic, salt, nutritional yeast and lemon zest. Pulse until the mixture has broken down into smaller pieces. Add the lemon juice and set your processor to blend. While blending, drizzle in the olive oil slowly. If you want a thicker pesto, add 1/4 cup of oil. If you are looking for a thinner sauce, continue to add more oil until you have reached your desired consistency. Taste and adjust seasonings (salt, lemon juice) accordingly.
This is best used immediately, but can be stored in an airtight container in the fridge for up to three days.
The post Lemony Vegan Basil Pesto appeared first on Never. Not. Eating..
]]>The post S’more Cups appeared first on Never. Not. Eating..
]]>
Memories of s’mores by the fire are the best memories. Trying to get your ‘mallow perfectly toasted to your liking, and then fanangling it onto your chocolate-topped graham cracker without burning your fingers – Epic!
Well, this dessert is easier to eat and there is no fanangling necessary. Graham cracker crust underneath a smooth chocolate ganache, topped with toasted marshmallows. YUM.

Let’s talk toasting. You can toast your marshmallows in a few different ways. I highly recommend purchasing a kitchen torch, like the one found here. This is what I use. It is a great way to control the amount of toastiness and is easy to pack along on trips to the cottage (or campground). It also will come in handy down the road for other desserts, such as Creme Brulee.

If you don’t plan to buy a torch, then you can use your oven broiler for this. Set the broiler to low and throw a few marshmallows on a parchment lined baking sheet and pop it in the oven, watching very carefully. They will only need a few seconds under the broiler. You can lift them from the parchment with a spatula to transfer to the top of your dessert.

Thirdly, if you are around a campfire, you can swap the mini marshmallows for large ones and roast them up to perfection before sliding them onto the top of these cups. Either way, these are delicious!

A classic with a twist!
S’more Cups
Serving size: Makes about 15 cups
Prep time: 15 minutes
Chill time: 1.5 hours
Ingredients:
- 10 full sheet graham crackers (about 1.5 cups of crumbs)
- 1 tbsp brown sugar
- 3 tbsp salted butter, melted
- 300 g good quality dark chocolate, chopped into small pieces
- 150 ml heavy cream
- 1/2 tsp pure vanilla extract
- mini marshmallows (about 2 cups)
Instructions:
- Prepare your muffin trays by lining 15 cups with paper or silicone muffin liners. Set aside.
- Place the graham crackers into your food processor and pulse until they resemble small crumbs (see photo). Skip this step if using prepackaged graham cracker crumbs. Transfer crumbs to a bowl and stir together with the sugar. Add the butter and mix to combine. Press a large spoonful into the bottom of each muffin liner. Use the bottom of a glass or a measuring cup to firmly flatten and evenly press down the crust. Place in freezer for at least an hour to set up.
- In the meantime, make the ganache. Place your chocolate into a large, heat-proof bowl. Add the heavy cream to a small saucepan over medium-high heat. Watch carefully. When you see tiny bubbles begin to form around the edges, remove from heat and pour over the chocolate. Do not let the cream boil. Let it sit in the bowl with the chocolate for 3-4 minutes and then whisk to combine. Add the vanilla and whisk until smooth. Spoon the ganache on top of each of the graham cracker crusts and smooth out. Refrigerate until set, about 30 minutes.
- Right before eating, remove the cups from the fridge and peel off the liners. Add a few mini marshmallows to the top and use a kitchen torch to carefully toast them. Alternatively, set your oven to broil and place a few marshmallows in a small circle on a parchment lined baking sheet (do this for the number of s’more cups you will be eating at that time). Place the baking sheet under the broil for a few seconds and watch carefully. When toasted to your liking, remove from oven and use a spatula to transfer the marshmallows to the top of your cups. If you are around a campfire, roast a large marshmallow to your liking and place on top of your cup!
NOTES:
These are great to make-ahead and bring with you on a camping/cottaging trip. You can also make this into one large s’more pie dessert by filling a 9-inch tart pan instead of individual cups.
The post S’more Cups appeared first on Never. Not. Eating..
]]>The post Lemon Caper Pasta appeared first on Never. Not. Eating..
]]>
They say you should wake up everyday and still make your bed and get dressed while in self-isolation. They say it helps individuals feel more accomplished and more productive. So I’ve been rising and shining. I get up, straighten out my duvet, pick up all of my little decorative pillows and arrange them at the head of my bed. I put on my yoga pants (better than pajamas?!), slip on a cozy sweater and wash my face. Later, I praise my ambition and appreciate my yoga pant choice because, pasta. THIS pasta. Lemon Caper Pasta. The best pasta in all the lands. And it pairs perfectly with my stretchy pants.
REASONS TO MAKE LEMON CAPER PASTA
This is a perfect dish to make if:
- you want a date night idea
- you need a quick meal
- you like flavour
- you like food
- you are quarantined
- you are a human
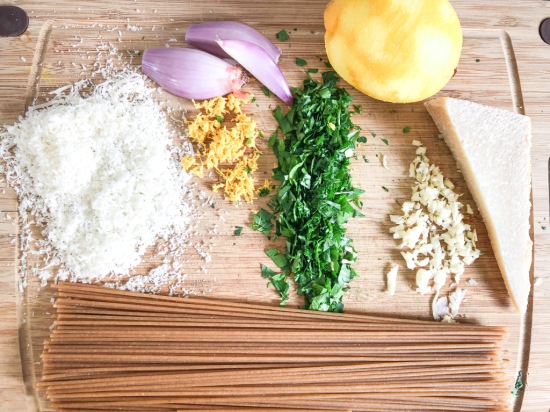
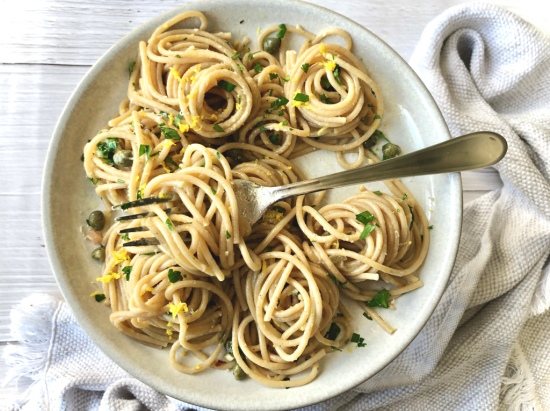
A luscious pasta coated in a white wine-butter sauce with melty parm, briney capers and fresh citrus.
The Pasta
For the pasta, you can really use whatever you have. Here, I’ve used a whole wheat semolina pasta. It’s a bit heartier and nuttier than white pasta. It’s also healthier and is usually my go-to, as well as any spelt pastas.
The capers give this recipe a delicious salty, briney punch. If you don’t want to venture off to the grocery store, you can buy capers here. You can also substitute them for green olives.
It has BOLD flavours. DELICIOUS flavours. CRAVE-WORTHY flavours.
Do you ever meet someone who is really attractive, smart AND kind? Yup. That is this recipe in pasta-form. It’s not impastable. It exists, right here.
Come and spaghet it.
OTHER IDEAS SIMILAR TO LEMON CAPER PASTA:
Simple Beetroot Pasta (for a fun, colourful meal)
Creamy Vegan Mushroom Rigatoni (a wholesome meal)
Butternut Squash and Kale Lasagna Roll-Ups (a great way to hide vegetables for the kids)
Tortiglioni in Roasted Red Pepper Sauce (Nonna will be proud)
Lemon Caper Pasta
Serving size: 2
Prep time: 5 minutes
Cook time: 20 minutes
Ingredients:
- 2 servings of choice pasta (approx. 180 g)
- salt
- 2 tbsp olive oil
- 1 shallot, diced
- 2 cloves garlic
- 1/3 cup white wine
- 1 tbsp butter
- 1/3 cup fresh, grated parmesan, plus more for topping
- 1/4 tsp chili flakes (optional)
- 1/2 tbsp caper brine (optional)
- 2 tbsp capers
- zest of one lemon
- juice of half a lemon (approx. 2 tbsp)
- 1/4 cup chopped parsley
- fresh ground pepper
Instructions:
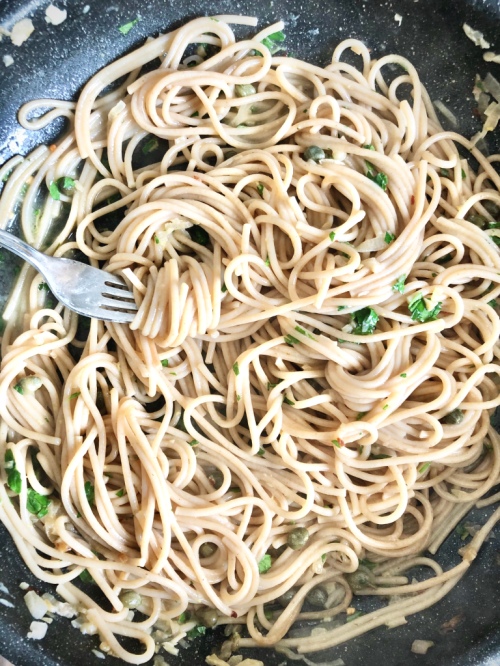
- Fill a large pot with water and bring to a boil. Salt the water generously and add the pasta. Cook according to package directions, until ‘al dente.’ Reserve about 1/3 cup of the pasta water before draining.
- Meanwhile, add olive oil to a large skillet over low heat. When pan is warm, add the shallot and stir for a few minutes until tender. Add garlic and stir for about 30 seconds until fragrant. Pour the white wine into the pan and increase the heat to medium-high. Let the wine reduce for about 5 minutes, or until you can no longer smell the alcohol. When reduced by about half, add the butter and stir to incorporate. Reduce the heat again to medium-low.
- When the pasta is done, add it right to the pan along with the reserved pasta water. Add the parmesan and chili flakes to the pan and toss everything together.
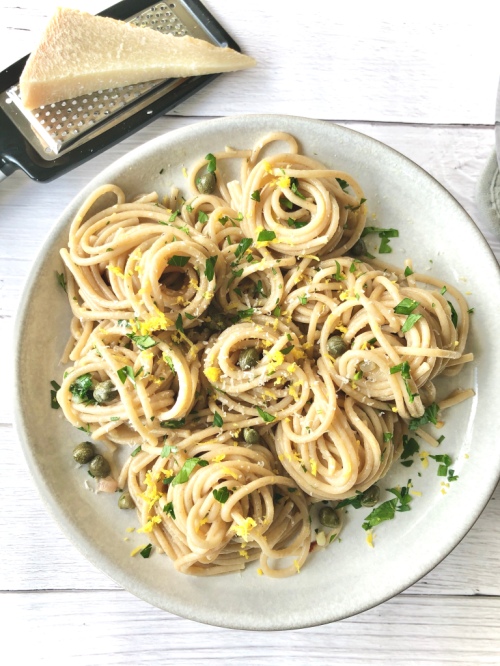
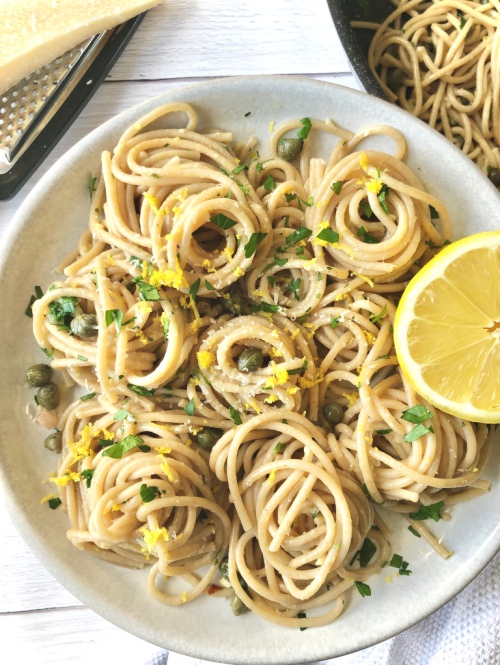
- Turn the heat off and add the caper brine, capers, lemon zest, lemon juice, parsley and a few grinds of fresh black pepper. Toss to combine, dish onto two plates and top with more parmesan, if you would like.
The post Lemon Caper Pasta appeared first on Never. Not. Eating..
]]>