The post Easy Peanut Butter Coconut Cake appeared first on Never. Not. Eating..
]]>
I immediately knew I needed to try to make my own version, and since Easter is around the corner, it seemed like the perfect cake to test out for the occasion.
WHAT IS PEANUT BUTTER COCONUT CAKE?
Let me let you in on a little secret – this is a cheater cake. That’s right, I zhuzhed- (how do you even spell that?! Do you know what I’m trying to say though?) up box cake. Sometimes Betty Crocker pulls through.
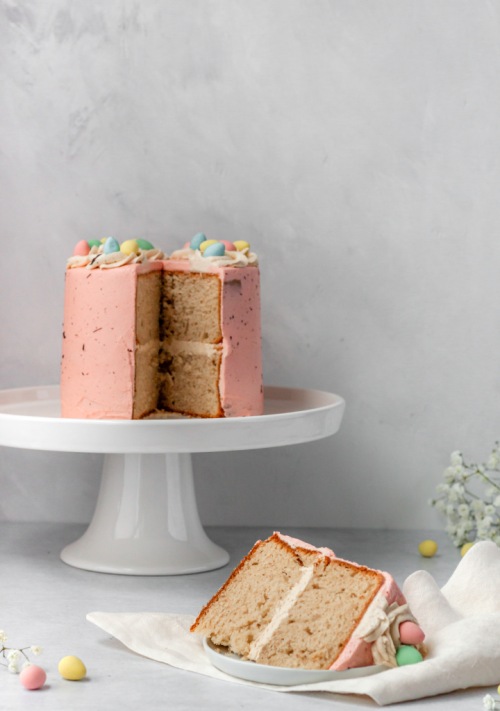
A few weeks ago I purchased a couple of boxes of Betty’s French Vanilla cake because it was on sale for $1.00 – what a steal! Now, I have the perfect use for it. All you need to do is add some peanut butter and swap the milk for coconut milk. It leaves you with this dreamy and decadent, fluffy cake. It’s an Easter miracle!
Oh, and the icing is also a peanut butter buttercream! You’re welcome.
THE INGREDIENTS
This is the simplest cake you will ever make! These are the ingredients you will need:
- boxed french vanilla cake
- eggs
- vegetable oil
- coconut milk (canned and full-fat)
- peanut butter
- icing sugar
- shortening
- butter
DECORATING THIS PEANUT BUTTER COCONUT CAKE
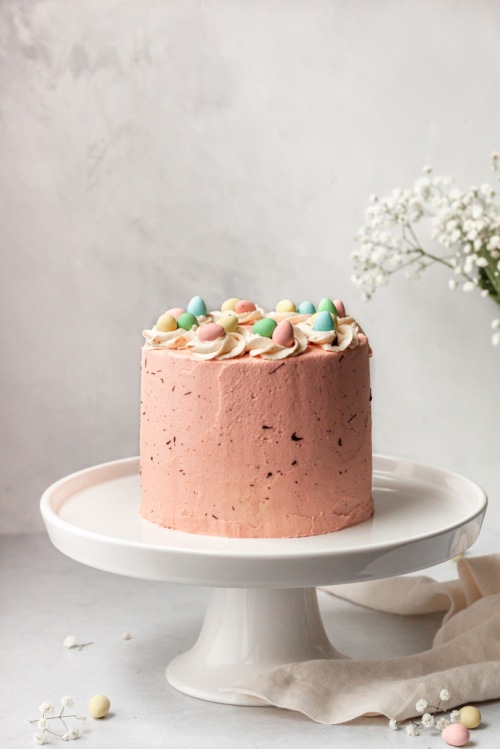
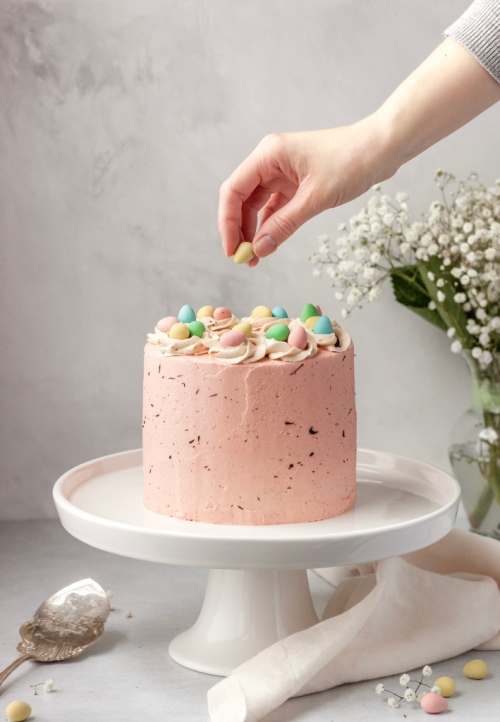
For the decoration, I used gel food colouring (a tiny bit of red) to dye my icing a pale pink colour, reserving a small amount of the original colour (which was slightly brown, from the pb) to create “nests” on top. I filled each nest with a few mini eggs and then melted down some chocolate, which I “flicked” onto my cake using a paintbrush to create a speckling.
Wishing you all a very happy spring and a lovely, cake-filled Easter, if you celebrate!
MORE EASY DESSERT RECIPES TO TRY
Gluten Free Stone Fruit Galette (a brilliant summer dessert)
Apple Cardamom Hand Pies with a Rum Glaze (just store-bought puff pastry and a quick filling)
Vegan Pumpkin Coconut Cake (pumpkin + coconut = goals)
TOOLS I USED TO MAKE THIS EASY PEANUT BUTTER COCONUT CAKE
If this recipe sounds like something you would want to make, click on the images below to see some helpful tools I used to get the job done.


This post contains affiliate links and I may earn a small commission when purchases are made after clicking the links, at no cost to you – thank you!
Easy Peanut Butter Coconut Cake
Servings: Makes four 6-inch cake layers (enough for two small cakes)
Prep time: 15 minutes
Cook time: 30 minutes
INGREDIENTS
- 2 boxes of French Vanilla cake mix (432 g each)
- 6 large eggs
- 3/4 cup vegetable oil
- 1 can full fat coconut milk (400 ml)
- 3/4 cup smooth peanut butter
For the icing:
- 1/2 cup vegetable shortening
- 1/2 cup butter, at room temperature
- 1 tbsp meringue powder (optional)
- 1/2 cup smooth peanut butter
- pinch of salt
- 4 cups powdered sugar
- 4-6 tbsp coconut milk
INSTRUCTIONS
- Preheat oven to 350 degrees Fahrenheit. Butter four 6-inch cake pans, line the bottoms with parchment paper and dust with flour.
- Firstly, dump the cake mix into a large bowl. Create a well in the middle of the mix and add the eggs and oil. Pour the coconut milk into a measuring cup and add water to bring it up to an even 2 cups. Pour into the bowl with the other ingredient and add the peanut butter. Mix all of these ingredients well with an electric mixer, starting on low and working up to medium speed, for about 1-2 minutes. Divide batter between the four cake pans – it works out to be approximately 450g per pan. Bake in the oven for 30-35 minutes, or until a toothpick comes out clean. Cool completely before icing.
For the icing:
- Combine the shortening, butter and peanut butter in a medium bowl and mix with an electric mixer until light and fluffy.
- Add the meringue powder (if using), the salt and one cup of powdered sugar and beat until combined, starting on low.
- Drizzle in one tablespoon of coconut milk and beat. Continue to alternate between adding one cup of powdered sugar and one tablespoon of milk until all of the powdered sugar has been used. If icing is too thick, continue to add half of a tablespoon of milk at a time until you have reached desired consistency.
ASSEMBLY TIPS
- Use a sharp serrated knife to level off the rounded top of each cake
- Place a large dollop in the middle of the first layer and gently push it out to the sides with an offset spatula until it is hanging off the edges
- Flip the second layer upside down before placing on top of the bottom layer
- Add another large dollop on the top of the cake and again, push the icing out to the sides with a back and forth motion, trying to avoid lifting the spatula in an upwards direction
- Once the top is levelled out, use the icing that spilled over the edge from the centre to fill in any gaps on the sides where the two layers meet, and add more icing to help cover the rest of the sides
I hope you enjoyed this easy cake recipe! If you have any feedback or comments, please leave them below! Don’t forget to follow me on Instagram @nevernoteatingca for more recipes, tips and tricks!
The post Easy Peanut Butter Coconut Cake appeared first on Never. Not. Eating..
]]>The post Roasted Garlic Mashed Cauliflower (Low-Carb) appeared first on Never. Not. Eating..
]]>We are officially entering Fall and that means, Thanksgiving. I’m a lover of enjoying seventy-four side dishes and can always forego the main one. I am always on the hunt for new and fun sides to add to any meal…especially those around the holidays!

This Roasted Garlic Mashed Cauliflower is the perfect side for Thanksgiving, Christmas, Easter…you name it! It’s low-carb and will please your keto and vegan family members. Bonus: It tastes just as good as mashed potatoes!
How to Make Vegan Roasted Garlic Mashed Cauliflower
I highly recommend a good food processor or blender. The Ninja Kitchen line is a great product and I use their food processor every single day. I make EVERYTHING in it – smoothie bowls, pestos, pastry doughs and this mashed cauliflower. It is an affordable alternative to the well-known Vitamix.

For this recipe, everything gets precooked, placed in your food processor and then blended until smooth – it’s THAT easy! Here is what you will need:
- One medium-sized head of cauliflower
- A head of garlic
- Vegetable broth
The Roasted Garlic
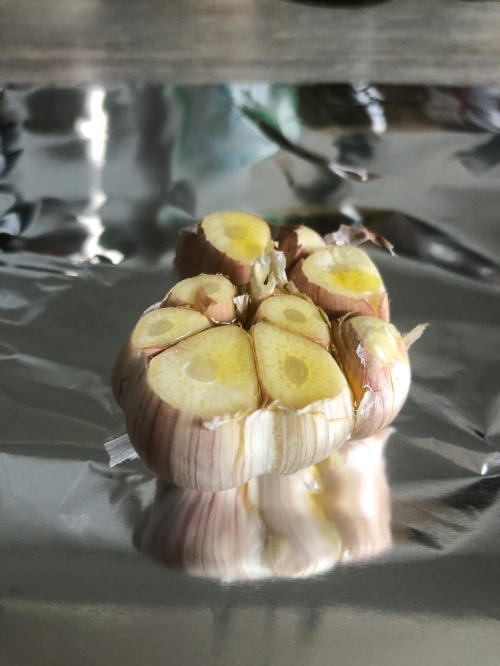
Let’s talk about the garlic – is there anything better?! For this recipe I love using roasted garlic, and although it may take longer, it’s so worth it. In addition, you will also have leftover cloves that you can use in other dishes that you will be serving (or just save them for another day). Roasting a head of garlic is a great move for large dinner parties or holiday gatherings.
To roast, all you have to do is cut off the top of the entire head of garlic, leaving the top of the cloves exposed. Drizzle the head with olive oil, wrap in tin foil and place on a baking sheet and into the oven for 45 minutes. If you want to save on time, you can mince your raw garlic, add to a pan over low heat with some olive oil for about 30 seconds to one minute, and use this in place of the roasted stuff in the recipe. Above all, don’t skimp on the garlic!
Cooking the Cauliflower
To cook the cauliflower, place the florets into a large pot with about a cup and a half of veggie stock. Cover and set your burner to high, and when the liquid starts boiling, turn the burner down slightly and let steam for about 5-10 minutes (depending on how small your florets are). They will be ready when they are fork-tender. Don’t overcook them because you will end up with mushy cauliflower instead of mashed cauliflower!
After you cook the garlic and cauliflower, all that’s left to do is throw it all into your food processor and watch it come together – Pillowy, low-carb clouds of heaven!

More Amazing Cauliflower Sides
Sumac Roasted Cauliflower (a showstopper)
Hot and Sweet Cauliflower Wings (perfect for game day)
East Creamy Cauliflower Soup (a winter hit)
This post contains affiliate links and I may earn a small commission when purchases are made after clicking the links, at no cost to you. Thank you!
Vegan Roasted Garlic Mashed Cauliflower
Servings: 4
Prep time: 10 minutes
Cook time: 45 minutes
Ingredients:
- 1 whole head of garlic
- medium head of cauliflower, broken into florets
- 1 1/2 cups vegetable stock
- salt
- pepper
- olive oil
- fresh thyme, for topping (optional)
Instructions
For the garlic:
- Preheat oven to 375 degrees Fahrenheit.
- Peel the outer layer of skin off of the garlic and slice the top of the head off (see photo above). Place on a piece of tin foil and drizzle the top with about one tablespoon of olive oil. Wrap the garlic up so that there are no holes for the steam to escape and place on a baking sheet and then in the oven for 45-55 minutes.
For the cauliflower:
- When the garlic has been roasting for about half hour, start your cauliflower. Place the florets into a large pot with the vegetable stock, cover and bring to a boil. Once boiling, reduce slightly to a rolling boil and allow the cauliflower to steam for 5-10 minutes, or until just fork tender – do not drain.
- Use a slotted spoon to transfer the cauliflower to a food processor or blender and add one tablespoon of the veggie stock that the cauliflower was cooking in.
- Remove the garlic from the oven and carefully unwrap. Use your fingers to squeeze out two of the cloves (or as many as you want!) and place in the food processor with the cauliflower and stock. Add in 1/4 teaspoon of salt and a few grinds of fresh black pepper and pulse everything to combine and then blend until smooth. Be patient and scrape down the sides often. You can add more of the veggie stock to help loosen it, but don’t add too much or else it will become mushy. Eventually, if you continue to blend and scrape, the mixture will become smooth without the added veggie stock.
- Taste and add more salt and pepper or another clove of garlic, if desired. I like to put more than 1/4 teaspoon of salt, but it is always better to start with less and add more, than to add too much for your taste.
- Transfer the cauliflower to a serving bowl, drizzle with some olive oil and top with fresh thyme, if desired.
The post Roasted Garlic Mashed Cauliflower (Low-Carb) appeared first on Never. Not. Eating..
]]>