The post No-Measure Oatmeal Almond Butter Cookies appeared first on Never. Not. Eating..
]]>
What are No-Measure Oatmeal Almond Butter Cookies?
I am always finding ways to “healthify” traditional treats, and I was in the mood for some cookies this time around. I had a few ingredients that I needed to get rid of, so I decided to try my hand at some no-measure Oatmeal Almond Butter Cookies, and it turned out to be a success! So much so, I make them all the time with the ingredients that need to get used up in my home.
I just eyeball all of my ingredients into a bowl, mix them up and form them into cookies! They are refined sugar-free, dairy-free and gluten-free.

The Ingredients for No-Measure Oatmeal Almond Butter Cookies
This is where it gets fun! You can change the ingredients in any way that suits you and what you have in your kitchen! Generally, I like to use the following staple ingredients in my cookies:
Overripe bananas
I like using bananas as a sugar substitute in my baking. They also bring more moisture into the cookies and help to bind the ingredients together. It is important to use overripe bananas for a sweeter result. I typically only use one banana, unless I am hoping to yield a larger batch of cookies…in that case, I will add another!
Almond butter (or any preferred nut butter)
Nut butters have high fat, fibre and protein and, therefore, can serve a number of purposes when added to baked goods. Firstly, nut butters are a good replacement for oils or butters, due to their fat content. The fibre in nut butters help to balance out the sugars in a recipe. Protein gives these cookies a bit more structure and allows them to hold up well! I like to add a healthy pour of almond butter…say a 1/2 cup or so!
Egg
As in any baking recipe, the job of the egg is to bind everything together and create structure. Think of it as the “glue” that holds everything together. If I’m hoping for eight cookies, I use one egg.

Gluten-free rolled oats
The oats are the main dry ingredient in this recipe and they replace the flour in a normal cookie recipe. Without the oats, your cookies would lack form and be very “goopy.” They are also much healthier than all-purpose flour! This is the ingredient that I truly have no measurements for – just pour in a bit at a time until the batter is not too wet, but not too dry. Eyeball it!
Vanilla
You should not skip this flavour bomb! Always use pure vanilla extract in any baking you do. If you would like to see how you can make your own at home, check out my Instagram reel (@nevernoteatingca). It takes two minutes to make!
Cinnamon
I like adding cinnamon to these cookies to add a little bit of warmth. Plus, I just love cinnamon!
Maple syrup
Along with the bananas, the maple syrup offers sweetness to these cookies. Depending on how much of a sweet tooth you have, pour in a small amount, or add a bit more to amplify that maple flavour!
Sugar-free chocolate
Because I wanted to make these cookies healthy, I decided to use sugar-free chocolate, but you can use whatever chocolate you want! I like a lot of little chocolate pools in my cookies, so I add a LOT of chocolate!

How to bring the ingredients together
Begin by using a hand mixer or a whisk to mix all of the wet ingredients together, just as you would in any normal baking recipe. Mash the banana(s) and pour in some almond butter, add an egg, some vanilla and maple syrup, according to how sweet you would like it.
Next, sprinkle in some cinnamon and pour in a small amount of oats, mixing until everything is combined. Continue to add more oats until the batter comes together and is not too wet, but not too dry. Fold in some chocolate and scoop onto a parchment-lined baking sheet. Flatten the cookies with your palm and bake in a 350 degree oven for around 10 minutes, or until cookies are set and release easily from the tray. You will notice the bottoms beginning to brown when they are ready.

Other healthy recipes you NEED to check out:
Vegan Protein Energy Balls (the perfect post-work, pre-workout snack)
Dark Chocolate Protein Nuggets [high protein, high (good) fat…these get you through the day]
Vegan Power Muffins (a morning pick-me-up)
This post contains affiliate links and I may earn a small commission when purchases are made after clicking the links, at no cost to you. Thank you!
No-Measure Oatmeal Almond Butter Cookies
*This recipe is NO-MEASURE. Please read above to get an idea of the purpose and amount of each ingredient.
Prep time: 10 minutes
Bake time: 10-13 minutes
Ingredients:
- banana(s), mashed
- nut butter
- egg(s)
- maple syrup
- vanilla
- salt
- cinnamon
- rolled oats (aim for gluten-free)
- sugar-free chocolate
Instructions:
- Preheat oven to 350 degrees Fahrenheit.
- Use a hand mixer or a whisk to combine the mashed banana(s), nut butter, egg(s), maple syrup and vanilla.
- Add in a big pinch of salt, a sprinkle of cinnamon and some rolled oats. Stir with a wooden spoon to combine. Continue to add more oats until the batter is not too wet, but not too dry. It should be slightly sticky. Fold in the chocolate.
- Using a large cookie scoop, scoop the batter onto a parchment-lined cookie sheet. Flatten each cookie using the palm of your hand and bake for 10-13 minutes or until the cookies have set up and release easily from the cookie sheet. Let cool on a wire rack and store in an airtight container.
*Check out my Instagram reel to see a video on how these cookies come together!

The post No-Measure Oatmeal Almond Butter Cookies appeared first on Never. Not. Eating..
]]>The post Vegan Ice Cream Bars appeared first on Never. Not. Eating..
]]>
This has been one of the hottest summers on record, and I’m just a bit mad at myself that I developed these ice cream bars now, instead of at the beginning of summer. Then again, it’s not like I’m going to stop eating them when the weather cools down…I’m an ice-cream-all-year-long kinda gal!
HEALTHIER THAN STORE-BOUGHT
So here are a few reasons why you should make these bars, STAT:
- The recipe includes natural sugar from pure maple syrup only, and you can omit it entirely if you wish.
- They are vegan.
- They are made quickly in a blender.
- You like delicious treats.
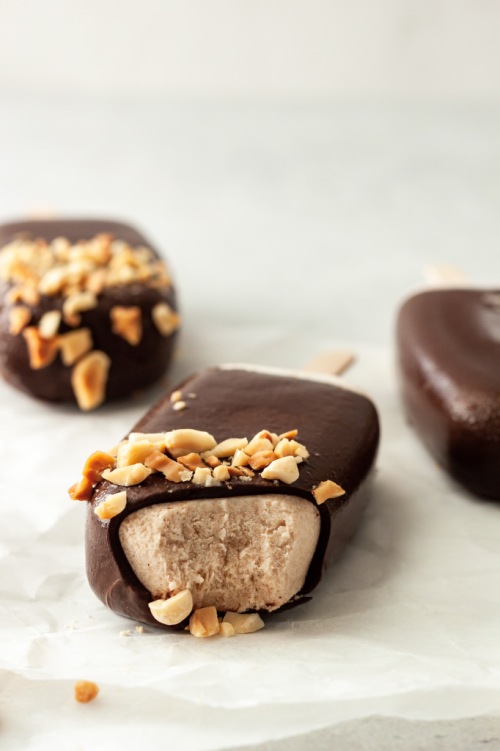
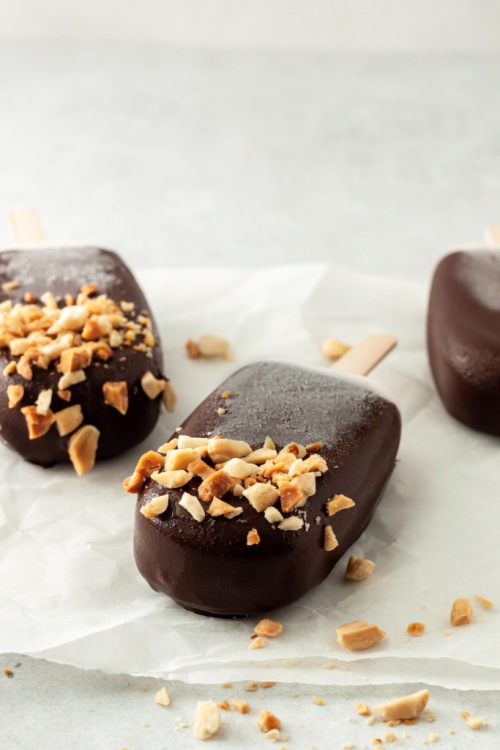
These remind me of the Magnum bars you can buy at the grocery store. The only difference is you know all of the ingredients going into them, and they are way healthier than anything you would get out of a box.
HOW TO MAKE VEGAN ICE CREAM BARS
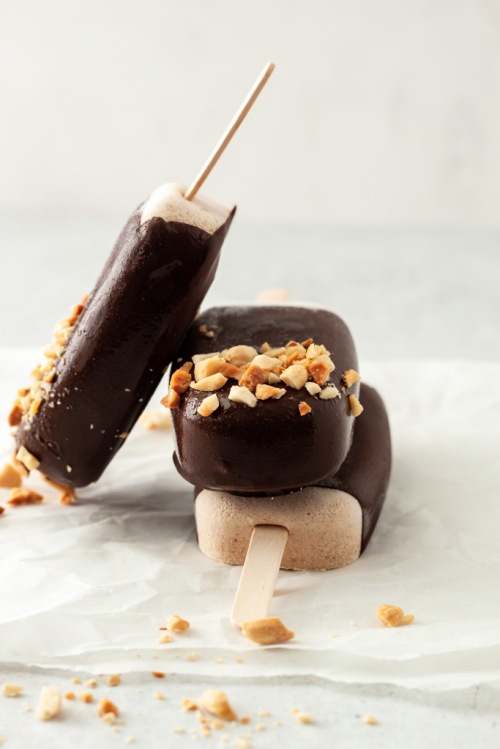
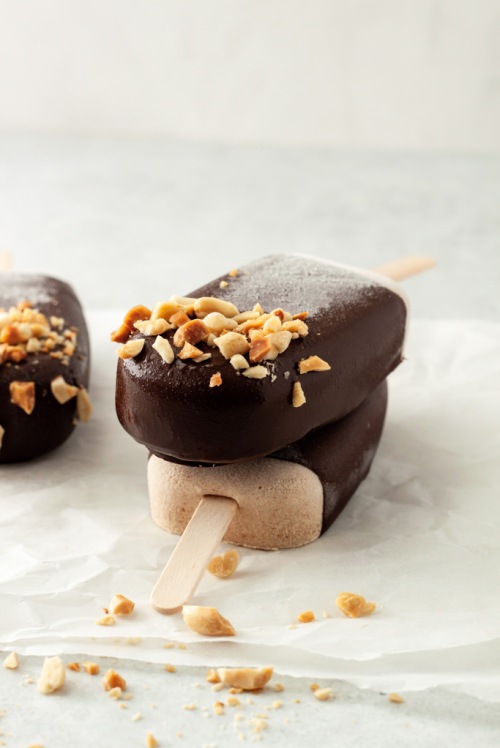
The recipe for these bars is simple – blend all ingredients together using a high-powered blender. Pour into the cutest popsicle molds. Freeze for a few hours until firm. Dip in chocolate and sprinkle on some crushed peanuts.
When you bite into one of these little babes, you first get the crack of the chocolate, followed by the creaminess of the filling which is made rich by coconut milk and nut butter. It’s beyond good. Ice cream goals!

OTHER VEGAN TREATS TO TRY
Vegan Protein Energy Balls (the perfect pre-workout snack)
Vegan Mocha Buttercream (my favourite cake topping)
Sweet Potato Creme Brulee (a great holiday dessert)
This post contains affiliate links and I may earn a small commission when purchases are made after clicking the links, at no cost to you. Thank you for supporting me!
Vegan Ice Cream Bars
Serving size: Makes 8 bars
Prep time: 10 minutes
Freeze time: 4 hours
Ingredients:
- 1 can full-fat coconut milk (refrigerated for at least 24 hours)
- 1/2 cup nut butter (I love using cashew or peanut butter for this)
- 1/2 cup coconut yogurt
- 2-3 tbsp pure maple syrup
- 1/2 tbsp pure vanilla extract
- 1/4 tsp cinnamon powder (optional)
- 85 g dark vegan chocolate (chopped)
- 1 tbsp coconut oil
- 1/4 cup peanuts, chopped
Instructions:
- Remove coconut milk from the fridge and carefully open the can. Scoop the solid white part out into a high-powered blender. Reserve the coconut water in the bottom of the can for tomorrow’s smoothie!
- Add the nut butter, yogurt, syrup, vanilla and cinnamon to the blender and blend until smooth. Pour into popsicle molds and place in the freezer until firm, about four hours.
- Over a double boiler*, melt the chocolate with the coconut oil, stirring often. Pour into a tall cup wide enough for the popsicles to fit in. Dip each popsicle into the chocolate and lay on a piece of parchment paper. Immediately sprinkle with the chopped peanuts.
- Store in the freezer for up to 10 days.
NOTES:
*For the double boiler – fill a small pot with an inch or two of water. Bring to a gentle simmer and place a larger bowl on top with a wooden spoon in between to let the steam escape. Place the chocolate and coconut oil in the bowl and stir frequently. Alternatively, you can melt the chocolate in the microwave in short, 20-30 second increments, stirring in between.
Tip – Take the ice cream bar out of the freezer and let sit a few minutes before consuming!
The post Vegan Ice Cream Bars appeared first on Never. Not. Eating..
]]>The post Dark Chocolate Almond Butter Bars appeared first on Never. Not. Eating..
]]>
I’m a HUGE choco + peanut butter fan, but I thought I’d switch it up today and choose a slightly healthier nut butter to create a slightly less-healthy dessert. Balance.

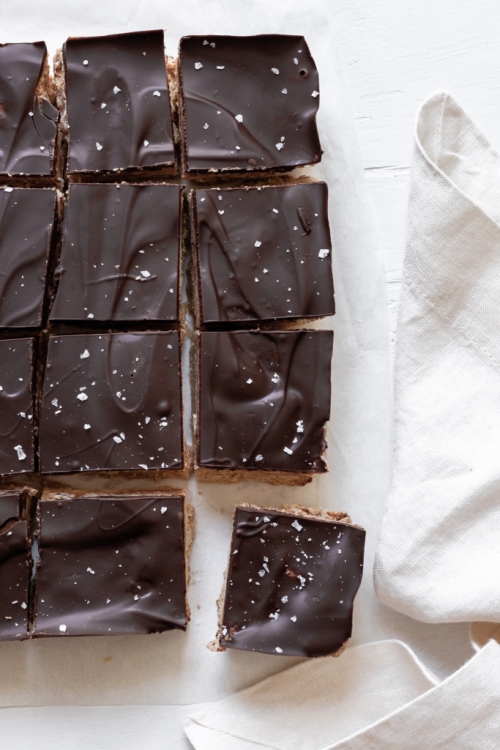
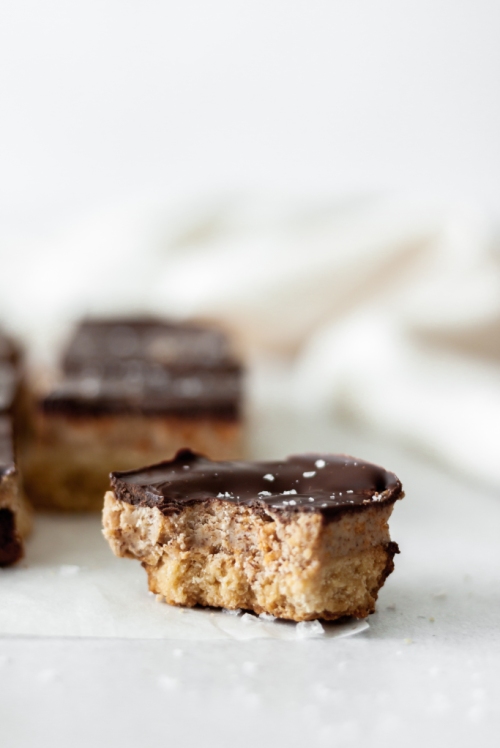
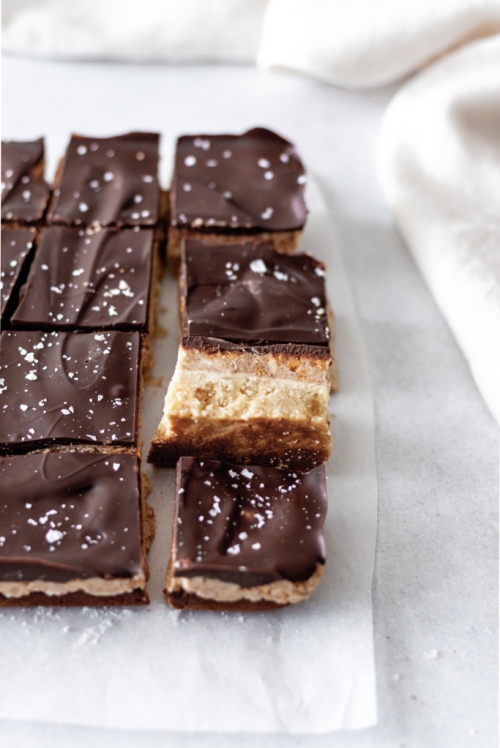
These bars have a thick shortbread-type bottom layer, a crunchy and sweet almond butter centre, and a lush dark chocolate top. They are friggin’ delish.
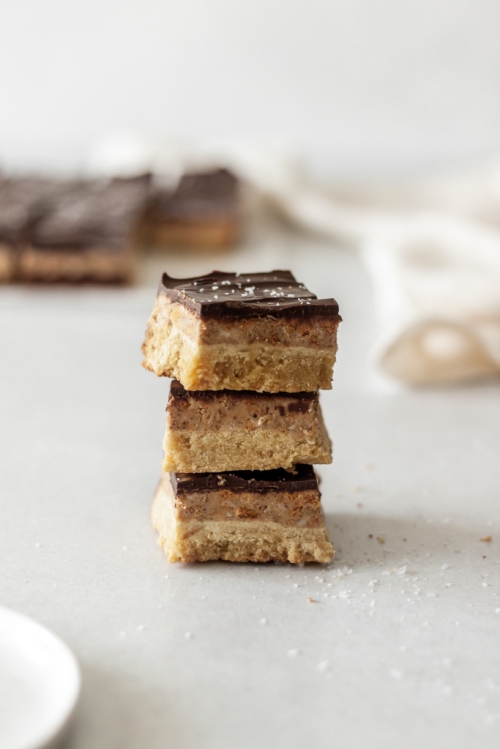
In order to keep these bars gluten-free, I’ve made the crust with a mix of almond flour and Bob’s Red Mill Gluten-Free All Purpose Flour, and I’ve crushed up my favourite gluten-free cereal to add texture to the middle. Feel free to swap for any gluten-filled flour or cereal you wish!
Let’s make them!
Dark Chocolate Almond Butter Bars
Servings: Makes 16 squares
Prep time: 10 minutes
Cook time: 10 minutes
Cool time: 1 hour
Ingredients:
For the bottom layer:
- 1 cup almond flour
- 1 1/2 cups gluten-free flour
- pinch of salt
- 3-4 tbsp agave
- 4 tbsp (1/4 cup) cold coconut oil
For the almond butter layer:
- 1/2 cup smooth almond butter
- 1/3 cup coconut oil, melted
- 1 cup powdered sugar
- 1 cup of your favourite gluten-free cereal, made into crumbs (makes a heaping 1/2 cup)
- pinch of salt
- 1/2 tbsp vanilla
For the chocolate layer:
- 150 g dark chocolate, chopped
- flaky sea salt, for topping (optional)
Instructions:
- Preheat oven to 350 degrees Fahrenheit and line an 8 x 8 inch baking pan with parchment paper.
- For the bottom layer – Combine the flours and salt in a food processor and pulse to combine. Add the coconut oil and three tablespoons of agave and pulse. If the dough does not start coming together, add the fourth tablespoon of agave. Dump into parchment lined pan and use your hands or the bottom of a glass to distribute evenly. Pierce the top a few times with a fork. Bake for 10-15 minutes, or until it turns light brown around the edges. Cool completely.
- For the almond butter layer – Combine all ingredients in a large bowl and stir to combine. Dollop the mixture onto the cooled bottom layer and use your hands to press down and spread evenly. Set aside.
- For the chocolate layer – Add the chocolate to a glass or heatproof bowl set over a double boiler. Melt, watching closely and stirring often. Alternatively, melt the chocolate in the microwave in small increments. Pour melted chocolate over the almond butter layer and place in the fridge to set for at least an hour. Cut into squares and serve!
Store in an airtight container in the fridge for up to 5 days.
The post Dark Chocolate Almond Butter Bars appeared first on Never. Not. Eating..
]]>The post Chocolate Hummus appeared first on Never. Not. Eating..
]]>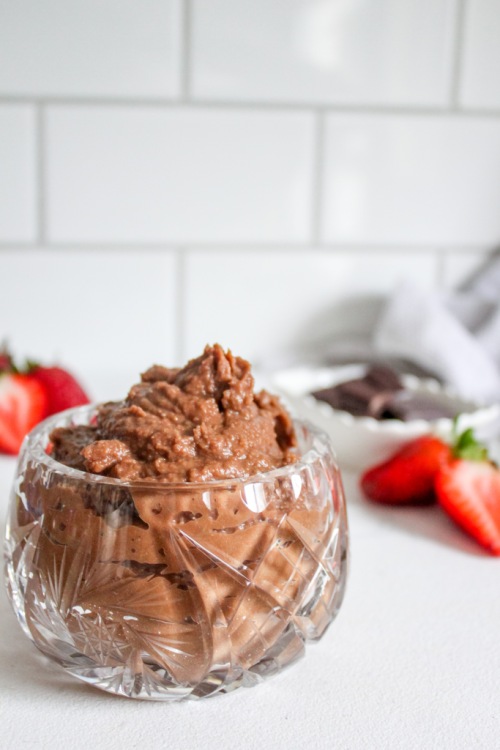
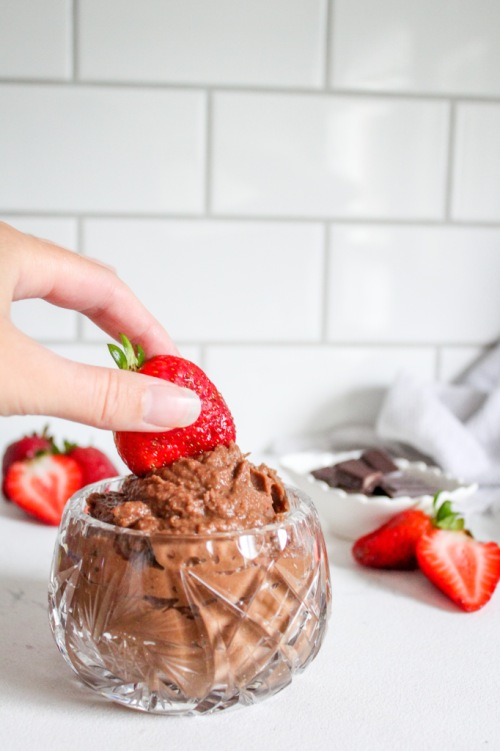
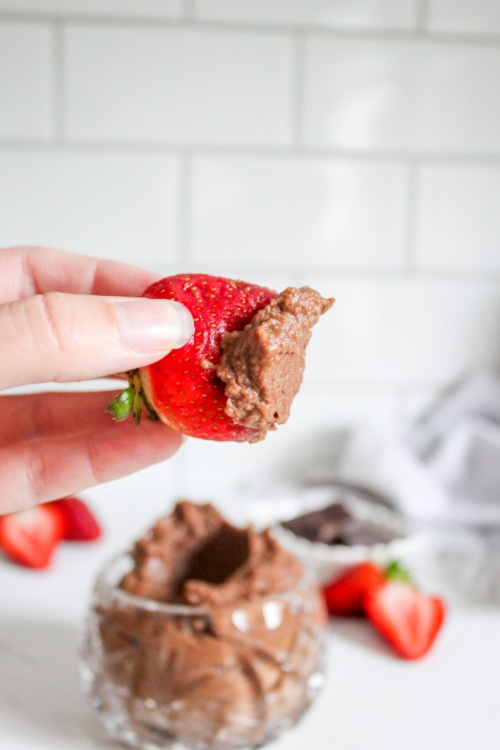
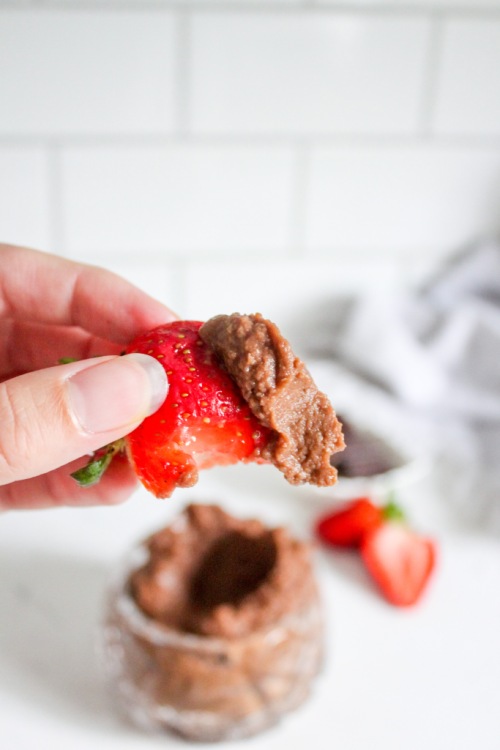
Y’all know I love a good healthy snack, and this is that. Full of protein, fibre, iron and CHOCOLATE. How do you eat chocolate hummus, you ask? Well, if not by the spoonful, then perhaps with fruits, on toast or alongside some salty pretzels. Follow your heart.
Here is what you will need for this recipe:
- Chickpeas (I always use dry chickpeas that I soak overnight and cook for an hour – they make dips much smoother than the canned stuff)
- Cocoa powder
- Maple syrup
- Vanilla
- Salt
This recipe is flexible, depending on your taste. If you love chocolate, you can choose to add more cocoa powder, or if you would like a subtler chocolate flavour, add less. Same with the sweetness level. If you enjoy really sweet desserts, add more syrup. If you are like me and prefer less sweet, add the amount you see in the recipe.
Let’s do the damn thing!
Chocolate Hummus
Serving size: Makes about 1 cup
Prep time: 5 minutes
Inactive time (for soaking): 8 hours
Cook time: 1 hour
Ingredients:
- 3/4 cup dry chickpeas (or 2 cups canned, rinsed very well)
- 3 – 4 tbsp cocoa powder
- 3 tbsp maple syrup (or more, to taste)
- 1/2 tsp pure vanilla extract (optional)
- 1/4 tsp salt
Instructions:
- If working with dry chickpeas (recommended for a smoother consistency), cover chickpeas with two inches of water and soak overnight. Drain, rinse and transfer to a medium-sized pot. Cover with two inches of water and bring to a boil. Reduce heat to a rolling simmer and cook chickpeas, lid off, for one hour or until tender. If working with canned chickpeas, skip this step.
- Add cooked chickpeas to a food processor, along with three tablespoons of cocoa powder, the syrup, salt and the vanilla, if using. Blend until smooth, scraping down the sides of your food processor every so often. Taste and add more cocoa or syrup, if desired.
- Transfer hummus to an airtight container if not serving immediately and store in the fridge for up to four days.
The post Chocolate Hummus appeared first on Never. Not. Eating..
]]>The post Vegan Coconut Panna Cotta with a Mango Compote appeared first on Never. Not. Eating..
]]>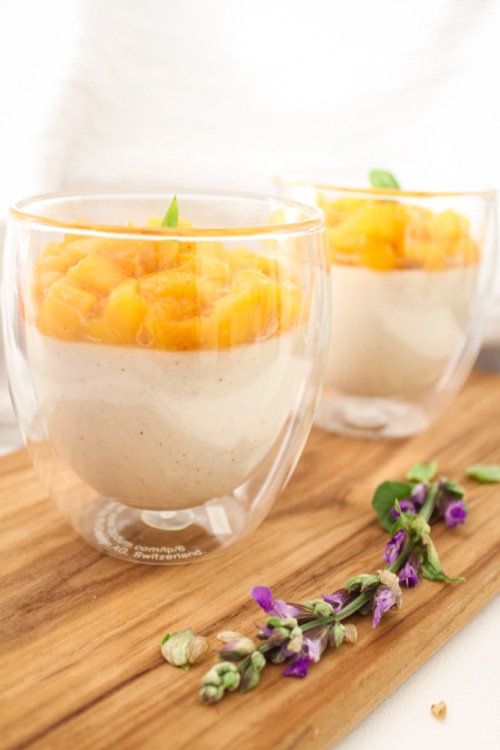
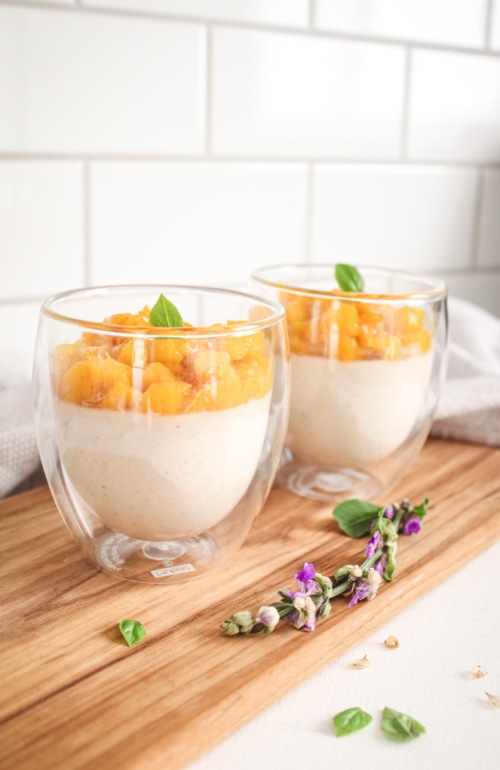
This vegan dessert mimics the OG Italian dessert. “Panna Cotta” means “Cooked Cream” in Italian, and I give you just that! Minus the cream, sub the coconut milk – My fav! It’s smooth, creamy, sweet and fruity. The perfect make-ahead dessert!

This dessert consists of two parts – the panna cotta and the fruit compote on top. For the panna cotta, you are going to need:
- Full-fat coconut milk
- maple syrup (or your choice of sugar)
- agar agar (a vegan gelatin)
- cinnamon
- nutmeg
- salt
For the compote, you will need:
- One mango
- cinnamon
- nutmeg
- salt
- citrus juice (lime or lemon)
- maple syrup
It may seem like a daunting task, but trust me…It’s the simplist dessert imaginable! It takes about 10 minutes to make each part and then all you have to do is wait until it sets up in the fridge! So easy. More delicious. Panna cotta pefection.
Here is the recipe.
Vegan Coconut Panna Cotta with a Mango Compote
Serving size: Makes 3 desserts
Prep time: 10 minutes
Cook time: 20 minutes
Set time: 1 hour
Ingredients:
For the Panna Cotta:
- 1 14-oz can of full-fat coconut milk
- 1/4 tsp cinnamon
- pinch of fresh nutmeg
- 3/4 tsp agar agar
- 1/4 cup maple syrup (or sugar of choice)
- pinch of salt
For the Mango Compote:
- 1 mango, small dice
- 1 tbsp maple syrup
- 2 tbsp freshly squeezed citrus juice (I use half lemon, half lime)
- pinch of cinnamon
- pinch of fresh nutmeg
- pinch of salt
Instructions:
- Bring the coconut milk to a boil in a small saucepan with cinnamon and nutmeg, watching carefully to avoid boiling over. Once boiling, add agar agar and reduce heat. Whisk for one minute and then add the maple syrup and salt. Simmer on low for another two minutes, whisking occasionally. Strain through a fine mesh sieve into a measuring cup with a spout. Divide into three dessert cups or stemless wine glasses and place in the fridge for at least an hour to set up.
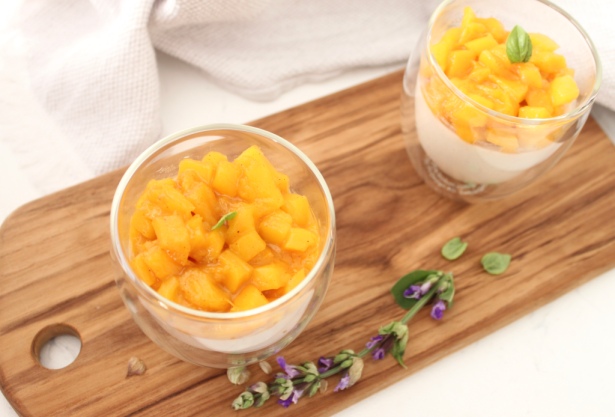
- In a small saucepan, add the mango, maple syrup, citrus juice, cinnamon, nutmeg and salt. Let simmer until it takes on a jam-like consistency, about 10 minutes. Let cool about 10 minutes before spooning on top of the set panna cotta. Eat warm, or place back in the fridge and enjoy cold (my favourite).
The post Vegan Coconut Panna Cotta with a Mango Compote appeared first on Never. Not. Eating..
]]>