The post No Churn Strawberry Swirl Ice Cream appeared first on Never. Not. Eating..
]]>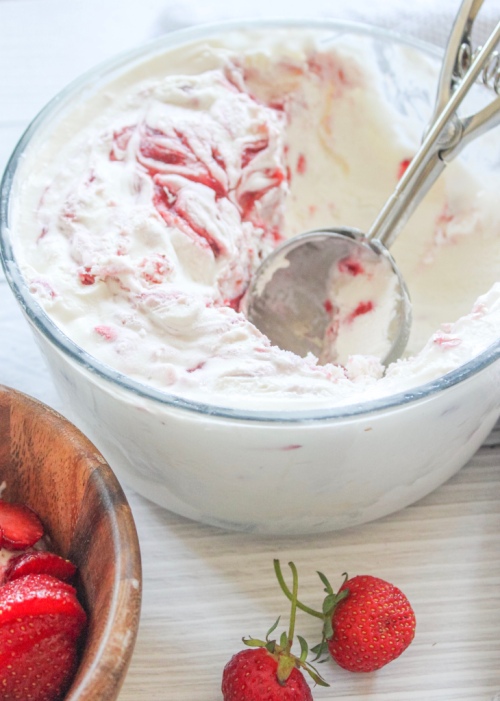
Listen guys – I have no idea why people buy ice cream. Making your own is where it’s at. Don’t have an ice cream machine? You don’t need one! This no churn ice cream only requires 5 ingredients and is so easy to make. The only thing that’s difficult about it is not eating the entire container. #summerbod
This recipe will give you a solid base that you can change and adapt to whichever flavours you’re feeling. I chose to make this batch with strawberries, because they are in season and I just went strawberry picking and I have a ton to use up. But you can easily omit the strawberries and add something else, whether it be another fruit, chocolate, caramel sauce, nuts…The possibilities are endless!

Here is what you will need:
- Sweetened Condensed Milk
- Greek yogurt
- Whipping cream
- Strawberries
- Jam (optional)
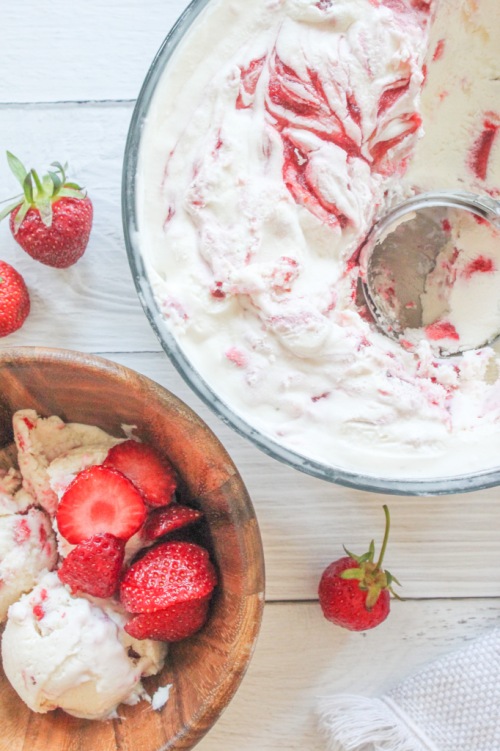
This is a perfect summer treat. Eat it alone, with fresh fruit, sandwiched between two cookies, added to an ice cream cake – whatever you like! It is highly addictive.
No Churn Strawberry Swirl Ice Cream
Yield: Makes approximately 7 cups of ice cream (1.65 L)
Prep time: 6-8 minutes
Chill time: 7 hours
Ingredients:
- 300 ml sweetened condensed milk
- 1/2 cup plain greek yogurt
- pinch of salt
- 500 ml fresh whipping cream (35%)
- 1 tsp pure vanilla extract
- 1 cup strawberries, finely chopped
- 1/4 cup jam (optional), I use my homemade Strawberry Rhubarb Jam
Instructions:
- Place the bowl of your stand mixer in the freezer with the whisk attachment to get cold. If using a hand mixer, do the same but with a large bowl and your beaters.
- Add sweetened condensed milk to a separate, large bowl with yogurt and salt. Whisk until combined and then set aside.
- Remove the bowl and whisk from the freezer and attach to your stand mixer. Add the whipping cream to the bowl with the vanilla. Beat on high until stiff peaks form, approximately 3 minutes.
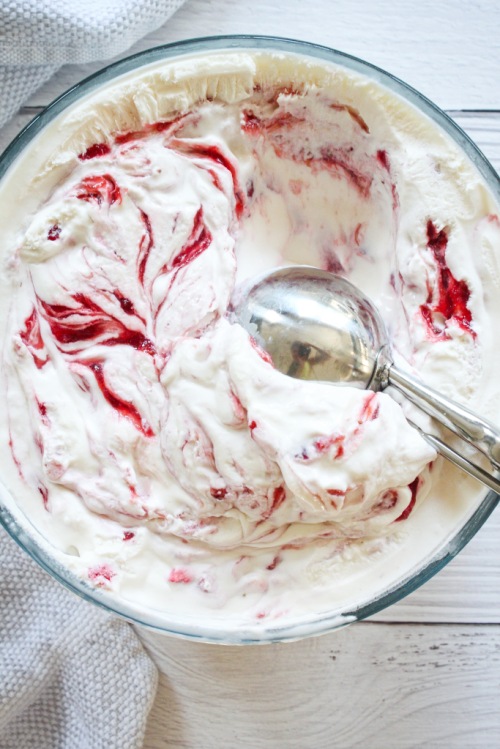
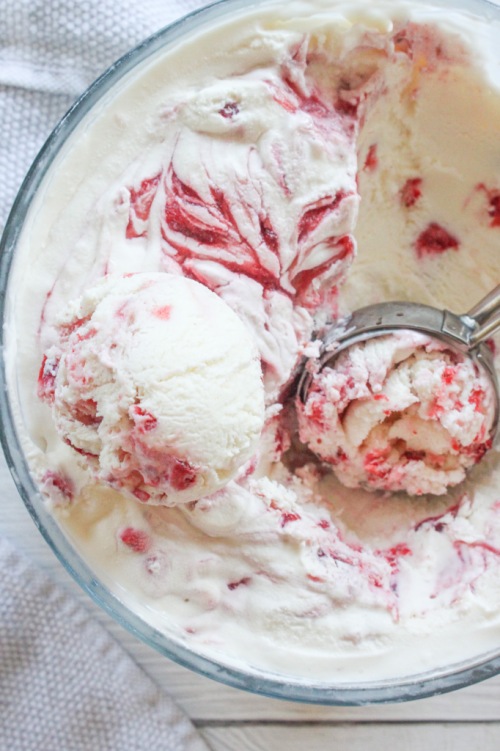
- Add the strawberries and half of the whipped cream to the sweetened condensed milk mixture and carefully fold in with a spatula. Once mostly combined, add the rest of the whipped cream and fold until fully incorporated. Transfer mixture to a large bowl that has a fitted lid (needs to hold at least 1.65 litres). Dollop spoonfuls of the jam on top and use a knife to swirl the jam around. Freeze for at least 7 hours. Take out about 10 minutes before serving to let soften before scooping.
The post No Churn Strawberry Swirl Ice Cream appeared first on Never. Not. Eating..
]]>The post Lemon Caper Pasta appeared first on Never. Not. Eating..
]]>
They say you should wake up everyday and still make your bed and get dressed while in self-isolation. They say it helps individuals feel more accomplished and more productive. So I’ve been rising and shining. I get up, straighten out my duvet, pick up all of my little decorative pillows and arrange them at the head of my bed. I put on my yoga pants (better than pajamas?!), slip on a cozy sweater and wash my face. Later, I praise my ambition and appreciate my yoga pant choice because, pasta. THIS pasta. Lemon Caper Pasta. The best pasta in all the lands. And it pairs perfectly with my stretchy pants.
REASONS TO MAKE LEMON CAPER PASTA
This is a perfect dish to make if:
- you want a date night idea
- you need a quick meal
- you like flavour
- you like food
- you are quarantined
- you are a human
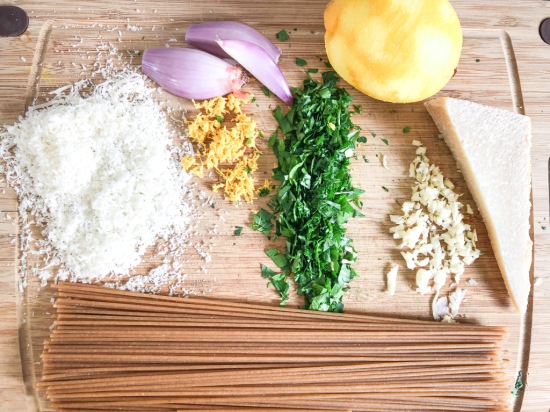
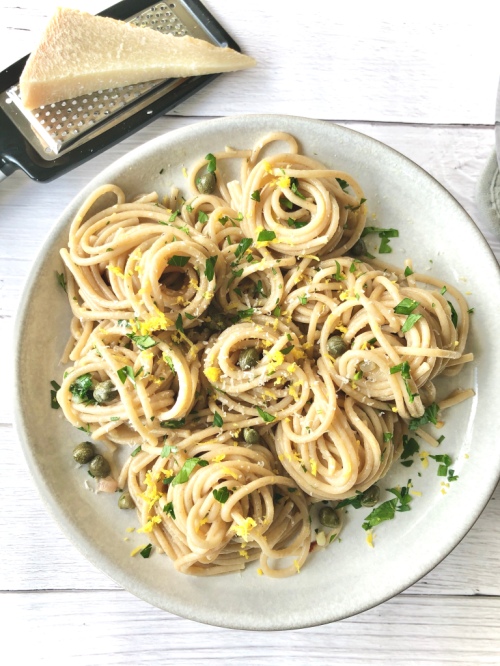
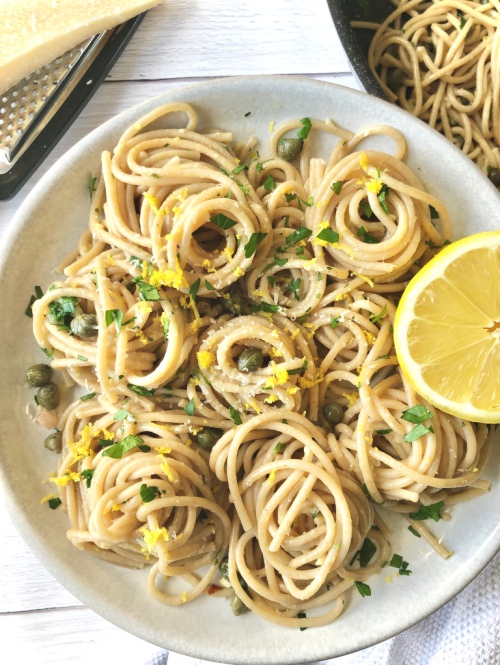
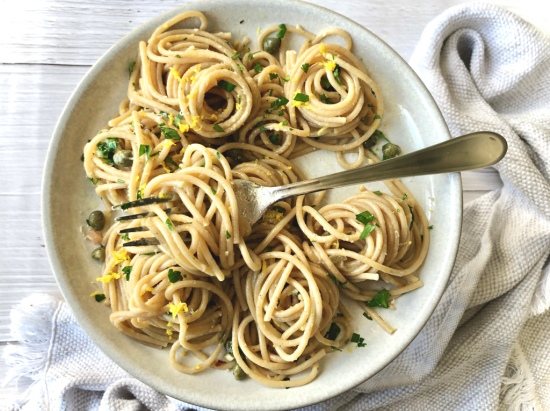
A luscious pasta coated in a white wine-butter sauce with melty parm, briney capers and fresh citrus.
The Pasta
For the pasta, you can really use whatever you have. Here, I’ve used a whole wheat semolina pasta. It’s a bit heartier and nuttier than white pasta. It’s also healthier and is usually my go-to, as well as any spelt pastas.
The capers give this recipe a delicious salty, briney punch. If you don’t want to venture off to the grocery store, you can buy capers here. You can also substitute them for green olives.
It has BOLD flavours. DELICIOUS flavours. CRAVE-WORTHY flavours.
Do you ever meet someone who is really attractive, smart AND kind? Yup. That is this recipe in pasta-form. It’s not impastable. It exists, right here.
Come and spaghet it.
OTHER IDEAS SIMILAR TO LEMON CAPER PASTA:
Simple Beetroot Pasta (for a fun, colourful meal)
Creamy Vegan Mushroom Rigatoni (a wholesome meal)
Butternut Squash and Kale Lasagna Roll-Ups (a great way to hide vegetables for the kids)
Tortiglioni in Roasted Red Pepper Sauce (Nonna will be proud)
Lemon Caper Pasta
Serving size: 2
Prep time: 5 minutes
Cook time: 20 minutes
Ingredients:
- 2 servings of choice pasta (approx. 180 g)
- salt
- 2 tbsp olive oil
- 1 shallot, diced
- 2 cloves garlic
- 1/3 cup white wine
- 1 tbsp butter
- 1/3 cup fresh, grated parmesan, plus more for topping
- 1/4 tsp chili flakes (optional)
- 1/2 tbsp caper brine (optional)
- 2 tbsp capers
- zest of one lemon
- juice of half a lemon (approx. 2 tbsp)
- 1/4 cup chopped parsley
- fresh ground pepper
Instructions:
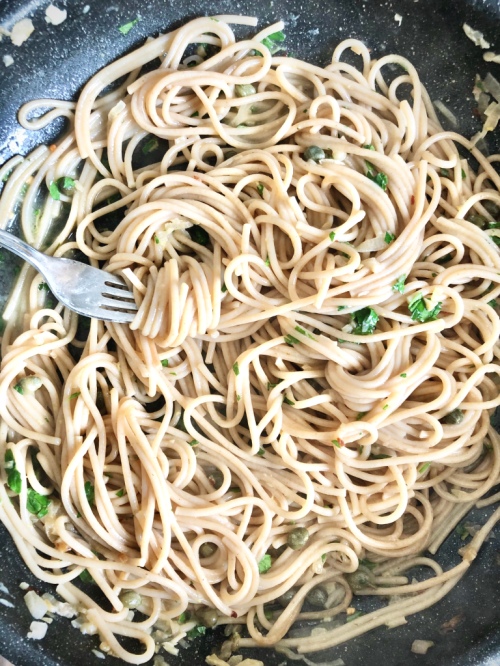
- Fill a large pot with water and bring to a boil. Salt the water generously and add the pasta. Cook according to package directions, until ‘al dente.’ Reserve about 1/3 cup of the pasta water before draining.
- Meanwhile, add olive oil to a large skillet over low heat. When pan is warm, add the shallot and stir for a few minutes until tender. Add garlic and stir for about 30 seconds until fragrant. Pour the white wine into the pan and increase the heat to medium-high. Let the wine reduce for about 5 minutes, or until you can no longer smell the alcohol. When reduced by about half, add the butter and stir to incorporate. Reduce the heat again to medium-low.
- When the pasta is done, add it right to the pan along with the reserved pasta water. Add the parmesan and chili flakes to the pan and toss everything together.
- Turn the heat off and add the caper brine, capers, lemon zest, lemon juice, parsley and a few grinds of fresh black pepper. Toss to combine, dish onto two plates and top with more parmesan, if you would like.
The post Lemon Caper Pasta appeared first on Never. Not. Eating..
]]>The post Apple Cardamom Hand Pies with a Rum Glaze appeared first on Never. Not. Eating..
]]>
This pie recipe is simple, quick and easy. One day I was loungin’ and needed something sweet to eat and I took a peak in my fridge and used what I had on hand. It turned out to be a keeper and that’s proof that this recipe is so simple and easy.
WHAT ARE APPLE CARDAMOM HAND PIES?
They are a classic American dessert transformed into a little handheld present that won’t disappoint. Tender, spiced apples wrapped in a flaky, golden brown pastry, topped with an adult-only rum glaze. I mean….come onnnn! You must.

THE PASTRY
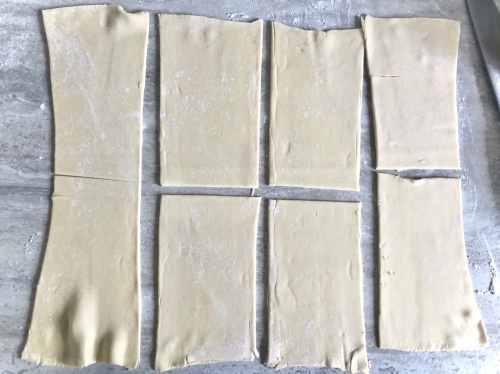
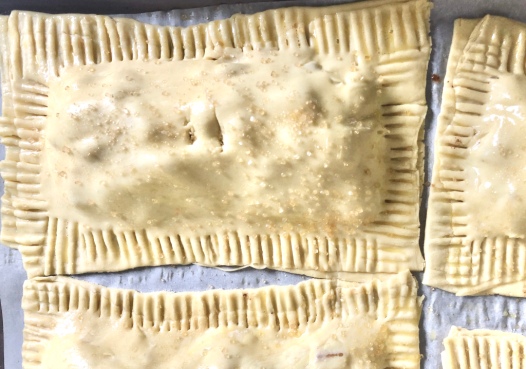
The puff pastry is really what makes this recipe so easy. No fussy pie dough to deal with, just crispy, flaky pillows of amazingness. And all you need is one sheet! Roll it out nice and thin, cut into 8 equal rectangles and fill them up with the tastiest little apples.
You can also make smaller hand pies if you have more control over your portion size than I do. Just cut your puff pastry into 16 squares instead!
THE FILLING
I tend to migrate toward using Honeycrisp apples for my apple-forward baking recipes because they are my absolute favourite. Crispy and sweet, yet tart, they beat out every other apple. You can also use the classic Granny Smith, or whatever you have in your fridge, and they will still be tasty and flavourful!
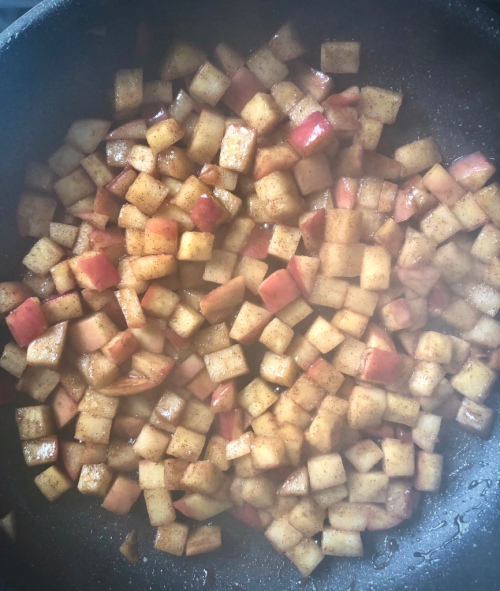
To prepare the apples, add them to a large skillet with all the cinnamon, cardamom, salt, maple syrup and brown sugar and cook until tender and they begin to release their juices. This stuff is honestly gold – I could just eat it with a spoon.
MAKING THE APPLE CARDAMOM HAND PIES
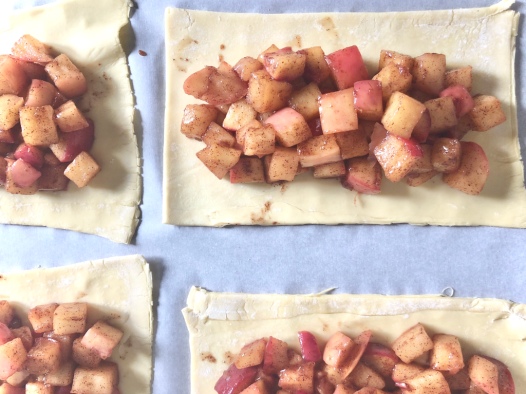
Divide your apples between the four puff pastry rectangles and top with the remaining pastry. Crimp the edges so it looks super cute, and pierce a couple of holes in the top to allow the steam to escape. It is important to let them chill in the fridge for at least half hour at this point. This allows the butter in the dough to firm up again after being handled, and thus, it will melt slower once you bake it. Once chilled, pop them in the oven and watch them transform into the most delicious little treat!

While the pies are baking, make your luscious glaze. Add powdered sugar, rum, vanilla, cinnamon and non-dairy (or regular) milk to a bowl and whisk until smooth. It’s your choice how you want to apply this glaze – you can just pile it on, drizzle it, or spoon it as you go. There’s no judgement here.
I think that’s all I need to tell you about this recipe. Does anyone actually read this part of the post anyways???
MORE FRUIT-FORWARD RECIPES
5-Ingredient Peach Crisp (a summer must-have)
Strawberry Honey Ginger Galette (a dessert with a little sha-bang!)
Tropical Banana Flambe (take me down south)
Grilled Pina Colada French Toast (a heavenly breakfast idea)
TOOLS I USED TO MAKE THESE APPLE CARDAMOM HAND PIES
Click on the images below to see what I use for this recipe.


This post contains affiliate links and I may earn a small commission when purchases are made after clicking the links, at no cost to you. Thank you!
APPLE CARDAMOM HAND PIES WITH A RUM GLAZE
Servings: Makes 4 large hand pies
Prep time: 15 minutes (active), 30 minutes (inactive)
Cook time: 20 minutes
INGREDIENTS
- 1 tbsp coconut oil
- 2 large apples, small dice (I like Honeycrisp or Granny Smith)
- 1 tsp cinnamon
- a quarter tsp cardamom
- 1-2 tbsp maple syrup (depending on how sweet you want them, I do 1 tbsp)
- 1 tbsp brown sugar
- pinch of salt
- 1 tbsp cornstarch
- 1 tbsp water
- a half tsp vanilla
- 1 tbsp freshly squeezed lemon juice
- 1 sheet puff pastry, thawed
- an egg
- 1 tbsp water
- Raw turbinado sugar for topping (optional)
For the glaze:
- 1/4 cup powdered sugar
- 1 tsp dark spiced rum
- 1/2 tsp vanilla
- 1/4 tsp cinnamon
- 1-3 tsp non-dairy milk
INSTRUCTIONS
- Melt coconut oil in a large skillet over medium heat. Add apples, cinnamon, cardamom, maple syrup, brown sugar and salt. Cook until apples begin to soften (8-10 minutes), stirring often.
- While the apples are cooking, prepare your puff pastry. On a lightly floured surface, roll out your puff pastry until it is about 1/4 inch thick. Cut into 8 rectangles (see photo above) and place four of the rectangles on a baking sheet lined with parchment paper.
- Whisking the cornstarch and water together. Add to the apples, stir and remove skillet from heat. Add in the lemon juice and vanilla and mix until combined.
- Use a spoon to scoop the apples into the centre of the four puff pastry rectangles that were placed on the baking sheet. Leave a half-inch border all the way around. Place the other four pastries on top and crimp the edges with a fork. Cut a few slits into the top of each so the steam can escape. Place in fridge for at least 30 minutes to chill.
- Preheat the oven to 400 degrees Fahrenheit.
- Beat the egg and water together to make an egg wash. Remove pies from fridge and brush with the egg wash. Sprinkle the tops with the turbinado sugar. Bake for 18-20 minutes or until puffed up and golden brown. Let cool on a wire rack for 5-10 minutes before serving.
For the glaze:
- Add the powdered sugar, rum, vanilla, cinnamon and one teaspoon of milk to a bowl and whisk. If it is too thick, continue to add more milk, one teaspoon at a time until you reach a drizzle-able consistency.
- Drizzle the hand pies with the glaze and serve warm. Store in the fridge for up to 5 days in an airtight container.
The post Apple Cardamom Hand Pies with a Rum Glaze appeared first on Never. Not. Eating..
]]>The post Blue Buckwheat Pancakes appeared first on Never. Not. Eating..
]]>
I’m a breakfast fanatic, and you can’t have an amazing breakfast without pancakes….am I right?! I’m right.

The buckwheat flour in these pancakes make them gluten-free, yet still texturally on-point. Buckwheat is actually a seed that is packed with protein and antioxidants. I prefer using it to other gluten-free flours (such as almond and coconut flour) in pancake recipes as it acts more like regular flour would.

The “blue” comes from spirulina. If you follow my blog or instagram page (@nevernoteatingca), you know that I use spirulina a lot. It is basically algae that has been dried and ground up into a powder form. You can purchase regular green spirulina, which has an unpleasant fishy smell, but is usually not detectable when added to food/drink, or you can buy blue spirulina, which doesn’t have any fishy odour or taste, and makes your food appear vibrantly blue in colour.

This recipe is also dairy-free. When I started to become interested in cooking and baking (pre-internet), I would grab my mom’s ancient cookbooks out of the closet and do my best to follow the recipes. I would always become frustrated when seeing the ingredient, “buttermilk” listed, as it was something we never had. BUT, after flipping through an old-school Betty Crocker book my mom owned, I learned that mixing vinegar and milk together created an alternative that could be substituted for buttermilk! And now, since I don’t drink cow’s milk, I always substitute regular milk for non-dairy, nut milk and I’m pretty sure it works. Thanks, Betty. If you DO drink milk, you can stick to buttermilk instead of using the apple cider vinegar and almond milk mixture in this recipe. You do you.

There are a few other unorthodox ingredients I have snuck into these babies. Maca powder for an energy boost and further health benefits. Maple syrup to replace the regular, refined sugar that would be added to pancakes. And because maple syrup just goes with pancakes, of course!

I’d say that these pancakes are worth a shot if you are trying to live a healthier lifestyle but still want to indulge in breakfast’s best. They are fluffy, moist, delicious and beautiful! Top with fresh fruit and more maple syrup and enjoy!
Happy International Pancake Day, everyone!
Blue Buckwheat Pancakes
Serving size: Makes about 10 small pancakes
Prep time: 8 minutes
Cook time: 10 minutes
Ingredients:
- 1 tbsp apple cider vinegar
- 1 1/4 cup non-dairy milk (I like almond)
- 1 cup buckwheat flour
- 1 tsp baking powder
- 1/2 tsp baking soda
- 1/2 tsp salt
- 1 tbsp blue spirulina powder
- 1 tsp maca powder (optional)
- 1 large egg
- 1-2 tbsp pure maple syrup
- 1/2 tsp pure vanilla extract
- Coconut oil (for the pan)
Instructions:
- Stir together the apple cider vinegar and the dairy-free milk and set aside.
- In a small bowl, whisk together the flour, baking powder, baking soda, salt, spirulina and maca powder (if using).
- In a large bowl, beat the egg and then add the maple syrup, vanilla and milk/vinegar mixture.
- Add the dry ingredients to the wet ingredients and whisk until just incorporated. Set aside for a few minutes to let the batter develop.
- Preheat your griddle or pan over medium heat. Add enough coconut oil to generously coat the bottom of the pan and (when the pan is hot) scoop in some of the pancake batter. When you see the edges begin to cook and bubbles begin to form on top (about a minute and a half to two minutes), flip the pancake. Let it cook for another minute or until cooked through and remove from pan. Continue with the remainder of the batter.
NOTES:
These are great the next day, or make them for meal prep and place them in your freezer, take them with you to work and pop them in the toaster! Easy peasy.
The colour of the pancakes become less vibrant as the pancakes cook, so if you want them to be a brighter blue colour – add more spirulina and cook them until just done on each side, trying to avoid browning which takes away from the blue.
The post Blue Buckwheat Pancakes appeared first on Never. Not. Eating..
]]>The post Tropical Nice Cream appeared first on Never. Not. Eating..
]]>
My dad is a HUGE ice cream fanatic and I have definitely inherited the same taste buds from him. Any kind, anywhere – we’re game. Thus, the inspiration for this recipe…because y’all know I can’t be eating real ice cream every day. This Tropical Nice Cream is SO easy and SO tasty you may never go back to the real stuff again.
Grab your bananas. Let’s do this.
This is a one-ingredient recipe. I can’t believe it, either. You are going to need:
- Frozen fruit
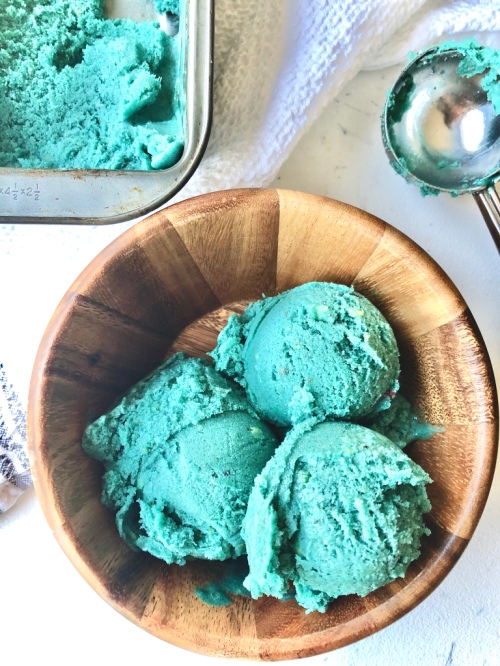
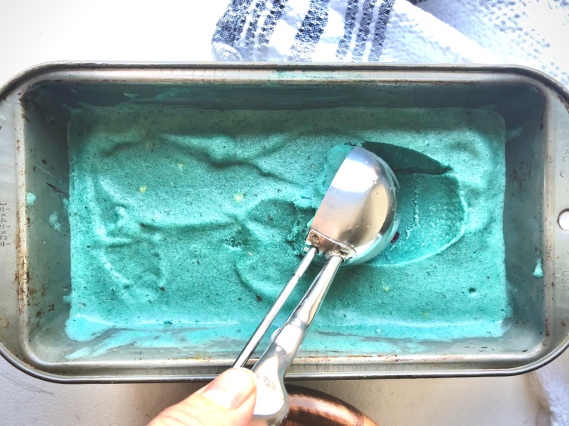
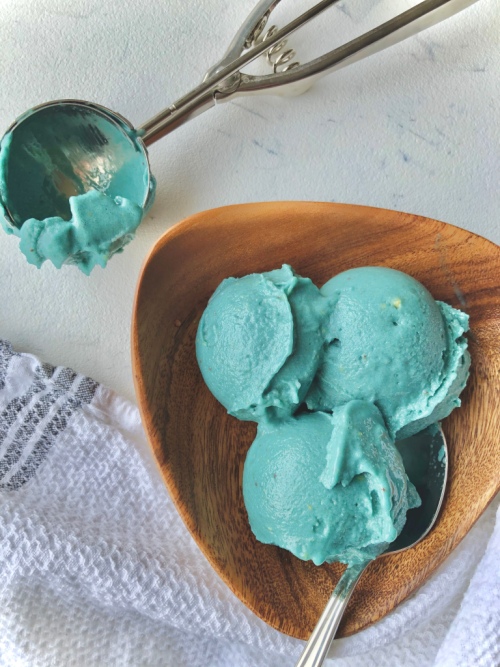
Yup. That’s it! Okay, fine…if you want your ice cream to be the pretty blue that you see in the photos, then just add some spirulina powder and that’s that. But the base of this “ice cream” can be achieved by just using frozen fruit. You are so welcome.

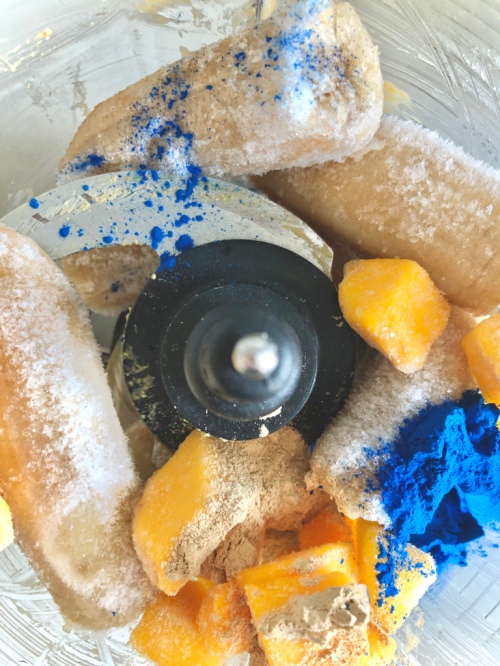
Okay, make sure you have a whole five minutes. Grab your food processor. Load it up with some frozen bananas, mangoes, pineapples and spirulina (if using). Blend. Eat. Feel amazing. Make some more.
But actually…it’s that easy! Happy New Year to us.
Tropical Nice Cream
Servings: 4
Prep time: 1 minute
Cook time: 3-5 minutes
Ingredients:
- 4 frozen bananas (quarter or half them before freezing)
- 1/2 cup frozen pineapple
- 1/2 cup frozen mango
- 1 tsp blue spirulina (optional)
Instructions:
- Add all ingredients to a food processor (or blender). Pulse a few times until fruit is broken up and spirulina is incorporated. Blend on low until smooth. You will need to scrape down the bowl a number of times throughout.
- Transfer to an air-tight container and place in the freezer. Remove from freezer a few minutes prior to eating and serve using an ice cream scoop (or large metal spoon) that has been dipped in warm water.
The post Tropical Nice Cream appeared first on Never. Not. Eating..
]]>The post Jewelled Brussel Sprout Kale Salad with Honey Dijon Dressing appeared first on Never. Not. Eating..
]]>
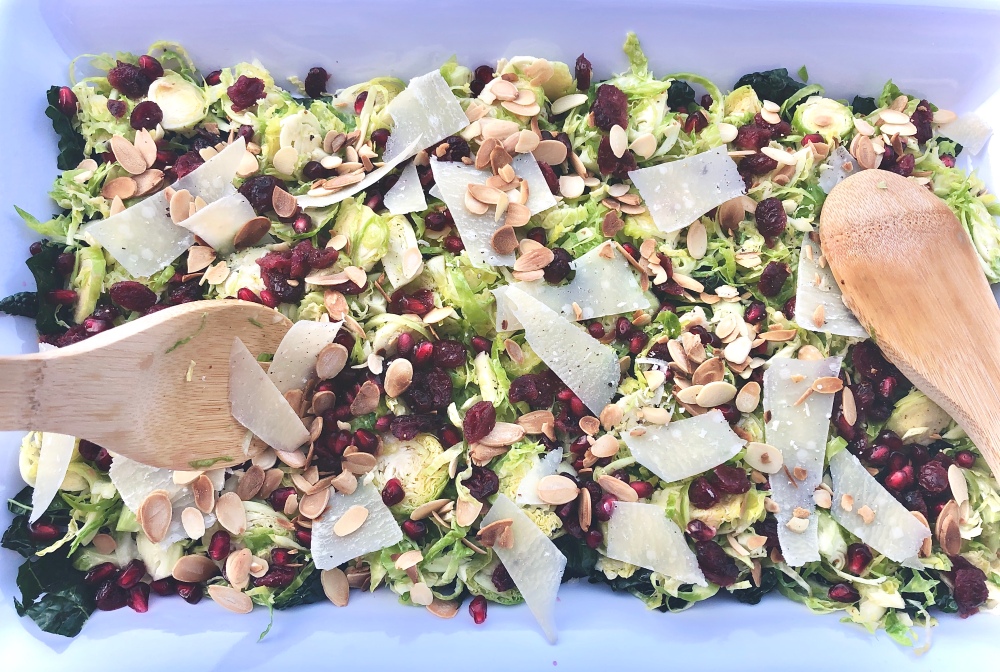
Ahhh the brussel sprout. It looks like a mini cabbage and grows on a thick, weird looking trunk, that could probably be used as a weapon. Nonetheless, they are so yummy. This recipe highlights the sprout in a simple salad that is super easy to make and takes no time at all! Perfect for a side dish or a lunch on it’s own.
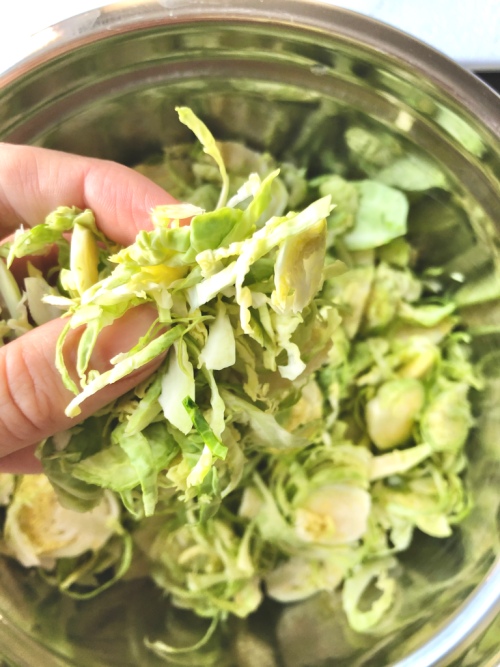
For this recipe, you can thinly slice your sprouts with a sharp knife, shave them on your mandolin, OR buy them pre-shaved at the grocery store. Easy peasy. Cut off the bottom where the stem is, peel off the outer leaves and discard if you are doing it yourself!
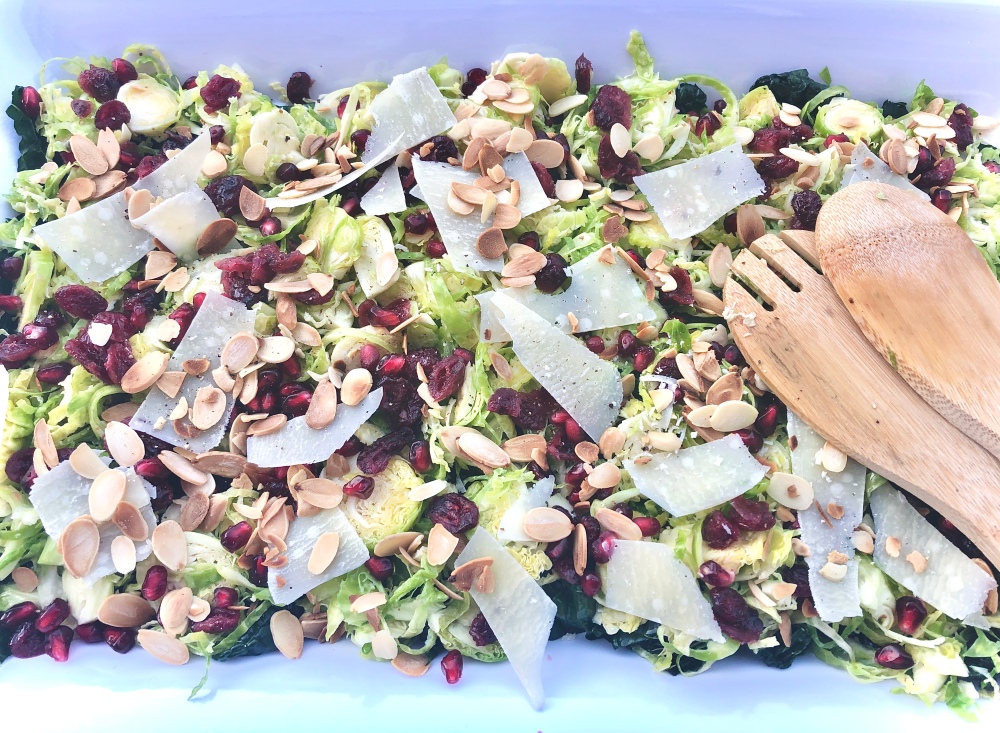
Zee jewels – Why do you call it “Jewelled” Brussel Sprout Kale Salad you ask?! Well, lemme tell you! Firstly, nature’s most beautiful jewels are sprinkled on top – the pomegranate seed. So bright and colourful, pomegranate seeds provide a textural element to any dish as well as a crisp “pop” of happiness when bitten down on.
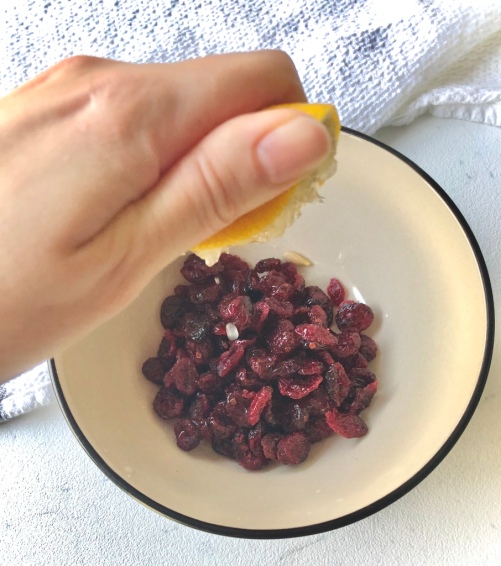
Secondly, dried cranberries that have been brought back to life with a little lemon juice and some hot water. They plump right up and are legitimate gems that are beautiful and wonderful and perfectly tart and sweet and a wanted addition to any salad. You’ll see.
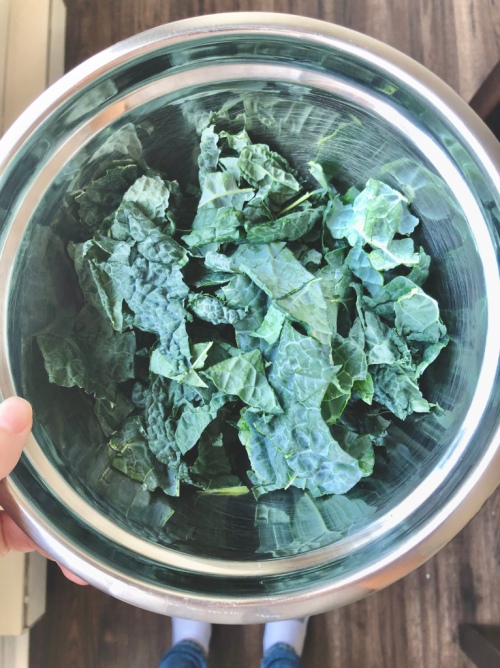
On to the kale. I prefer using Tuscan Kale. It is hearty and after a nice oil massage, the colour is vibrant and provides a perfect accompaniment to the lighter green brussel sprout. It’s also delicious. The massage is important as it helps to tenderize the kale, making it more palatable. And who doesn’t like a good massage? Treat your kale right.
Pre-massage:
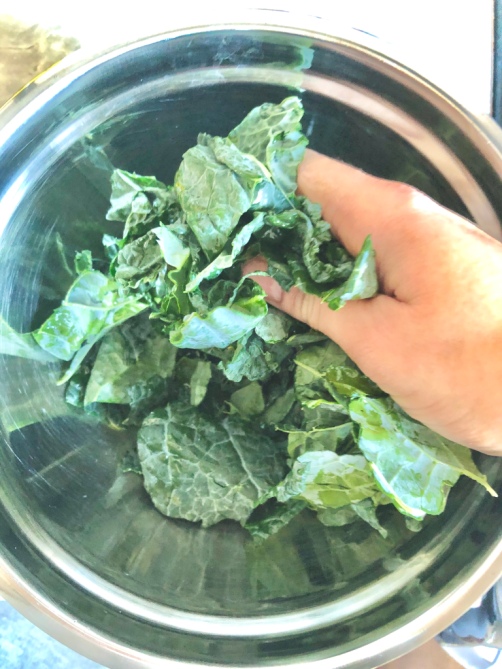
Massage:
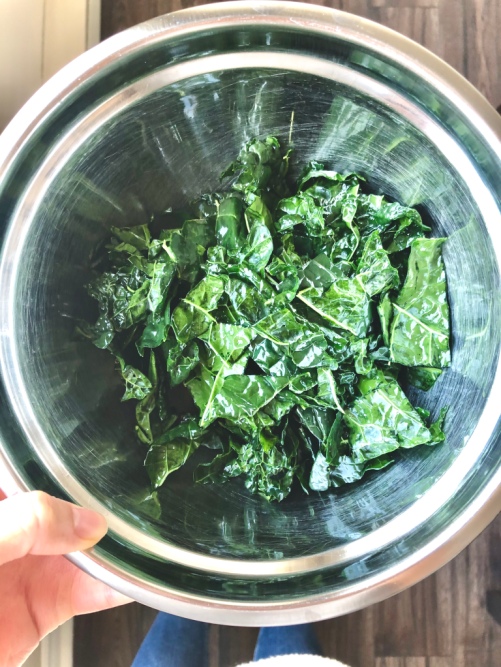
Post massage:
Finally, a few toasted almonds and a couple shavings of fresh parmigiano reggiano bring this whole thing together. Not to mention the yummy honey dijon dressing that takes 2 minutes to whip up from scratch.
Jewelled Brussel Sprout Kale Salad with Honey Dijon Dressing
Serving size: 6
Prep time: 10-15 minutes
Ingredients:
For the Honey Dijon Dressing:
- 2 tbsp apple cider vinegar
- 1 tbsp dijon mustard
- 1.5 tsp honey (or maple syrup, if you are vegan)
- 1/4 tsp salt
- freshly ground black pepper
- 1/3 cup olive oil
For the salad:
- 1/2 cup dried cranberries
- 1 tbsp lemon juice
- 1/3 cup slivered almonds
- 2 cups roughly chopped tuscan kale, stem removed
- olive oil
- 5 cups shaved or thinly sliced brussel sprouts (approximately 20 sprouts)
- parmigiano reggiano (optional)
- 1/3 cup pomegranate seeds
Instructions:
For the dressing:
- Add all ingredients except olive oil to a bowl and whisk together. Slowly drizzle the oil in a steady stream as you whisk to emulsify the dressing. Place in fridge while you prepare the salad.
For the salad:
- Preheat the oven to 350 degrees F.
- Boil water in a kettle and pour over the cranberries that have been placed in a bowl with the lemon juice until just covered. Set aside.
- Line a small baking sheet with parchment paper and lay the almonds on top in a single layer. Toast in the oven for 3-6 minutes, watching carefully. They burn easily, so be careful! Set aside.
- In a bowl, add your kale with 1 teaspoon of olive oil and a pinch of salt. Use your hands to massage the kale. You will notice the colour brightens and the kale begins to tenderize. Set aside.
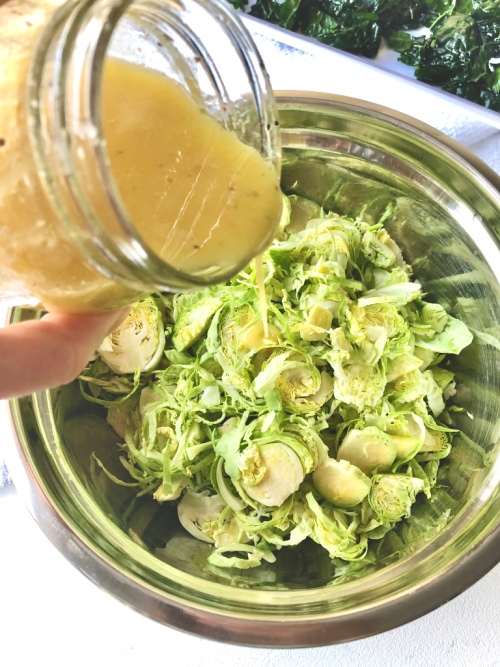
- Place your brussel sprouts in a bowl and pour half of the dressing on top. Toss gently with two large spoons. Set aside. The dressing will help to soften the sprouts, so let sit for at least 10 minutes before assembling your salad.
- Use a vegetable peeler or the side of a box grater to thinly shave your parmigiano, if using.
- When ready to serve, build the salad – on a long tray (or in a large bowl), layer the kale followed by the brussel sprouts. Drain the cranberries and add them to the top with the toasted almonds, pomegranate seeds and parmigiano shavings. Drizzle with a little more dressing and place the remaining dressing to the side for those that like their salad well-dressed. Bon Appetit!
The post Jewelled Brussel Sprout Kale Salad with Honey Dijon Dressing appeared first on Never. Not. Eating..
]]>The post Brown Butter Nutty Granola appeared first on Never. Not. Eating..
]]>- Christmas is coming
- You need a hostess gift
- You like nuts
Truly – this is the best, most perfect, thoughtful, fast, easy, cheap and delicious gift that you could give to someone for hosting you over the holidays. I wouldn’t lie to you. Scout’s honour.
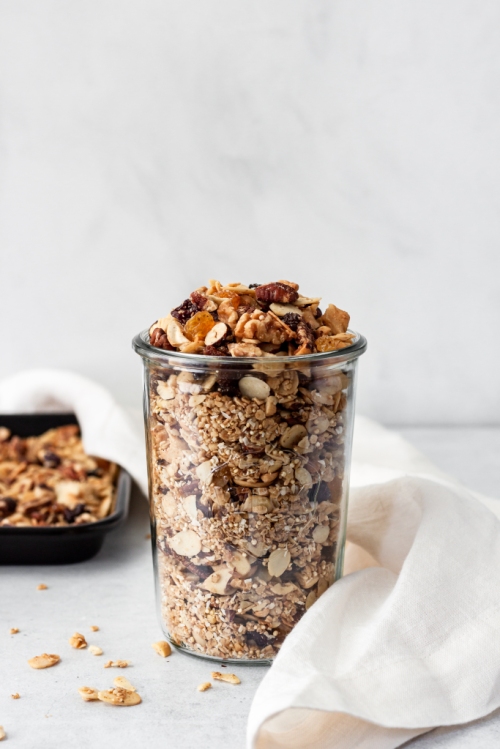
This granola recipe boasts all things Christmas – warm spices, toasted nuts, jeweled cranberries…and brown butter – the best part. Grab a few small mason jars and fill ’em up, tie some bows and get ready to have a handful of new best friends.
Alright, less talk, more granola.

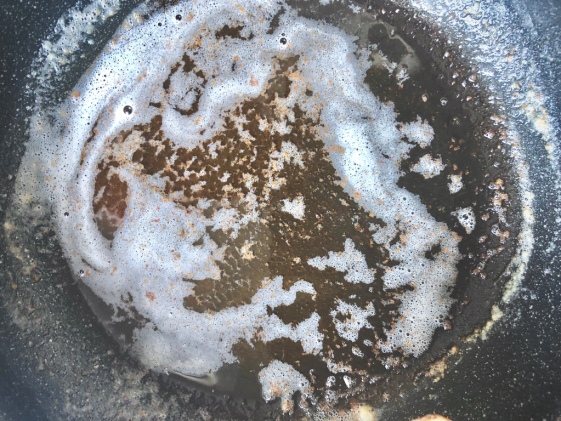
First step: Make the brown butter. Add a quarter cup of cold butter to a pan over medium-low heat. Let the butter foam up and become fragrant, stirring often.
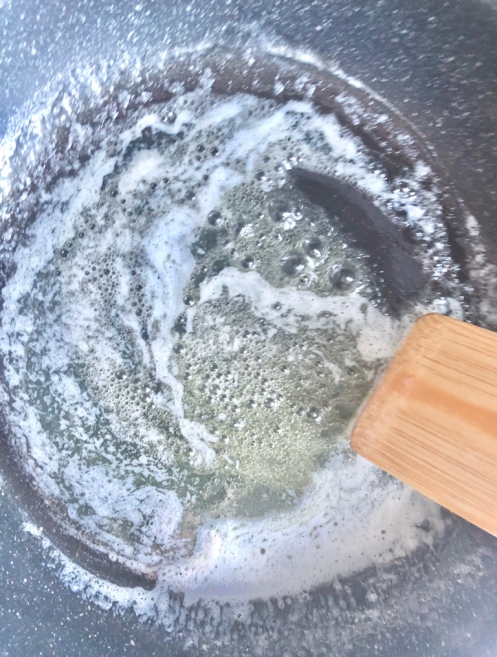
It will begin to develop brown bits on the bottom of the pan (5 minutes or so) – remove from heat and let cool (put it in the fridge or freezer to speed up this process).
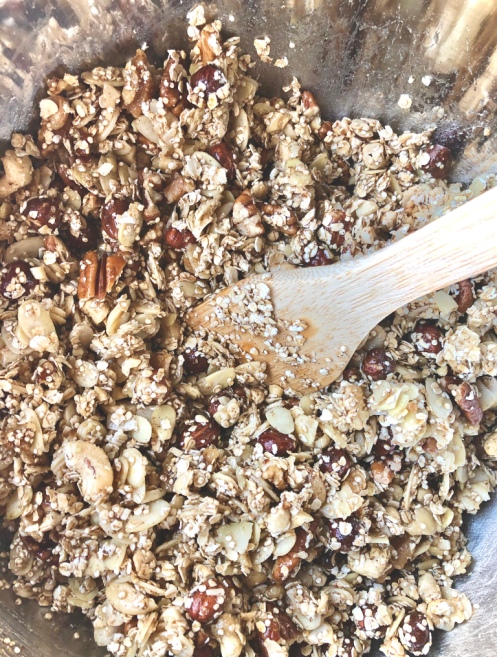
Secondly: Grab the biggest bowl you own. We’re not messin’ around.
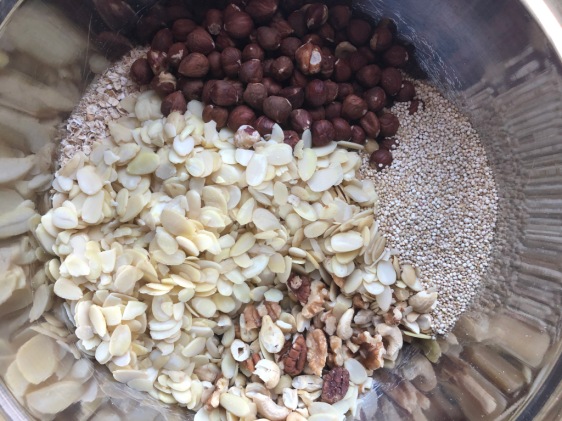
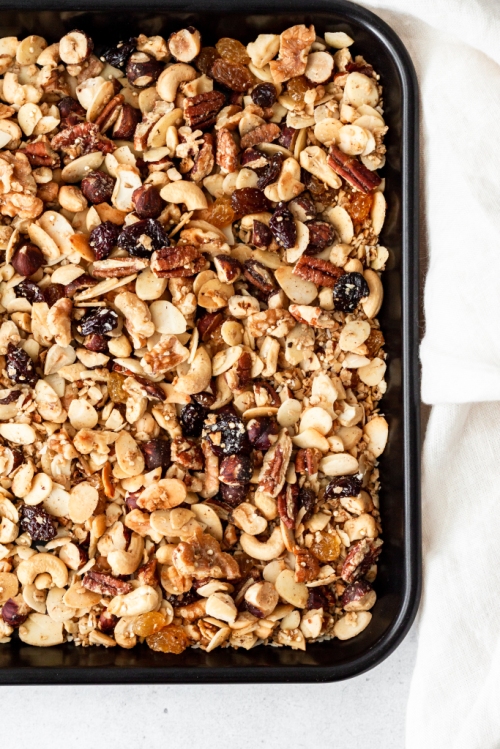
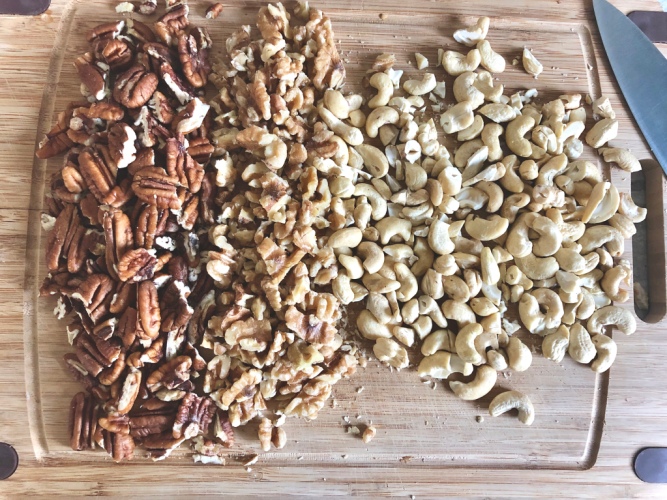
Dump in 2 cups of rolled oats, 6 cups of your favourite types of nuts (I do one cup pecans, one cup walnuts, one cup cashews, two cups slivered almonds and one cup hazelnuts) and half of a cup of quinoa. Set aside.
Next: In a small measuring cup, whisk together three-quarters of a cup of maple syrup, the cooled brown butter, half a teaspoon vanilla, half a teaspoon cinnamon and a quarter of a teaspoon of nutmeg.
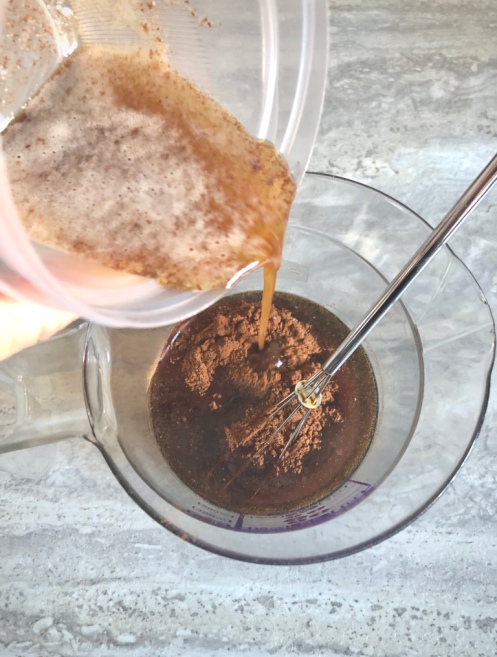
Pour over the nut mixture and stir, making sure everything is coated nicely.
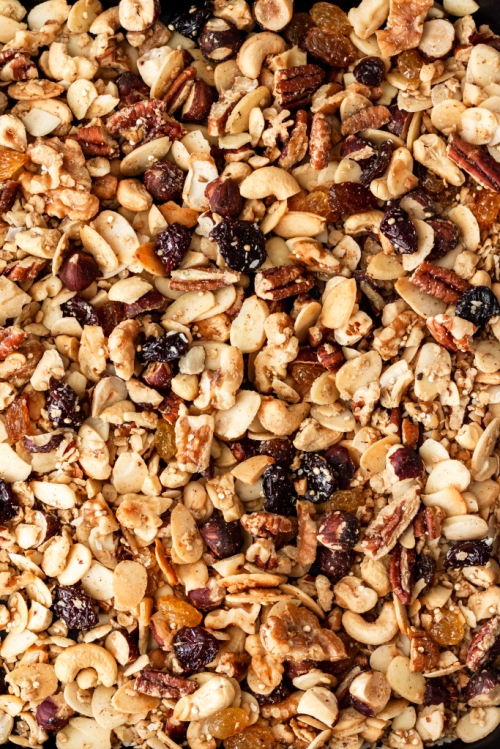
Transfer to a baking sheet that is lined with aluminum foil and bake in a 375 degree oven for 30-35 minutes, stirring often to prevent burning. Add large coconut flakes for the last two minutes of baking. Remove from oven and add some golden and sultana raisins as well as a handful of dried cranberries and a bunch of flaky sea salt. Cool for twenty minutes before putting into jars or storing in airtight containers.
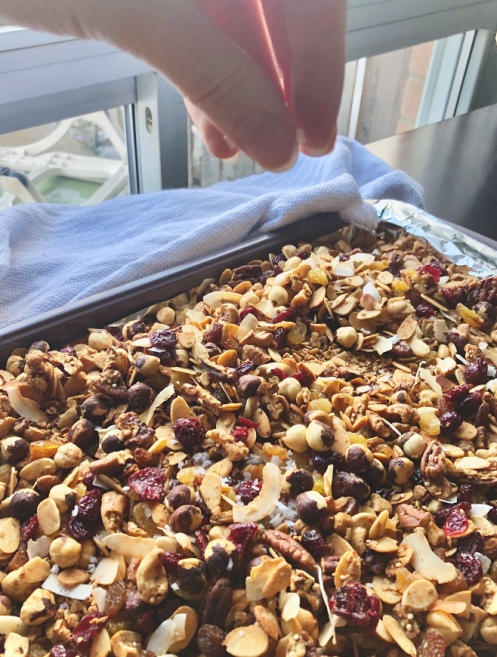
*I highly recommend using heavy duty aluminum foil for this as thinner foil can rip easily when you are stirring the granola. No one likes tin flakes in their food!
Brown Butter Nutty Granola
Yield: 8 cups
Prep time: 10 minutes
Cook time: 35 minutes
Ingredients:
- 1/4 cup cold butter
- 2 cups quick (or rolled) oats
- 1 cup pecans, rough chop
- 1 cup walnuts, rough chop
- 1 cup cashews, rough chop
- 2 cups slivered almonds
- 1 cup hazelnuts, rough chop
- 1/2 cup raw quinoa
- 3/4 cup pure maple syrup
- 1/2 teaspoon vanilla
- 1/2 teaspoon cinnamon
- 1/4 teaspoon nutmeg
- 1/2 cup large flake coconut
- 1/3 cup sultana raisins
- 1/3 cup golden raisins
- 1/3 cup dried cranberries
- 1/2 tbsp – 1 tbsp flaky sea salt
Instructions:
- Add butter to a medium-sized pan over medium-low heat. Cook, stirring often, until you see brown bits begin to form on the bottom of the pan (about 5 minutes). Remove from heat immediately and cool completely (speed up cooling process in fridge or freezer). Do not burn the butter!
- Preheat oven to 375 degrees Fahrenheit and line a large baking sheet with heavy duty aluminum foil.
- In a very large mixing bowl, add the oats, nuts and quinoa.
- In a small measuring cup, measure out the maple syrup. Add the cooled brown butter, vanilla, cinnamon and nutmeg and whisk until combined. Drizzle over the nut mixture and toss until everything is coated. Spread evenly on the foil-lined baking sheet. Bake granola in oven for 35 minutes, stirring frequently to avoid burning. During the last five minutes, add the flaked coconut. The granola is ready when everything is a golden brown colour.
- Remove from oven and add the raisins, cranberries and sea salt to taste (don’t skip the salt!!!).
- Let cool completely before storing in an airtight container.
The post Brown Butter Nutty Granola appeared first on Never. Not. Eating..
]]>The post Homemade Hummus Three Ways appeared first on Never. Not. Eating..
]]>
At first, I couldn’t figure hummus out. It was always so grainy and never smooth like the store-bought ones. Why?! Someone please tell me why!? And then, after much research, I got it. I was using canned chickpeas instead of dry. Soaking dry chickpeas is a gamechanger.
The prep time on this recipe seems outrageous, but it’s really just a put-dry-chickpeas-in-bowl-and-fill-with-water-and-forget-about-overnight-kind-of-thing. The next day, they cook in a pot until soft and then a quick bim-bam-boom in the food processor and we have velvety smooth hummus. And trust me, it’s WAY better than the store bought option!
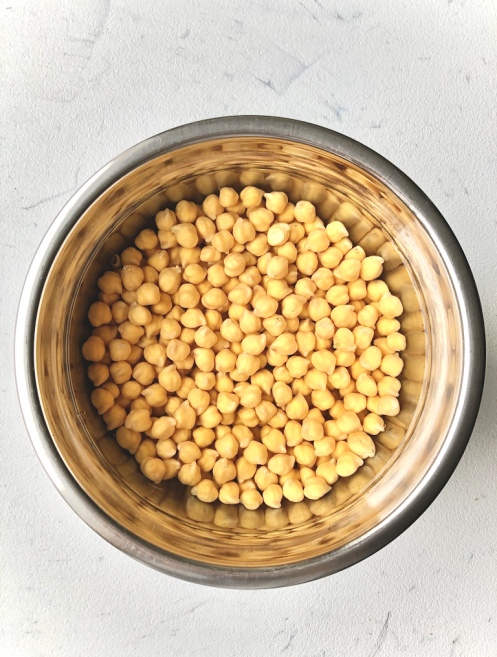
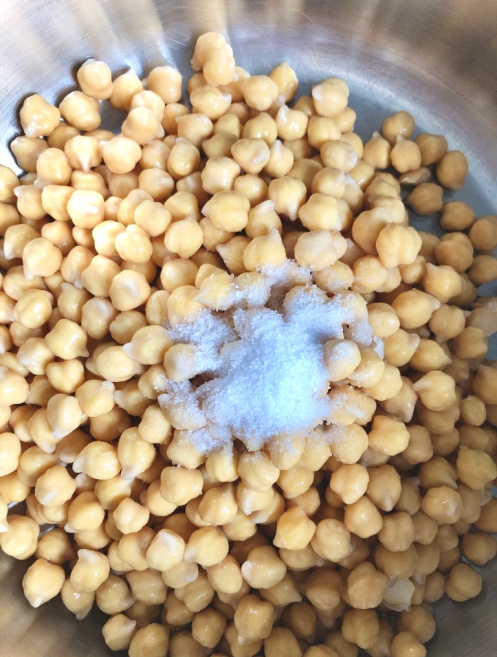
Okay, I’ll break it down a bit more. FIRST – Soak the chickpeas for at least 12 hours. I always throw them in a bowl and cover them with a few inches of water and leave overnight. They practically double in size. It’s miraculous. NEXT – Rinse them and put them in a large pot with fresh water (covering them with an extra two inches), baking soda (helps to soften) and salt (flavour bomb). Bring to a boil and then reduce heat to a simmer, cover and cook until soft – about an hour and 45 minutes.
While the chickpeas are boiling, set your oven to 400 degrees F and wrap up a few golden beets in a little tin foil package. Place on a baking tray and put in the oven for about an hour and fifteen minutes. Remove and carefully open the package – when the steam escapes, it is extremely hot! Take two paper towels and hold a beet in one and use the other to peel off the skin. Rinse off your peeled beets under cold water, cut into smaller chunks and set aside.

To roast the garlic – Turn the oven down to 375 degrees F when the beets are done roasting. Slice the top quarter of the entire garlic head off. Your knife will take off the top tip of each clove and after cutting, you should be able to see the actual cloves. Drizzle with olive oil and wrap up in another cute little tin foil package. Roast in the oven for an hour, or until garlic is tender.

You have an hour to yourself now. May I recommend making coffee, turning on the Food Network and putting your feet up?!
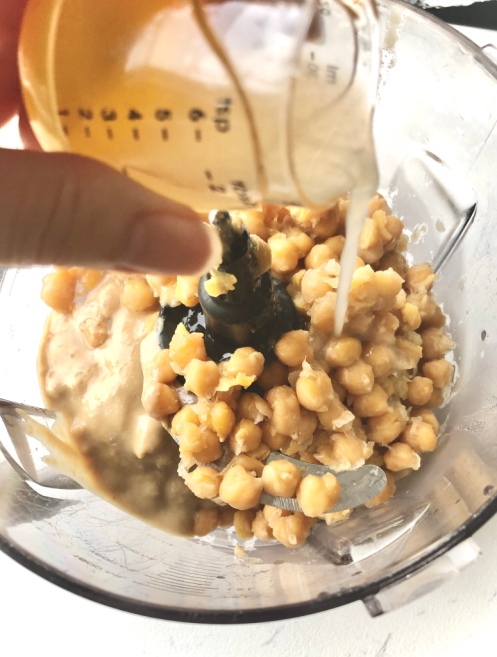
When the chickpeas are done, drain and transfer them to a food processor. I have the full Ninja Blender Set (found here) and it is amazing. Squeeze a few of the roasted garlic cloves out of their skinned casing and add to processor. Add tahini, salt and lemon juice and blend until smooth. Begin to drizzle ice cold water into the hummus in a slow stream. continue to blend for a few more seconds. Taste the hummus and add more salt if needed.

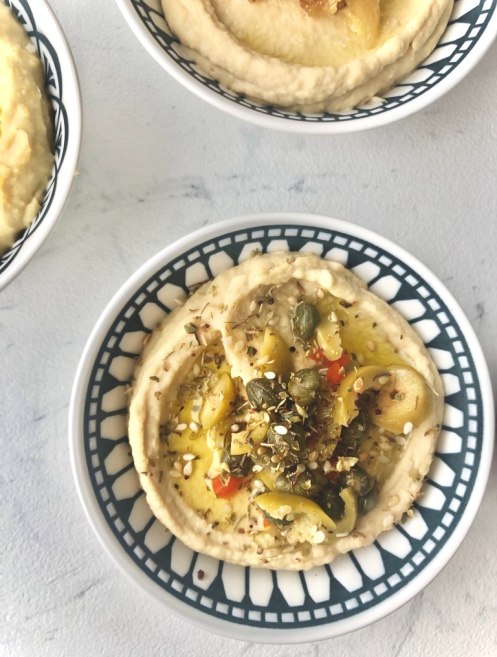
Remove two-thirds of the hummus from the food processor and split into two bowls (or containers if serving at a later time). To one bowl, add chopped up green olives and capers, a drizzle of olive oil and a generous pinch of za’atar. If you don’t have za’atar in your pantry, get to the grocery store NOW and buy it, or if you are lazy like me, order it here through Amazon. It’s worth it.
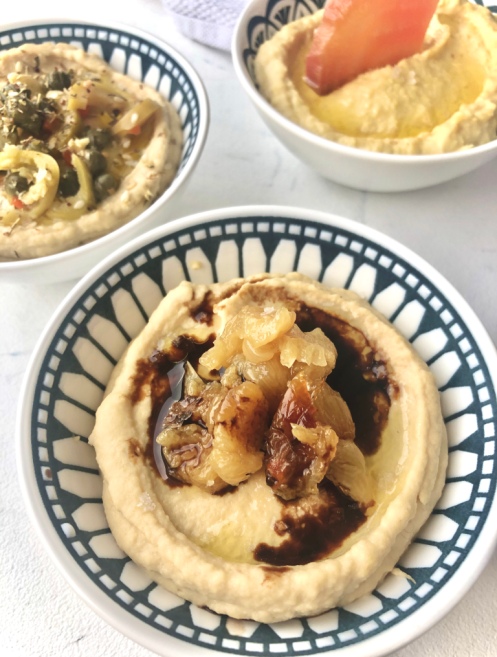
To the other bowl, squeeze the remaining garlic cloves right on top and add a drizzle of olive oil, your favourite balsamic vinegar (I use this fig balsamic) and a pinch of flaky sea salt.
To the other third of hummus still remaining in the processor, add one golden beet plus half of another, chopped, and pulse a few times.
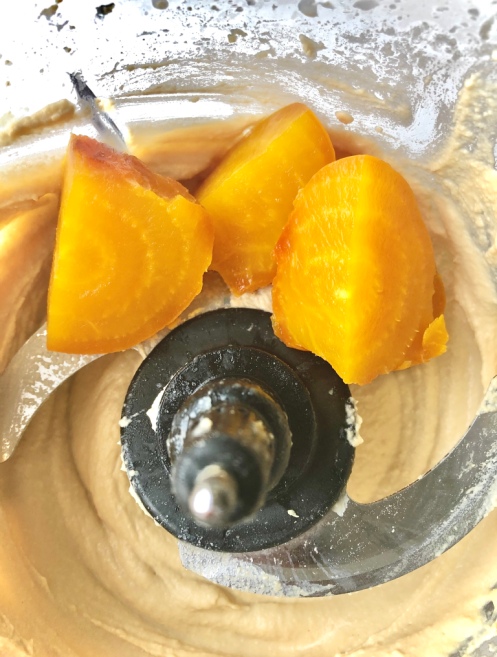
Blend until the beet pieces have incorporated. Transfer to a bowl and top with more beet slices and some flaky salt. Earthy, salty, nutty…delicious!

Three different dips. One recipe. Holiday. Ready.

Homemade Hummus Three Ways
Prep time: 12 hours
Cook time: 2 hours
Ingredients:
- 1 cup dry chickpeas
- 1/2 tsp baking soda
- 1.5 tsp salt, separated
- 2 medium-sized golden beets (or any kind)
- 1 head of garlic
- olive oil
- 1/2 cup tahini paste
- 2 tbsp freshly squeezed lemon juice (about half a lemon)
- ice cold water
- 1.5 tbsp capers
- 1.5 tbsp sliced olives
- za’atar
- balsamic vinegar (a sweet-flavoured one goes well with this recipe)
- flaky sea salt (optional)
Instructions:
- Place chickpeas in a bowl and cover with a few inches of water. Soak overnight or for 12 hours.
- Preheat oven to 400 degrees F.
- Drain and rinse chickpeas and place in a large pot with baking soda and 1 teaspoon of salt. Cover with 2 inches of water and bring to a boil. If you see foam rising to the top, skim it off with a spoon and discard. Turn the heat down and simmer, covered, for an hour and 45 minutes, or until chickpeas are soft and tender.
- In the meantime, get started on your beets. Place washed beets on a long piece of tin foil. Wrap the beets up like a present, making sure there are no holes in the package where the steam can escape. Place on a baking tray in the oven for an hour and 15 minutes, or until the beets are tender enough to slide a butter knife easily into the centre. Remove the beets and carefully open the tin foil package. Let the beets sit for one minute. Use a paper towel to hold a beet in one hand and another paper towel to peel away the skin of the beet in your other hand. The skins should remove easily when the beets are fully cooked. Rinse the beets in cold water and set aside.
- Turn the oven down to 375 degrees F and start prepping your garlic. Slice the top quarter of your garlic head off and drizzle the top of the visible cloves with a tablespoon of olive oil. Wrap in a tight tin foil package, place on a baking tray and roast in the oven for 50 minutes to an hour. The cloves will caramelize and be super tender.
- Add a few ice cubes to a small measuring cup filled with cold water and set aside. When the chickpeas are done cooking, drain and transfer to a food processor. Add the tahini, lemon juice and 1/2 teaspoon of salt. Squeeze three of the roasted garlic cloves out and add to food processor. Blend for about a minute or until smooth. Remove ice cubes from measuring cup and measure out one-quarter cup of the ice-cold water. Turn the motor on and slowly drizzle the water into the food processor. Blend for another minute. Scoop out two-thirds of the hummus into two separate bowls (or airtight containers topped with a thin layer of olive oil if not serving immediately). Top one of the bowls with the capers, sliced olives, a drizzle of olive oil and a generous sprinkling of za’atar. Top the other bowl with the remaining cloves of roasted garlic, olive oil, a trickle of sweet balsamic vinegar (I use a fig vinegar) and a pinch of flaky sea salt.
- To the remaining third still in the processor, add one of the golden beets plus half of the second (diced). Pulse a few times and then blend until the hummus is smooth. Use a spatula to transfer to another bowl and top with the last half beet (chopped), olive oil and some more flaky sea salt.
- Serve hummus dips with raw vegetables, crackers, pita or naan bread.
- To store leftover hummus, add to an airtight container with a thin layer of olive oil on top and place in fridge for up to one week.
The post Homemade Hummus Three Ways appeared first on Never. Not. Eating..
]]>The post Easy Butternut Squash Fettuccine “Alfredo” with Whipped Ricotta appeared first on Never. Not. Eating..
]]>- Smooth and rich like an alfredo but without the dairy and calorie count
- Vegetable bonus blended right into the sauce
- A lot less fat content than regular alfredo
- Cloud-like whipped ricotta (okay, it’s dairy, but some things are just worth it)
That is all. Hopefully you are convinced.

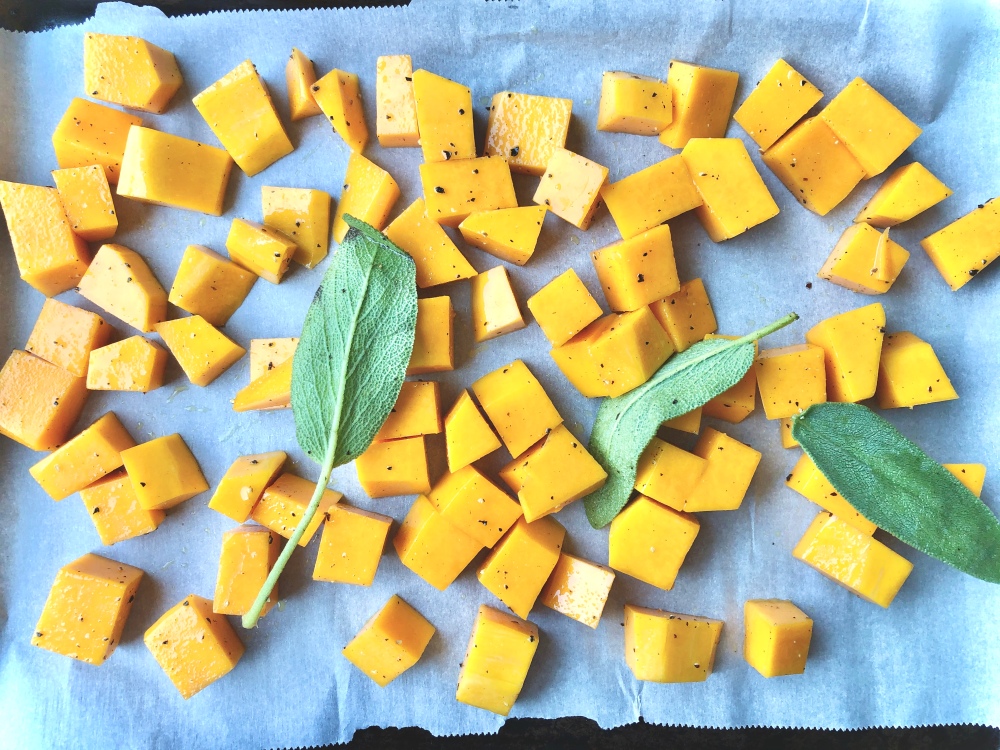
This recipe starts like any good vegetarian recipe – with a few cups of roasted vegetables. So sharpen your knife and start cubin’ up that butternut squash, add a few sage leaves, do the drizzy with some EVOO and season with S & P! Pop it in the oven and forget about it (well, for 20 minutes, until you have to give ’em a toss)!
In the meantime, throw some fettuccine into a pot of heavily salted boiling water and cook until al dente.
When the squash is slightly caramelized and tender, remove from oven and let’s start the transformation from solid –> liquid(ish). Grab your blender – I use my Ninja for everything…it is A.M.A.Z.I.N.G. – transfer the squash and some veggie stock and blend until smooth.
On the same sheet tray that you had the squash on, add two tablespoons of breadcrumbs and a quarter cup of chopped walnuts and put back into the oven to toast up. This only takes a few minutes, so watch carefully! When browned, remove from oven and toss in a few finely chopped sage leaves and some melted butter and set aside…YUM.
Let’s continue shall we…I’m drooling. Okay – grab a pan, heat some olive oil and saute some diced shallots until transparent. Add in a few cloves of minced garlic and it’s ready for the sauce. Pour in the butternut squash puree and add some more stock to the pan, cooking and stirring until smooth and combined.
Next, add half of a cup of canned coconut milk and simmer for a few minutes until sauce has thickened.
While the sauce is finishing, grab your ricotta from the fridge and beat with a hand mixer with 1 tablespoon of freshly squeezed lemon juice, a pinch of salt and a few grinds of pepper. Whip until it is smooth and creamy and spreadable and marvelous.

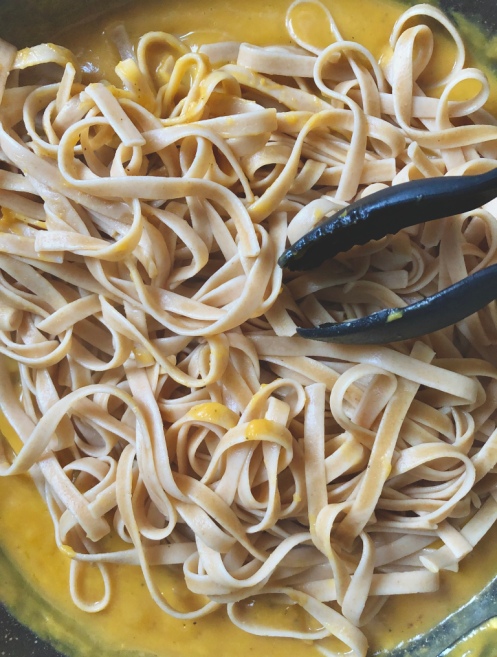
The Grand Finale: When the sauce coats the back of a spoon, it’s ready for it’s best friend – pasta – to join it in the pan. Toss the pasta around with a pair of tongs and be sure to coat every last strand with that velvety sauce. Turn the heat off and add a squeeze of lemon juice to bring it altogether.
Plating: Start with the whipped ricotta. Maybe even be fancy and make a little “swoop” on your plate!

Next, add the fettuccine, and then top with the bread crumb/walnut mixture. And now it’s time to manger, manger (that’s French, mmmm kay?!)!

One question – Are you a “use a spoon to assist in the delicate twirling of the noodles around your fork” kind of person, or a “shove noodles in mouth as quickly as possible, I’m not worried about whether they are hanging from my mouth” kind of person? Because I’m definitely number two.

^ A twirling attempt…strictly for pictures.
Easy Butternut Squash Fettuccine “Alfredo” with Whipped Ricotta
Servings: 4
Prep time: 15 minutes
Cook time: 40 minutes
Ingredients:
- Olive oil
- 3 cups of butternut squash, cubed
- 6-8 sage leaves, separated
- 325 g fettuccine (or 4 serving sizes)
- 1/2 cup ricotta cheese
- 1.5 tablespoons fresh lemon juice, separated
- 2 tbsp bread crumbs
- 1/4 cup walnuts, finely chopped
- 1 tbsp butter, melted
- 1 cup vegetable stock, separated
- 1 shallot, finely diced
- 2 cloves garlic, minced
- 1/2 cup canned coconut milk
- salt and pepper to taste
Instructions:
- Preheat oven to 375 degrees F.
- Line a baking sheet with parchment paper and add squash, 1 tbsp olive oil, 3-4 sage leaves, a few pinches of salt and some fresh black pepper and toss to coat. Place in the oven and roast for 30-40 minutes or until you see slightly caramelized edges and squash is fork-tender.
- Meanwhile, bring a pot of heavily salted water to a boil and add fettuccine. Cook until the pasta is al dente (according to package directions…or taste one)! Reserve one quarter cup of the pasta water and then drain the fettuccine and set aside.
- For the whipped ricotta: Add ricotta, 1 tablespoon of lemon juice and a pinch of salt and pepper to a medium bowl. Use a hand mixer and whip on medium speed until ricotta is smooth and fluffy – about 3-4 minutes. Place in fridge to keep cool.
- For the crumb topping: On a baking sheet lined with parchment paper, toast the bread crumbs and walnuts in the oven for about 5-8 minutes, or until golden brown. Watch carefully so they don’t burn. Remove from oven and add 3-4 finely chopped sage leaves and the melted butter. Toss and set aside.
- When the squash is done cooking transfer to a blender (don’t discard the sage leaves, transfer to blender as well) and add 1/2 cup of vegetable stock. Blend until smooth.
- Heat a tablespoon of olive oil in a large pan over medium-low heat. Add the shallot and saute for a few minutes until it starts to turn translucent. Add the garlic and cook for 30 seconds, or until fragrant. Pour the blended squash into the pan and add the quarter cup of pasta water and the other 1/2 cup of stock, stirring for a few minutes until smooth. Add the coconut milk and simmer until it thickens and coats the back of a metal spoon. Squeeze a bit of lemon juice overtop of the sauce and then add the pasta. Turn the heat off and toss the pasta around until coated with the sauce.
- To plate, spread some whipped ricotta on the bottom of your plate. Add the pasta on top and then sprinkle with the bread crumb/walnut crumble. Bravo!
The post Easy Butternut Squash Fettuccine “Alfredo” with Whipped Ricotta appeared first on Never. Not. Eating..
]]>The post Shakshuka appeared first on Never. Not. Eating..
]]>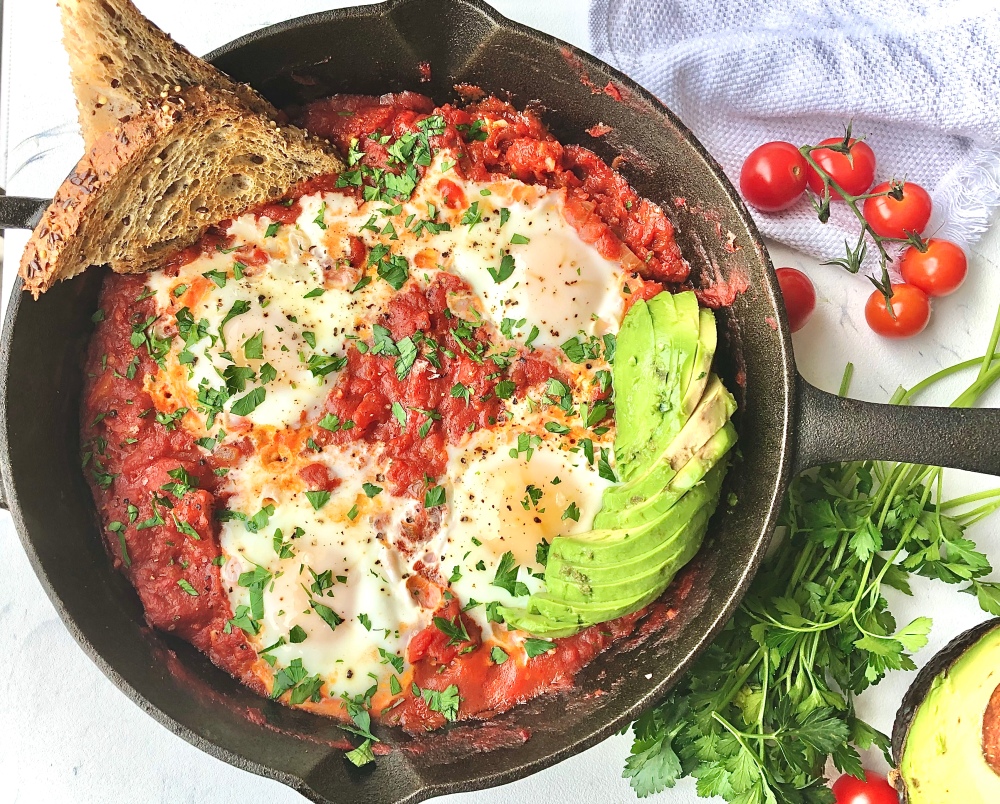
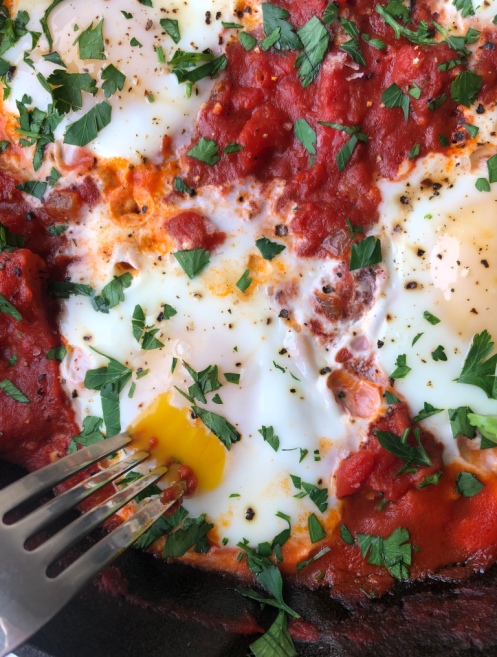
I’ve been really diggin’ Middle Eastern cuisine lately, and shakshuka is something that has been on rotation in my kitchen for a while now. It is basically eggs poached in a spicy tomato sauce served with crusty bread for dipping. And I’m not mad about anything that I can dip into.
There are many places where shakshuka can be found on every corner, and one that has been inspiring me lately is Israel. Does anyone want to go with me?? I’m patiently waiting for the school year to be over so I can hop on a plane and land in Tel Aviv where I will devour all of the deliciousness that derives from this up and coming city.
Shakshuka is so simple and easy. It’s onions and bell pepper, sauteed with garlic and traditional middle-eastern spices, like cumin, coriander, paprika and cayenne, and simmered in a tomato sauce. Make a few wells in the sauce, crack a few eggs, let them cook to your liking and you have breakfast. Or brunch. Or lunch or dinner. Good for a friendly gathering, too. You can’t limit shakshuka…Don’t even try.
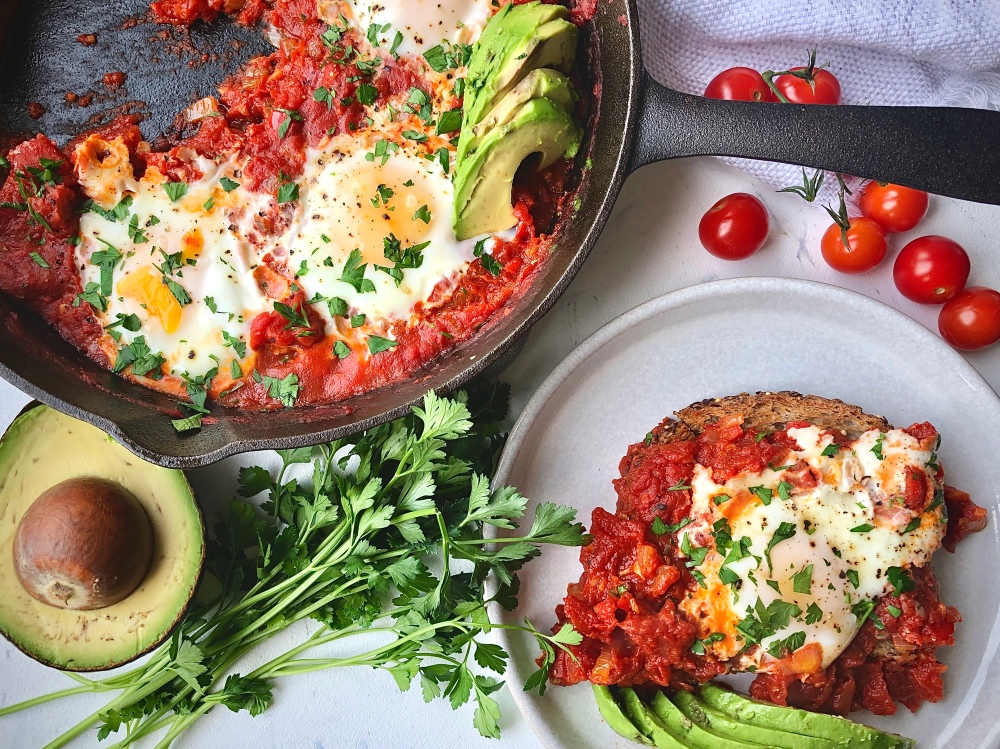
Did I mention that all of this delightfulness is made in ONE cast iron pan. Yup. I love an easy clean.
Toppings: You know I’m the topping queen. If I can find more food to put onto a dish full of food than I’m a happy girl. I like to add creamy avocado slices, a crusty sourdough bread for dipping, fresh parsley and flaky sea salt on top of my shak. Feta is also a badass addition.
Shakshuka
Servings: 3-4
Prep time: 5 minutes
Cook time: 30 minutes
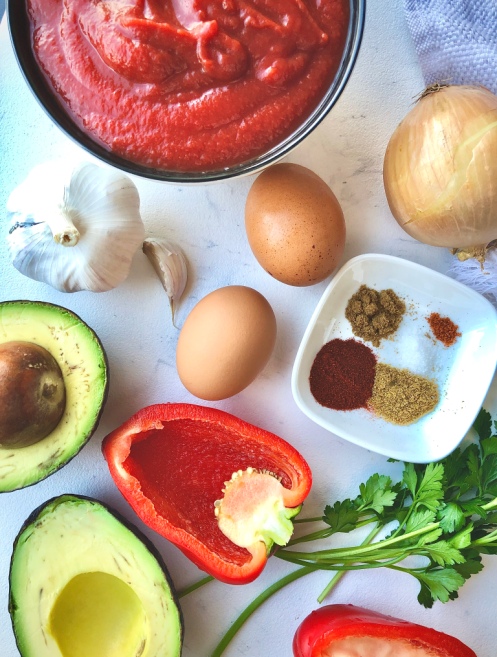
Ingredients:
- 2 tbsp olive oil, plus more for drizzling
- 1/2 of an onion, diced
- 1/2 of a red bell pepper, seeded and finely diced
- 2 cloves of garlic, finely chopped
- 1/2 tsp cumin
- 1/2 tsp paprika
- 1/4 tsp coriander
- pinch of cayenne (optional)
- 1 cup crushed tomatoes
- 1 cup canned diced tomatoes (with their liquid)
- 4 large eggs
- salt
- fresh black pepper
- parsley
- avocado (optional)
- toasted, crusty bread (I prefer sourdough), for dipping
Instructions:
- Heat olive oil over medium heat in a cast iron skillet. Add the onion and saute for a minute. Add the bell pepper and continue to cook for about 10 minutes, or until onion starts becoming translucent and just slightly browned around the edges.
- Add the garlic, cumin, paprika, coriander and cayenne. Toast until fragrant, about one minute.
- Pour in the crushed and diced tomatoes, a pinch of salt and a few grinds of fresh black pepper. Let simmer for 15-20 minutes. The sauce will lose a lot of its water content and it will thicken up.
- Make 4 wells in the sauce and crack an egg into each one. Turn the burner down to medium-low, cover the skillet and cook for 3-5 minutes, or until eggs are cooked to your liking.
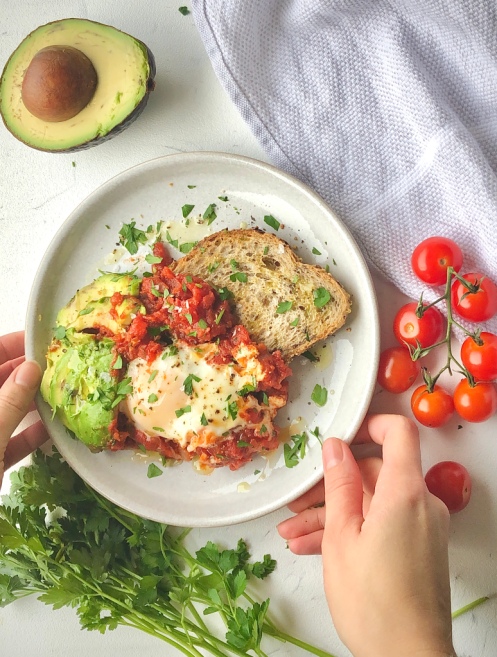
- Turn heat off and sprinkle with fresh parsley, a few more grinds of pepper and flaky sea salt. Add avocado slices and eat with your favourite crusty bread.
The post Shakshuka appeared first on Never. Not. Eating..
]]>