The post Vegan Whipped Cream (Vanilla Bean) appeared first on Never. Not. Eating..
]]>I’m here to tell you that you can vegan-ify whipped cream using coconut milk instead of dairy cream. Irish coffee topping? Check! Berries and cream? Check! Pie topping? Check! This vegan whipped cream recipe does it all!

WHAT IS VEGAN WHIPPED CREAM?
It’s a fact that a high percentage of humans living on Earth have a sensitivity to dairy, so if that’s true for you, or you eat a plant-based diet, why not try this delicious and completely vegan whipped cream? It is made with solidified coconut milk instead of dairy cream. When placed in the fridge, canned coconut milk firms up and becomes perfect for whipping into a delicious dream cloud of a dessert topping!
WHY I LIKE THIS RECIPE
I recently took a food sensitivity test and guess what? Yup, that’s right – dairy was marked as an inflammatory food for my body. This didn’t surprise me, knowing that more than two-thirds of the world is lactose intolerant. I naturally try to steer clear of having dairy in my diet anyway, but this test really gave me the push I needed to avoid it on most days.
This Vegan Whipped Cream is the perfect substitute for the real thing. It whips up to a luscious texture that mimics that of real whipped cream. I like knowing that I am able to still enjoy some of my favourite desserts, despite it not having traditional ingredients in it. If I can make it plant based, I will!

INGREDIENTS
This Vegan Whipped Cream recipe only calls for three ingredients:
- canned coconut milk
- powdered sugar
- one vanilla bean (or vanilla extract)

MAKING VEGAN WHIPPED CREAM
This recipe couldn’t be easier. All you need to do is place all of the ingredients into a bowl and whip until stiff peaks form – it actually takes less time than a dairy-based whip cream!
TIPS
- Make sure your canned coconut milk is full-fat and a good quality brand. I use Aroy-D.
- Try not to shake your can, you want to keep the coconut milk and water separate.
- Place the can of coconut milk in the fridge for as long as possible. It needs at least 24 hours for the milk to firm up. I usually just place one can in the fridge when I buy it and leave it in there for a few weeks, until I decide I want to make whipped cream.
- Place your bowl and beater attachments into the freezer for at least 15 minutes beforehand to make sure it stays nice and cold.
- Place the cold bowl in a larger bowl filled with ice if you are making this on a hot day.

OTHER VEGAN RECIPES TO TRY
Chocolate Chai Ganache (the perfect vessel for this whipped cream).
Vegan Rice Crispy Chocolate Treats (the most-fun little snack)!
Vegan Protein Energy Balls (the perfect pre-gym pump-me-up).
TOOLS I USED TO MAKE THIS VEGAN WHIPPED CREAM
Click on the images below to see what I used for this recipe.


Vegan Whipped Cream (Vanilla Bean)
Servings: Approximately 2 cups
Prep time: 20 minutes
INGREDIENTS
- 1 can full-fat coconut milk (placed in the fridge for at least 24 hours)
- 3 tbsp powdered sugar
- 1/2 vanilla bean or 2 tsp pure vanilla extract
INSTRUCTIONS
- Set up your station – Place a medium bowl and the beater attachments from your hand mixer into the freezer for at least 15 minutes. Measure out your sugar and set aside. Slice the vanilla bean lengthwise, scraping the inner seeds out with a knife and set aside. Alternatively, measure out your vanilla extract into a small bowl.
- Open the cold can of coconut milk, being careful not to shake it. Remove the bowl and attachments from the freezer and scoop out the top, solid part of the canned milk into the bowl. Don’t throw away the water at the bottom of the can – reserve it for smoothies or other recipes.
- Add the powdered sugar and vanilla to the bowl with the coconut milk. Whip on medium-high speed until stiff peaks form, approximately 1-2 minutes. Taste the whipped cream – if you would like it sweeter, add another tablespoon of powdered sugar and whip to combine.
Store in an airtight container in the fridge for up to 3 days.
The post Vegan Whipped Cream (Vanilla Bean) appeared first on Never. Not. Eating..
]]>The post Chocolate Chai Ganache (Vegan, Gluten-Free) appeared first on Never. Not. Eating..
]]>
WHAT IS CHOCOLATE CHAI GANACHE?
A ganache is traditionally a mixture of chocolate and warmed cream. It is often used as a filling or icing for cakes, to serve with fruit or something to stuff pastries with! It is also really addicting on it’s own…by the spoonful. Just sayin’.
THE INGREDIENTS
This Chocolate Chai Ganache is fully vegan, meaning no dairy whatsoever! Whoop, whoop! Instead, I use full-fat coconut milk. You can also use a lower-fat coconut milk, if you prefer. To make this recipe, you will need three ingredients – vegan chocolate, chai tea bags and one can of coconut milk.

THE PROCESS
The first step is to infuse that beautiful chai flavour into the coconut milk. Pour the coconut milk into a small saucepan and add two chai tea bags. Bring to a gentle simmer for 15 minutes. You don’t want to simmer for much longer, or else you will lose more of the liquid. 15 minutes is the perfect length of time to retain enough liquid and still get a rich chai flavour!
When the milk is ready, simply pour it over the vegan chocolate, wait one minute, and then stir until all of the chocolate is melted. See below for different ways you can use this ganache and how the recipe may change slightly, depending on it’s purpose.

CHOCOLATE CHAI GANACHE AS A GLAZE
If you are tired of the overly sweet American buttercream usually used on the outside of cakes, try making this ganache and pouring it over your cake instead. To make this the perfect glaze consistency, use 1 can of coconut milk to 1 cup of chocolate. Once it has cooled, pour it over a cold cake and watch it drip over the sides and coat your cake in a luscious layer of pure YUM.
CHOCOLATE CHAI GANACHE AS A FILLING
Okay, this may be my favourite way to use ganache – INSIDE cakes. Cake layer one goes down, a thick layer of ganache goes on top, cake layer two goes down – perfection! It is important that, if you are making a filling, the texture is thicker so it doesn’t ooze out of the sides of your cake. Therefore, use 1 can of coconut milk to one and a quarter cup of chopped chocolate. After the coconut milk has been poured over the chocolate and stirred completely, the chocolate will begin to firm up. You can even put it in the fridge to speed up the process, but you still want to be able to spread it easily, so keep an eye on it!

DON’T MISS THESE OTHER VEGAN DESSERTS
Vegan Ice Cream Bars (similar to Magnums)
Vegan Mocha Buttercream (fill your cakes with ganache and top them with this perfect buttercream)
Sweet Potato Creme Brulee (perfect for a dinner party)
This post contains affiliate links and I may earn a small commission when purchases are made after clicking the links, at no cost to you. Thank you!
Chocolate Chai Ganache (Vegan, Gluten-Free)
Prep time: 2 minutes
Cook time: 15 minutes
INGREDIENTS
| Purpose | Vegan Chocolate | Coconut Milk | Chai |
|---|---|---|---|
| Glazing cakes | 1 cup, chopped (or chunks) | 1 can (400 ml) | 2 tea bags |
| Filling cakes | 1 1/4 cup, chopped (or chunks) | 1 can (400 ml) | 2 tea bags |
INSTRUCTIONS
- Add coconut milk and tea bags to a small pot and bring to a gentle simmer for 15 minutes, uncovered.
- Place vegan chocolate into a heat-proof bowl, remove the tea bags from the pot, and strain the coconut milk over the chocolate. Let sit for one minute and then whisk until the chocolate is fully melted. Let cool before using.
TIPS:
- If GLAZING – when the ganache has cooled, pour it over an assembled cake that has been elevated and has a baking tray underneath to catch the drips.
- If FILLING – you can place the ganache in the fridge to help cool and firm up, but you want it to be spreadable, so make sure it doesn’t get too firm.
The post Chocolate Chai Ganache (Vegan, Gluten-Free) appeared first on Never. Not. Eating..
]]>The post Grilled Peaches with Cinnamon Coconut Whipped Cream and a Balsamic Reduction (Vegan & GF) appeared first on Never. Not. Eating..
]]>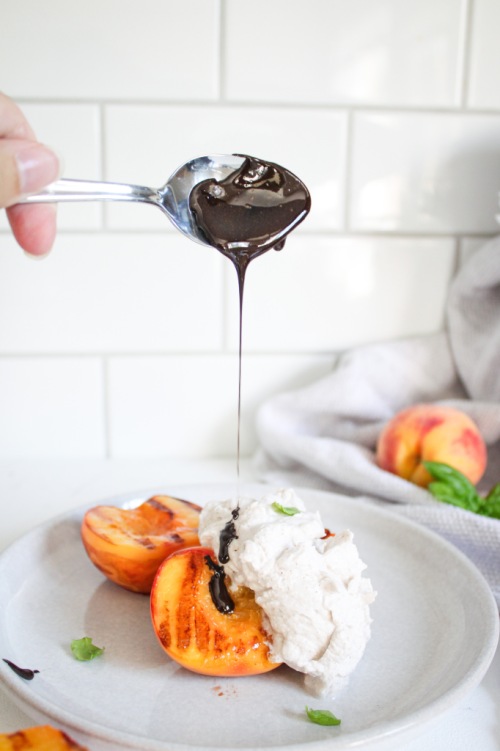
Okay, picture this – you are watching the abnormally late NBA playoffs (thanks, Covid), and you’re eating your wings, nachos and burgs. Halftime comes and you need something sweet. Why not fire up the BBQ and throw on some peaches? Dress them up with some coconut whip cream? A little sweet balsamic reduction? Yes, yes and yes. I vote yes.
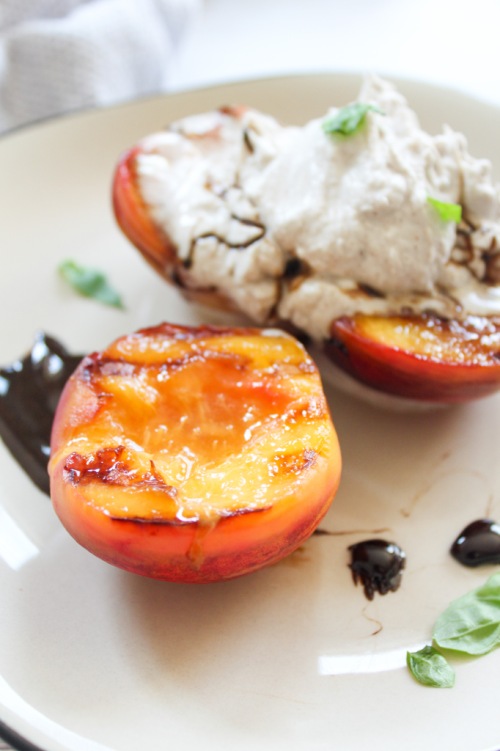
Even easier, you can use a cast iron grill pan on your stovetop. I use the one found here, and I love it! It’s perfect for those without a barbeque, or anyone who just wants an easier clean-up. All you need to do is set it over medium-high heat and brush the peaches with olive oil before cooking them for about 2-3 minutes per side. They will still develop those beautiful grill marks that you get on the Q, just with less hassle.
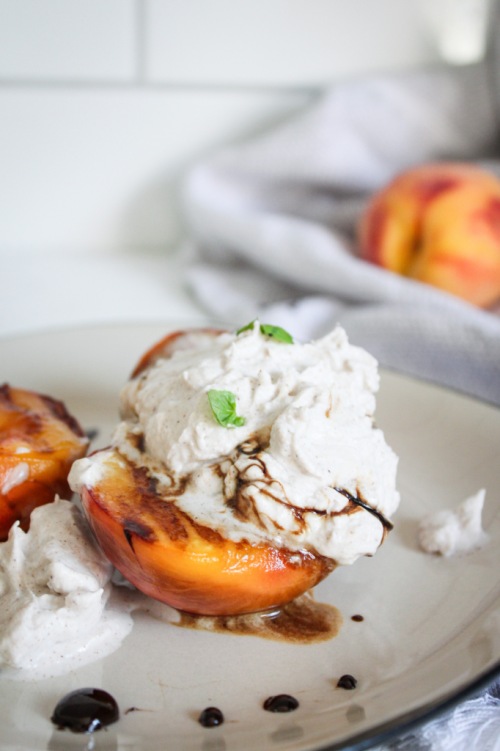
The coconut whip cream is my favourite. As a traditional whip cream lover, finding a vegan alternative was super exciting. This part is a bit tricky, as you need to find a can that solidifies properly when you store it in the fridge. I have found that 365 Everyday Value and Aroy-D are the best for this. To make the whipped cream, place a can of coconut milk in the fridge for at LEAST 24 hours. The longer, the better. Also, try not to shake the can too much before placing it in the fridge. The coconut milk and water will naturally separate, and we want to keep it that way, so shaking it before refrigerating it will slow the process of separation and then solidification.
When it is time to make the whipped cream, place your mixing bowl and mixers into the freezer to get super cold, about 15 minutes before you plan on beginning. Carefully open the can (without shaking) and scoop out the firm top part into your bowl. You will notice a clearer liquid at the bottom of the can (the water) – do not add this to the bowl. Save this and add to a morning smoothie! Add some cinnamon and vanilla to the coconut milk and whip until soft peaks form. Next, add in your sugar – I like to use maple syrup, but you can use powdered sugar as well. Continue beating until stiff peaks form. It is unlikely that they will become as stiff as regular whip cream, but sometimes I put the bowl in the freezer for ten minutes and re-whip for a few more seconds before serving. This usually does the trick!
For the balsamic glaze, place some balsamic vinegar with a dash of maple syrup into a small pot and bring to a gentle simmer. Let it reduce for about eight minutes. TIP: Keep the pot over the lowest heat up until you use the reduction, as it cools quickly and becomes very sticky.
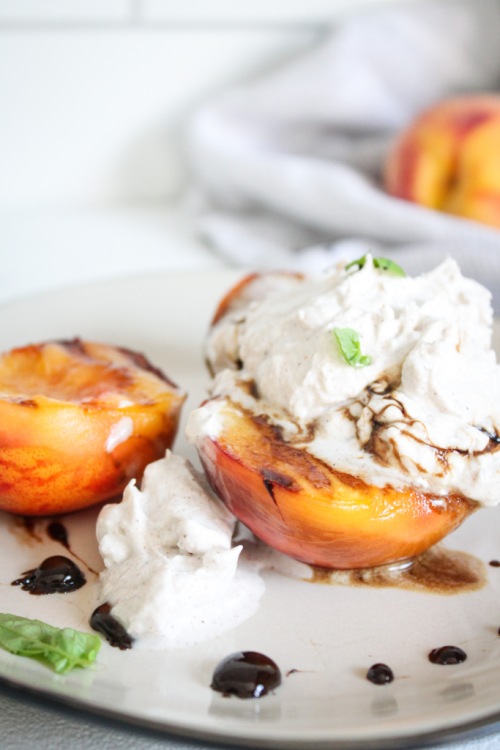
Now, grab a plate, put the peaches down, scoop on some whipped cream and drizzle with that lush reduction! It’s the freshest summer dessert one could ask for!
Grilled Peaches with Cinnamon Coconut Whipped Cream and a Balsamic Reduction (Vegan & GF)
Servings: 4
Prep time: 15 minutes
Cook time: 10 minutes
Ingredients:
- 1 14 oz can of full-fat coconut milk (I like Aroy-D and 365 Everyday Value), refrigerated for at LEAST 24 hours
- 1/2 tsp cinnamon powder
- 1/2 tsp pure vanilla extract
- 2 tbsp pure maple syrup (or confectioner’s sugar), divided
- 1/2 cup balsamic vinegar
- 4 peaches, halved and pits removed
- olive oil
Instructions:
- Place a medium bowl and your beaters into the freezer for at least 15 minutes.
- Remove the coconut milk from the fridge and carefully open it, without shaking. Scoop the top, white part into the cold bowl. You will see a clearer liquid at the bottom (the water), DO NOT add this to the bowl (save for morning smoothies). Add the cinnamon and vanilla to the coconut milk and whip on high until soft peaks. Add one tablespoon of syrup (or sugar) and whip again until stiff peaks form.* Place in the fridge while preparing the rest of the recipe.
- To a small pot over medium heat, add the balsamic and the remaining tablespoon of maple syrup. Bring to a gentle simmer and let cook down for about 8 minutes, stirring frequently. Turn the heat to the lowest setting to keep the reduction loose and drizzle-able. It cools quickly and becomes very sticky, so keeping it on the lowest heat prevents it from becoming taffy-like.
- Set your grill to medium-high heat and brush the peach halves with olive oil (I like to use my cast iron grill pan for this). Place the peaches cut side down onto your grill and cook for about 2 minutes, without touching them. Flip and cook for another three to four minutes, or until tender but not too soft.
- Place your peaches on a plate, top with the coconut whipped cream and drizzle with the balsamic reduction!
NOTES:
*Coconut whipped cream will not always create stiff peaks, as regular whipped cream does. It depends on how hot your kitchen is. If your whipped cream is looser, place the bowl back in the freezer for 10 minutes and re-whip for a few seconds when ready to plate.
The post Grilled Peaches with Cinnamon Coconut Whipped Cream and a Balsamic Reduction (Vegan & GF) appeared first on Never. Not. Eating..
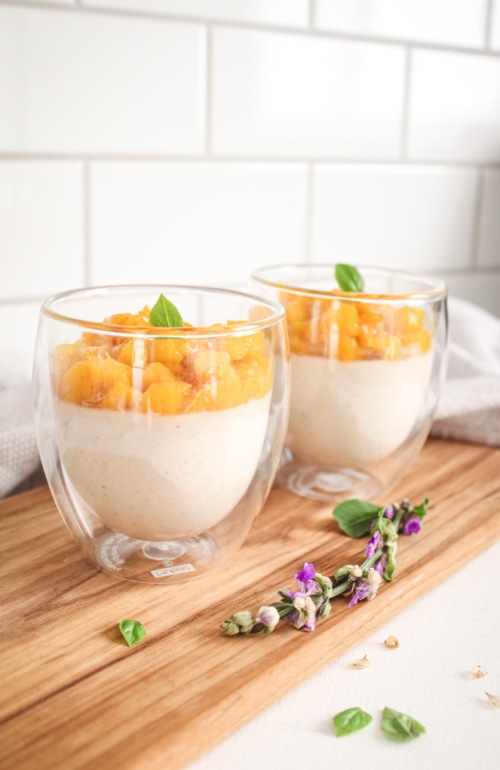
]]>The post Vegan Coconut Panna Cotta with a Mango Compote appeared first on Never. Not. Eating..
]]>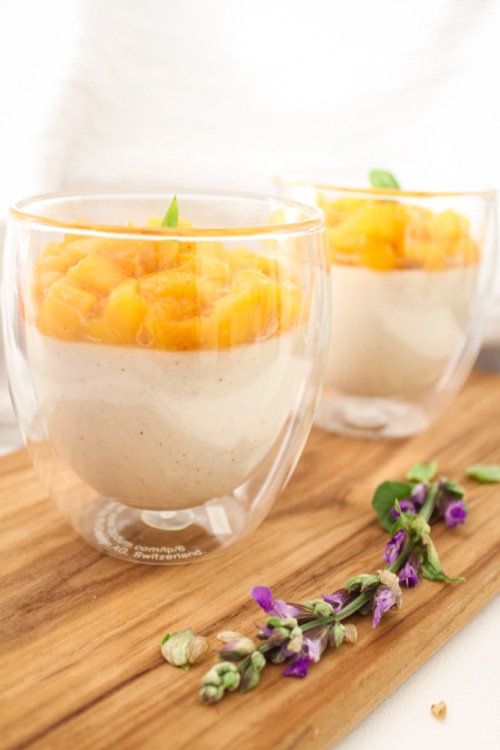
This vegan dessert mimics the OG Italian dessert. “Panna Cotta” means “Cooked Cream” in Italian, and I give you just that! Minus the cream, sub the coconut milk – My fav! It’s smooth, creamy, sweet and fruity. The perfect make-ahead dessert!

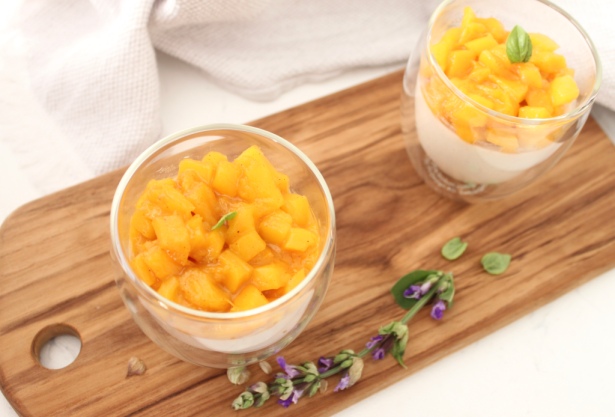
This dessert consists of two parts – the panna cotta and the fruit compote on top. For the panna cotta, you are going to need:
- Full-fat coconut milk
- maple syrup (or your choice of sugar)
- agar agar (a vegan gelatin)
- cinnamon
- nutmeg
- salt
For the compote, you will need:
- One mango
- cinnamon
- nutmeg
- salt
- citrus juice (lime or lemon)
- maple syrup
It may seem like a daunting task, but trust me…It’s the simplist dessert imaginable! It takes about 10 minutes to make each part and then all you have to do is wait until it sets up in the fridge! So easy. More delicious. Panna cotta pefection.
Here is the recipe.
Vegan Coconut Panna Cotta with a Mango Compote
Serving size: Makes 3 desserts
Prep time: 10 minutes
Cook time: 20 minutes
Set time: 1 hour
Ingredients:
For the Panna Cotta:
- 1 14-oz can of full-fat coconut milk
- 1/4 tsp cinnamon
- pinch of fresh nutmeg
- 3/4 tsp agar agar
- 1/4 cup maple syrup (or sugar of choice)
- pinch of salt
For the Mango Compote:
- 1 mango, small dice
- 1 tbsp maple syrup
- 2 tbsp freshly squeezed citrus juice (I use half lemon, half lime)
- pinch of cinnamon
- pinch of fresh nutmeg
- pinch of salt
Instructions:
- Bring the coconut milk to a boil in a small saucepan with cinnamon and nutmeg, watching carefully to avoid boiling over. Once boiling, add agar agar and reduce heat. Whisk for one minute and then add the maple syrup and salt. Simmer on low for another two minutes, whisking occasionally. Strain through a fine mesh sieve into a measuring cup with a spout. Divide into three dessert cups or stemless wine glasses and place in the fridge for at least an hour to set up.
- In a small saucepan, add the mango, maple syrup, citrus juice, cinnamon, nutmeg and salt. Let simmer until it takes on a jam-like consistency, about 10 minutes. Let cool about 10 minutes before spooning on top of the set panna cotta. Eat warm, or place back in the fridge and enjoy cold (my favourite).
The post Vegan Coconut Panna Cotta with a Mango Compote appeared first on Never. Not. Eating..
]]>The post Butternut Squash and Kale Lasagne Roll-Ups appeared first on Never. Not. Eating..
]]>
Thaz right. The layers in this lasagne aren’t lookin’ like a sedimentary rock, nuh uh. They are more like a snail shell. Yah feel me?!
This is a lasagne revolution – the pasta sheet laid out, smothered with the toppings and then rolled up into a cute little present that takes a bath in squash. I mean sauce. I mean squash sauce. And, although I love the standard tomato sauce with all of my heart, squash sauce is my side piece and needs attention, too.

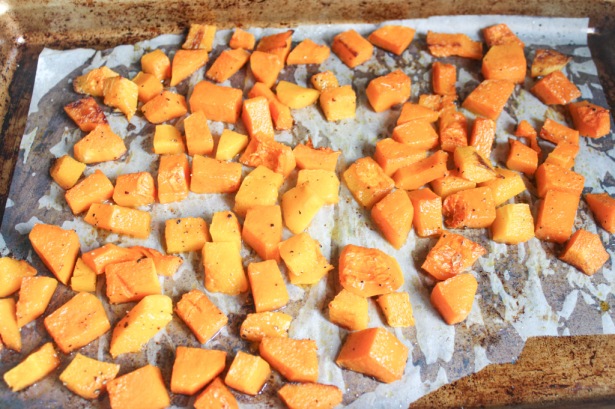
Okay, for reals – this lasagne dish is everything. It starts with the creamy sauce. Roasted butternut squash, pureed and then hit with some garlic, coconut milk and flavourful pasta water – an important ingredient for any great sauce. Nutritious kale and fluffy, whipped ricotta cheese on top of a perfectly cooked lasagne noodle, rolled up and finished off together in the oven with some extra parm on top for that nuttiness. DROOL.

This should be your next pasta night recipe.

Butternut Squash and Kale Lasagne Roll-Ups
Servings: Makes 10 rolls (feeds about 3 people)
Prep time: 20 minutes
Cook time: 50 minutes
Ingredients:
- 1 large butternut squash, diced into 1/2 inch cubes
- olive oil
- salt
- pepper
- 5 large kale leaves, thick stem removed (I prefer Tuscan Kale)
- 2 cups ricotta cheese
- 1 tbsp fresh lemon juice + more for serving (optional)
- 1 cup vegetable stock
- 1/4 tsp fresh (or packaged) nutmeg
- 10 lasagne sheets
- 2 cloves garlic, minced
- 1 cup canned coconut milk
- 1 cup fresh parmesan or mozzarella cheese, shredded
- fresh basil for topping (optional)
Instructions:
- Preheat your oven to 400 degrees Fahrenheit.
- Place the squash onto a parchment lined baking sheet. Drizzle with 1-2 tbsp olive oil and add a generous pinch of salt and a few grinds of fresh black pepper. Toss with your hands until coated and roast in the oven for 25-30 minutes, flipping once throughout the cooking time. Squash should be tender throughout.
- Lower the oven to 350 degrees Fahrenheit.
- While the squash is cooking, prepare your other ingredients. Chop the kale into small, bite-size pieces and massage with a little bit of olive oil. This helps to tenderize the kale.
- Use an electric mixer to beat the ricotta with 1 tbsp of lemon juice and a pinch of salt and pepper. Whip until smooth.
- Add the cooked squash to a food processor with the vegetable stock, nutmeg, 1/2 tsp salt and 1/4 tsp pepper. Blend until smooth.
- In the meantime, bring a large pot of heavily salted water to a boil and add the lasagne sheets. Cook according to package directions. Reserve 1/4 cup of the pasta water before draining.
- Set a large, oven-safe saucepan over medium-low heat and add 2 tbsp olive oil. Add the garlic and cook for 30 seconds, or until fragrant. Immediately add the squash puree from your food processor as well as the reserved pasta water and let simmer for 5 minutes, stirring frequently. Pour in the coconut milk and stir until smooth.
- Make the rolls by taking a sheet of the cooked lasagne, spreading the ricotta mixture on it, topping with a few pieces of kale and then rolling it up, starting at one end and working your way to the other. Tuck the roll into the squash sauce, placing the side with the seam down. Do this for all of the rolls.
- Evenly distribute the cheese overtop of the rolls and sauce. Bake in the oven for 10 minutes, or until the cheese is fully melted. Remove and let cool a few minutes before serving. Top with fresh basil and a squeeze of lemon!
The post Butternut Squash and Kale Lasagne Roll-Ups appeared first on Never. Not. Eating..
]]>The post Cauliflower and Sweet Potato Curry appeared first on Never. Not. Eating..
]]>
I’m lucky to live in the most multicultural country in the world, in a city that embraces diversity and highlights it on every corner. I’m able to walk through the downtown core and fulfill cravings of any kind with just a few steps. We are a nation rich in culture, and thus rich in cuisines from around the world, and I’m grateful for the opportunity to gain new perspectives through the city’s eats.
This curry dish is by no means traditional. I haven’t had the pleasure of learning, first-hand, what it takes to put together an amazing Indian-style curry, but I do eat a lot of food (like, a lot!), and this is my take on curry, with a few twists. What I do know is that a decent chunk of the Indian population is vegetarian, and it’s exciting that a dish without meat can be so fulfilling and hearty. My Cauliflower and Sweet Potato Curry is meatless, but you can always add your choice of meat protein (or tofu, or paneer), if that’s your thing!
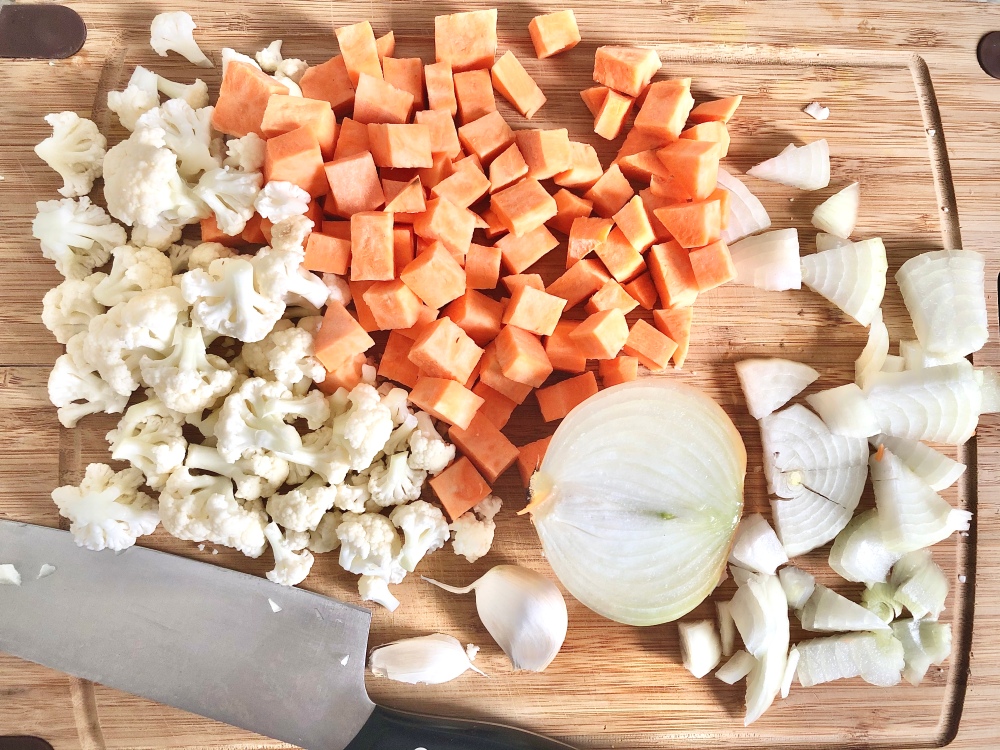
Because there is a bit of prep work that goes into making a curry, I like to do all of the chopping and measuring first so that everything is ready to go into the pot at the proper time. So, let’s start with the vegetables. You will need about one and a half cups of both, sweet potatoes and cauliflower florets. I like to chop both into smaller size pieces so they cook through in the time it takes the curry to develop. You will also need an onion, baby spinach and some minced garlic. Flavour!
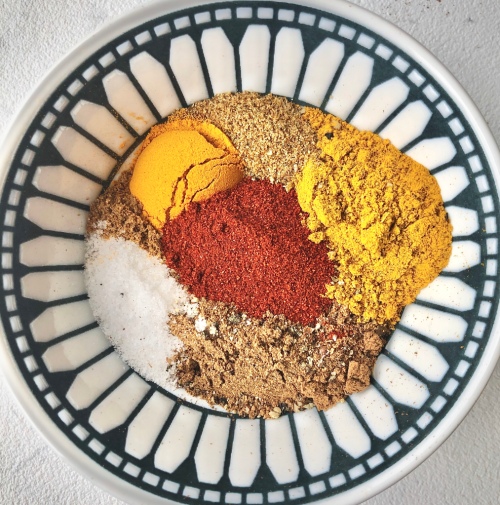
It is a good idea to also have the spices ready. This prevents one of the spices from burning while you try to measure out all of the rest. I chose to use curry powder, garam masala, cumin, cayenne (optional), coriander, turmeric, paprika, salt and pepper for this recipe. As soon as they hit the pan, your house will fill with the most wonderful aroma!
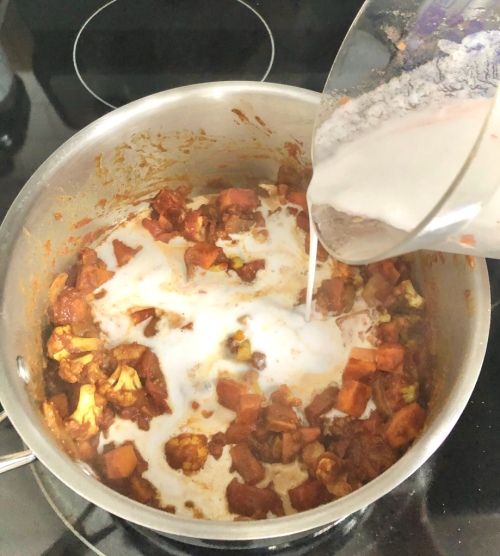
The base of the sauce is made up of diced tomatoes (you can use fresh or canned), full-fat coconut milk, and cashew milk. Obviously the cashew milk isn’t a typical base in a curry, but I promise it gives it a creaminess and smooth flavour that you won’t be mad about. I always like to use the Silk brand. You may substitute this for any other milk of your choice – coconut milk, almond milk or even regular milk if you consume dairy.
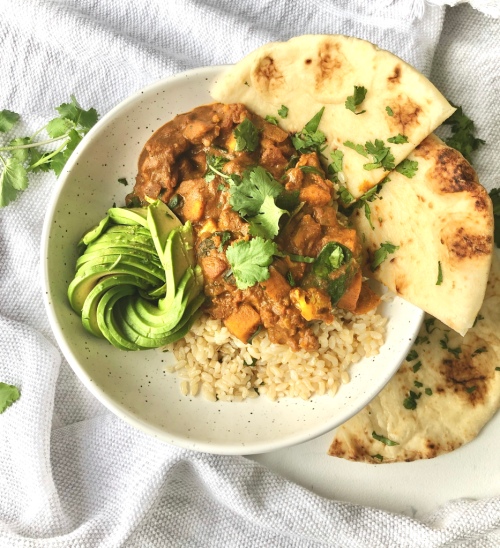
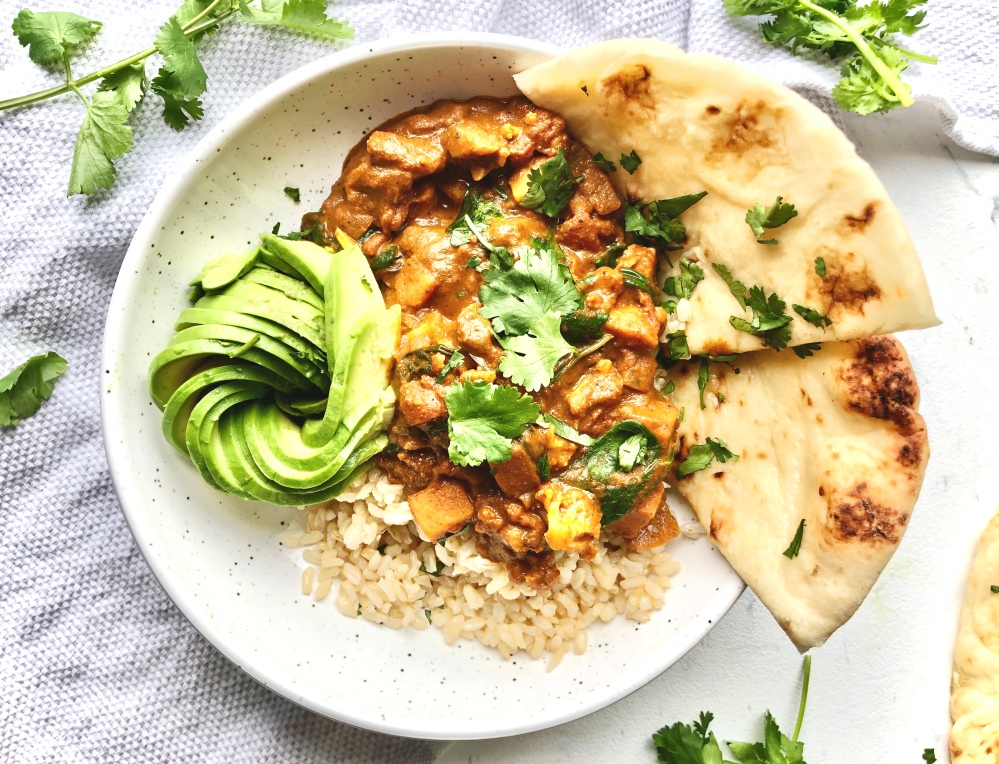
There are a few more ingredients to prep and then it is time to cook! You will need some tomato paste to help thicken and enrich the flavour of the curry, some coconut flour to act as another thickener (this is optional) and some lime to finish it off and brighten it up. Of course toppings like avocado and cilantro are always encouraged.

This curry, like all other curries are best served with rice and naan bread. Two carbs, one girl. Just the way I like it.
Cauliflower and Sweet Potato Curry
Servings: 4
Prep time: 15 minutes
Cook time: 30 minutes
Ingredients:
- 1/2 yellow onion, diced
- 1.5 cups cauliflower florets
- 1.5 cups sweet potato, small dice
- 2 cloves garlic, minced
- 2 tsp curry powder
- 1 tbsp garam masala
- 1 tsp cumin
- 1 tsp paprika
- 1/2 tsp coriander powder
- 1/2 tsp turmeric powder
- 1/4 tsp cayenne (optional)
- 1 tbsp tomato paste
- 2 cups diced tomatoes (fresh or canned)
- 3/4 cup canned coconut milk
- 3/4 cup cashew milk (may sub for coconut milk or almond milk, I prefer Silk brand)
- 1.5 tbsp coconut flour (optional)
- 2 big handfuls of spinach
- Juice of half a lime
- salt
- pepper
- olive oil
- Cooked rice and naan bread to serve with
- Avocado and fresh cilantro for topping (optional)
Instructions:
- Put 1.5 tablespoons of olive oil in a large pot over medium-low heat. Add the onion and let it cook down until it is transparent. About 5 minutes.
- Add the cauliflower and sweet potato to the pot and allow vegetables to begin to soften. This takes about 8-10 minutes, stirring often.
- Add the minced garlic, curry powder, garam masala, cumin, paprika, coriander, turmeric, cayenne (if using), 1/2 teaspoon of salt and a few grinds of fresh black pepper. Stir for a few seconds, coating all of the vegetables with the spices. Quickly add the tomato paste and mix again to coat the veggies.
- Add in the diced tomatoes and allow everything to simmer together for another 10 minutes.
- Pour in the coconut milk, the cashew milk and add in the coconut flour. Stir well and simmer for at least 15 minutes, or until the curry has developed and thickened.
- Toss in the spinach and let the heat of the pot wilt it down. This does not take long.
- Turn the heat off and add a squeeze of lime to the curry. Mix it all together and spoon over cooked rice.
- Serve with warm, buttery naan bread, avocado, a sprinkling of fresh cilantro and an extra lime wedge.
NOTES:
Any protein would be a great addition to this dish. I would recommend tofu or paneer to maintain the vegetarianism, or chicken or shrimp if you eat meat.
The post Cauliflower and Sweet Potato Curry appeared first on Never. Not. Eating..
]]>The post Panettone Bread Pudding appeared first on Never. Not. Eating..
]]>
Bread pudding – that dessert made with day-old bread soaked in an egg and milk mixture and baked to perfection. Da best. Add in whatever you have on-hand, at your own discretion.
Panettone – An Italian Christmas cake that blows up in the grocery store after Halloween. They come in a million varieties and have a range of additions including chocolate, dried fruit and nuts. This recipe uses a basic but delicious chocolate morsel panettone, but you can use whatever you have left over from the holidays, or just go buy one from the grocery store at the discounted post-Christmas price…it’s a win-win.

Eggnog – Whoever goes through an entire carton of eggnog? The intention is there when you buy it and think how fancy you’re going to be when your guests come over and you’re stirring up rum nogs with a cinnamon stick…but the reality is, it’s hard to drink more than one. So instead of all milk, substitute half for that leftover eggnog when making this recipe.
To prepare the panettone, slice into 1-inch cubes and dry out in the oven for 15-20 minutes at 275 degrees F. While that’s happening, mix the egg base by whisking together five large eggs, one and a half cups eggnog (or canned coconut milk if you don’t have, or are dairy-free) and one and a half cups milk (or coconut milk…I prefer Silk). Add in a teaspoon of cinnamon, a teaspoon and a half of vanilla, a tablespoon of maple syrup, a quarter of a teaspoon of salt and a pinch of nutmeg. When the panettone is dry and cooled, transfer to a 9 x 13 inch baking dish. Sprinkle over your choice of toppings, I like adding chocolate chunks, dried sultana raisins (they plump up beautifully in this recipe) or leftover fresh cranberries. Pour over the egg mixture and press down gently with your hands to soak all exposed panettone.

Cover with plastic wrap and place in the fridge for at least 30 minutes to soak, giving the bread a toss once to make sure every piece of panettone has been given equal opportunity to soak up the liquid. I often leave it in the fridge overnight and make it in the morning as a breakfast dish.
When you are ready to bake, place in a 350 degree F oven for about 35-45 minutes or until set.
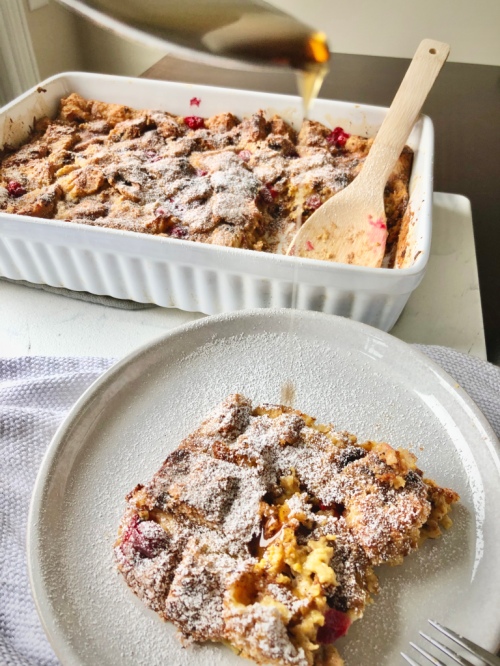
Top with confectioners sugar, my Salted Coconut Caramel Sauce and some fresh fruit and get your yoga pants on and indulge!

Panettone Bread Pudding
Serving size: 8-10
Prep time: 1 hour (includes inactive soaking time)
Cook time: 45 minutes
Ingredients:
- 1 large panettone cake, cut into 1-inch cubes
- 5 large eggs
- 1.5 cups eggnog (or canned coconut milk)
- 1.5 cups coconut milk (I prefer Silk)
- 1 tbsp pure maple syrup
- 1.5 tsp vanilla
- 1 tsp cinnamon
- Pinch of nutmeg
- 1/4 tsp salt
- Optional additions: 3/4 cup fresh cranberries, 1/4 cup dried golden or sultana raisins, 1/2 cup chocolate chunks
- Salted Coconut Caramel Sauce
Instructions:
- Preheat oven to 275 degrees F.
- Line a baking sheet with parchment paper. Add the panettone cubes in a single layer and dry out in the oven for 15-20 minutes or until fully dry. Cool completely.
- While the panettone is in the oven, make the egg mixture. Lightly beat the eggs in a large bowl. Add the eggnog, coconut milk, maple syrup, vanilla, cinnamon, nutmeg and salt. Whisk to combine.
- Evenly spread the panettone cubes into a 9 x 13 inch oven-safe baking dish. Distribute your preferred toppings over the cubes and then pour over the egg mixture, pressing down lightly to help the panettone soak up the liquid. Cover with plastic wrap and put in the fridge for at least 30 minutes, or overnight, pressing down once or twice throughout.
- Preheat the oven to 350 degrees F.
- Remove the plastic wrap and place the bread pudding into the oven. Bake for 35-45 minutes, or until the pudding has fully set. Cool for 5 minutes in the dish before serving.
- Top with confectioners sugar, fresh fruit and caramel sauce.
The post Panettone Bread Pudding appeared first on Never. Not. Eating..
]]>