The post Chocolate Raspberry Baked Oats appeared first on Never. Not. Eating..
]]>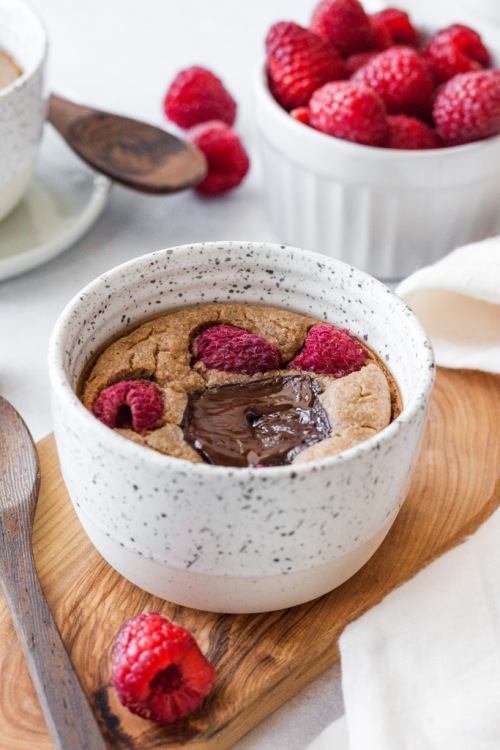
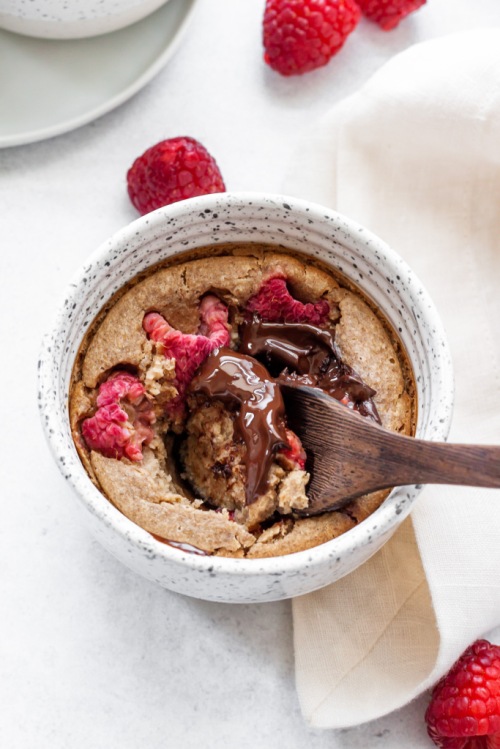
This is a quick, simple and pretty healthy little breakfast idea. It’s basically a better-for-you version of a mug cake. It’s so delicious.
All of the required ingredients get added to your blender and then poured into oven-safe ramekins (how cute are these ones?!) and baked off. You don’t even need a bowl. I used my single-serve cup blender…didn’t even have to dirty my big blender. Goals.
Here is what you will need:
- Rolled oats
- Chia seeds
- Cinnamon
- Baking Powder
- Salt
- Banana
- Almond butter
- Vanilla
- Maple Syrup
- Oat milk
- Raspberries
- Dark Chocolate
It looks like a lot, but you probably have every single one of these items in your house already. Feel free to swap out ingredients as you please – almond butter for peanut butter, maple syrup for agave, oat milk for your favourite plant-based milk…we are flexible here!
I hope you enjoy these baked oats as much as I did. They are changing the breakfast game!
This post contains affiliate links and I may earn a small commission when purchases are made after clicking the links, at no cost to you. Thank you!
Chocolate Raspberry Baked Oats
Servings: 2
Prep time: 5 minutes
Cook time: 25 minutes
Ingredients:
- 1/2 tsp maca powder (optional)
Instructions:
- Preheat oven to 375 degrees Fahrenheit.
- Place oats and chia seeds in a single-serve blender and blend to make a flour. Add the rest of the ingredients, other than the raspberries and chocolate, and blend until smooth.
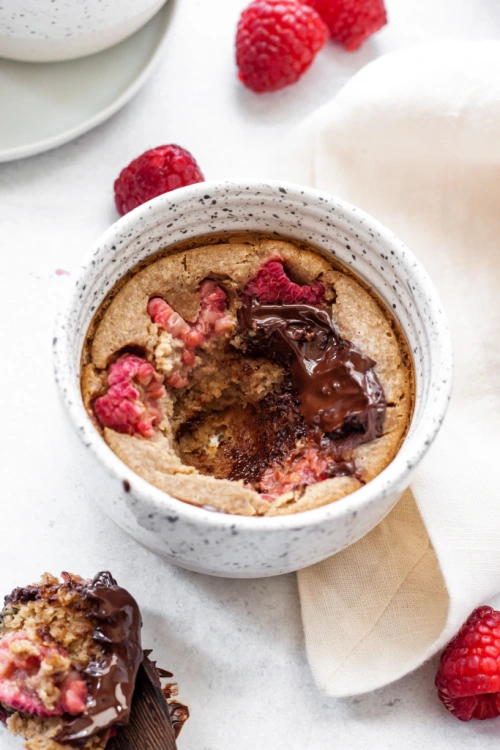
- Pour into one large, or two small ramekins and top with the fresh raspberries and chocolate.
- Bake for 25 minutes, or until the top begins to brown and form cracks. Carefully remove from oven and cool for a few minutes before enjoying!
The post Chocolate Raspberry Baked Oats appeared first on Never. Not. Eating..
]]>The post Vegan Power Muffins appeared first on Never. Not. Eating..
]]>
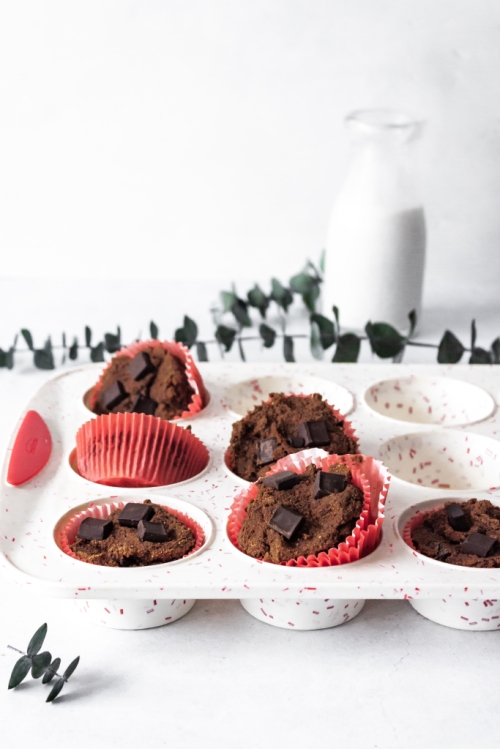
I LOVE muffins. Love, love, love them. But I’m always finding myself feeling bad after eating them, which is so silly. A girl can’t eat a muffin in the 21st century anymore without feeling all the sadness of the number of calories she just consumed. Life, eh?!
Luckily, this has inspired me to create some healthier muffins that not only will punch guilt in the face, but will also provide you will that extra energy boost and a protein POP for those slower mornings. Sign. Me. Up.
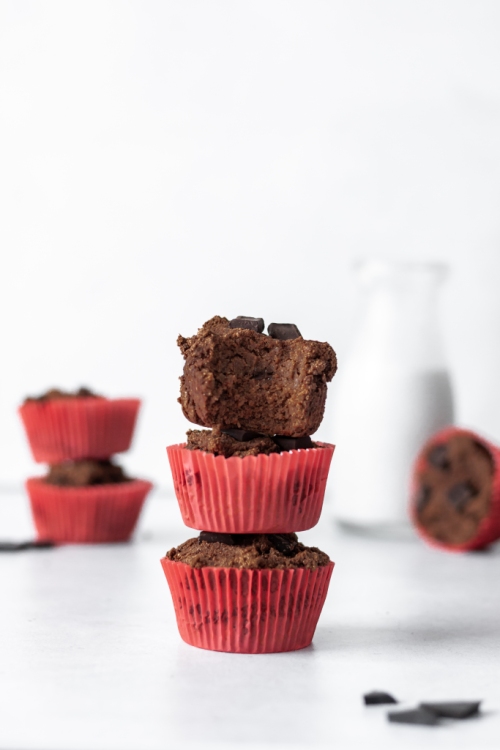
I love many things about these muffins: they are gluten-free, dairy-free, refined sugar-free and vegan. They are packed with healthy fats, fibre and protein. And, they are easy to make!
Let’s talk substitutions:
The fats: We know fats are important in baking. They keep things moist. Instead of butter, I’m swapping it out with some coconut oil. We all know the research on coconut oil, with its likeliness to improve hair, skin and nails, as well as boost brain health.
The binder: Typically, eggs are used to make everything stick together and to add structure in our baking. Since I wanted to keep this recipe vegan, we are subbing the eggs for chia seeds that have “gelled” in water. They create a gelatinous “paste” that mimics the job of an egg. Not to mention they have tons of fibre, good fats and protein.
The flour: You will rarely catch me eating white flour. Hell naw. Today, we are using coconut flour instead. Coconut flour definitely requires more liquid than your standard AP flour, and can be a bit tricky to work with, but the benefits are worth it. It’s gluten-free and promotes digestion with the ample amounts of fibre it provides.
The sweetness: I have made this recipe in two different ways. One way, I use JUST bananas to add a touch of sweetness, and the other, I add some maple syrup along with the bananas to satisfy that sweet tooth (naturally, of course). You can leave out the syrup if you prefer (just add an extra mashed banana).
Extras: There are a few other ingredients that I like to sneak into these muffins to give that extra little WAHBAM – coffee, maca and protein powder. Coffee brings out the chocolatey flavour, maca is healthy AF, and protein powder, well, I think that’s pretty clear. You can always leave these ingredients out if they are not for you!
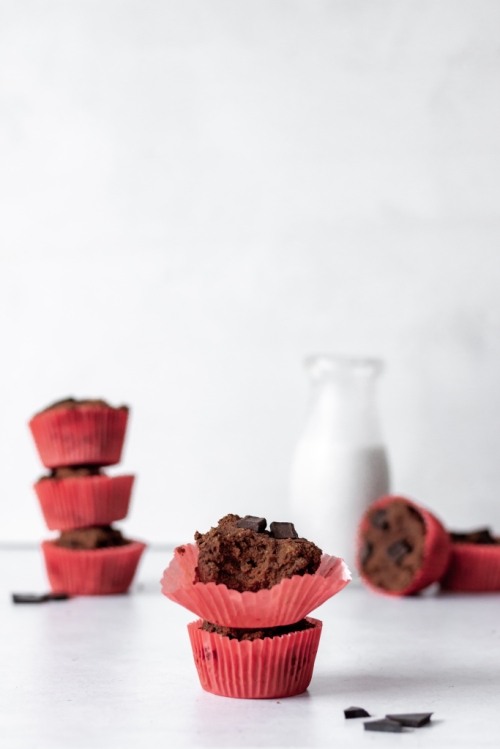
These muffins release nicely from the sides of the muffin liners. I love shopping on Amazon to find liners that go with my mood, or a celebration if I am bringing treats. I love these rose gold ones, or these fun ones that come with cute little toppers. If I am just baking for myself, I like to use my silicone mold to reduce waste and have an easy clean-up.
This post contains affiliate links and I may earn a small commission when purchases are made after clicking the links, at no cost to you. Thank you!
Vegan Power Muffins
Yield: Makes 12 muffins
Prep time: 5 minutes
Bake time: 30 minutes
Ingredients:
- 1/4 cup chia seeds
- 1/2 cup plant-based milk
- 1/2 tbsp apple cider vinegar
- 3 bananas, mashed
- 1/4 cup coconut oil, melted
- 1/2 cup smooth almond butter
- 1/2 tbsp pure vanilla extract
- 1/3 cup maple syrup
- 3/4 cup coconut flour
- 1/3 cup cocoa powder
- 1/2 tsp salt
- 1/2 tsp baking soda
- 1/2 tsp cinnamon
- 1 tbsp instant coffee (optional)
- 1 tsp maca powder (optional)
- 1 scoop (27 g) protein powder (optional)
- 3/4 cup dark chocolate chunks
Instructions:
- Preheat your oven to 350 degrees Fahrenheit. Line a muffin tin with 12 muffin cups.
- Mix the chia seeds with 2/3 cup of water in a small bowl and set aside to “gel,” at least 10 minutes.
- Mix the milk and apple cider vinegar and set aside.
- In a large bowl, use a hand mixer to beat together the bananas, coconut oil, almond butter, vanilla, maple syrup, chia seeds and milk/vinegar mixture, until smooth.
- In a medium bowl, whisk the coconut flour, cocoa powder, salt, baking soda, cinnamon, coffee, maca and protein powder (if using) until combined.
- Add the wet ingredients to the dry ingredients and beat until fully combined (batter will be thick). Fold in the chocolate chunks.
- Scoop the batter into the muffin liners and bake for 30-35 minutes, or until they look dry on the top and a toothpick comes out clean.
- Let cool in pan for 10 minutes before transferring to a wire rack to finish cooling. Store in an airtight container on the counter for up to three days, in the fridge for up to 5 days, or freeze for later.
Best served at room temperature or from the fridge!
The post Vegan Power Muffins appeared first on Never. Not. Eating..
]]>The post Grilled Piña (Colada) French Toast appeared first on Never. Not. Eating..
]]>
Whenever I travel to the Caribbean, I have piña coladas on rotate. They are thick, slushy and sweet, and just the perfect hot-day drink. And, obviously my inspiration for this recipe!

A traditional piña colada has rum, coconut milk and pineapple juice, and we’re keeping it consistent with this recipe! The spiced rum and coconut milk come together with some fragrant vanilla, eggs and warm spices to create the batter for the bread. Speaking of the bread, I chose to use brioche for this recipe, because seriously there is nothing better than brioche. Eggy, buttery and just darn delicious.

I love cooking my french toast in my cast iron. It helps with even heat distribution, and that means a beautiful browning on either side of the toast! I also use a ribbed cast iron to grill up some pineapple to top the french toast off with. It’s muy deliciosa!
Grilled Piña (Colada) French Toast
Servings: 3-4
Prep time: 10 minutes
Cook time: 20 minutes
Ingredients:
- 2 large eggs
- 1 tsp vanilla
- pinch of salt
- 1/2 tsp cinnamon
- pinch of fresh nutmeg
- 1/2 cup canned coconut milk
- 1/2 cup coconut milk (I use Silk Brand)
- 2 oz of spiced dark rum (optional)
- 12-14 slices of day old brioche bread
- vegan butter (or regular butter)
- coconut oil
- 1/2 of a fresh pineapple, sliced into flatter wedges
- pure maple syrup, for topping
- 1/4 cup coconut flakes, for topping (optional)
Instructions:
- Whisk the eggs, vanilla, salt, cinnamon, nutmeg, coconut milks and rum in a shallow container, until combined.
- Add a tablespoon of butter to a hot pan (temperature at medium-high). Dip a slice of brioche into the milk mixture and then transfer to pan. Cook for 2-4 minutes, or until golden brown, and then flip and repeat. Continue with the rest of the brioche.
- While the french toast is cooking, preheat your grill over medium-high heat. Add the Pineapple slices right to your grill if using an outdoor barbeque, or, oil your indoor grill with 1 tablespoon of coconut oil first, then add the pineapple. Grill for 2-3 minutes on each side, or until you see those nice grill marks!
- Place a few slices of french toast on a plate, top with a few pieces of grilled pineapple, sprinkle with the coconut flakes, and drizzle with pure maple syrup. Salud!
The post Grilled Piña (Colada) French Toast appeared first on Never. Not. Eating..
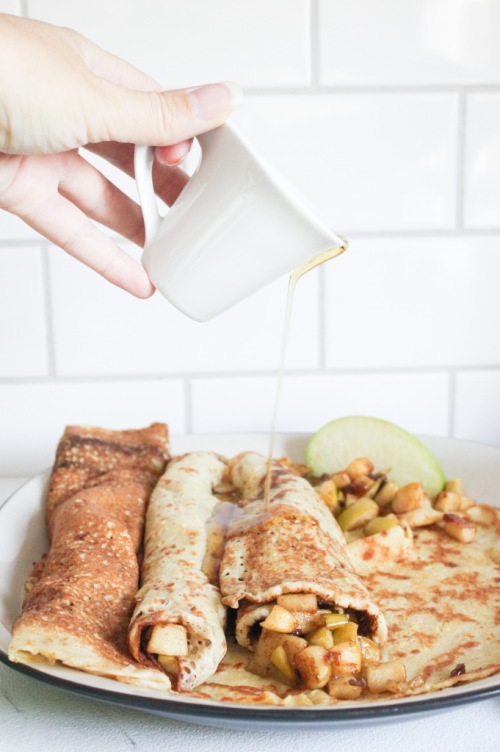
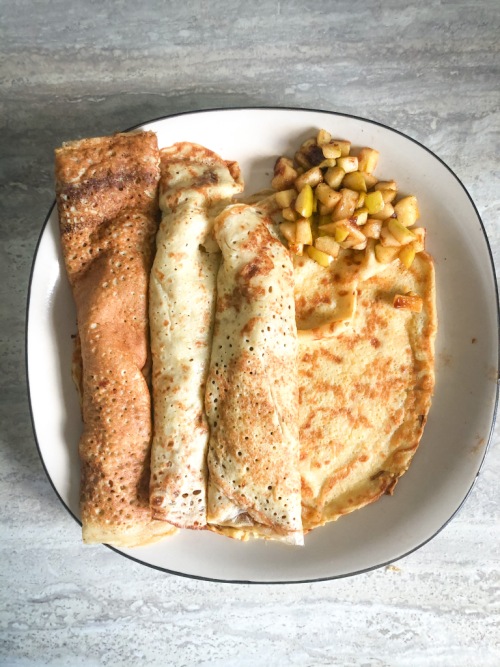
]]>The post Gluten Free Crepes with an Apple Cinnamon Compote appeared first on Never. Not. Eating..
]]>
I’ve used my soup maker to make an abundance of different recipes, such as: soup (duh!), smoothies, juices, pancakes and my favourite, alcoholic beverages. It’s truly simple to use and does all of the cooking and blending for you, allowing time to clean up your kitchen, or do something more fun, like snack while you wait for your food. If you have a soup maker, or are thinking of purchasing one, check out my Instagram account for some more fun recipes to make in it – @nevernoteatingca
So let’s talk about these crepes. Firstly, I struggle to call them “crepes,” because as a kid, my family and I only ever ate “Finnish pancakes,” which were more crepe-like in appearance, but were never referred to as crepes. Those were our style of pancakes. We never ate traditional American pancakes. But you know what?! I’m all about pleasing the people. People see flat pancakes, they say “crepes.” So, this is for you.
Secondly, if you follow my IG account, or have read some of my posts, or even tried some of my recipes (thank you), you know that I like to put a healthier spin on foods that aren’t so healthy. Therefore, I have made these “crepes” with gluten-free flour, plant-based milk and no refined sugar. If you want to indulge a bit more, feel free to sub in the healthy ingredients for the not-so-healthy ones.
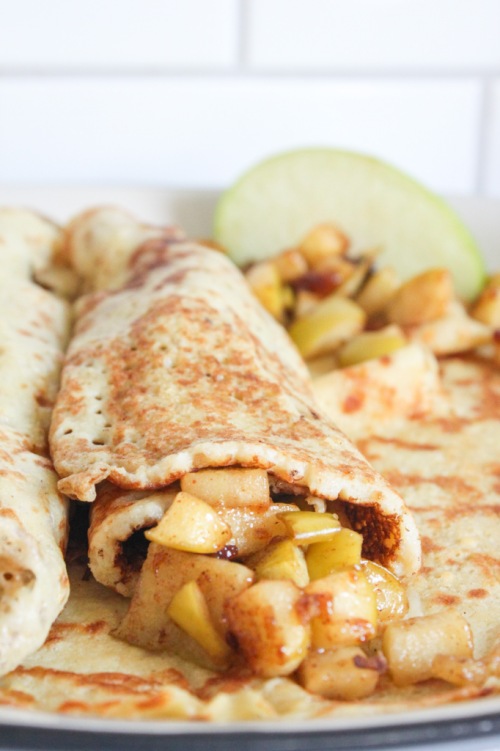
I can’t decided whether my favourite part of this dish is the pancake…I mean crepe…or the filling. It’s apple season right now, and nothing goes better together than apples and cinnamon. And nutmeg. Nutmeg is bomb. The filling is tart and sweet and ooey and gooey. It’s a great addition to these less-sweet crepes. I prefer to use honeycrisp or granny smith apples for this, but you can definitely use whatever you have on hand. I also like to keep the skins on, mostly because I’m lazy, but feel free to peel your apples if that’s your jam.
Below you will find two ways to make this recipe. The first is the easiest way, but you need a soup maker for that! The second is more traditional, but totally yummy just the same.
May your day be enhanced with pancake-crepes and fall fillings!
Gluten Free Crepes with an Apple Cinnamon Compote
Serving Size: Makes 10 large crepes
Prep time: 5 minutes
Cook time: 20 minutes
Ingredients
- 2.5 cups dairy-free milk
- 2 eggs, beaten
- 2 tbsp maple syrup, plus more for serving
- 1 tsp vanilla extract
- 1.5 cups gluten free flour
- 1/2 tsp salt
- 2 medium apples, finely diced (I use honeycrisp or granny smith)
- 1/2 tsp lemon zest
- 1 tbsp lemon juice
- 1/2 tsp cinnamon
- pinch of fresh nutmeg
- 1/2 tbsp of cornstarch
- 1 tbsp maple syrup or brown sugar
- coconut oil or butter (for the pan)
Instructions
With a soup maker:
- Add the milk, eggs, syrup, vanilla, flour and salt to your soup maker. Set to “juice.” When finished mixing, skip to step 3 below.
Without a soup maker:
- Whisk together milk, eggs, syrup and vanilla and set aside.
- In a medium bowl, whisk flour and salt together. Add the wet ingredients and whisk until combined.
- Place a large pan over medium-high heat and add half a tablespoon of coconut oil (or butter). When the pan is very hot, add about 1/3-1/2 cup of the crepe batter (depending on the size of your pan). Swirl the pan around until the batter coats the entire bottom. There shouldn’t be a lot of batter sitting on top.
- Let the crepe cook until the edges begin to come up from the pan and the bottom is browned. Flip and cook on the other side for about 2 minutes or until darker spots begin to develop on the underside. Remove from pan, place on a plate and store in the oven or microwave to keep warm. Continue with the remainder of the batter.
For the filling:
- While the crepes cook, add the apples, zest, lemon juice, cinnamon, nutmeg, cornstarch and sugar to a bowl and stir to combine. Let sit for at least 5 minutes.
- Preheat a large pan over medium-low heat. Add a half tablespoon of coconut oil or butter to the pan. When melted, add the apples. Let cook until apples are fork tender, about 8-10 minutes, stirring occasionally.
Assembly:
- Top each crepe with a few spoonfuls of the filling and a drizzle of maple syrup. Roll and enjoy!
The post Gluten Free Crepes with an Apple Cinnamon Compote appeared first on Never. Not. Eating..
]]>The post Caramelized Peach and Pecan Oatmeal appeared first on Never. Not. Eating..
]]>
Alright, I’m taking full advantage of the local produce, here in Southern Ontario. We have amazing peaches during the summer months and I’m using them today to make this caramelized peach oatmeal. Typically, I don’t eat oatmeal very often, but when I do, it needs to be topped with nuts, fruit and maple syrup. Otherwise, I won’t eat it.

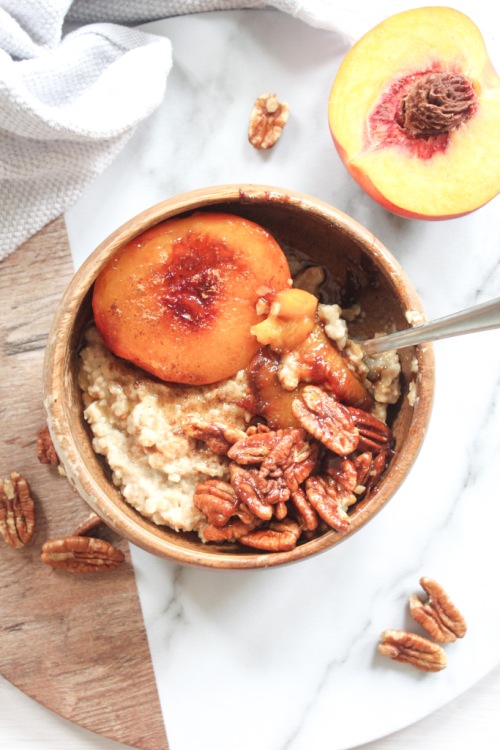
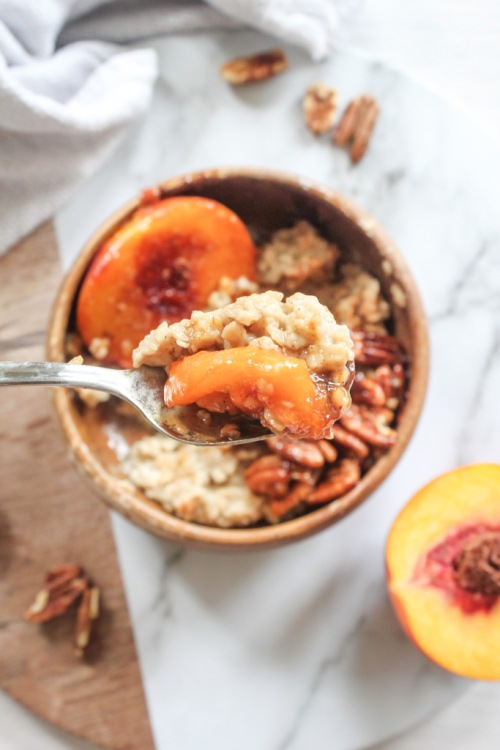
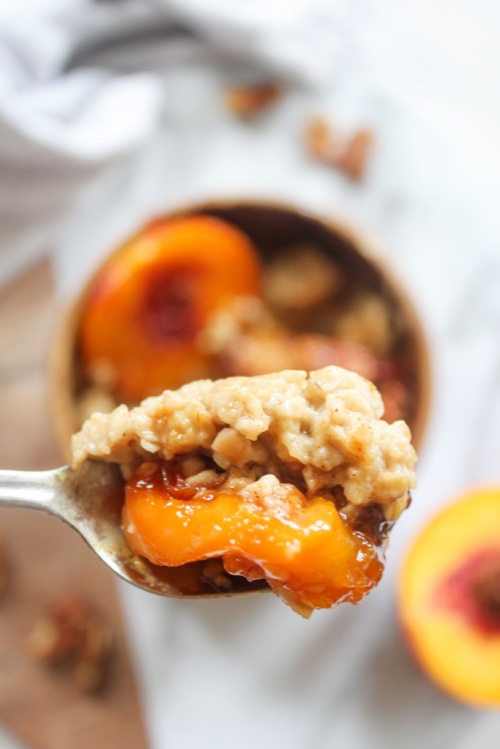
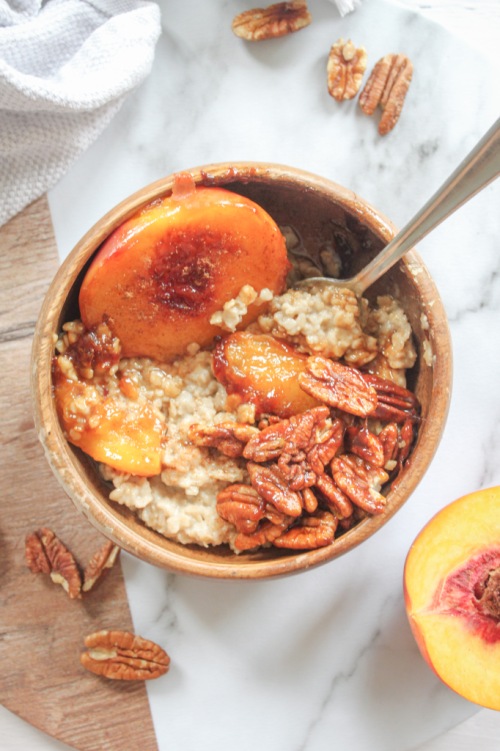
So today, I bring to you, my Caramelized Peach and Pecan Oatmeal. Creamy, spiced oatmeal with soft, tender peaches and sticky maple pecans. YUM.
Let’s talk oatmeal. Because I don’t drink cow’s milk, I always make my oatmeal with plant-based milk. You can check out my Homemade Cashew milk, here. This is a really great milk choice for this recipe as it is creamy and flavoured with vanilla. Otherwise, you can use almond milk, soy, oat, or even water. Whatever you have on hand!

The best part of this recipe would have to be the toppings. Peaches and pecans are a match made in heaven. I have even seen whiskey with these two flavours infused…YUM. The peaches become soft and fork-tender when cooked down with maple syrup, some lemon juice and a pinch of salt. You could easily just eat these themselves.
Pecans are delicious naturally, but when coated in the sticky syrup, they are even better. Not to mention all of the benefits you get from eating pecans – good fats, tons of fibre, magnesium, iron and protein. Tree nuts are a vegans dream food.
Finally, I always like to top my oatmeal off with (yet another) drizzle of pure Canadian maple syrup and a pinch of cinnamon.
This one’s for you, oatmeal lovers!
Caramelized Peach and Pecan Oatmeal
Serving size: 1
Prep time: 2 minutes
Cook time: 5-8 minutes
Ingredients:
- 2/3 cup plant-based milk (check out my homemade cashew milk, here)
- 3/4 tsp cinnamon, divided
- 1/4 tsp nutmeg, divided
- salt
- 1/3 cup rolled oats
- 1 peach, sliced into wedges
- 1 tbsp lemon juice
- 2 tbsp maple syrup
- 1 tbsp butter or oil of choice
- 1/4 cup raw pecans
Instructions:
- Add milk, 1/2 tsp cinnamon, pinch of nutmeg and a pinch of salt to a small pot over medium high heat. Bring to a boil and add the oats. Stir, bring back up to a boil and then reduce heat to a simmer. Cook for 4-5 minutes, or until oats have absorbed most of the liquid and mixture has thickened.
- To a small bowl, toss the peach slices with the lemon juice, a pinch of salt, the remaining 1/4 tsp cinnamon, a pinch of nutmeg and the maple syrup.
- Add the butter or oil to a medium pan (or cast iron skillet) over medium-high heat. When butter is hot, add in the peach slices. Cook for 3 minutes and then add the pecans. Finish cooking when the slices are fork-tender, stirring occasionally, another 2-4 minutes.
- Scoop oatmeal into a bowl and top with the caramelized peaches and pecans. Top with extra maple syrup and a dash of cinnamon if desired.
The post Caramelized Peach and Pecan Oatmeal appeared first on Never. Not. Eating..
]]>The post The Triple P’s – Pink Pitaya Pancakes (Vegan & GF) appeared first on Never. Not. Eating..
]]>
Not only is pink a pretty hue, but it has also made its mark on our planet. Pink ribbons are used to raise awareness for breast cancer, a pink shirt is a symbol for anti-bullying, and pink flowers and hearts are given to express one’s love for another.
Pink food is more enjoyable as well, and that’s a fact. Okay, fine…it’s not a fact, but it’s my very strong opinion and I dare you to challenge me!
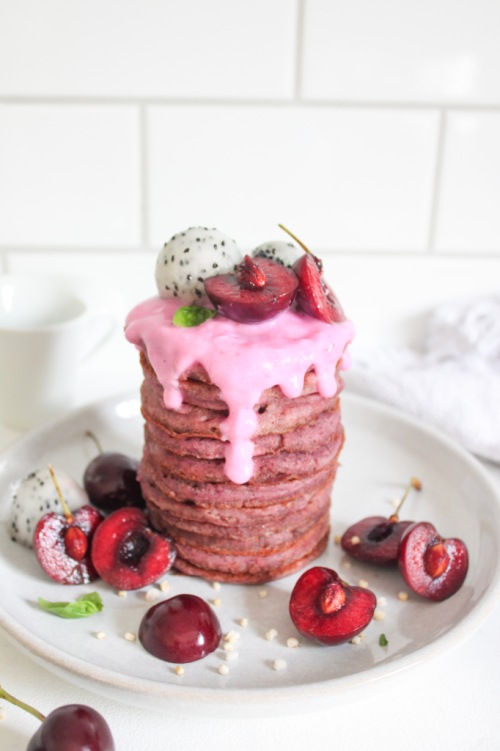
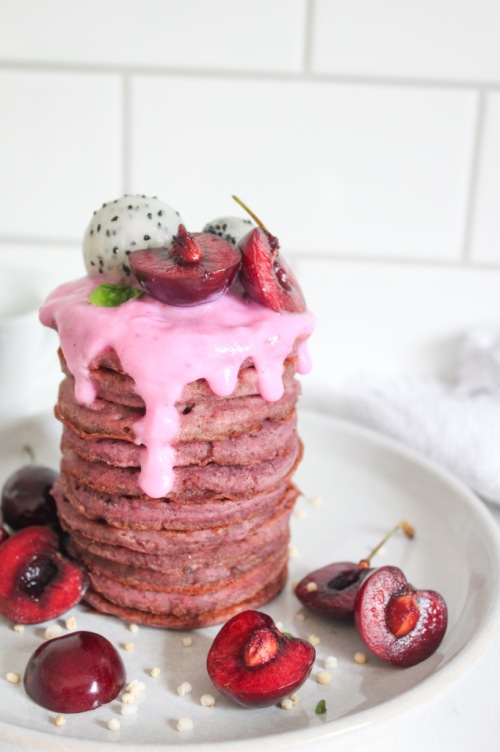
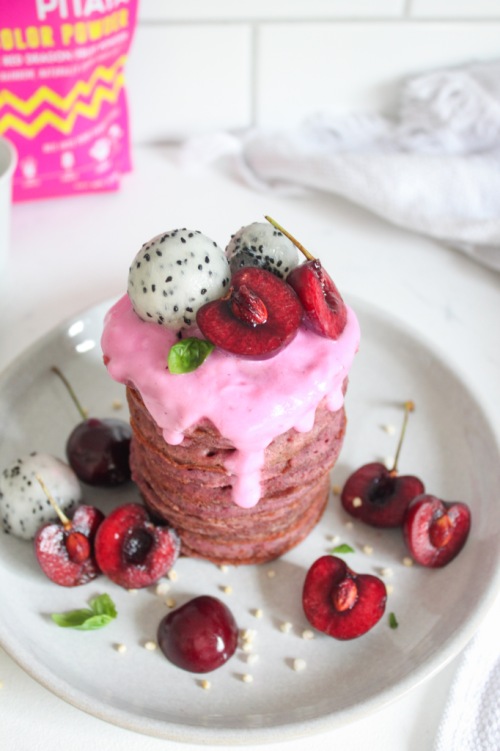
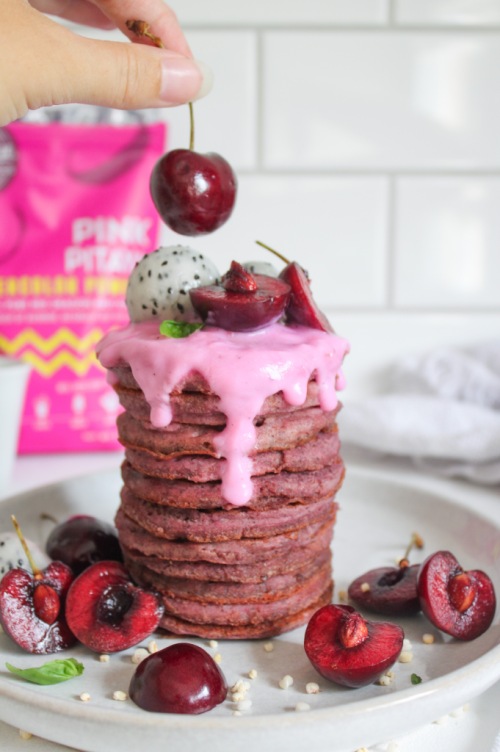
Anywho, since we now agree that pink food is better than non-pink food, I have a pretty sweet recipe for you – The Triple P’s! PINK PITAYA PANCAKES.
Since we’ve already discussed the importance of the colour pink, let’s talk about pitayas. If you don’t know, a pitaya is a fruit, commonly known as “dragonfruit” in North America. It has a pink skin with scale-like spikes shooting out of the exterior. It’s quite unique in appearance, and also quite beautiful. The inside of a pitaya can be white or a bright pink, with little black seeds, similar to that of a kiwi. It has a very mild taste and soft, fleshy texture. The pitaya I am using in this recipe is actually in powder form. The fruit is dried out and then finely ground so it can be used in smoothies, baking, and today – PANCAKES! You can find pink pitaya powder here.
And, these aren’t just any pancakes, peeps. These are gluten-free, vegan, and refined sugar-free! You. Are. Welcome. So, what replaces all of the glutenous, sugary, dairy-forward ingredients, you ask? Well, let’s start with the dry:
Buckwheat flour – I love, love, love using buckwheat flour as a substitute for all-purpose. It is NOT made out of wheat, and therefore is gluten-free. Buckwheat is actually a seed and it is ground up and sold in ‘flour’ form. I consider it to be the best GF flour for pancakes because it holds up and acts the most similar to regular flour. I also really like the nuttier taste.
Flax – Eggs are a typical pancake ingredient, but if I added them to this recipe then the pancakes wouldn’t be vegan. So instead, I use a flax ‘egg,’ which is literally just flax meal and water mixed together and left to sit for a few minutes to thicken up. It’s the perfect vegan binder.
Oat Milk – In any standard flapjack recipe, you will either find milk or buttermilk. And, again, since I’m going for vegan pancakes today, dairy products just don’t cut it. That’s why I have created my vegan ‘buttermilk’ by mixing some organic apple cider vinegar with oat milk instead of the baby cow elixir. You can also use white vinegar for this, if you don’t have ACV. Make sure you are using a certified gluten-free oat milk, as oats themselves do not have gluten in them, but often can be cross-contaminated with other glutenous products. If you can’t find a gluten-free oat milk, you can definitely use almond, cashew or soy milk instead!
Maple Syrup – Finally, the sweet stuff. Obviously white refined sugar is standard, but that shiz is so bad for you, man. I typically could eat these pancakes without any sugar, just because I’m sweet enough, but sometimes I like to add a little maple syrup to bring out the Canadian in me. It’s completely optional, but you do you. You can add more than what is called for if you like a sweeter pancake.
Alright, I think I’ve covered all of the important bases here. Let’s make some flippy flappies!
The Triple P’s – Pink Pitaya Pancakes (Vegan, GF)
Serving size: Makes about 15 small pancakes
Prep time: 10 minutes
Cook time: 15 minutes
Ingredients:
- 1 tbsp flax meal
- 1/2 tsp apple cider vinegar or white vinegar
- 3/4 cup gluten-free oat milk (or your preferred dairy-free milk)
- 1/2 cup buckwheat flour
- 1/2 tsp baking powder
- 1/4 tsp baking soda
- 1/4 tsp salt
- 1 tsp maca powder (optional)
- 1.5 tbsp pink pitaya powder (optional)
- 1-3 tbsp pure maple syrup (according to how sweet you want them, I do 1 tbsp)
- 1/2 tsp pure vanilla extract
- coconut oil
Instructions:
- To a small bowl, add flax meal and 2.5 tablespoons of water. Mix well and place in the fridge for at least 5 minutes.
- Add vinegar and plant-based milk to a measuring cup and stir. Set aside.
- To a medium bowl, add buckwheat flour, baking powder, baking soda, salt, maca powder and pitaya powder, if using. Whisk to combine and set aside.
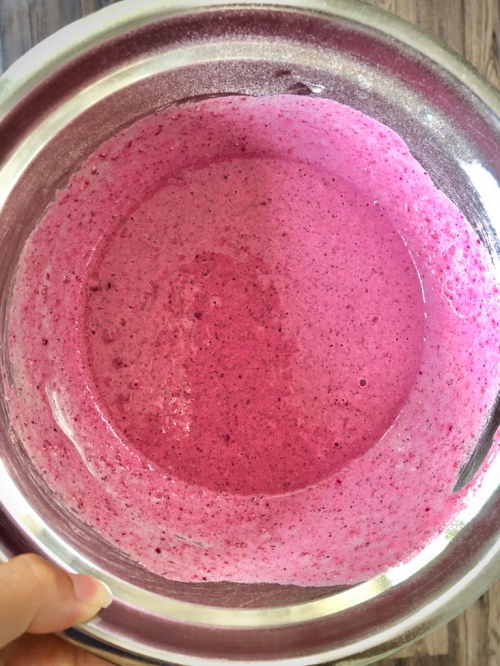
- Add the maple syrup and vanilla to the measuring cup with the vinegar and milk. Remove flax mixture from the fridge and add to the milk mixture as well. Stir and then pour into the dry ingredients. Whisk until combined.
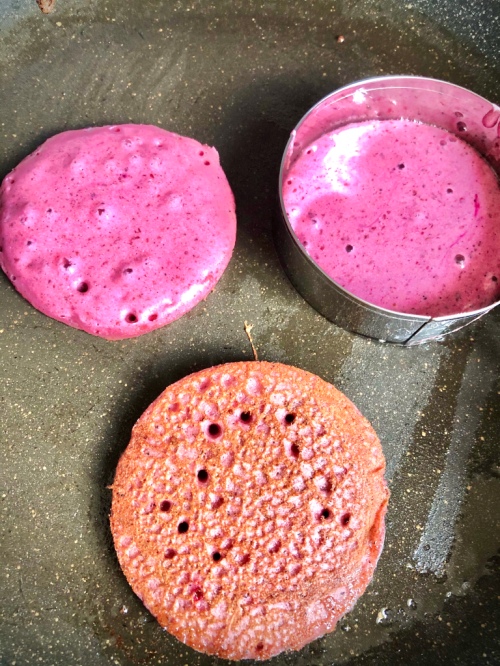
- Add about 1/2 tablespoon of coconut oil to a pan set over medium heat. When the oil is hot, use a ladle to pour some of the pancake batter into the pan. When bubbles begin to appear around the edges (about 1-2 minutes), flip the pancake and cook for 30 seconds to one minute more. Remove from heat and continue with rest of batter, adding more coconut oil as needed.
- Serve immediately or store in an airtight container in the fridge for up to three days.
NOTES:
I love serving these with fresh fruit, yogurt and pure maple syrup.
This recipe feeds approximately two people. You can double the recipe if feeding a larger family.
The post The Triple P’s – Pink Pitaya Pancakes (Vegan & GF) appeared first on Never. Not. Eating..
]]>The post Strawberry Rhubarb Jam appeared first on Never. Not. Eating..
]]>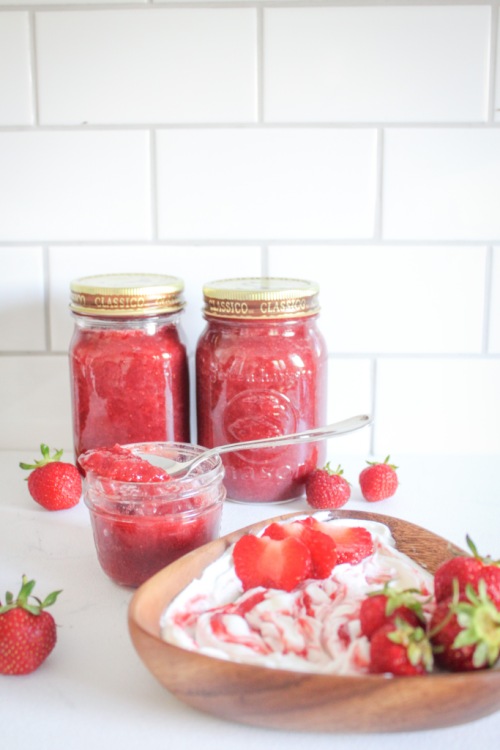
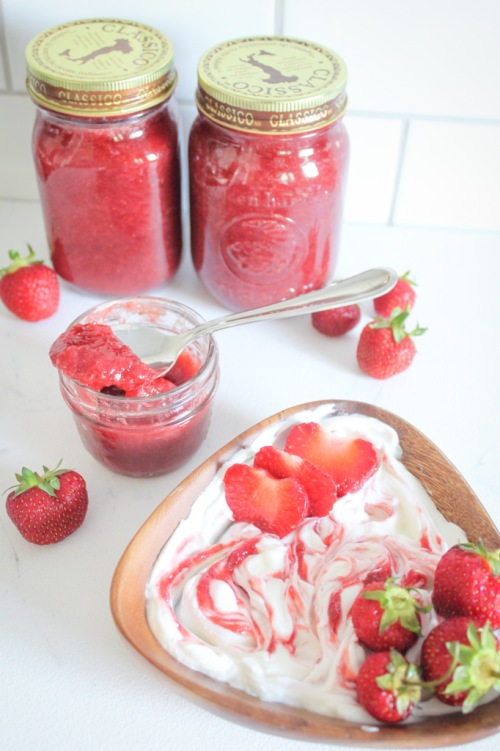
Growing up, we would always go strawberry picking and my mom would spend the rest of the day making delicious strawberry jam that we would be able to enjoy for months to come. Little did I know back then, jam is good on everything…not just toast. I swirl it into my yogurt, add it to ice cream and am currently in the process of developing a peanut butter and jam chocolate cup.
To give it a bit of dimension, I decided to add rhubarb as well. Typically, I don’t like really sweet foods, so the tartness of the rhubarb helps to balance out the super sweet strawberries.
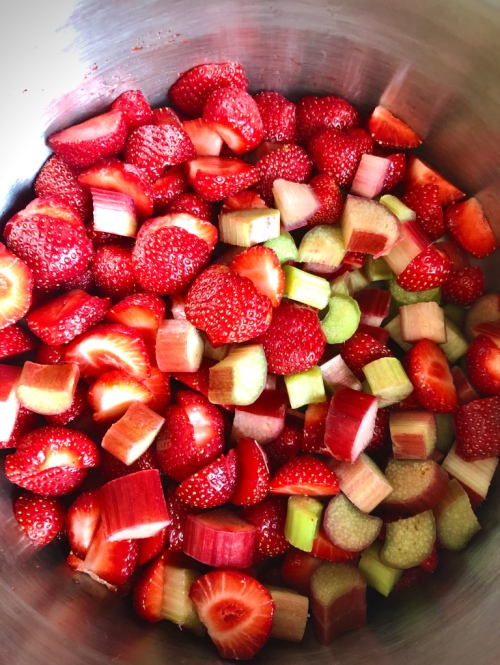
Jam is deceivingly simple to make. This recipe only requires for ingredients:
- Strawberries
- Rhubarb
- Sugar
- Lemon juice
Many jam recipes call for pectin, which is sold in isolated form at most grocery stores, however, pectin is actually a natural substance found in many fruits, especially citrus. Pectin works as a thickener when it is mixed with sugar and heated. It is what gives the jam body. This recipe does not call for pectin. Instead, I use lemon juice, where it can be found naturally.
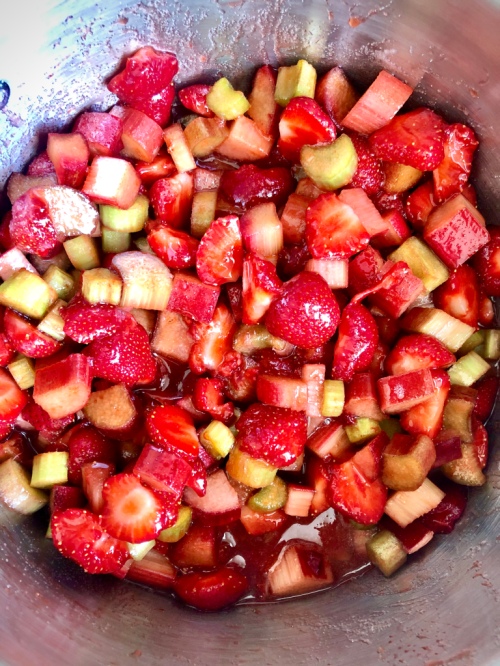
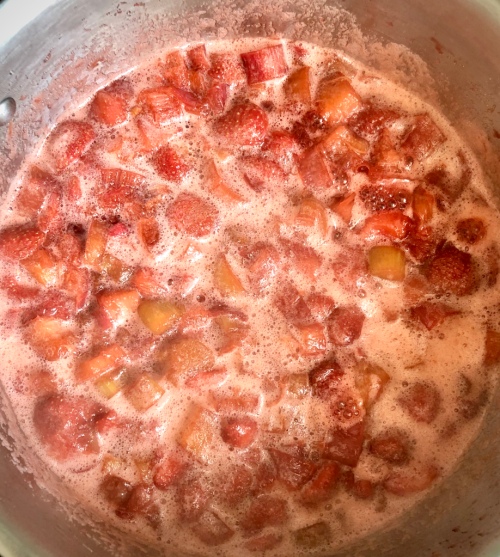
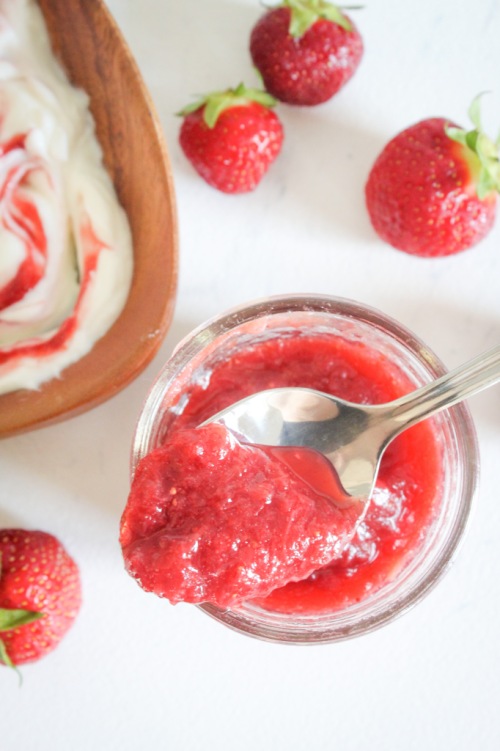
To make this jam, all you have to do is add all of your ingredients to a large pot, bring up to a boil, reduce heat and let gently simmer for an hour while stirring frequently. That’s it!
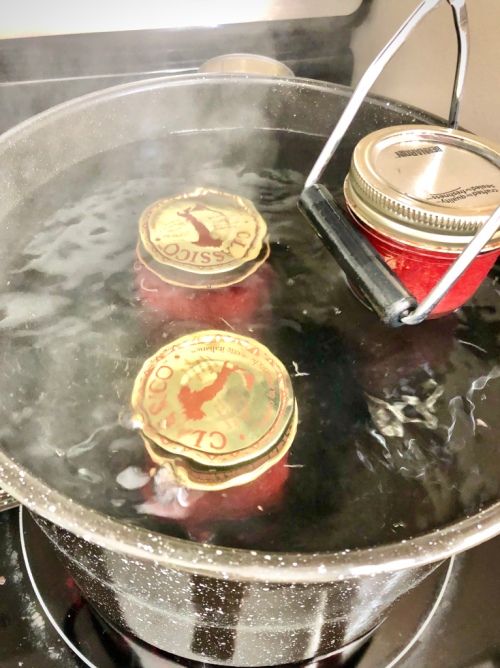
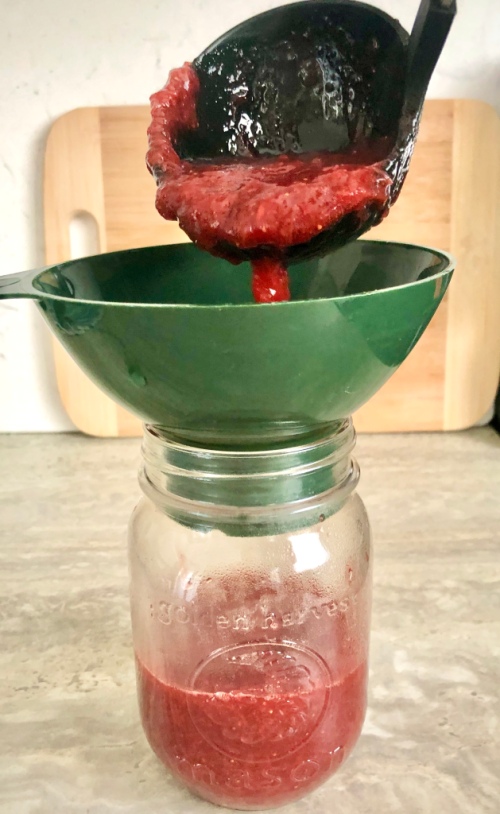
This recipe fills three regular mason jars (or you can reuse old pasta jars, as seen in the pictures). If they will not all be consumed within a month’s time, you must seal your jars. To do this, bring water to a boil in a large stock pot. First, disinfect all of your tools – all of your mason jars and lids, a funnel (if you have one), and your jam jar lifter. Carefully drop each tool into the boiling water and let disinfect for 10 minutes. Remove and set on a clean tea towel while jam cooks.
When jam is finished cooking, place the funnel on top of your first jar and scoop in the hot jam, leaving about 1/2 inch from the top. Place the lid on being sure that the rim of your jar is clean, and then screw on the ring so that it is sealed, but not too tight. Use your jar lifters to drop the jars into a stock pot of gently boiling water. Jars will sit on the bottom of the pot. Keep them in the pot for 10 minutes and then remove them with the lifters onto a clean tea towel. You should hear the lid “pop” shortly after removing them from the pot.
After you have sealed the jars, leave them on your counter at room temperature, undisturbed for at least 24 hours. Store jars in a cool dark place for up to one year. Once opened, jars must be refrigerated and are best if consumed within one month’s time. Depending on how much jam you eat, it may be better to fill smaller mason jars to help prevent waste.
Strawberry Rhubarb Jam
Yield: 3, 16 oz mason jars
Prep time: 10 minutes
Cook time: 1 hour
Ingredients:
- 6 cups rhubarb (stalks), cut into 1/2 inch chunks
- 4 cups fresh strawberries, halved
- 2 cups sugar
- 3 tbsp freshly squeezed lemon juice
Instructions:
- Add rhubarb, strawberries, sugar and lemon juice to a large pot. Turn heat to low until the sugar has melted and then increase to medium-high, bringing to a gentle boil. Once boiling, reduce heat again until you have a consistent, very gentle simmer. Ensure that it is not rapidly bubbling. Cook for about an hour, stirring often to prevent burning. Jam will be done when it takes on a thicker consistency.
- While the jam cooks, disinfect your tools. Bring a large stock pot of water to a boil. Once boiling, add your mason jars, lids and funnel (if using) and allow them to disinfect for 10 minutes. Use your jar lifters to carefully remove from the water and place on a clean tea towel.
- When jam is finished cooking, place the funnel on top of your first jar and scoop in the hot jam, leaving about 1/2 inch from the top. Place the lid on, being sure that the rim of your jar is clean, and then screw on the ring so that it is sealed, but not too tight. Do this for the remaining two jars.
- Using your jar lifters again, drop the jam jars into a stock pot of gently boiling water. Jars will sit on the bottom of the pot. Keep them in the pot for 10 minutes and then remove them with the lifters onto a clean tea towel. You should hear the lid “pop” shortly after removing them from the pot. Let them sit on the tea towel, undisturbed for at least 24 hours.
NOTES:
Store jars in a cool dark place for up to one year. Once opened, jars must be refrigerated and are best if consumed within one month’s time. Depending on how much jam you eat, it may be better to fill smaller mason jars to help prevent waste.
The post Strawberry Rhubarb Jam appeared first on Never. Not. Eating..
]]>The post Lemon Blueberry Loaf appeared first on Never. Not. Eating..
]]>
This recipe has two of my loves – gluten and fruit. That’s half healthy!
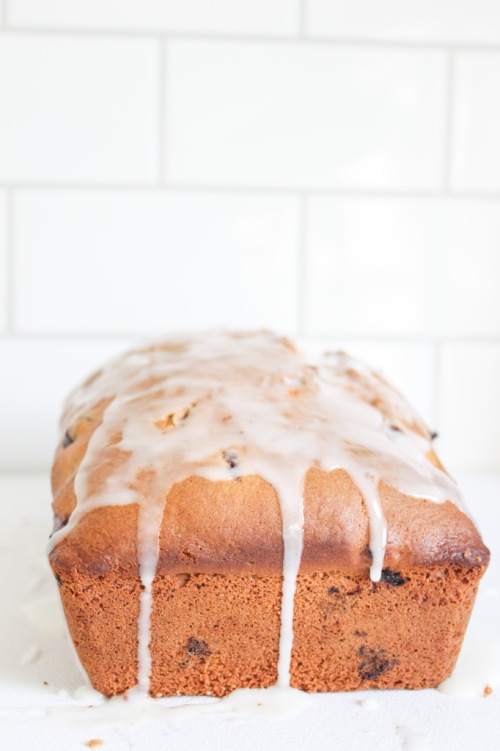
But seriously, this is the perfect morning treat with coffee. It is a great snack between meals. It’s a wonderful end to the day with tea. It’s just good anytime. You can’t put limits on loaves.
When I want to bake something, I always have this idea in my head that I need to set aside a ton of time for it. Then I get started and, every time, I realize that it actually just takes minutes to put together, and even the bake time isn’t too bad. This loaf honestly takes around 10 minutes to prep, and although the oven time is around an hour…It’s passive time. You can do anything while it is in the oven: laundry, work from home, lunges, paint… Whatever, man!

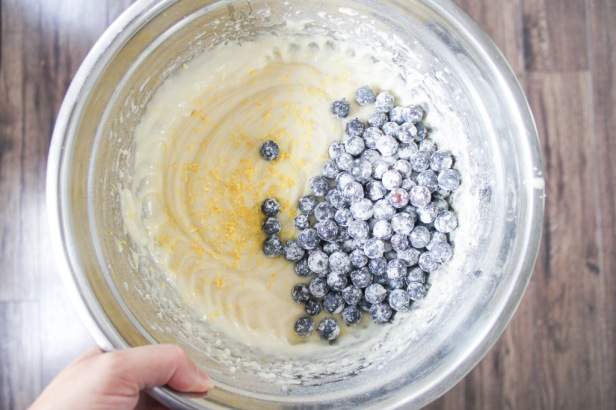
The first thing you need to do is whisk together all of your dry ingredients – flour, baking soda, baking powder and salt. Set this aside and move on to your wet – sugar, eggs, vanilla and oil. Beat this until smooth, and then in a few additions add the dry to the wet, alternating with some buttermilk. Fold in the lemon zest and blueberries and you are done! Easy breezy.
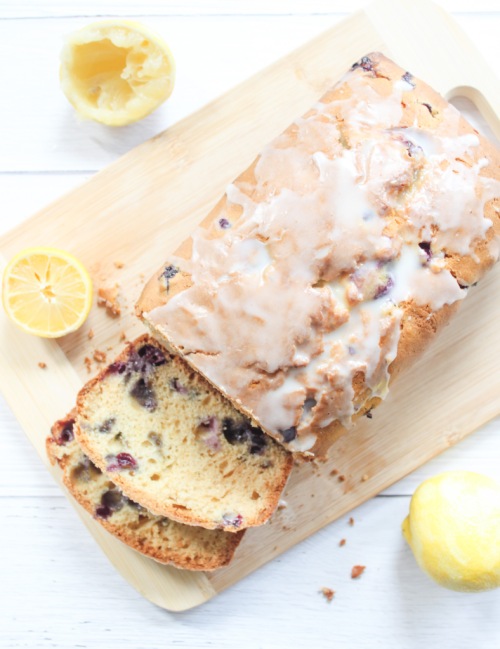
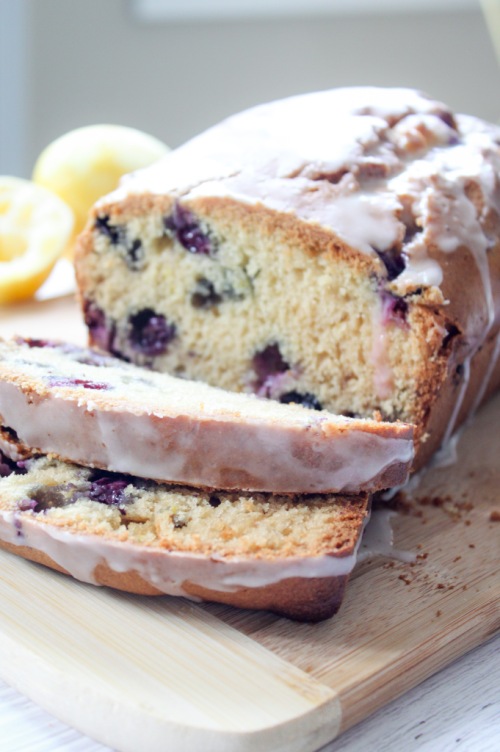
This loaf fills your house with the most delicious aroma. There is nothing more “home-y” than walking into a house that is filled with the smell of fresh baked goods. It let’s guests know that you have it together. You got it goin’ on. You are a successful adult.
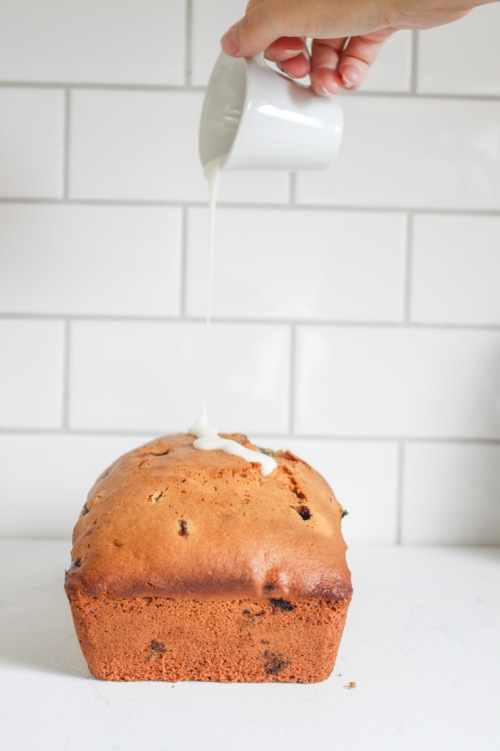
While your creation is forming in the oven, start making the glaze. This is not necessary, but it adds a little bit of sweetness to the loaf and also makes it look really pretty. All it requires is a little bit of powdered sugar and some lemon juice whisked together until smooth. I like to drizzle it over the top when the loaf is still warm so it can absorb all of the goodness throughout.
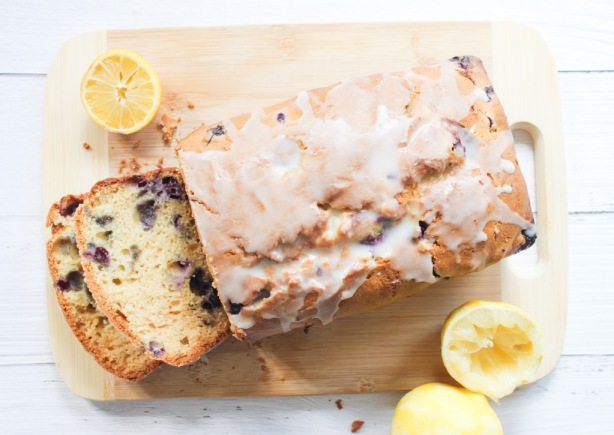
Loaf drop.
Lemon Blueberry Loaf
Prep time: 10 minutes
Cook time: 50 minutes
Ingredients:
- 2 cups all-purpose flour + 1 tbsp
- 3/4 teaspoon baking soda
- 1/2 teaspoon baking powder
- 3/4 teaspoon salt
- 1 cup sugar
- 1/2 cup canola oil
- 2 large eggs
- 1 teaspoon pure vanilla
- 3/4 cup buttermilk
- zest of one lemon
- 1 heaping cup blueberries, washed and dried
For the lemon glaze:
- 1/3 cup powdered sugar
- 1-2 tbsp freshly squeezed lemon juice
Instructions:
- Preheat the oven to 350 degrees and grease a loaf pan.
- In a medium-sized bowl, whisk together the two cups of flour, baking soda, baking powder and salt. Set aside.
- In a separate, larger bowl, beat the sugar, oil, eggs and vanilla together until smooth and combined.
- Add the dry ingredients and buttermilk alternately in three additions, being careful not to overmix the batter.
- Sprinkle the remaining tablespoon of flour over the blueberries and toss until coated. Shake off any excess flour and then carefully fold the blueberries into the batter along with the zest.
- Pour into prepared pan and bake for 50-60 minutes, or until a toothpick inserted in the middle comes out clean.
- Run a butter knife along the edges of the loaf to loosen and turn out onto a wire rack to cool completely.
- To prepare your glaze – add the powdered sugar to a small bowl and whisk in the lemon juice, a half tablespoon at a time, until you reach your desired consistency. Drizzle over the loaf* and use an offset spatula to evenly distribute over the top.
NOTES:
*I like to drizzle the glaze on the loaf when it is still warm. This way, the loaf absorbs the liquid and it gets distributed throughout. You will not be able to see the glaze on top if you do this. If you are going for more of a “look,” let the loaf cool completely before topping with the glaze.
The post Lemon Blueberry Loaf appeared first on Never. Not. Eating..
]]>The post Blue Buckwheat Pancakes appeared first on Never. Not. Eating..
]]>
I’m a breakfast fanatic, and you can’t have an amazing breakfast without pancakes….am I right?! I’m right.

The buckwheat flour in these pancakes make them gluten-free, yet still texturally on-point. Buckwheat is actually a seed that is packed with protein and antioxidants. I prefer using it to other gluten-free flours (such as almond and coconut flour) in pancake recipes as it acts more like regular flour would.

The “blue” comes from spirulina. If you follow my blog or instagram page (@nevernoteatingca), you know that I use spirulina a lot. It is basically algae that has been dried and ground up into a powder form. You can purchase regular green spirulina, which has an unpleasant fishy smell, but is usually not detectable when added to food/drink, or you can buy blue spirulina, which doesn’t have any fishy odour or taste, and makes your food appear vibrantly blue in colour.

This recipe is also dairy-free. When I started to become interested in cooking and baking (pre-internet), I would grab my mom’s ancient cookbooks out of the closet and do my best to follow the recipes. I would always become frustrated when seeing the ingredient, “buttermilk” listed, as it was something we never had. BUT, after flipping through an old-school Betty Crocker book my mom owned, I learned that mixing vinegar and milk together created an alternative that could be substituted for buttermilk! And now, since I don’t drink cow’s milk, I always substitute regular milk for non-dairy, nut milk and I’m pretty sure it works. Thanks, Betty. If you DO drink milk, you can stick to buttermilk instead of using the apple cider vinegar and almond milk mixture in this recipe. You do you.

There are a few other unorthodox ingredients I have snuck into these babies. Maca powder for an energy boost and further health benefits. Maple syrup to replace the regular, refined sugar that would be added to pancakes. And because maple syrup just goes with pancakes, of course!

I’d say that these pancakes are worth a shot if you are trying to live a healthier lifestyle but still want to indulge in breakfast’s best. They are fluffy, moist, delicious and beautiful! Top with fresh fruit and more maple syrup and enjoy!
Happy International Pancake Day, everyone!
Blue Buckwheat Pancakes
Serving size: Makes about 10 small pancakes
Prep time: 8 minutes
Cook time: 10 minutes
Ingredients:
- 1 tbsp apple cider vinegar
- 1 1/4 cup non-dairy milk (I like almond)
- 1 cup buckwheat flour
- 1 tsp baking powder
- 1/2 tsp baking soda
- 1/2 tsp salt
- 1 tbsp blue spirulina powder
- 1 tsp maca powder (optional)
- 1 large egg
- 1-2 tbsp pure maple syrup
- 1/2 tsp pure vanilla extract
- Coconut oil (for the pan)
Instructions:
- Stir together the apple cider vinegar and the dairy-free milk and set aside.
- In a small bowl, whisk together the flour, baking powder, baking soda, salt, spirulina and maca powder (if using).
- In a large bowl, beat the egg and then add the maple syrup, vanilla and milk/vinegar mixture.
- Add the dry ingredients to the wet ingredients and whisk until just incorporated. Set aside for a few minutes to let the batter develop.
- Preheat your griddle or pan over medium heat. Add enough coconut oil to generously coat the bottom of the pan and (when the pan is hot) scoop in some of the pancake batter. When you see the edges begin to cook and bubbles begin to form on top (about a minute and a half to two minutes), flip the pancake. Let it cook for another minute or until cooked through and remove from pan. Continue with the remainder of the batter.
NOTES:
These are great the next day, or make them for meal prep and place them in your freezer, take them with you to work and pop them in the toaster! Easy peasy.
The colour of the pancakes become less vibrant as the pancakes cook, so if you want them to be a brighter blue colour – add more spirulina and cook them until just done on each side, trying to avoid browning which takes away from the blue.
The post Blue Buckwheat Pancakes appeared first on Never. Not. Eating..
]]>The post Gooey Caramelized Banana Oatmeal appeared first on Never. Not. Eating..
]]>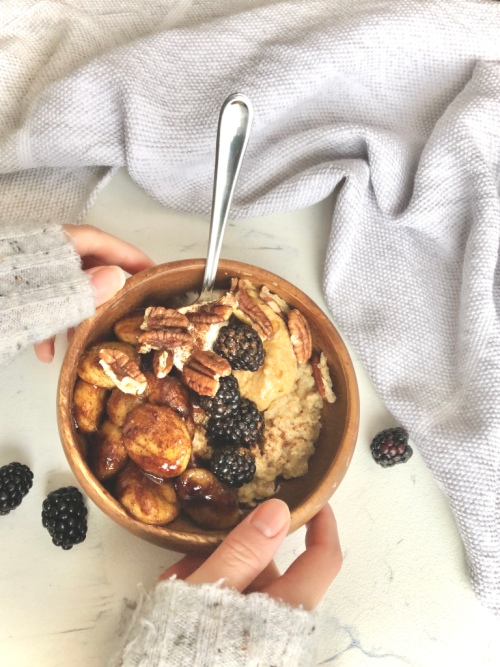
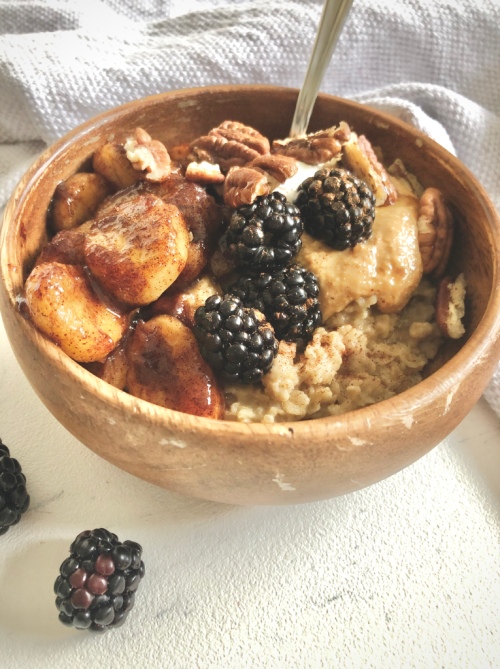
This oatmeal is a 100% plant-based, animal-friendly, environment-saving bowl of happiness. It has Sunday morning, sit by the window with a blanket and coffee, petting your dog, written all over it.
Unlike the rest of my family growing up, I never was an oatmeal lover. I found it to be bland and texturally challenging to my palate. My brother loved those packaged brands that you pour boiled water over and I just never understood it and I still don’t. My mom loved Cream of Wheat, and when served to me, I swear I’d have to cover the bowl with a thick layer of brown sugar if I was getting it down. I was an oatmeal outcast in my family.
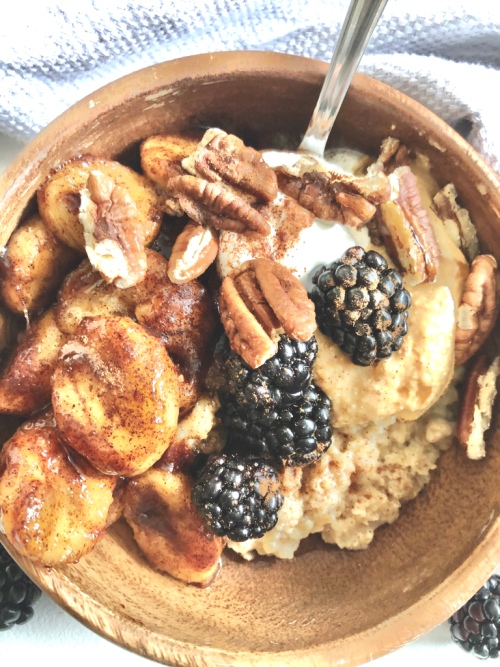
It is time that I fit in. It’s time that oatmeal was revolutionized. I needed to make it enjoyable, so I covered it in cinnamon and maple syrup and dolloped nut butter on top with some fresh fruit and warm bananas and I think I’m part of the fam now. Fingers crossed.
This quest to assimilate with oatmeal lovers began with my understanding that I just didn’t enjoy oats cooked in water, SO, the first thing that changed was the cooking of the oats themselves. Cashew milk is my new fav, and salt is definitely needed to begin the transformation from yuck to yum. I also added some cinnamon right to the pot as well as maca powder for a healthy boost. The oatmeal comes to a boil with double the milk and then simmers for a few minutes until thick and creamy.
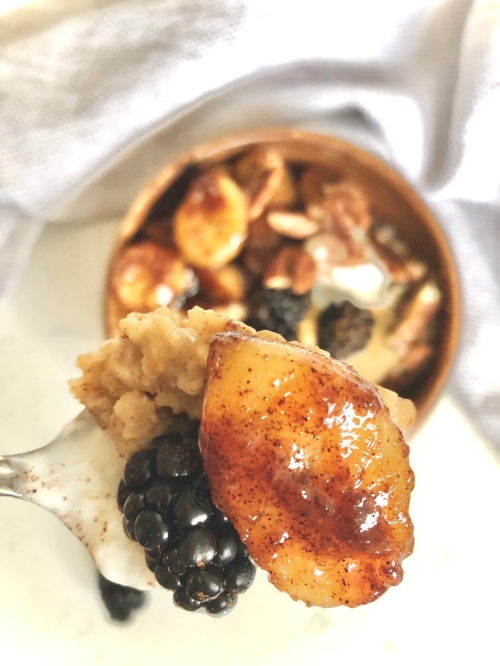
Separately, in a pan, I added coconut oil with maple syrup and some more cinnamon, brought this to a simmer and added my sliced bananas. These cook in the sauce and become sticky, gooey, delicious little bites to slather over to the oatmeal.

Finally, the topping queen works her magic with a creamy nut butter, fresh fruit to lighten things up, toasted pecans and a dollop of coconut yogurt to provide a very welcomed temperature contrast.
Now, that is an oatmeal that I can get behind!
I hope if you were like me and are upset about regular oatmeal, that this recipe inspires you to try again. Oatmeal lovers unite!
Gooey Caramelized Banana Oatmeal
Serving size: 1
Prep time: 2 minutes
Cook time: 6-7 minutes
Ingredients:
- 1/3 cup quick oats
- 2/3 cup non-dairy milk (I prefer cashew)
- 1/4 tsp salt
- 1 tsp cinnamon, separated
- 1/2 tsp maca powder (optional)
- 1/2 tbsp coconut oil
- 3 tbsp maple syrup
- 1 banana, sliced
- Optional toppings: Nut butter, coconut yogurt, toasted pecans*, fresh fruit
Instructions:
- To a small pot, add oats, milk, salt, 1/2 tsp cinnamon and maca powder. Bring to a boil and turn heat on low to simmer for 3-5 minutes, or until creamy.
- While the oats are cooking, add coconut oil, maple syrup and remaining 1/2 tsp cinnamon to a medium saucepan. Bring to a simmer and add the banana. Mix to coat bananas and continue to cook for 3-4 minutes, until bananas are soft and caramelized.
- Spoon the oatmeal into a bowl and top with bananas, nut butter, yogurt, toasted pecans, fresh fruit, a dash of cinnamon and a bit more maple syrup.
NOTES:
*Toast pecans in a 350 degree oven for 5-7 minutes, watching carefully to avoid burning.
The post Gooey Caramelized Banana Oatmeal appeared first on Never. Not. Eating..
]]>