The post Cinnamon Vanilla Cashew Butter Recipe appeared first on Never. Not. Eating..
]]>WHAT IS CINNAMON VANILLA CASHEW BUTTER?
Well, I’m so glad you asked! It’s your regular nut butter with a gorgeous, put-me-in-the-holiday-mood kick! Who doesn’t love warm notes of cinnamon and dreamy vanilla? This nut butter is dressed up and ready for a night on the town. It’s all-natural and all-delicious!

WHY I LIKE THIS CINNAMON VANILLA CASHEW BUTTER
I am someone who is obsessed with nut butters, but ever since groceries have skyrocketed in price, peanut and other nut butters are basically unaffordable. I mean, seven dollars for a jar of peanut butter…are you nuts?! So now, I head to Costco, buy a large bag of cashews for cheap and makes TONS of nut butter with it. It’s much more cost effective, not to mention I can see everything going into it!

THE INGREDIENTS
Another great thing about this recipe is the minimal ingredients. Just three to be exact (not including salt). They are:
- raw cashews
- cinnamon
- vanilla
- pink Himalayan sea salt
HOW TO MAKE CINNAMON VANILLA CASHEW BUTTER
The first, and arguably, the most important step of this recipe is toasting the cashews. With an oven set to 350 degrees Fahrenheit, roast cashews for 5-8 minutes, checking often. Nuts burn easily and quickly, so it’s important that you keep an eye on them. Once they start turning light brown, remove them from the oven.
Now, you just add all of the ingredients to a food processor and blend until smooth, or until it reaches your desired consistency. Make sure you have a high processed blender, like the Vitamix, or the Ninja, and be patient with it! It takes about 15-20 minutes to become “butter,” so just trust the process.

TIPS
- Use 100% real vanilla – it’s much better than the artificial stuff
- Have a spatula while the nut butter is blending and scrape down the sides often
- Give the engine of your blender a break now and again to preserve it’s life
OTHER HEALTHY SPREADS YOU NEED TO TRY
Vegan Cilantro Lime Dressing (I put this stuff on everything)
Pink Hummus (perfect for date night or Valentine’s Day)
3-Ingredient Strawberry Chia Jam (would go perfectly with this cashew butter)
TOOLS I USED TO MAKE CINNAMON VANILLA CASHEW BUTTER
Click below to access the tools I used for this recipe:


Cinnamon Vanilla Cashew Butter
Servings: Makes approximately 1 cup
Prep time: 20 minutes
Cook time: 5 minutes
Ingredients:
- 2.5 cups raw cashews
- 1 tsp cinnamon powder
- 1/2 tbsp pure vanilla extract
- 1/4 – 1/2 tsp pink Himalayan sea salt (or just regular sea salt)
Instructions:
- Preheat your oven to 350 degrees Fahrenheit and place cashews on a baking sheet. Bake for 5-8 minutes, or until they begin turning a light golden brown colour. Watch carefully – they burn quickly!
- Once the cashews are toasted, add them to a food processor with the cinnamon, vanilla and 1/4 teaspoon of salt. Pulse a few times and then blend. Stop the motor every so often and scrap the sides down. It will look very grainy at first, but after about 15 minutes of blending and scraping, it will start to smooth out. The longer you blend, the smoother it becomes.
- Once the cashews have reached the texture you like, taste it and add more salt if desired. Spoon the butter into an airtight container and store in the fridge for up to 5 weeks.

The post Cinnamon Vanilla Cashew Butter Recipe appeared first on Never. Not. Eating..
]]>The post Flourless Oatmeal Blueberry Cookies appeared first on Never. Not. Eating..
]]>
WHAT ARE FLOURLESS OATMEAL BLUEBERRY COOKIES?
These healthy cookies are a guilt-free, post-dinner or pre-workout snack! They are made in one bowl, with only natural ingredients and no refined sugar. I make them every week because I refuse to allow dinner to be my final meal of the night.

WHY I LIKE THESE COOKIES
I don’t just like these cookies – I am obsessed with them! The blueberries add the juiciest “pop” and a perfect sweetness that is unmatched, in my opinion. I also feel good about eating them (every day), as they only contain natural ingredients, all of which are pantry staples.

THE INGREDIENTS
You only need a few pantry ingredients to make this recipe:
- banana
- peanut butter
- egg
- vanilla
- maple syrup
- cinnamon
- salt
- oats
- blueberries
MAKING FLOURLESS OATMEAL BLUEBERRY COOKIES
You will honestly be amazed with how easy these are to make. Grab a big mixing bowl and add all of the wet ingredients – a mashed banana, peanut butter, egg, vanilla and syrup. Whisk together – that’s right, you don’t even need an electric mixer!
Add in the dry ingredients – the salt, cinnamon and oats. Switch over to a spatula to make sure everything has been mixed fully. Finally, fold in the blueberries and save a few to put on top of the cookies before baking. Scoop the dough onto a parchment lined cookie sheet, using a large cookie scoop and flatten them with the palm of your hand (they will not rise in the oven, so no need to space them too far apart). Bake for 12-14 minutes and enjoy!

TIPS
- Choose an all-natural nut butter to maintain the healthiness of this recipe (look at the ingredient list on the jar – it should only have one ingredient)!
- You can use fresh or frozen blueberries for this recipes, either one works beautifully!
- The cookie dough will be on the wetter side – don’t worry, they will bake up nicely and easily release from the baking sheet when they are fully cooked.
OTHER HEALTHY TREATS YOU NEED TO TRY
Vegan Rice Crispy Chocolate Treats (a fun, bite-sized snack)
No-Measure Oatmeal Almond Butter Cookies (skip the measuring with these perfect failproof cookies)
Healthy Pumpkin Oatmeal Chocolate Chip Cookies (the perfect Fall version of these Flourless Oatmeal Blueberry Cookies)
TOOLS I USED TO MAKE THESE FLOURLESS OATMEAL BLUEBERRY COOKIES
Click on the images below to see what I used for this recipe.


FLOURLESS OATMEAL BLUEBERRY COOKIES
Servings: Makes 8 large cookies
Prep time: 10 minutes
Cook time: 13 minutes
Ingredients
- 1 very ripe banana, mashed
- 1/4 cup peanut butter (or any nut butter)
- 1 tbsp pure vanilla extract
- 2 tbsp pure maple syrup
- 1 large egg
- 1/2 tsp cinnamon
- 1/2 tsp salt
- 2 1/4 – 2 1/2 cups rolled oats
- 1 cup fresh or frozen blueberries
Instructions
- Preheat your oven to 350 degrees Fahrenheit.
- In a large bowl, whisk together the mashed banana, peanut butter, vanilla and maple syrup. Next, add in the egg and whisk until fully combined.
- Add the cinnamon, salt and 2 1/4 cups of oats to the bowl. Mix with a spatula. If the dough is very wet, add in the extra 1/4 cup of oats. The mixture should be slightly on the wetter side.
- Fold in the blueberries and then use a 1.5 tablespoon cookie scoop to form 12 cookies (alternatively, roll into balls using wet hands). Place on a parchment lined baking sheet and use your palm to flatten each cookie. As these will not spread, you don’t need to leave too much space between them.
- Bake for 13 minutes, remove from oven and let cool for a minute on the baking sheet before transferring to a wire rack to cool completely.
- Once they have fully cooled, store in an airtight container for up to four days.

The post Flourless Oatmeal Blueberry Cookies appeared first on Never. Not. Eating..
]]>The post Healthy Pumpkin Oatmeal Chocolate Chip Cookies appeared first on Never. Not. Eating..
]]>
WHAT ARE PUMPKIN OATMEAL CHOCOLATE CHIP COOKIES?
These cookies are a one-bowl miracle – they are simple to make, healthy and perfect for autumn. Refined-sugar free, these little treats can be eaten without guilt, for breakfast or as a snack in-between meals.

WHY I LIKE THESE PUMPKIN OATMEAL CHOCOLATE CHIP COOKIES
Other than for obvious reasons, I love these cookies because they are a fun and healthy way to incorporate pumpkin into a recipe. It has proven to be challenging to find recipes made with pumpkin puree that aren’t packed with processed sugars and unhealthy fats. I also love making my own pumpkin puree (recipe found here) to ensure I know exactly what is going into my baking!

THE INGREDIENTS
A few simple pantry ingredients are all you will need to make these cookies:
- Banana
- Pumpkin puree (NOT pie filling)
- Cashew butter (or any nut butter)
- Vanilla
- Maple syrup
- An egg
- Spices (pumpkin pie and cinnamon)
- Oats
- Dark chocolate chips
MAKING HEALTHY PUMPKIN OATMEAL CHOCOLATE CHIP COOKIES
The first thing you will want to do is whisk together all of your wet ingredients – mash up the banana and add in the puree, nut butter, vanilla, maple syrup and egg.
Add your spices, some salt, the oats and chocolate chips right into the wet ingredients and mix with a spatula. Once combined, use a large cookie scoop to portion your cookies, placing them on a parchment lined baking sheet. These will not spread out, so you don’t need to worry about spacing them out too much. Flatten them with the palm of your hand and bake for 11-14 minutes.

TIPS
- Choose an all-natural nut butter to maintain the healthiness of this recipe (look at the ingredient list on the jar – it should only have one ingredient)!
- Don’t use pumpkin pie filling. Make sure you have pure pumpkin puree – click here for a recipe, or find it canned at any grocery store.
- The cookie dough will be on the wetter side – don’t worry, they will bake up nicely and easily release from the baking sheet when they are fully cooked.
OTHER HEALTHY TREATS YOU NEED TO TRY
No-Measure Oatmeal Almond Butter Cookies (skip the measuring with these failproof cookies)
Vegan Rice Crispy Chocolate Treats (a fun, bite-size snack)
Vegan Ice Cream Bars (like a Magnum, but vegan)

TOOLS I USED TO MAKE THESE PUMPKIN OATMEAL CHOCOLATE CHIP COOKIES
Click on the images below to see what I used for this recipe.
Healthy Pumpkin Oatmeal Chocolate Chip Cookies
Servings: Makes a dozen cookies
Prep time: 10 minutes
Cook time: 13 minutes
Ingredients
- 1 very ripe banana, mashed
- 1/4 cup pure pumpkin puree
- 1/4 cup cashew butter (or any nut butter)
- 1 tsp pure vanilla extract
- 2 tbsp pure maple syrup
- 1 large egg
- 1/2 tsp pumpkin pie spice
- 1/4 tsp cinnamon
- 1/2 tsp salt
- 2 1/4 – 2 1/2 cups rolled oats
- 3/4 cup sugar-free dark chocolate chips
Instructions
- Preheat your oven to 350 degrees Fahrenheit.
- In a large bowl, whisk together the mashed banana, pumpkin puree, cashew butter, vanilla and maple syrup. Add in the egg and whisk until fully combined.
- Add the pumpkin pie spice, cinnamon, salt and 2 1/4 cups of oats to the bowl. Mix with a spatula. If the dough is very wet, add in the extra 1/4 cup of oats. The mixture should be slightly on the wetter side.
- Fold in the chocolate chips and then use a 1.5 tablespoon cookie scoop to form 12 cookies (alternatively, roll into balls using wet hands). Place on a parchment lined baking sheet and use your palm to flatten each cookie. As these will not spread, you don’t need to leave too much space between them.
- Bake for 13 minutes, remove from oven and let cool for 2 minutes on the baking sheet before transferring to a wire rack to cool completely.
- Once they have fully cooled, store in an airtight container for up to four days.

The post Healthy Pumpkin Oatmeal Chocolate Chip Cookies appeared first on Never. Not. Eating..
]]>The post 3-Ingredient Strawberry Chia Jam appeared first on Never. Not. Eating..
]]>
WHAT IS STRAWBERRY CHIA JAM
This is the easiest jam you will ever make, I promise you that! This 3-Ingredient Strawberry Chia Jam comes together in about 15 minutes and is made with fresh ingredients and no refined sugar. It is the perfect topping for yogurt, toast, scones…even ice cream!
THE INGREDIENTS
As suggested in the title, this jam requires only three main ingredients. I have included other add-ins that enhance the flavour profile of this jam, but they are totally optional, according to your taste. You will need:
- strawberries
- honey or maple syrup (optional)
- lemon juice
- chia seeds
- cinnamon (optional)

HOW TO MAKE 3-INGREDIENT STRAWBERRY CHIA JAM
You won’t believe how easy this recipe is to make. The first step is to add your strawberries and lemon juice to a pot, along with your sweetener of choice and cinnamon, if using. Let the strawberries cook down for about 10 minutes, stirring occasionally. You will notice that they release their juices and begin to break down.
After the strawberries have been cooking for 10 minutes, mash them up with a fork or a potato masher and stir in the chia seeds, cooking for another 2 minutes. Remove from heat and let cool for a few minutes before serving right away, or pouring into an airtight container to be stored in the fridge.

RECIPES THAT GO WELL WITH THIS JAM
Easy Chia Pudding Parfait (sub the fresh fruit in this chia pudding for a few dollops of jam)
Blueberry Basil Moscow Mule (swap the blueberries for this jam in this delicious cocktail)
Gluten Free Crepes with an Apple Cinnamon Compote (fill these crepes with jam instead of the apple compote)
TOOLS I USED TO MAKE THIS RECIPE
Click on the images below to see what I use for this recipe.


This post contains affiliate links and I may earn a small commission when purchases are made after clicking the links, at no cost to you – thank you!
3-Ingredient Strawberry Chia Jam
Serving size: Makes about 12 ounces of jam
Prep time: 5 minutes
Cook time: 12 minutes
INGREDIENTS
- 1 lb (454g) fresh strawberries, quartered (or cut into smaller chunks if they are larger)
- juice of half a lemon (2 tbsp)
- 2 tbsp honey or maple syrup (optional)
- 1 tsp cinnamon (optional)
- pinch of salt
- 1.5 tbsp chia seeds
INSTRUCTIONS
- Place a medium-sized pot over medium heat and add the strawberry pieces, lemon juice, honey, cinnamon and salt. Let the mixture cook for 10 minutes, until the strawberries have broken down and have released their juices. Use a fork or potato masher to crush the strawberries until they are fully broken down.
- Add the chia seeds to the pot and stir to incorporate. Cook for another two minutes, remove from heat and let cool for 5 minutes before serving. Place in an airtight container and store in the fridge for up to one week.
The post 3-Ingredient Strawberry Chia Jam appeared first on Never. Not. Eating..
]]>The post The 8 Best Coffee Spots in Hamilton, Ontario (2022) appeared first on Never. Not. Eating..
]]>I, like many others, drink coffee every day, and I want to share with you some of my favourite places to grab a cup in my city. If you live in Hamilton, or are visiting, be sure to check out some of these spots!

THE 8 BEST COFFEE SPOTS IN HAMILTON, ONTARIO (2022)
8. ST. JAMES ESPRESSO BAR AND EATERY
Address: 170 James St. N
Website: St. James
In the heart of Hamilton, right on James North, this tiny little space is the perfect stop on your way to run errands through the city. Grab a cup of coffee, or even better, sit down for one of their delicious breakfast options. Their avocado toast is the best in the city!

7. MULBERRY COFFEEHOUSE
Address: 193 James St. N
Website: Mulberry
Just across the street from St. James is this adorable little coffeehouse. Go in the summer to enjoy their cozy patio (that’s strung with Edison lights!), or head inside to meet with friends and sit amongst the art-filled exposed brick walls. Their coffee is good, but their snacks are even better. The “Hello Sailor” bar is to-die-for. They also have cookies, cupcakes, muffins, loaves… even adult beverages!

6. TRUESHOT COFFEE
Address: 158 James St. S
Website: Trueshot
If you are heading to the James South area, check out Trueshot Coffee. A new-ish coffeehouse in Hamilton that boasts great, friendly service and a really clean, trendy space. If you are looking for a less-busy vibe, I highly recommend this place.

5. STEELTOWN GARAGE CO.
Address: 8 Barton St. E
Website: Steeltown
I’m definitely not cool enough for this place. It is a whole vibe. They aren’t just a coffee shop, but also a merchandise store that sells apparel, sweet coffee paraphernalia and biking accessories. The service is great and it’s really fun to shop around while your coffee is being made. Check them out!

4. THE CANNON
Address: 180 Ottawa St. N
Website: Cannon
If you’re looking to stay out of the downtown core, but still want good coffee, check out The Cannon. Located in the middle of the up-and-coming Ottawa St., The Cannon is the best coffee outside of the inner-city. They also serve the absolute tastiest savoury and sweet waffle breakfasts. You can stop in for a bite and then explore the many different antique shops on Ottawa Street!

3. SYNONYM SHOP
Address: 328 James St. N
Website: Synonym
Another James North MUST. I absolutely love this place – their coffee is SO good. They also have a full-day menu with everything from scrambled eggs to charcuterie to ceviche. This is a great spot for catching up with friends or bringing your laptop to get some work done while you work your way through their menu.

2. DURAND COFFEE
Address: 142 Charlton Ave. W
Website: Durand
This neighbourhood cafe almost took the top spot on my list simply due to the fact that their coffee is the focus, and it shows. They are consistent – nailing my standard order every time (flat white with oat milk). The Durand neighbourhood is a really quaint place, and is conveniently close to the popular Locke St. and Hess Village. It’s a great place to get some work done, or grab a to-go order and walk around the area. They also recently opened a bottle shop with a selection of unique wines to choose from!

1. RED CHURCH CAFE + GALLERY
Address: 68 King St. E
Website: Red Church
I’m OBSESSED. This place is everything I love in life – coffee, art, sourdough, prosecco. Right next to the iconic Gore Park in Hamilton, Red Church is just a stunning space. Walk inside to grab some of the city’s best coffee, to shop for some specialty grocery items, to grab a freshly prepared meal, or to check out some really neat art. It’s a no-brainer why this cafe is #1 on my list!

Drop a comment below with your favourite of these 8 best coffee spots in Hamilton!
BREAKFAST RECIPES TO GO WITH THE 8 BEST COFFEE SPOTS IN HAMILTON
The Fluffiest Gluten-Free Pumpkin Pancakes (guilt-free yet satisfying)
How to Create the Perfect Smoothie Bowl (you can’t go wrong with a nutrient-dense breakfast)
The Best Chocolate Chunk Banana Bread (a classic)

THE 8 BEST COFFEE SPOTS IN HAMILTON, ONTARIO (2022)
The post The 8 Best Coffee Spots in Hamilton, Ontario (2022) appeared first on Never. Not. Eating..
]]>The post No-Measure Oatmeal Almond Butter Cookies appeared first on Never. Not. Eating..
]]>
What are No-Measure Oatmeal Almond Butter Cookies?
I am always finding ways to “healthify” traditional treats, and I was in the mood for some cookies this time around. I had a few ingredients that I needed to get rid of, so I decided to try my hand at some no-measure Oatmeal Almond Butter Cookies, and it turned out to be a success! So much so, I make them all the time with the ingredients that need to get used up in my home.
I just eyeball all of my ingredients into a bowl, mix them up and form them into cookies! They are refined sugar-free, dairy-free and gluten-free.

The Ingredients for No-Measure Oatmeal Almond Butter Cookies
This is where it gets fun! You can change the ingredients in any way that suits you and what you have in your kitchen! Generally, I like to use the following staple ingredients in my cookies:
Overripe bananas
I like using bananas as a sugar substitute in my baking. They also bring more moisture into the cookies and help to bind the ingredients together. It is important to use overripe bananas for a sweeter result. I typically only use one banana, unless I am hoping to yield a larger batch of cookies…in that case, I will add another!
Almond butter (or any preferred nut butter)
Nut butters have high fat, fibre and protein and, therefore, can serve a number of purposes when added to baked goods. Firstly, nut butters are a good replacement for oils or butters, due to their fat content. The fibre in nut butters help to balance out the sugars in a recipe. Protein gives these cookies a bit more structure and allows them to hold up well! I like to add a healthy pour of almond butter…say a 1/2 cup or so!
Egg
As in any baking recipe, the job of the egg is to bind everything together and create structure. Think of it as the “glue” that holds everything together. If I’m hoping for eight cookies, I use one egg.

Gluten-free rolled oats
The oats are the main dry ingredient in this recipe and they replace the flour in a normal cookie recipe. Without the oats, your cookies would lack form and be very “goopy.” They are also much healthier than all-purpose flour! This is the ingredient that I truly have no measurements for – just pour in a bit at a time until the batter is not too wet, but not too dry. Eyeball it!
Vanilla
You should not skip this flavour bomb! Always use pure vanilla extract in any baking you do. If you would like to see how you can make your own at home, check out my Instagram reel (@nevernoteatingca). It takes two minutes to make!
Cinnamon
I like adding cinnamon to these cookies to add a little bit of warmth. Plus, I just love cinnamon!
Maple syrup
Along with the bananas, the maple syrup offers sweetness to these cookies. Depending on how much of a sweet tooth you have, pour in a small amount, or add a bit more to amplify that maple flavour!
Sugar-free chocolate
Because I wanted to make these cookies healthy, I decided to use sugar-free chocolate, but you can use whatever chocolate you want! I like a lot of little chocolate pools in my cookies, so I add a LOT of chocolate!

How to bring the ingredients together
Begin by using a hand mixer or a whisk to mix all of the wet ingredients together, just as you would in any normal baking recipe. Mash the banana(s) and pour in some almond butter, add an egg, some vanilla and maple syrup, according to how sweet you would like it.
Next, sprinkle in some cinnamon and pour in a small amount of oats, mixing until everything is combined. Continue to add more oats until the batter comes together and is not too wet, but not too dry. Fold in some chocolate and scoop onto a parchment-lined baking sheet. Flatten the cookies with your palm and bake in a 350 degree oven for around 10 minutes, or until cookies are set and release easily from the tray. You will notice the bottoms beginning to brown when they are ready.

Other healthy recipes you NEED to check out:
Vegan Protein Energy Balls (the perfect post-work, pre-workout snack)
Dark Chocolate Protein Nuggets [high protein, high (good) fat…these get you through the day]
Vegan Power Muffins (a morning pick-me-up)
This post contains affiliate links and I may earn a small commission when purchases are made after clicking the links, at no cost to you. Thank you!
No-Measure Oatmeal Almond Butter Cookies
*This recipe is NO-MEASURE. Please read above to get an idea of the purpose and amount of each ingredient.
Prep time: 10 minutes
Bake time: 10-13 minutes
Ingredients:
- banana(s), mashed
- nut butter
- egg(s)
- maple syrup
- vanilla
- salt
- cinnamon
- rolled oats (aim for gluten-free)
- sugar-free chocolate
Instructions:
- Preheat oven to 350 degrees Fahrenheit.
- Use a hand mixer or a whisk to combine the mashed banana(s), nut butter, egg(s), maple syrup and vanilla.
- Add in a big pinch of salt, a sprinkle of cinnamon and some rolled oats. Stir with a wooden spoon to combine. Continue to add more oats until the batter is not too wet, but not too dry. It should be slightly sticky. Fold in the chocolate.
- Using a large cookie scoop, scoop the batter onto a parchment-lined cookie sheet. Flatten each cookie using the palm of your hand and bake for 10-13 minutes or until the cookies have set up and release easily from the cookie sheet. Let cool on a wire rack and store in an airtight container.
*Check out my Instagram reel to see a video on how these cookies come together!

The post No-Measure Oatmeal Almond Butter Cookies appeared first on Never. Not. Eating..
]]>The post Easy Chia Pudding Parfait appeared first on Never. Not. Eating..
]]>
WHY CHOOSE CHIA SEEDS?
I love chia pudding as my morning meal because these seeds are full of energy-boosting nutrients to start your day. Firstly, FIBRE. Absolutely essential for a healthy lifestyle, fibre enhances gut health and makes you feel full, longer.
Chia seeds are also high in protein. Protein is needed in the body to help rebuild muscle, strengthen hair, skin and nails, and provide energy. Chia seeds are a great way to incorporate protein into your diet, especially as a vegetarian or vegan!
This superfood is also high in iron. As someone with low iron, I’m always searching for more iron-rich foods to add to my diet. Iron helps carry oxygen throughout the body and develop red blood cells.
If that isn’t convincing enough, chia seeds also contain calcium, good fats, antioxidants and have no sugar. Get yourself a bag of seeds and I’ll show you how to use them in this yummy parfait recipe!
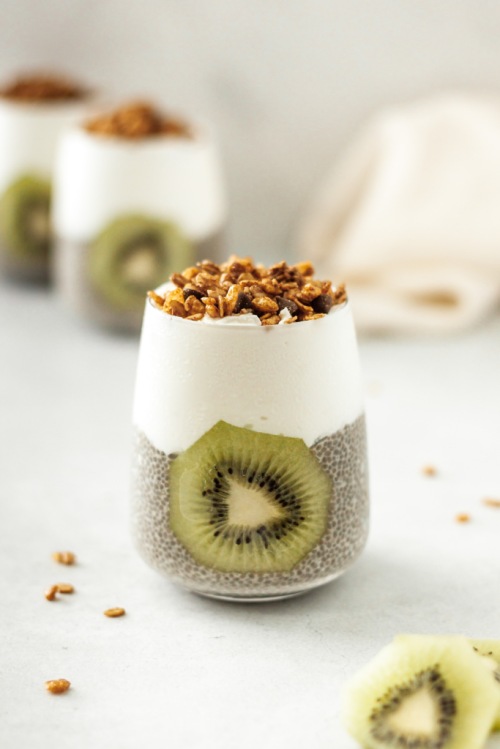
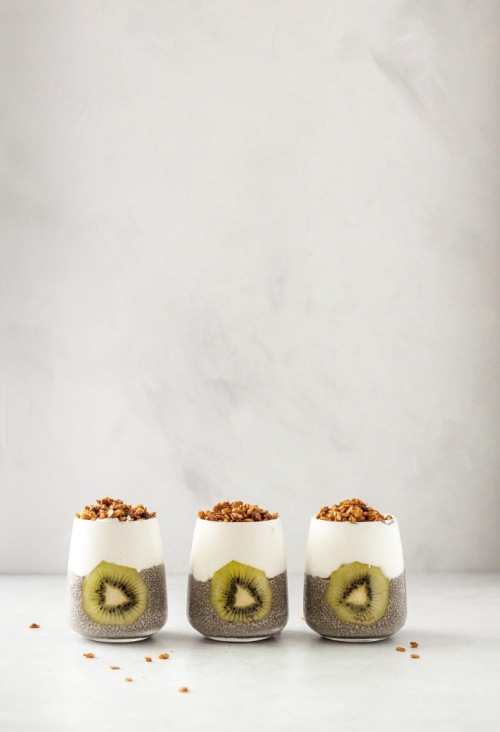
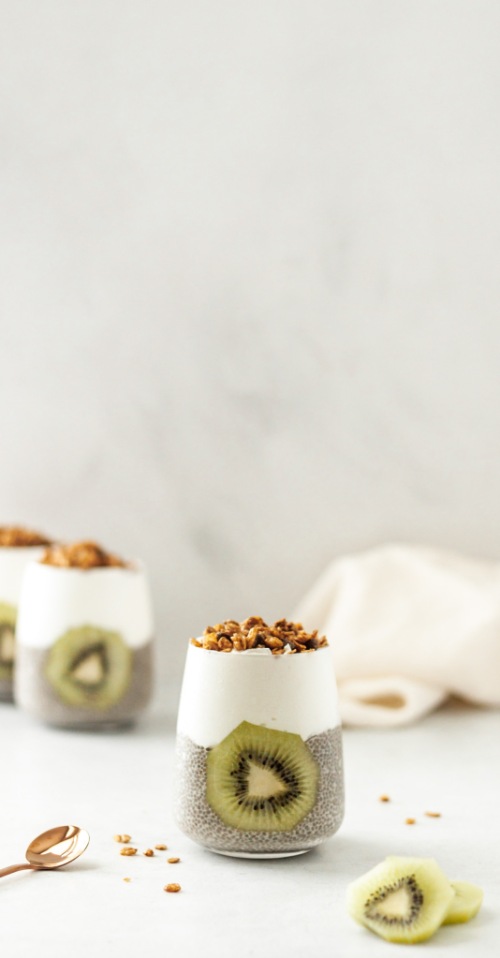
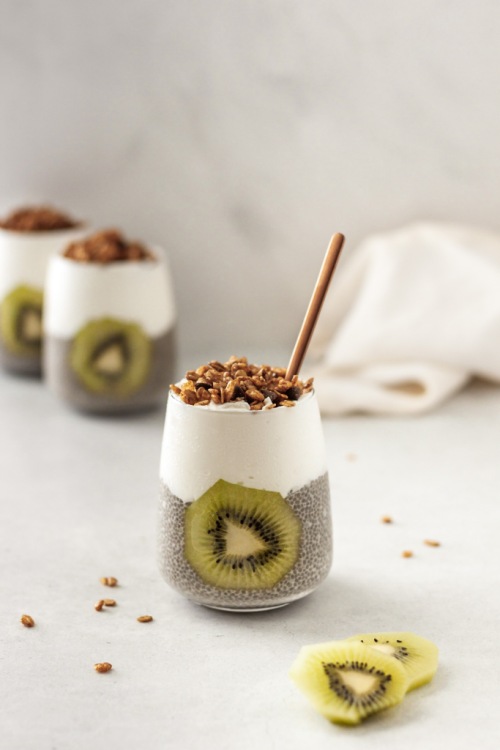
WHAT YOU NEED TO KNOW ABOUT MAKING THIS EASY CHIA PUDDING PARFAIT
Chia seeds are like sponges – any liquid added to them gets sucked up and the seeds expand and become almost gel-like. You can add any kind of milk you prefer, but this recipe is fully vegan and therefore calls for plant-based milk.
HOW TO MAKE EASY CHIA PUDDING PARFAIT
When mixing the seeds with your choice of liquid, I like to whisk them together in a bowl to avoid forming clumps. I set the bowl in the fridge for about 10 minutes and then whisk again. After another 10 minutes, the seeds have usually absorbed their capacity of liquid and are ready to be made into a parfait!
Depending on you, many of the extra ingredients in this recipe can be swapped out for others you prefer.
For example, if maple syrup isn’t your favourite choice of sweetener, feel free to switch it up by adding agave or honey (not vegan). Cinnamon can be taken out completely or swapped with a superfood powder, such as beetroot or spirulina. Maybe you would like to get funky with it and use an almond extract or a hazelnut syrup instead of the vanilla. Be crafty! The possibilities are endless.
STORING YOUR EASY CHIA PUDDING PARFAIT
If you are following this recipe to meal prep, it makes four servings. I love using these cute little mason jars to store them in, as they are airtight and keep them fresh in the fridge.
OTHER MEAL PREP IDEAS
Vegan Power Muffins (for a quick energy boost)
Middle Eastern Orzo Pilaf (makes a great side to any meal)
The Fluffiest Gluten-Free Pumpkin Pancakes (perfect for the kiddos – make ahead and pop in the toaster for a quick breakfast)
This post contains affiliate links and I may earn a small commission when purchases are made after clicking the links, at no cost to you. Thank you for supporting me!
Easy Chia Pudding Parfait
Servings: 4
Prep time: 5 minutes
Chill time: 20 minutes
Ingredients:
- 1/2 cup chia seeds
- 1.5 cups plant-based milk
- 2 tbsp pure maple syrup
- 1 tsp pure vanilla extract
- 1/4 tsp cinnamon
- pinch of salt
- 1 cup coconut yogurt
- fresh fruit, for topping
- granola, for topping
Instructions:
- In a medium bowl, whisk together the chia seeds, milk, maple syrup, vanilla, cinnamon and salt. Place in the fridge for 20 minutes, whisking a few times in between.
- Divide the mixture between 4 mason jars, or bowls, if serving immediately. Top with 1/4 cup of yogurt and some of the fruit. Sprinkle with granola before serving!
Store jars in the fridge for up to 4 days.
The post Easy Chia Pudding Parfait appeared first on Never. Not. Eating..
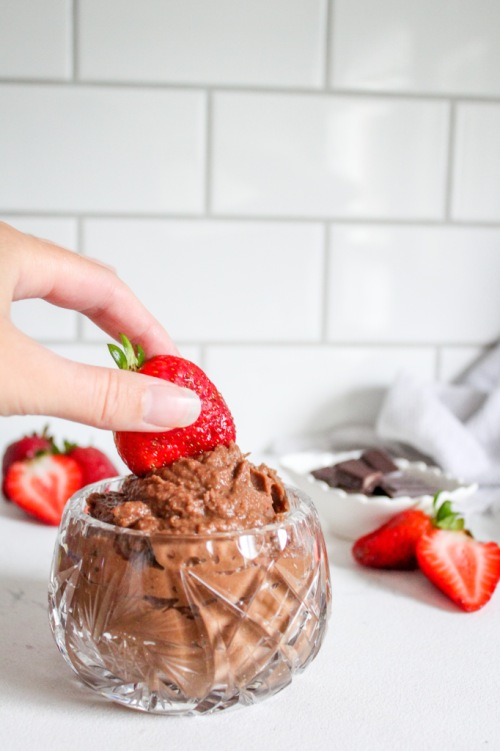
]]>The post Chocolate Hummus appeared first on Never. Not. Eating..
]]>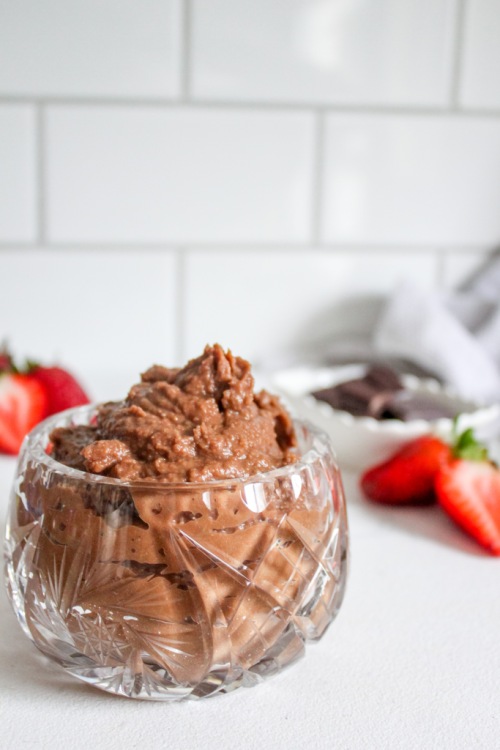
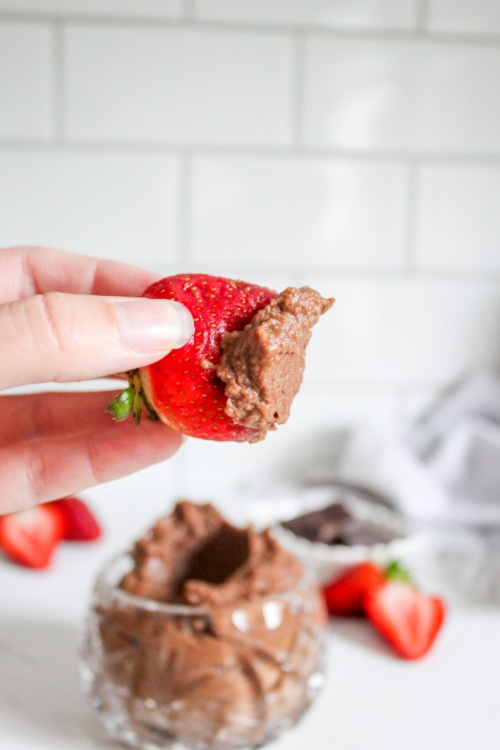
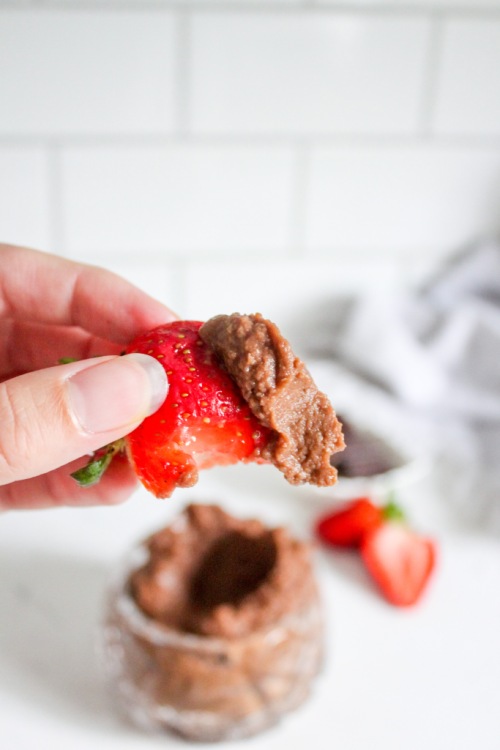
Y’all know I love a good healthy snack, and this is that. Full of protein, fibre, iron and CHOCOLATE. How do you eat chocolate hummus, you ask? Well, if not by the spoonful, then perhaps with fruits, on toast or alongside some salty pretzels. Follow your heart.
Here is what you will need for this recipe:
- Chickpeas (I always use dry chickpeas that I soak overnight and cook for an hour – they make dips much smoother than the canned stuff)
- Cocoa powder
- Maple syrup
- Vanilla
- Salt
This recipe is flexible, depending on your taste. If you love chocolate, you can choose to add more cocoa powder, or if you would like a subtler chocolate flavour, add less. Same with the sweetness level. If you enjoy really sweet desserts, add more syrup. If you are like me and prefer less sweet, add the amount you see in the recipe.
Let’s do the damn thing!
Chocolate Hummus
Serving size: Makes about 1 cup
Prep time: 5 minutes
Inactive time (for soaking): 8 hours
Cook time: 1 hour
Ingredients:
- 3/4 cup dry chickpeas (or 2 cups canned, rinsed very well)
- 3 – 4 tbsp cocoa powder
- 3 tbsp maple syrup (or more, to taste)
- 1/2 tsp pure vanilla extract (optional)
- 1/4 tsp salt
Instructions:
- If working with dry chickpeas (recommended for a smoother consistency), cover chickpeas with two inches of water and soak overnight. Drain, rinse and transfer to a medium-sized pot. Cover with two inches of water and bring to a boil. Reduce heat to a rolling simmer and cook chickpeas, lid off, for one hour or until tender. If working with canned chickpeas, skip this step.
- Add cooked chickpeas to a food processor, along with three tablespoons of cocoa powder, the syrup, salt and the vanilla, if using. Blend until smooth, scraping down the sides of your food processor every so often. Taste and add more cocoa or syrup, if desired.
- Transfer hummus to an airtight container if not serving immediately and store in the fridge for up to four days.
The post Chocolate Hummus appeared first on Never. Not. Eating..
]]>The post Homemade Pumpkin Spice Latte appeared first on Never. Not. Eating..
]]>
So, why would anyone pay $6.00 for a beverage from Starbucks when you can make it for way cheaper at home? You also know everything going into it when you make it yourself, and I’ll tell you what isn’t going into it – four pumps of pure sugar.

Here is what you will need to make this bevvy yourself:
- Espresso or strong coffee
- Plant-based milk (I love cashew milk)
- Pure pumpkin puree (homemade or canned)
- Maple syrup (optional)
- Pure vanilla extract
- Pumpkin pie spice (homemade or store-bought)
To make your drink more latte-ish, frothing the milk is essential. One of my favourite kitchen tools is this handheld milk frother that I purchased from amazon. It is super cheap and works so, so well. I use it every day. I highly recommend investing in a frother if you are looking to save money by creating your own coffee-based beverages.
Pumpkin pie spice can be found for purchase at most grocery stores, or online here. You can also make it yourself by combining cinnamon, ginger, cloves, nutmeg and some cardamom. If you don’t often use many of these spices, I would recommend just buying it as you will have an abundance of leftovers that will just be taking up room in your pantry.

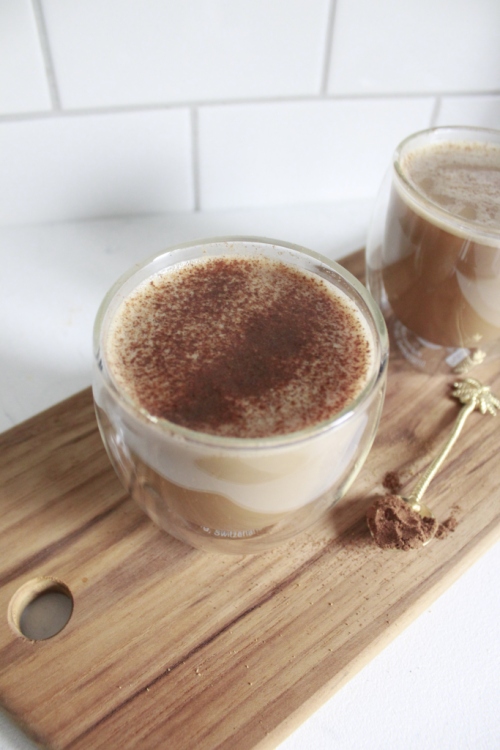
To put this yummy drink together, you first want to get your coffee ready. Brew 1-2 shots of espresso, depending on preference, in your espresso maker. Alternatively, you can use regular coffee instead. Next, combine your milk with all of the other ingredients, steam and then froth it up. Pour over espresso and top with an extra sprinkling of pumpkin pie spice and you got yourself a PSL.
Homemade Pumpkin Spice Latte
Servings: 1
Prep time: 5 minutes
Cook time: 5 minutes
Ingredients:
- 1 cup plant-based milk (I use cashew milk)
- 1 tbsp pumpkin puree
- 1/2 tbsp maple syrup (optional)
- 1/2 tsp pure vanilla extract
- 1/4 tsp pumpkin pie spice
- 1-2 shots of espresso (or 1/3 cup strong coffee)
Instructions:
- Add the milk, pumpkin, maple syrup, vanilla and spice to a small pot over medium heat and whisk. When the milk begins to steam, use a milk frother for 20 seconds or until foamy.
- While the milk is steaming, brew the espresso or coffee.
- Pour the espresso into a tall mug and top with the frothed milk. Add a sprinkling of pumpkin pie spice on top, if that’s your jam.
The post Homemade Pumpkin Spice Latte appeared first on Never. Not. Eating..
]]>The post Homemade Cashew Milk appeared first on Never. Not. Eating..
]]>
Did you know that the majority of the world is lactose intolerant (around 65% of the population)? Doesn’t that seem strange to anyone else?! With all of the research around dairy products and their long-term effects, it has really put me off of drinking milk for the last decade. Luckily, you can milk a nut. Just kidding, nuts don’t have nipples.
But seriously, plant-based milks are a thing, and they are easy to make. They can sub in for anything you do with cow’s milk, but you don’t get the runs after drinking them…Score!
There are so many types of non-dairy milks out there nowadays – soy, almond, coconut, oat. But, my favourite is cashew. It’s so creamy and delicious.

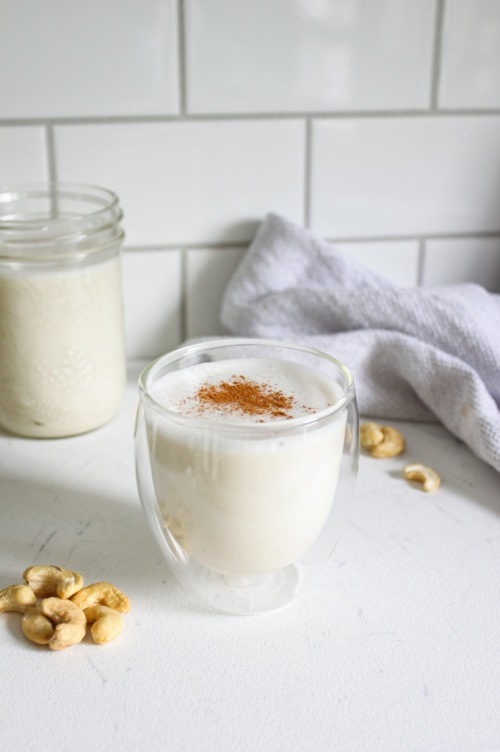
To make cashew milk, you need two things – cashews and water. Easy peasy. You can also add flavourings, like vanilla, or sweeteners, like maple syrup or honey. The best part about homemade nut milk (other than how easy it is), is that you know exactly what is going into it, and also what isn’t going into it – preservatives. Yah, baby.
To begin, you need to soak one cup of raw cashews in water overnight. In the morning, drain and rinse the cashews, add them to your high-powered blender (or soup maker, which is what I use) with your choice of additions and blend until smooth. That’s literally it. You don’t even need to strain cashew milk, like you would almond milk.
I hope this post has inspired you to make your own cashew milk at home. It is significantly less expensive than store-bought, healthier for you and takes only minutes. Tag me on Instagram if you try out this recipe – @nevernoteatingca
Homemade Cashew Milk
Prep time: 2 minutes (plus overnight soaking)
Cook time: 2 minutes
Ingredients:
- 1 cup raw cashews
- 3 cups water
- pinch of salt (optional)
- 1 teaspoon vanilla extract (optional)
- 1 tablespoon maple syrup (optional)
Instructions:
- Place your cashews in a bowl and cover with water. Let them soak overnight.
- Drain the cashews and rinse thoroughly. Transfer them to a high-powered blender, or soup maker. Add three cups of water as well as the salt, vanilla and syrup, if using. If using a blender, blend for about one minute, or until completely smooth. If using a soup maker, set to “juice” and press ON/OFF.
- Pour into a large mason jar or a container with an air-tight lid. Store in the fridge for up to 4 days.
NOTES:
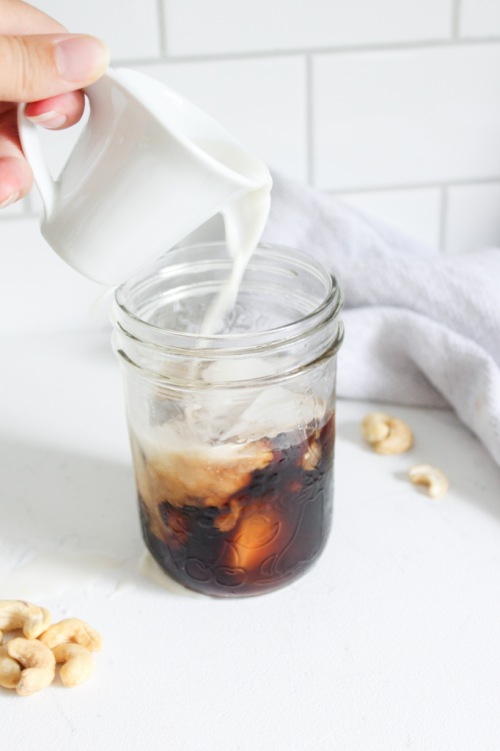
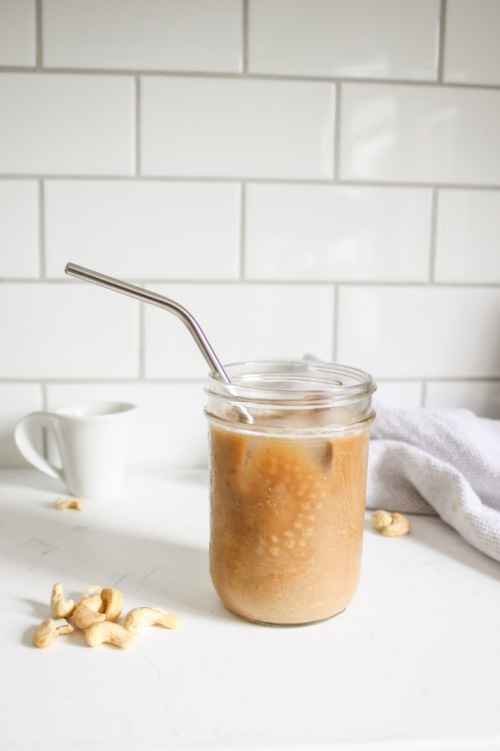
*I like to serve it with a dash of cinnamon or stir it into my morning cold brew over ice.
**Separation is normal…Shake well before serving!
The post Homemade Cashew Milk appeared first on Never. Not. Eating..
]]>