The post Easy Chia Pudding Parfait appeared first on Never. Not. Eating..
]]>
WHY CHOOSE CHIA SEEDS?
I love chia pudding as my morning meal because these seeds are full of energy-boosting nutrients to start your day. Firstly, FIBRE. Absolutely essential for a healthy lifestyle, fibre enhances gut health and makes you feel full, longer.
Chia seeds are also high in protein. Protein is needed in the body to help rebuild muscle, strengthen hair, skin and nails, and provide energy. Chia seeds are a great way to incorporate protein into your diet, especially as a vegetarian or vegan!
This superfood is also high in iron. As someone with low iron, I’m always searching for more iron-rich foods to add to my diet. Iron helps carry oxygen throughout the body and develop red blood cells.
If that isn’t convincing enough, chia seeds also contain calcium, good fats, antioxidants and have no sugar. Get yourself a bag of seeds and I’ll show you how to use them in this yummy parfait recipe!
WHAT YOU NEED TO KNOW ABOUT MAKING THIS EASY CHIA PUDDING PARFAIT
Chia seeds are like sponges – any liquid added to them gets sucked up and the seeds expand and become almost gel-like. You can add any kind of milk you prefer, but this recipe is fully vegan and therefore calls for plant-based milk.
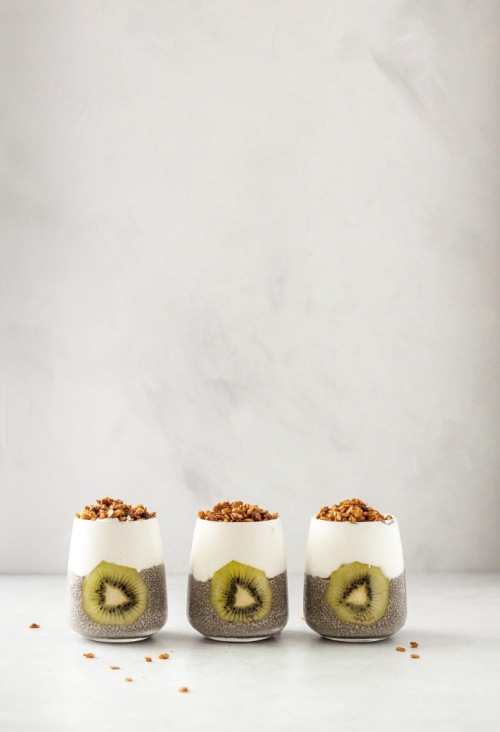
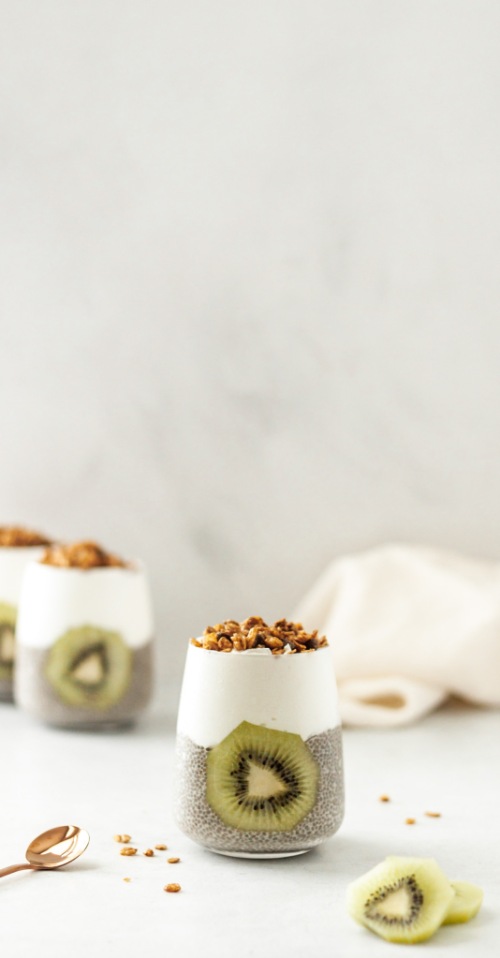
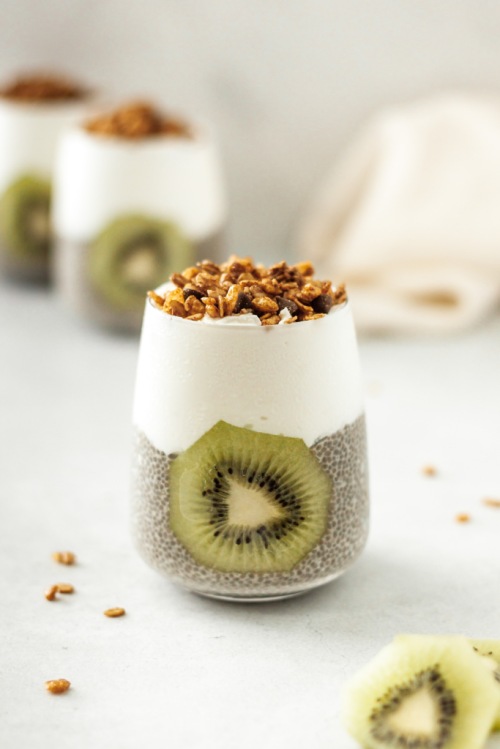
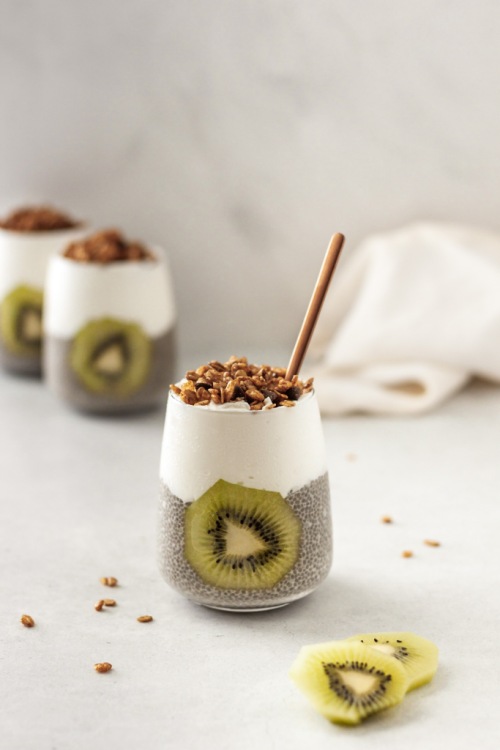
HOW TO MAKE EASY CHIA PUDDING PARFAIT
When mixing the seeds with your choice of liquid, I like to whisk them together in a bowl to avoid forming clumps. I set the bowl in the fridge for about 10 minutes and then whisk again. After another 10 minutes, the seeds have usually absorbed their capacity of liquid and are ready to be made into a parfait!
Depending on you, many of the extra ingredients in this recipe can be swapped out for others you prefer.
For example, if maple syrup isn’t your favourite choice of sweetener, feel free to switch it up by adding agave or honey (not vegan). Cinnamon can be taken out completely or swapped with a superfood powder, such as beetroot or spirulina. Maybe you would like to get funky with it and use an almond extract or a hazelnut syrup instead of the vanilla. Be crafty! The possibilities are endless.
STORING YOUR EASY CHIA PUDDING PARFAIT
If you are following this recipe to meal prep, it makes four servings. I love using these cute little mason jars to store them in, as they are airtight and keep them fresh in the fridge.
OTHER MEAL PREP IDEAS
Vegan Power Muffins (for a quick energy boost)
Middle Eastern Orzo Pilaf (makes a great side to any meal)
The Fluffiest Gluten-Free Pumpkin Pancakes (perfect for the kiddos – make ahead and pop in the toaster for a quick breakfast)
This post contains affiliate links and I may earn a small commission when purchases are made after clicking the links, at no cost to you. Thank you for supporting me!
Easy Chia Pudding Parfait
Servings: 4
Prep time: 5 minutes
Chill time: 20 minutes
Ingredients:
- 1/2 cup chia seeds
- 1.5 cups plant-based milk
- 2 tbsp pure maple syrup
- 1 tsp pure vanilla extract
- 1/4 tsp cinnamon
- pinch of salt
- 1 cup coconut yogurt
- fresh fruit, for topping
- granola, for topping
Instructions:
- In a medium bowl, whisk together the chia seeds, milk, maple syrup, vanilla, cinnamon and salt. Place in the fridge for 20 minutes, whisking a few times in between.
- Divide the mixture between 4 mason jars, or bowls, if serving immediately. Top with 1/4 cup of yogurt and some of the fruit. Sprinkle with granola before serving!
Store jars in the fridge for up to 4 days.
The post Easy Chia Pudding Parfait appeared first on Never. Not. Eating..
]]>The post Vegan Ice Cream Bars appeared first on Never. Not. Eating..
]]>
This has been one of the hottest summers on record, and I’m just a bit mad at myself that I developed these ice cream bars now, instead of at the beginning of summer. Then again, it’s not like I’m going to stop eating them when the weather cools down…I’m an ice-cream-all-year-long kinda gal!
HEALTHIER THAN STORE-BOUGHT
So here are a few reasons why you should make these bars, STAT:
- The recipe includes natural sugar from pure maple syrup only, and you can omit it entirely if you wish.
- They are vegan.
- They are made quickly in a blender.
- You like delicious treats.
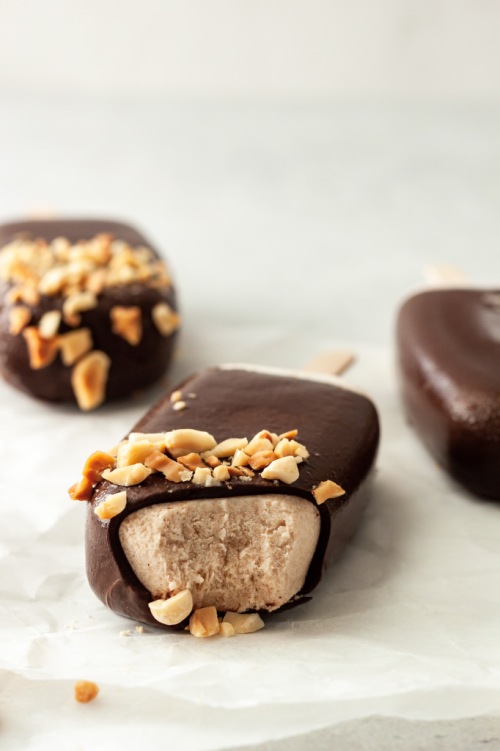
These remind me of the Magnum bars you can buy at the grocery store. The only difference is you know all of the ingredients going into them, and they are way healthier than anything you would get out of a box.
HOW TO MAKE VEGAN ICE CREAM BARS
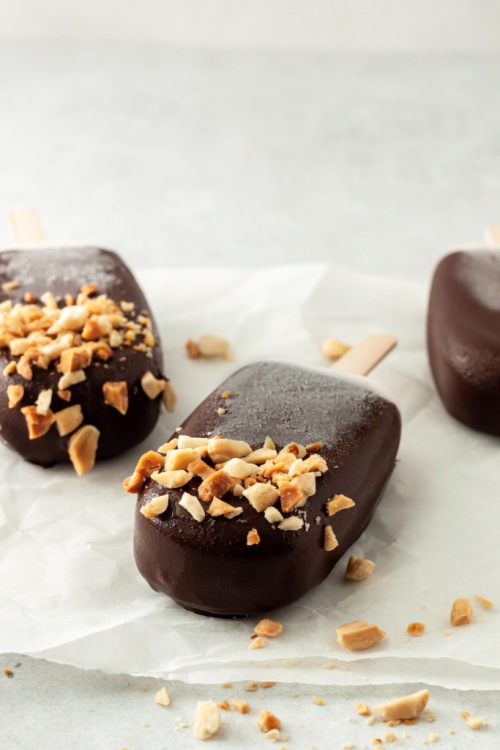
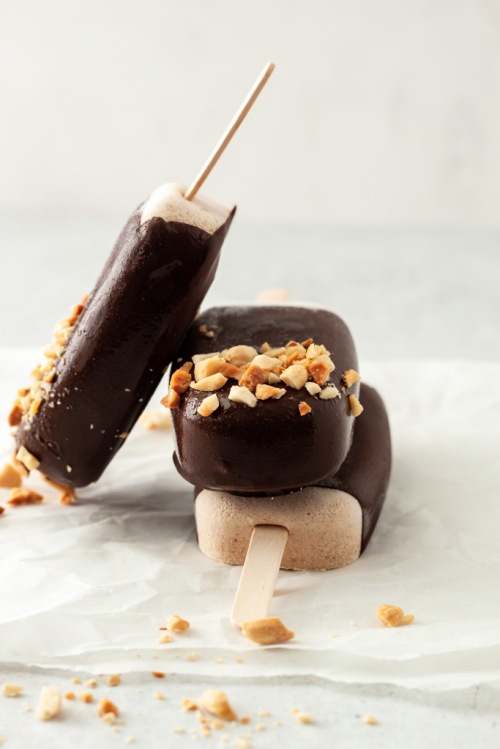
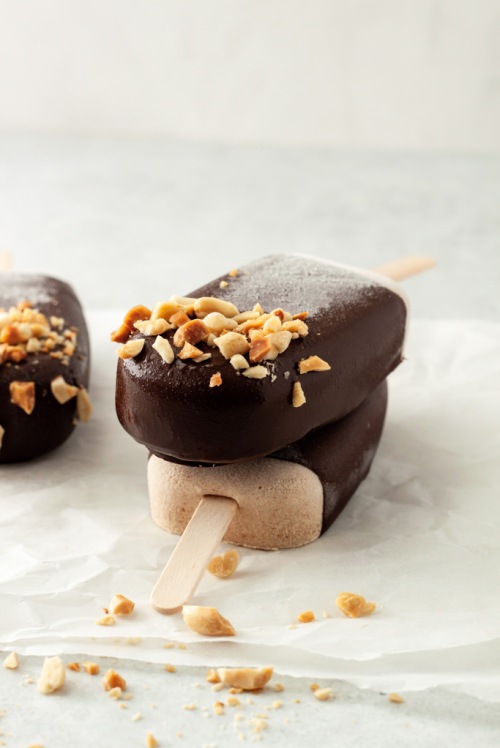
The recipe for these bars is simple – blend all ingredients together using a high-powered blender. Pour into the cutest popsicle molds. Freeze for a few hours until firm. Dip in chocolate and sprinkle on some crushed peanuts.
When you bite into one of these little babes, you first get the crack of the chocolate, followed by the creaminess of the filling which is made rich by coconut milk and nut butter. It’s beyond good. Ice cream goals!

OTHER VEGAN TREATS TO TRY
Vegan Protein Energy Balls (the perfect pre-workout snack)
Vegan Mocha Buttercream (my favourite cake topping)
Sweet Potato Creme Brulee (a great holiday dessert)
This post contains affiliate links and I may earn a small commission when purchases are made after clicking the links, at no cost to you. Thank you for supporting me!
Vegan Ice Cream Bars
Serving size: Makes 8 bars
Prep time: 10 minutes
Freeze time: 4 hours
Ingredients:
- 1 can full-fat coconut milk (refrigerated for at least 24 hours)
- 1/2 cup nut butter (I love using cashew or peanut butter for this)
- 1/2 cup coconut yogurt
- 2-3 tbsp pure maple syrup
- 1/2 tbsp pure vanilla extract
- 1/4 tsp cinnamon powder (optional)
- 85 g dark vegan chocolate (chopped)
- 1 tbsp coconut oil
- 1/4 cup peanuts, chopped
Instructions:
- Remove coconut milk from the fridge and carefully open the can. Scoop the solid white part out into a high-powered blender. Reserve the coconut water in the bottom of the can for tomorrow’s smoothie!
- Add the nut butter, yogurt, syrup, vanilla and cinnamon to the blender and blend until smooth. Pour into popsicle molds and place in the freezer until firm, about four hours.
- Over a double boiler*, melt the chocolate with the coconut oil, stirring often. Pour into a tall cup wide enough for the popsicles to fit in. Dip each popsicle into the chocolate and lay on a piece of parchment paper. Immediately sprinkle with the chopped peanuts.
- Store in the freezer for up to 10 days.
NOTES:
*For the double boiler – fill a small pot with an inch or two of water. Bring to a gentle simmer and place a larger bowl on top with a wooden spoon in between to let the steam escape. Place the chocolate and coconut oil in the bowl and stir frequently. Alternatively, you can melt the chocolate in the microwave in short, 20-30 second increments, stirring in between.
Tip – Take the ice cream bar out of the freezer and let sit a few minutes before consuming!
The post Vegan Ice Cream Bars appeared first on Never. Not. Eating..
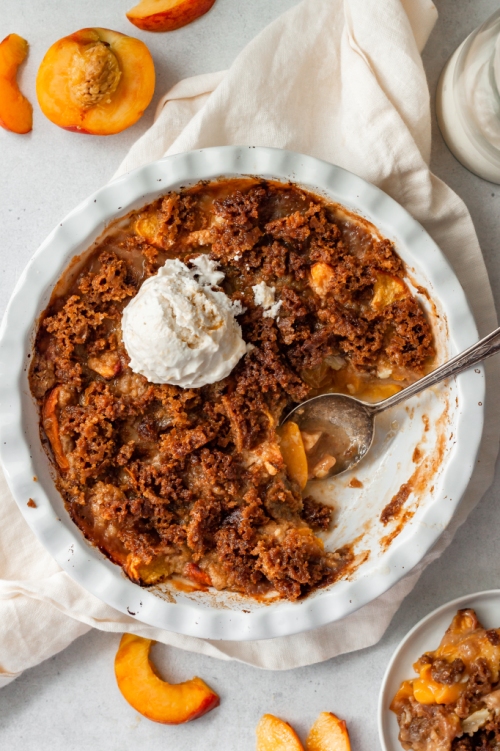
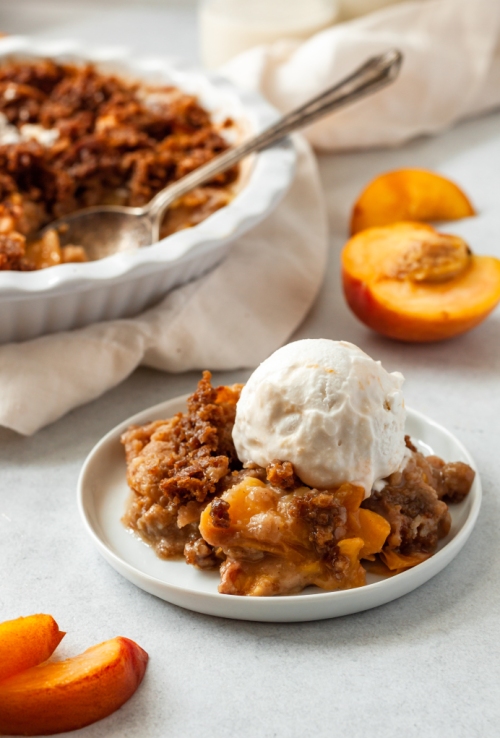
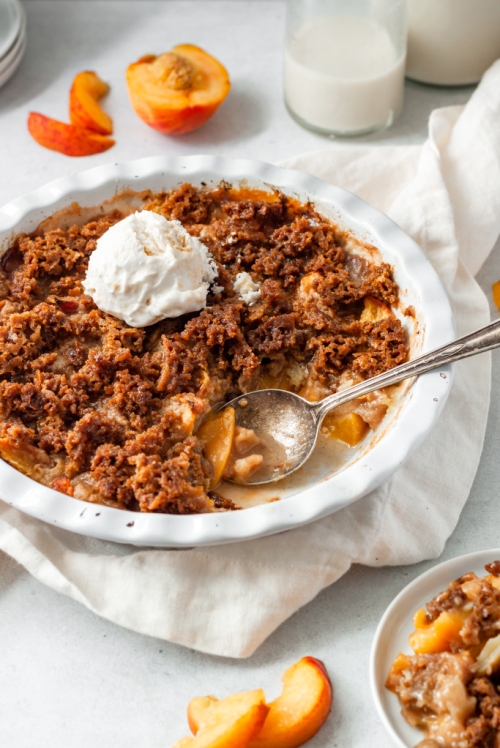
]]>The post 5-Ingredient Peach Crisp appeared first on Never. Not. Eating..
]]>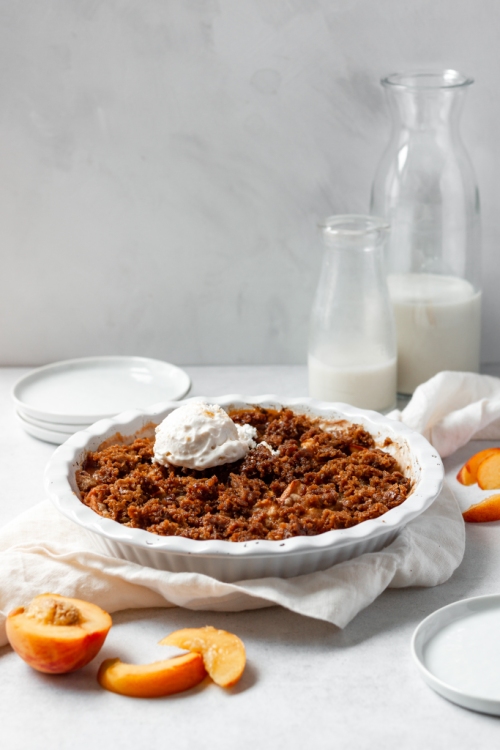
My mom used to make the best apple crisp growing up and it was my absolute favourite post-dinner treat. Since peaches are in season (in Ontario), I decided to make a peach crisp instead, and it did not disappoint. Take your girl up to the north, yeh, for those Canadian peaches! I hope you are a Justin Bieber fan, otherwise this post will make absolutely zero sense to you. And also, we cannot be friends if you aren’t (joking) (not really).
As the name suggests all you need are FIVE simple ingredients:
- Peaches
- Brown sugar
- Flour
- Lemon juice
- Butter
The simplicity of this recipe is insane, making it the easiest, most delicious dessert on the fly. It’s also perfect for a summer BBQ or outdoor gathering. Let’s make some peach crisp!
This post contains affiliate links and I may earn a small commission when purchases are made after clicking the links, at no cost to you. Thank you for supporting me!
5-Ingredient Peach Crisp
Serving size: 5-6 people
Prep time: 10 minutes
Cook time: 35 minutes
Ingredients:
- 3/4 cup brown sugar
- 1/2 cup all-purpose flour
- 1/4 tsp salt
- 1/2 tsp cinnamon powder (optional)
- 6 tbsp cold butter, cubed
- 4 large peaches (approximately 6 cups), washed and cut into 1/2-inch wide slices
- 1.5 tbsp lemon juice
Instructions:
- Preheat oven to 375 degrees Fahrenheit.
- In a medium bowl, combine brown sugar, flour, salt and cinnamon (if using). Use your hands or a pastry cutter to incorporate the cubed butter until it resembles large crumbs. Place the bowl in the freezer while you prepare the peaches.
- Place peaches into an 8-inch baking dish or cast iron pan. Pour the lemon juice over top and use your hands to toss the peaches around.
- Top the peaches with the crumble, making sure it is evenly spread across the top.
- Bake for 30-35 minutes, or until the top begins to turn golden brown and crispy.
Serve warm and with a scoop of vanilla ice cream. Store in an airtight container for up to 2 days.
The post 5-Ingredient Peach Crisp appeared first on Never. Not. Eating..
]]>The post Top 10 Best Amazon Kitchen Must-Haves (2022) appeared first on Never. Not. Eating..
]]>I have included links to both the Canadian and United States Amazon websites for each item. As I live in Canada and purchase on the Canadian Amazon website, I have done my best to find the same, or similar product link on the American site. Click on the name of each item to be directed to the link on Amazon. The links to the Canadian Amazon site are listed under each item’s description!
MY TOP TEN BEST AMAZON KITCHEN GADGETS:
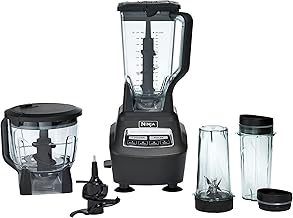
Out of all of my Amazon kitchen must-haves I have purchased to-date, this Ninja Kitchen System is the best. I use it every day. It comes equipped with a high-powered blender, food processor and individual serving size cups for morning smoothies. I am positive that this blender is the next greatest thing, after a Vitamix, and significantly less expensive. It pulverizes ice and makes the best smoothie bowls!
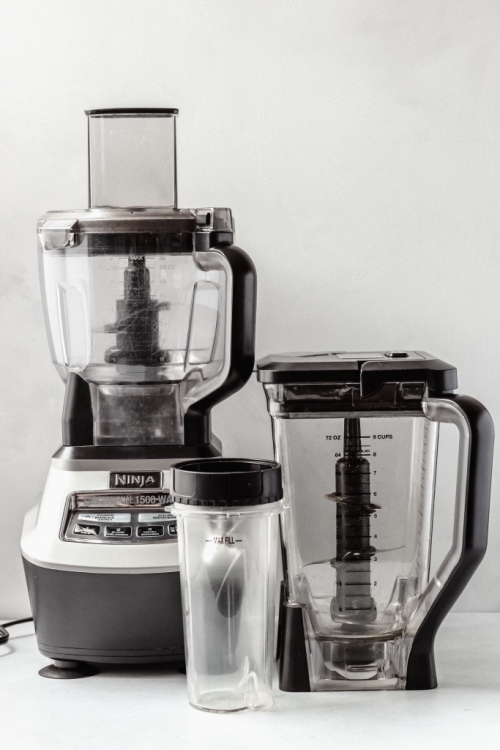
I use this system mostly to make pie doughs, pestos, lattes and (almost) daily smoothie bowls. I have had it for almost six years now and it still works perfectly, so I highly recommend!
Canadian Link: Ninja Blender Set
2. Juicer
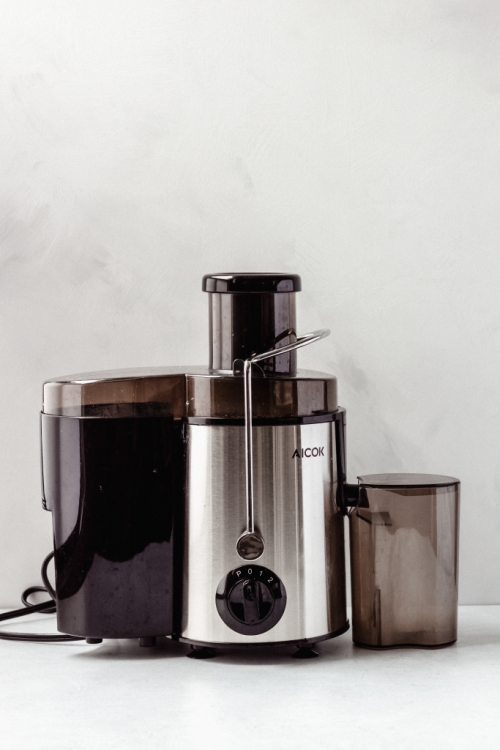
Okay, now for my second favourite purchase. This juicer is friggin’ amazing for the price. Making fresh juice has quite literally changed my life and my health. I swear by it.
This particular juicer is easy to clean and operate. It separates the pulp easily from the juice of any fruit or vegetable, even some of the harder veggies are liquified easily, such as carrots and celery. After using, I just remove all of the parts and rinse them out with water, and after about four or five uses, I will wash them in soapy water. It even comes with a little brush to help with the job! A++.
Canadian Link: Juicer
3. Milk Frother
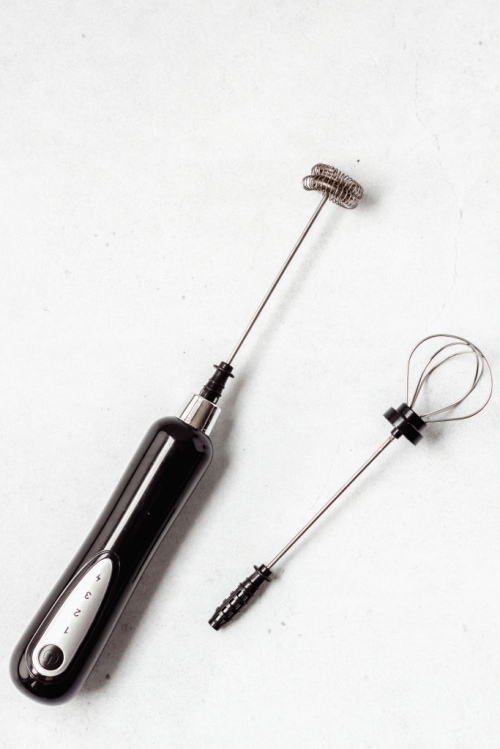
If you have seen my Instagram reels, you know I love making new and different coffee drinks in the morning. This Milk Frother is the bomb. It works so well, is super cheap and it only takes 10-20 seconds to froth up your favourite milks (I personally love oat milk). To clean, just turn it on in a sink full of soapy water! It’s just the best contraption to have in your kitchen, one of my favourite Amazon kitchen must-haves, and it also comes with an egg beater attachment!
Canadian Link: Milk Frother
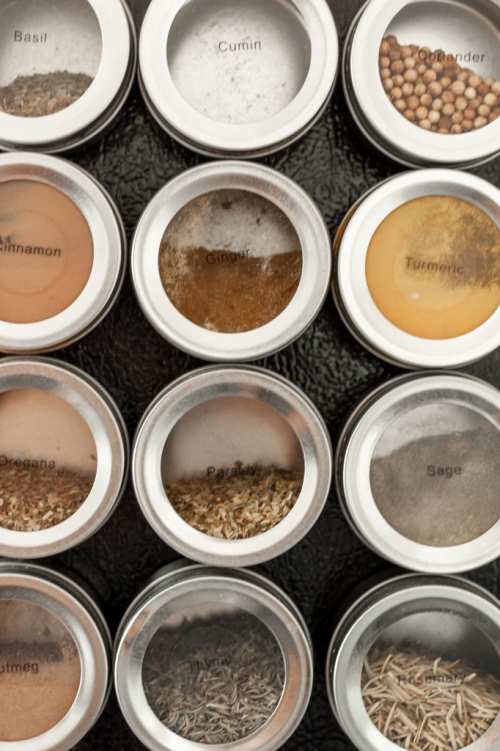
These are high up on my list of the best Amazon kitchen must-haves! If you have a smaller kitchen like me, and not much counter space, you need to get these Magnetic Spice Jars! Before buying these, I had a spice wheel that cluttered my countertop. I needed more room to work, so I invested in these babies, and let me tell you, I’m so glad I did.
I filled them with all of my most used spices and attached them to the side of my fridge for quick access. They even come with pre-made labels, and blank ones for any spices that they didn’t have listed already (which were unnecessary for me, because they thought of all of the best ones)! A game changer.
Canadian Link: Magnetic Spice Jars
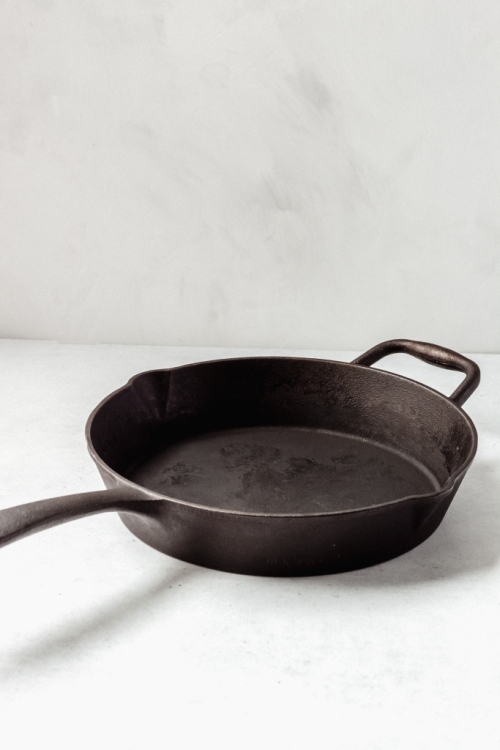
This is a two-for-one. I CANNOT live without these pans as I use them so frequently. First up, this regular cast iron pan. I use it for making both savoury dishes and desserts. It has the best heat distribution.
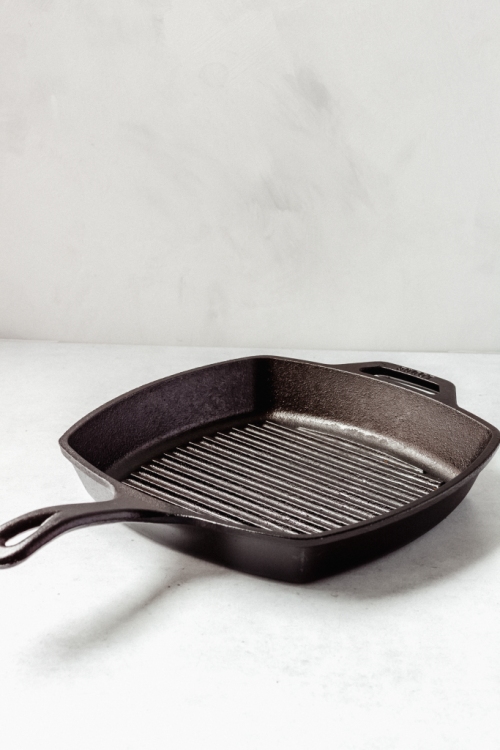
Secondly is this grill cast iron. It’s perfect if you want to grill meats, but don’t own a BBQ, or if you want to use it to grill veggies or fruits. I love using it for veggie burgers. Check out my Grilled Piña Colada French Toast for a recipe to make with this bad boy!
Canadian Link: Cast Iron Pan, Cast Iron Grill
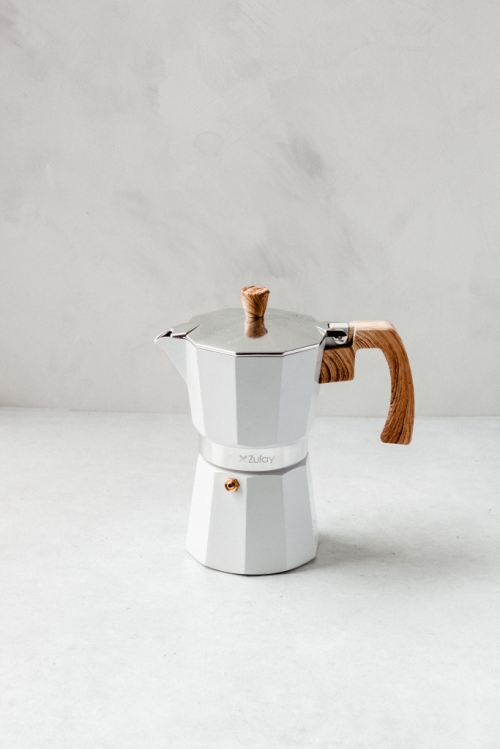
This is the perfect accompaniment to the Milk Frother listed above. I love this Espresso Maker because it is white, clean and looks pretty on your stovetop. It quickly makes some delicious espresso shots for your morning fix. If you want to save money on espresso drinks, try adding this to your kitchen!
Canadian Link: Espresso Maker
7. Turntable
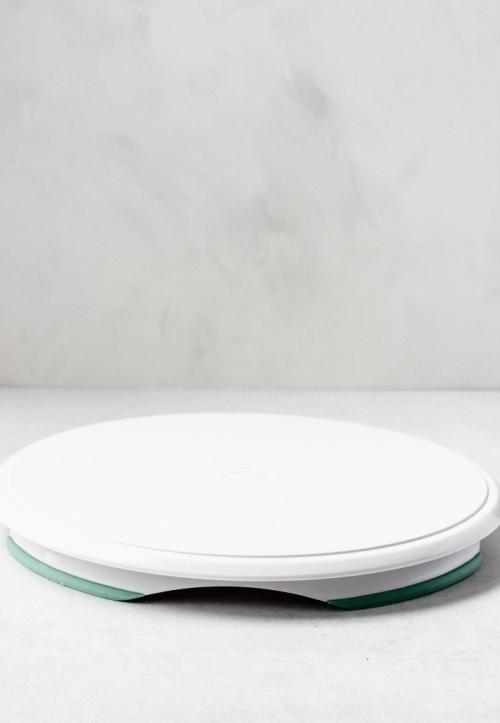
This one is for all of my cake decorators out there. Even if you are just getting into baking and decorating cakes, a turntable is a MUST. It makes the job so much easier and less stressful to do. I have TONS of cake decorating videos on my Instagram feed (@nevernoteatingca), if you are just beginning and want to see a few cakes come together!
Canadian Link: Turntable
8. Dutch Oven

What are you even doing if you don’t own a dutch oven?! It is the ultimate kitchen must-have. This heavy-duty dutch oven is perfect for high-temperature ovens. I make sourdough, stock, soups, stews, and even a whole roasted cauliflower in mine. There are just some things you need to splurge on.
Canadian Link: Dutch Oven
9. Pasta Roller

If you make homemade pasta, this one’s for you! I didn’t want to purchase a pasta attachment for my KitchenAid mixer because they were just too pricey, therefore, I decided to look on Amazon for an alternative, and of course, I found something just as good! This Pasta Roller clamps to your countertop and has a number of settings and thicknesses that you can set prior to rolling out your dough. It cuts pasta into fettuccine, spaghetti, lasagna, linguine and more!
Canadian Link: Pasta Roller
10. Kitchen Scale
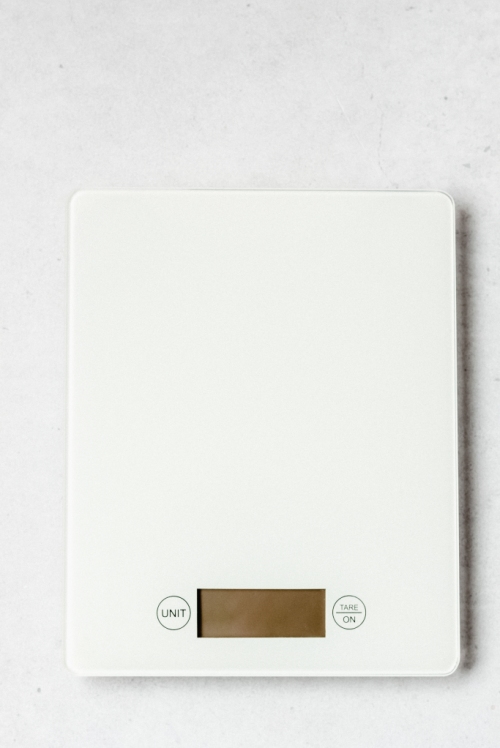
Let’s face it – we all know baking is a science, and it is 100 percent more precise with a kitchen scale. I use a kitchen scale pretty much everyday to feed my sourdough starter. You can set it to measure in ounces, grams, millilitres and pounds. It also comes with the very handy tare function, to set your scale back to zero at any point. This particular scale is sleek, modern and low-cost. Try it out when you bake to ensure accuracy with your recipes!
Canadian Link: Kitchen Scale
And, there you have it! Ten of my favourite essentials for the kitchen. I hope you found this blog post helpful. Leave a comment below to tell me your favourite kitchen tools!
This post contains affiliate links and I may earn a small commission when purchases are made after clicking the links, at no cost to you. Thank you for supporting me!
The post Top 10 Best Amazon Kitchen Must-Haves (2022) appeared first on Never. Not. Eating..
]]>The post Easy Za’atar Socca appeared first on Never. Not. Eating..
]]>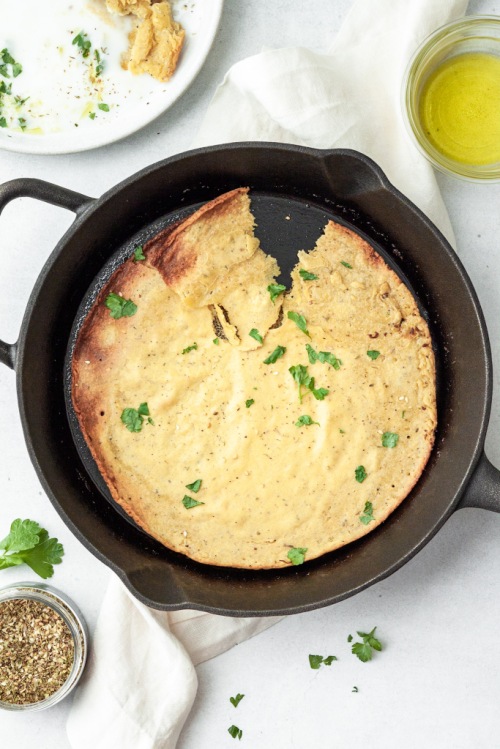
WHAT IS EASY ZA’ATAR SOCCA?
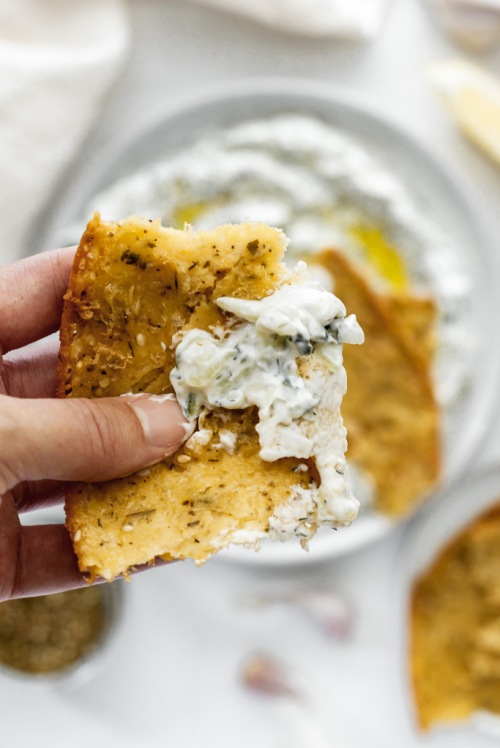
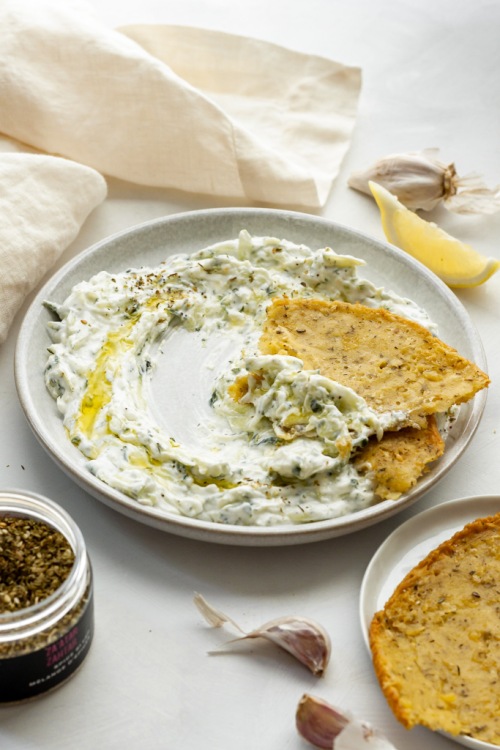
Crispy, gluten-free and the perfect vessel for dipping. I could ask for nothing more in my life. Socca is an Italian-French, crepe-like flatbread that is just so delicious. Try it with my Homemade Tzatziki recipe!
TIPS FOR MAKING SOCCA
The most important tool for perfecting this recipe, in my opinion, is a cast iron pan. It’s crucial to get the pan and oil scorching hot before pouring in the batter the ensure you achieve even heat distribution and crispy socca. Check out this one from Amazon.
What do you eat Socca with? If not just as is, then try it with your favourite dips, stews or curries. It is great for picking up sauce or just adding that missing piece to a meal!
This recipe only requires these three ingredients (salt and water don’t really count as an ingredient…right?!):
- chickpea flour
- za’atar
- olive oil
The easiest, most delicious gluten-free bread you will ever make!
This post contains affiliate links and I may earn a small commission when purchases are made after clicking the links, at no cost to you. Thank you for supporting me!
Easy Za’atar Socca
Serving size: Makes 2 large flatbreads
Prep time: 5 minutes
Cook time: 10-12 minutes
Ingredients:
- 1 cup chickpea flour
- 1/2 tsp salt
- 1 tsp za’atar
- 1 tbsp olive oil + more for the pan
- 1 cup water
Instructions:
- In a medium bowl, whisk together the flour, salt, za’atar, 1 tablespoon of olive oil and water until smooth. Set aside.
- Preheat oven to 450 degrees Fahrenheit. Coat the bottom of a cast iron pan with olive oil (about 2 tbsp) and place in the oven for 5 minutes to heat the oil. Remove carefully and pour in half of the batter, swirling the pan around to help spread it out. Cook in the oven for 10-12 minutes, or until edges turn brown and bread is cooked through. Remove from oven and repeat this process for the remaining half of the batter.
NOTES:
Socca is best when served immediately after cooking, but you can store in an airtight container in the fridge for a few days, if necessary.
The post Easy Za’atar Socca appeared first on Never. Not. Eating..
]]>The post Homemade Tzatziki appeared first on Never. Not. Eating..
]]>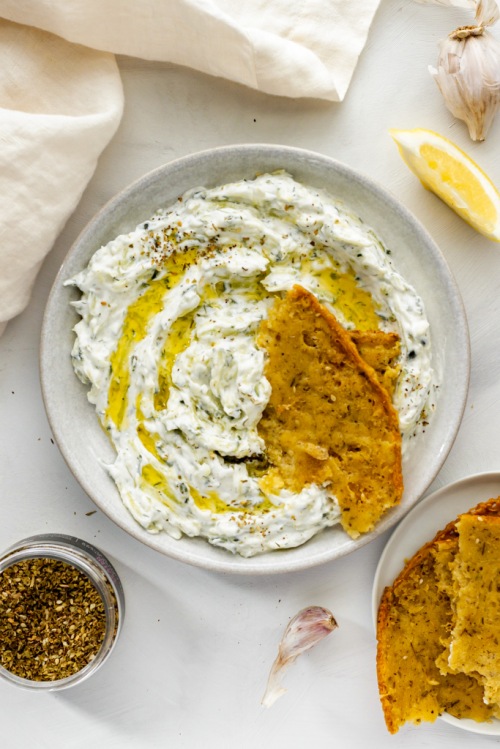
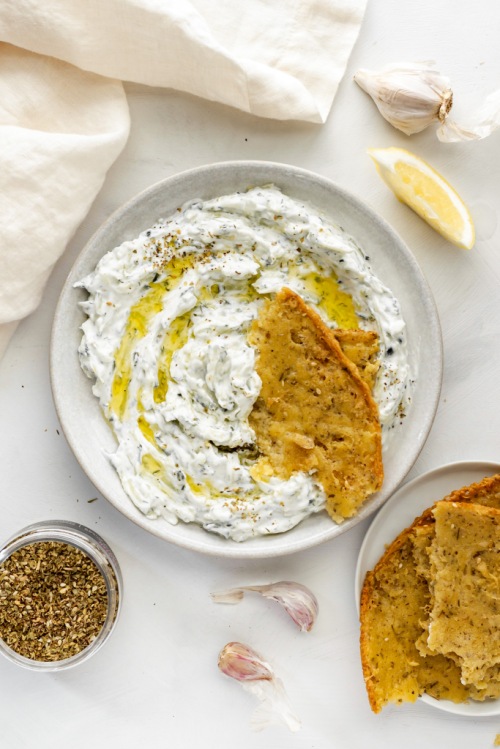
This tzatziki sauce is thick, creamy, refreshing and a great spread for wraps and gyros, or to go with falafel, fries, bread or vegetables. It’s the perfect match for anything that needs a creamy element! I love it with my Easy Za’atar Socca bread.
Tzatziki is popular around the Middle East and the Mediterranean, especially in Greece. It is my dream to travel to Greece one day and learn more about their cuisine, but until then, I will have this recipe on repeat, so I can pretend I’m there.
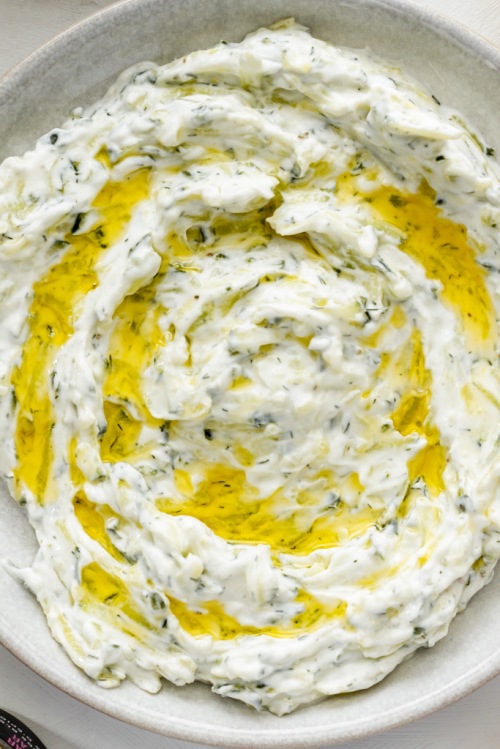
Tzatziki is simply a combination of yogurt, fresh herbs, lemon, cucumber, garlic, olive oil and salt. It’s a perfect summer dip, sauce or spread, as it’s cool and bright!
It is incredibly easy to whip up at home. Follow my recipe below, and feel free to add extras of your favourite ingredients!
Homemade Tzatziki
Serving size: Makes 1 cup
Prep time: 5 minutes
Ingredients:
- 1 cup cucumber, shredded
- 1 cup full-fat Greek yogurt
- 1 clove of garlic, grated
- zest of 1 lemon
- 1 1/2 tbsp freshly squeezed lemon juice
- 1 tbsp chopped dill
- pinch of salt
- olive oil (optional)
Instructions:
- Place cucumber in a clean tea towel or paper towel and squeeze the liquid out over a sink.
- Mix the cucumber, yogurt, garlic, lemon zest and juice, dill and salt in a bowl. Transfer to a small plate and use the back of a spoon to spread it out over the surface. Drizzle with a little bit of olive oil, if desired. Serve immediately.
- Store extra in an airtight container in the fridge for up to three days.

The post Homemade Tzatziki appeared first on Never. Not. Eating..
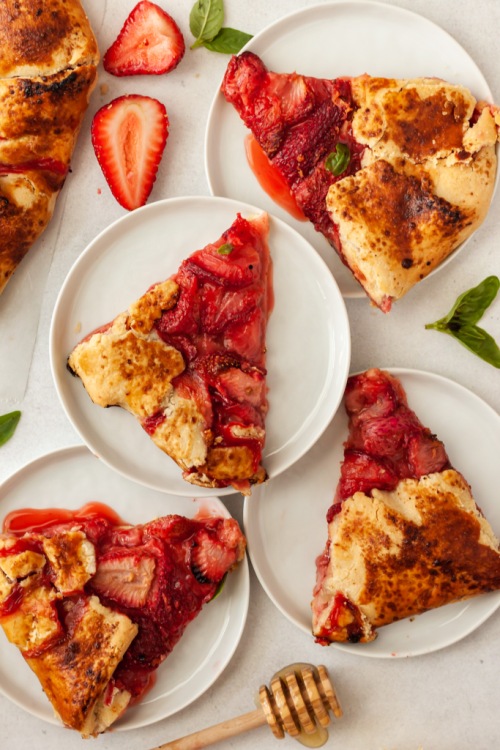
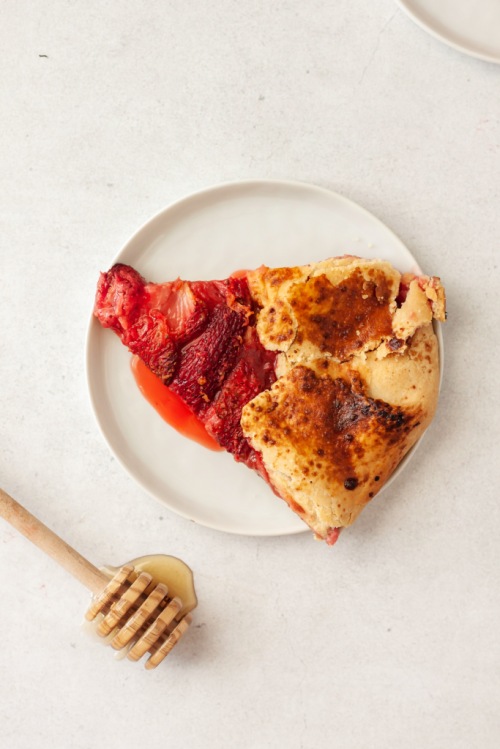
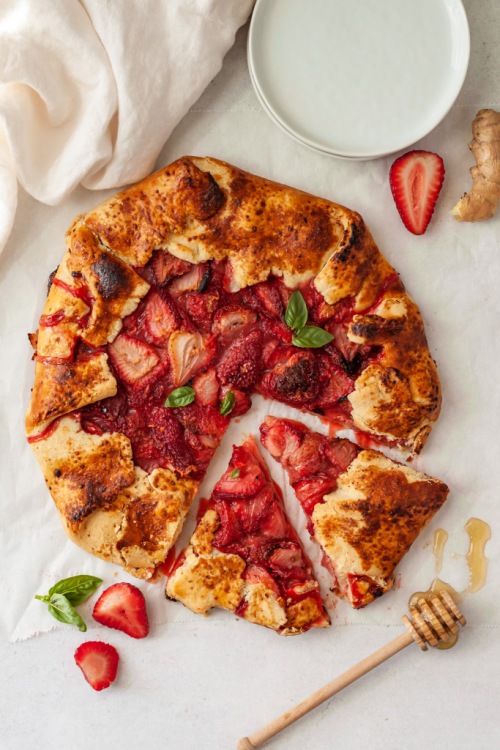
]]>The post Strawberry Honey Ginger Galette appeared first on Never. Not. Eating..
]]>
WHAT IS A STRAWBERRY HONEY GINGER GALETTE?
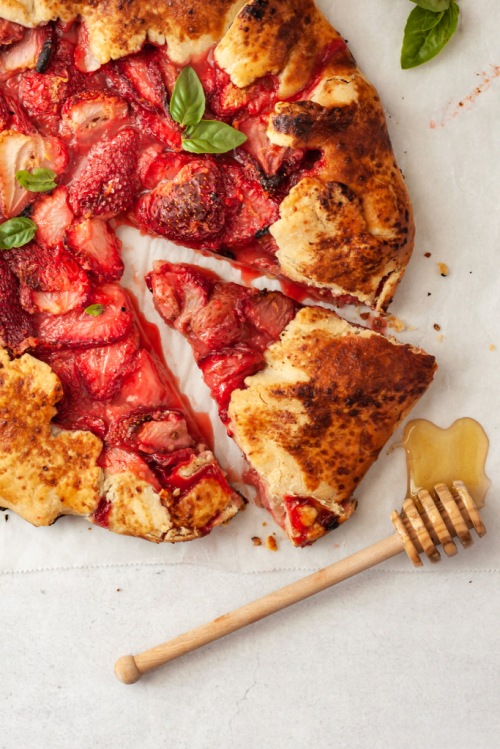
Sometimes I just need a WAHBAM, hit-me-in-the-face kind of dessert and I think this is it. We all know and love the humble strawberry, but sometimes she gets lonely all by herself. Therefore, I introduced her to a new friend in this recipe and they form a perfect match. Strawberry + ginger = BFFs.
I’ll be straight up with you – if you don’t like ginger, this recipe probably isn’t for you, however, I’m okay with you leaving it out. I’ll allow it, just this once. But, if you do like ginger, then why not switch up your summer dessert game? It adds a little kick that only ginger can give and I’m here for it.
THE INGREDIENTS
This recipe is not complicated. It’s actually quite simple, and requires minimal ingredients. Here is what you will need:
For the Dough:
- Flour
- Butter
- Salt & Ginger powder
For the filling:
- Strawberries
- Fresh ginger
- A lemon
- Honey
- Cornstarch
- An egg + sanding sugar (for the egg wash)
THE PASTRY DOUGH
You can definitely use store-bought pie dough for this, but why would you when making it yourself is uber easy?! All you need to do is throw all ingredients into a food processor and it comes together in a jiffy. You then roll it out, fill it up, fold it over, bake it and it becomes a gorgeously rustic little galette that will please all of your ginger-loving friends.
To ensure your pie dough is extra flaky when baked, you need to make sure your butter is super cold. I like to cube up the required amount and put the cubes in the freezer while I measure out the rest of the ingredients. This allows the butter to melt slower and create pockets of air that form those gorgeous layers in your crust.
THE FILLING
Firstly, you are going to want to prepare your strawberries. If they are smaller, halve them, and if they are larger, I like to cut them into thirds to have nice, big pieces in the galette. They will shrink down as they cook, so keep this in mind!
When your strawberries are ready, place them in a bowl with the other filling ingredients and that is *literally* it. Let it sit to thicken up while you roll out your dough – how easy is that?!
OTHER GLUTEN-FREE RECIPES
Gluten-Free Crepes with an Apple Cinnamon Compote (the perfect weekend breakfast)
Chocolate Chai Ganache (a luscious cake filling)
Gluten-Free Stone Fruit Galette (another open face pie for you to enjoy)
Gluten-Free Zucchini Galette (another galette, but a more savoury option)
TOOLS NEEDED TO MAKE THIS STRAWBERRY HONEY GINGER GALETTE
Click on the images below to see what I use for this recipe.


This post contains affiliate links and I may earn a small commission when purchases are made after clicking the links, at no cost to you – Thank you!
STRAWBERRY HONEY GINGER GALETTE
Serving size: 7-8
Prep time: 30 minutes (much of this is inactive time)
Cook time: 30 minutes
Ingredients:
- 1 1/2 cups all purpose flour
- 1/2 tsp salt
- 1/2 tsp ginger powder
- Half cup + 1 tbsp butter, cubed and very cold*
- 1.5 pounds fresh strawberries, halved
- zest of one lemon
- 1 1/2 tbsp lemon juice
- 1/2 – 1 tbsp fresh ginger, minced**
- 1 tbsp cornstarch
- 2 tbsp honey
- 1 egg, beaten
- 1 tbsp sugar (optional)
Instructions:
- Start with the dough by adding the flour, salt and ginger powder to a food processor and pulse to combine. Add the cold butter and continue to pulse until dough begins to resemble peas. Drizzle in one tablespoon of ice cold water and continue to pulse until the dough comes together. This may require an extra tablespoon or so of water, but make sure to add it slowly. Finally, form dough into a disc, cover in plastic wrap and refrigerate for 30 minutes.
- While the dough is resting, create the filling. Combine the strawberries, zest, lemon juice, ginger, honey and cornstarch in a bowl with a pinch of salt and set aside.
- Place the dough disc onto a lightly floured surface and roll it out to 1/8-inch thick. Carefully transfer to a parchment lined baking sheet. Scoop the filling into the middle of the pie dough with a slotted spoon, trying to avoid adding the excess liquid. Spread the filling out, leaving a 1.5 inch border all the way around. Work your way around the perimeter, folding the edges of the dough overtop of the filling. Place the entire baking sheet in the fridge to firm up the butter again, while the oven preheats.
- Preheat your oven to 400 degrees Fahrenheit.
- When your oven is ready, remove the galette from the fridge and brush the pastry edges with the beaten egg. Sprinkle the sugar over the egg wash and bake for 30-35 minutes, or until crust is golden brown. Remove from oven and let cool for 10 minutes before serving!
NOTES:
*I like to cube my butter ahead of time and place it in the freezer while I prep the other ingredients.
**Depending on how much of a kick you want from the ginger, I would measure it according to the people you are serving. If you just want a hint of ginger, put in 1/2 tbsp. If you want to really taste it, add up to 1 tbsp.
The post Strawberry Honey Ginger Galette appeared first on Never. Not. Eating..
]]>The post Blueberry Basil Moscow Mule appeared first on Never. Not. Eating..
]]>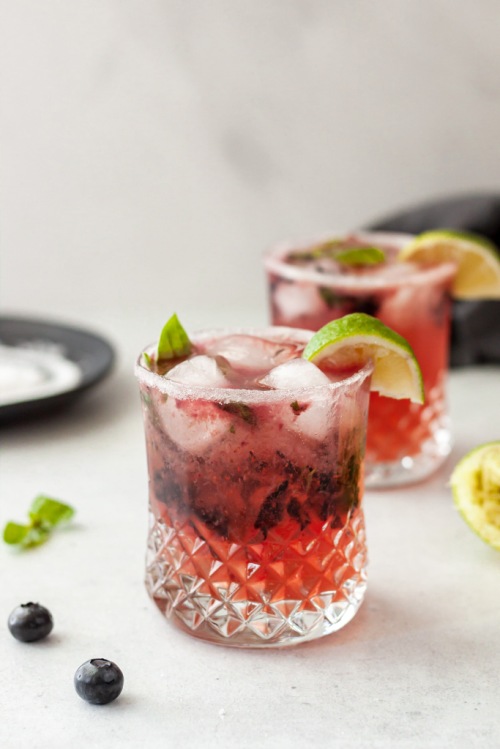
You know when you go to a bar, or your parent’s house, and it’s drink o’clock and you want something a bit different?! You want taste without the bloat of beer, flavour without the immense sugar bomb of a cooler, a party without the headache brought on by wine… Yah feel? Welp, I got you, boo.
This Blueberry Basil Moscow Mule is the perfect summer drink. It’s fresh and vibrant and a little sassy with that ginger beer. She bad!
This recipe makes two drinks (or one, depending on you), and here is what you will need:
- Blueberries
- Basil
- Vodka
- Ginger beer
- Lime juice (freshly squeezed)
- Sugar for the rim
The first step is to add the blueberries, basil, vodka and lime juice to a tall glass (or a mason jar), and use a muddler to release the juices of the blueberries and lime. Muddle everything together really well so all of the flavours meld together.
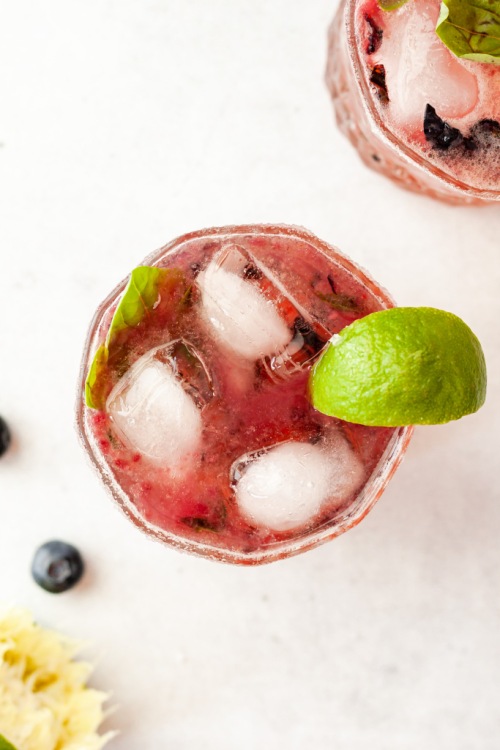
Next you’re going to want to rim your glass. This is totally optional, but it makes it look super pretty, and gives it a touch of sweetness, since there is no added sugar in this drink! Run a wedge of lime around the lip of your glass and then dip it into a plate with some sugar. You can also use coconut sugar for this. Fill your glass with some ice and strain the muddled blueberry mixture right over top. Finish it up with some ginger beer, add an extra lime wedge and a few basil leaves and that’s a cocktail!

That’s it! Grab your bluebs, peeps. Let’s mule!
Blueberry Basil Moscow Mule
Servings: Makes 2 drinks
Prep time: 5 minutes
Ingredients:
- 1/4 cup fresh blueberries, washed
- 7-8 small basil leaves
- juice of half a lime (about 1 tbsp), plus one wedge of lime for rimming
- 2 oz vodka
- 3 tbsp sugar
- 10 oz ginger beer
Instructions:
- Add the blueberries, basil, lime juice and vodka to a tall glass, bowl or mason jar, and muddle together to release the juices of the blueberries and the basil.
- Pour sugar onto a flat plate. Use the wedge of lime to rim the lip of two cocktail glasses and then place each glass upside down into the sugar to coat the rim.
- Fill each glass with ice and strain the muddled mixture over top, dividing it appropriately.
- Top up with the ginger beer, an extra lime wedge and a few basil leaves.
NOTES:
Place some of the crushed blueberries in each drink for a pop of colour and delicious texture!
The post Blueberry Basil Moscow Mule appeared first on Never. Not. Eating..
]]>The post Dark Chocolate Protein Nuggets appeared first on Never. Not. Eating..
]]>
I was in Costco the other day and I found these Keto Nuggets and decided to give them a shot. I’ve been looking for something that I can eat post-dinner that isn’t too terrible for you. I really just can’t get behind the idea that dinner is the last meal that I will eat in a day. I don’t vibe with that. Anyway, back to my story: I purchased them and they were pretty darn good! But, since it’s me and I need to make mostly everything from scratch, I decided that instead of buying them again, I was going to make them. And here we are!

So these “nuggets” are super quick and easy. The nuts and seeds in the recipe can easily be swapped out for your favourite nuts and seeds, as long as you abide by the number of grams listed!
I like to toast the almonds and pecans to get that roasty toasty flavah before dousing them in the melted chocolate. So good!

Note: There isn’t any extra sugar added to these…Just what is in the chocolate. I like things less-sweet, but also because I always use maple syrup, honey or agave to sweeten my food, and their properties could potentially seize the chocolate. Chocolate is super temperamental, and even the tiniest drop of water could ruin an entire bowl. Because all of my preferred sweeteners are in liquid form, I didn’t want to add any and compromise the chocolate.

You can definitely find a lot of the ingredients at Costco or your local bulk food store, but here are some links to the required products if you prefer to shop online:
- Pecans
- Almonds
- Hemp hearts
- Pumpkin seeds
- Chia seeds
- Shredded coconut
- Flaky sea salt
- Dark chocolate
- Coconut oil
Another very helpful item is a kitchen scale. This is so great to have on hand, especially if you do a lot of baking. I used my scale for this recipe as it is the most accurate, especially when you are measuring nuts – their awkward shape always fits differently into measuring cups.
Let’s make some nuggets!

This post contains affiliate links and I may earn a small commission when purchases are made after clicking the links, at no cost to you. Thank you for supporting me!
Dark Chocolate Protein Nuggets
Prep time: 10 minutes
Cook time: 10 minutes
Cool time (inactive): 1 hour
Ingredients:
- 1/2 tsp Flaky sea salt
Instructions:
- Preheat oven to 350 degrees Fahrenheit and line a large baking sheet with parchment paper.
- Spread the pecans out on the parchment paper and bake in oven for 3 minutes.
- Pull out the baking sheet and add the almonds. Bake for another 3-6 minutes, or until just starting to become brown. Watch carefully! They will burn easily.
- To a large bowl, mix together the toasted nuts, hemp hearts, pumpkin seeds, chia seeds, coconut and salt and set aside.
- Add the chocolate and coconut oil to a double boiler*, over low heat. Stir frequently with a spatula until almost completely melted. Remove and continue stirring until the remaining solid pieces melt.
- Pour the chocolate over the nut and seed mixture and use a wooden spoon to mix until all of the nuts and seeds are coated. Spread the mixture out onto a parchment lined baking sheet (you can use the same parchment you used for roasting the nuts). Place in the fridge for at least one hour to set.
- When fully set, remove from fridge and break into bite-size “nuggets.” Store in an airtight container in the fridge for up to 2 weeks!
NOTES:
*For the double boiler, fill a small pot with one – to two-inches of water and place over medium low heat. Add a larger glass, or heatproof bowl on top of the pot with a wooden spoon in between to let the steam escape. Place the chocolate and coconut oil into the glass bowl to melt.
The post Dark Chocolate Protein Nuggets appeared first on Never. Not. Eating..
]]>The post Vegan Mocha Buttercream appeared first on Never. Not. Eating..
]]>
This recipe has the word “vegan” in front of it, but if you aren’t vegan or prefer to use dairy-based products, you can make 1:1 swaps at any point!
I love how simple, yet different this recipe is. If you are looking for a change from your normal chocolate and vanilla frostings, this is IT. Trust me, it’s so good.

The Ingredients
Here is what you will need:
- vegetable shortening
- vegan butter
- salt
- vanilla
- cocoa powder
- instant coffee
- powdered sugar
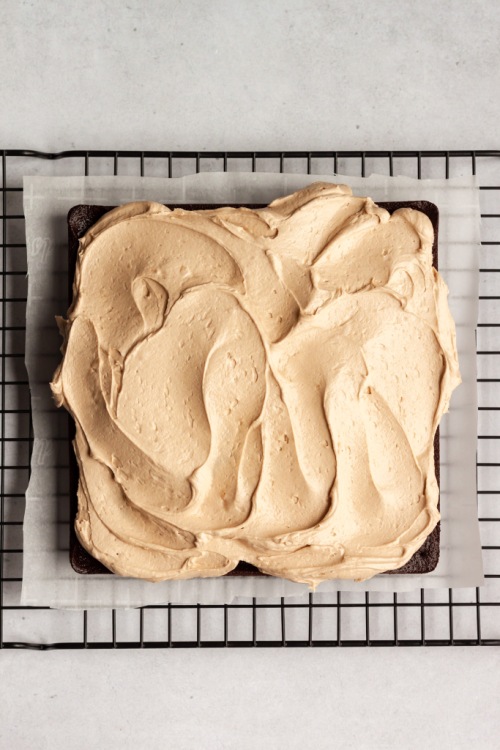
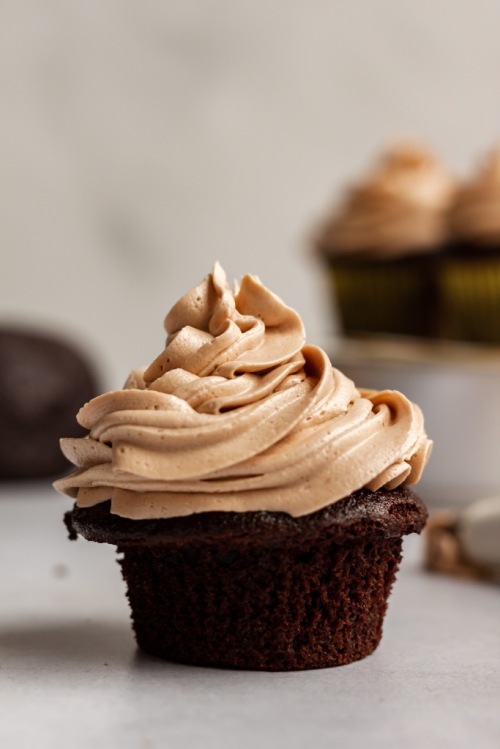
Use a stand mixer to bring all of the ingredients together and you will have a light, fluffy, perfect buttercream. It’s great for frosting cakes or cupcakes with. I love it on a rich chocolate cake!
Check out that swirly swirl!
This post contains affiliate links and I may earn a small commission when purchases are made after clicking the links, at no cost to you. Thank you!
Vegan Mocha Buttercream
Servings: Makes about 4 cups
Prep time: 10 minutes
Ingredients:
- 1/2 tbsp instant coffee
- 1/2 cup vegetable shortening*
- 1/2 cup vegan butter, softened**
- 1/2 tsp vanilla extract
- pinch of salt
- 2 teaspoons cocoa powder, sifted
- 4 cups powdered sugar
- 1-3 tbsp plant-based milk (I prefer oat milk, but you can use almond, cashew, coconut or soy)
Instructions:
- Stir the instant coffee together with three tablespoons of boiling water until dissolved. Set aside.
- Add the shortening and vegan butter to a stand mixer and mix with paddle attachment on medium speed until light and fluffy. Add in the vanilla, salt and cocoa powder and mix until combined.
- Add one cup of powdered sugar and turn the mixer on low. Pour in about half of the coffee and mix until incorporated. Add another cup of powdered sugar, followed by the rest of the coffee and continue mixing. Add the third cup of powdered sugar, followed by one tablespoon of the milk. Finally, incorporate the last cup of sugar and another tablespoon of milk, if needed. Beat until smooth and you have achieved your desired consistency. If the buttercream is too stiff, add the remaining tablespoon of milk and beat to incorporate.
- Use immediately or store in an airtight container in the fridge for up to 5 days.
NOTES:
*You can use all shortening if you do not have vegan butter.
**This can be substituted for regular, softened butter if desired.

The post Vegan Mocha Buttercream appeared first on Never. Not. Eating..
]]>